Table of Contents
Advertisement
Quick Links
Advertisement
Table of Contents

Subscribe to Our Youtube Channel
Related Manuals for Ursalink UC11-T1

Summary of Contents for Ursalink UC11-T1
-
Page 2: Table Of Contents
5.1 Add a LoRaWAN Gateway to The Things Network............23 5.1.1 Register Your Gateway in The Things Network............23 5.1.2 Connect Ursalink gateway to The Things Network..........24 5.2 Add UC11-T1 To The Things Network................26 5.2.1 Create an Application in The Things Network............26 5.2.2 Add Devices to The Application................27 5.2.3 Configure UC11-T1.................... -
Page 3: Preface
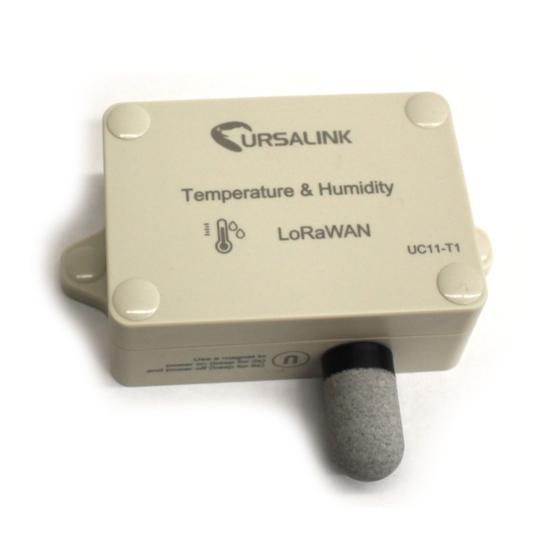
1. Preface Thank you for choosing Ursalink UC11-T1. This user guide will present in detail all the functions and features of the product. The UC11-T1 is designed for both industrial and commercial applications and helps devices stay connected. The product should be used under the guidance of this user manual, referring to parameters and technical specifications. -
Page 4: Parameters
Buzzer rings for 6 seconds: power off. 3. Configuration via PC 3.1 Configuration via ToolBox Follow these steps: Step 1: Connect the Ursalink UC11-T1 to PC via USB port. Step 2: Power on the Ursalink UC11-T1. Step 3: Run the Ursalink ToolBox. - Page 5 When the Ursalink ToolBox displays: Connecting to device, please wait... You can click Serial Port Settings to set the correct serial port parameters. Serial Port Settings Item Description Default Serial Port Select the serial port for data transmission. Null Login Password Enter the correct password to login.
-
Page 6: Status
If the serial port parameter is correct, it will display: Serial port is connected. 3.2 Status Click "Status" to see the basic status information of this device: Status Item Description Local Time Show the time of the device. Show if the device join the network successfully. Join Status The "Activate"... -
Page 7: Lorawan
Show the temperature value. Humidity Show the humidity value. Battery Show the battery level. The number of data frames sends uplink from UC11-T1 to the Uplink Frame-counter network server. Downlink The number of data frames sends downlink from the network Frame-counter server to UC11-T1. - Page 8 Application Key a network via over-the-air activation, the application key 526132303 is used to derive the Application Session key. 13823 The UC11-T1 reports the temperature and humidity at Reporting regular intervals. Interval Range: 5-30 (mins) After sending the regular report packet to the network server, if the device does not receive ACK bit from the network server, then the device will resend the packet.
-
Page 9: Basic-Abp
bit from the Network Server, then the device will resend the packet. Note: If the device doesn't receive ACK for a long time, the device will resend regular report confirmed packets 3 times at most. However, the device will resend attribute package all the time. - Page 10 Basic Settings-ABP Item Description Default identifier Device EUI Show the identifier of this device. of this device. Enter the application EUI.The Network Server receives request and consults the entity associated with the APP 24e124c00 App EUI EUI to validate the request.If permission is granted, it 02a0001 responds with a join-accept message.
- Page 11 Session Key 526132303 the end-device to encrypt and decrypt the payload field 13823 of application-specific data messages. The UC11-T1 reports the temperature and humidity at Reporting regular intervals. Interval Range: 5-30 (mins) After sending the regular report packet to the network server, if the device does not receive ACK bit from the network server, then the device will resend the packet.
-
Page 12: Channel
Note: Make sure the you have configured the corresponding channel on the gateway. E.g. If you have configured a 923.2 MHz channel on UC11-T1, then you have to configure a 923.2 MHz channel on gateway as well. -
Page 13: Upgrade
Note: Any operation on Ursalink ToolBox is not allowed during upgrading, otherwise the upgrading will be interrupted, or even the device will break down. -
Page 14: Configuration Via Ursalink Cloud
To set up an account with Ursalink Cloud, follow these steps: 1. Go to : https://cloud.ursalink.com/login.html to register a Ursalink Cloud account. 2. Log in to Ursalink Cloud after the email has been verified. Note: It is important that you have access to the verified email address before proceeding. -
Page 15: Add A Ursalink Lorawan Gateway
4.2 Add a Ursalink LoRaWAN Gateway To add your Ursalink gateway to the Ursalink Cloud, please follow these steps: 1. On the main page, click "Gateway". 2. On the gateway page, click "Add" to add a gateway. Enter the correct SN of the gateway and click “Add”. You can find your gateway SN either on the... - Page 16 Note: Please make sure the working mode of gateway is Ursalink Cloud. Once the device has been added successfully, You will see the device in the list.
-
Page 17: Add Devices To Ursalink Cloud
4.3 Add Devices to Ursalink Cloud To add a UC11-T1 to Ursalink Cloud, please follow these steps: Click to go to the configuration page of this gateway. 2. Click then click “Associated Devices” . 3. Click ”Add” to add a UC11-T1 to this gateway. - Page 18 4. Enter the correct SN of the UC11-T1, and then click ”Add”. Sensor SN can be found on the bottom of the sensor. 5. Once the device has been added successfully, You will see the device in the list. You can also add UC11-T1 directly to the main page, please follow these steps:...
- Page 19 2. Enter the correct SN of UC11-T1 and select the correct gateway. Then click “Add”. 3. Once the device has been added successfully, You will see the device in the list.
-
Page 20: Check The Data Of Uc11-T1
You can see the basic status of the UC11-T1 on the Ursalink Cloud main page. 4.5 Configure UC11-T1 via Ursalink Cloud Click to go to the configuration page of UC11-T1. You can edit the basic information of the device on this page. -
Page 21: Basic Settings
4.5.1 Basic Settings Basic Settings Item Description Default LoRaWAN Temperatu Device Name Enter the custom name of this device. re & Humidity Sensor 5572404c6 Enter the application key. Whenever an end-device joins 96e6b4c6f Application Key a network via over-the-air activation, the application key 526132303 is used for derive the Application Session key. - Page 22 The device will send an alert if battery is less than 20%. Enabled Alarm Basic Settings Item Description Default Temperature The device will send an alert to Ursalink Cloud if the Disabled Alarm temperature thresholds. goes above/below temperature greater than Enter the maximum temperature threshold.
-
Page 23: Configuration Via Ttn
5.Configuration via TTN 5.1 Add a LoRaWAN Gateway to The Things Network 5.1.1 Register Your Gateway in The Things Network To register your gateway in the The Things Network, please follow these steps: 1. Click “GATEWAYS” on the console screen. 2. -
Page 24: Connect Ursalink Gateway To The Things Network
5.1.2 Connect Ursalink gateway to The Things Network To connect your gateway to TTN , please follow these steps: Log in gateway web GUI. Click “LoRaWAN” → “Packet Forwarder” → “General” to configure the general setting. - Page 25 Click “Radios” to configure the center frequency and channels.
-
Page 26: Add Uc11-T1 To The Things Network
5.2 Add UC11-T1 To The Things Network 5.2.1 Create an Application in The Things Network TTN server uses Applications to create groups of devices. Gateways are associated with user account but not Applications. All gateways connected to TTN servers forward all LoRaWAN data traffic to the TTN message router. The TTN network server filters LoRa traffic by Application ID so that the data is routed to the correct user/application and users are only able to access data from devices registered to their account. -
Page 27: Add Devices To The Application
Dev EUI of 0025ca000000000f then the Device ID is dev-0025ca000000000f. 3. Enter the Device EUI, App EUI and App Key of UC11-T1. Note: Please go to “APPLICATION -> settings -> EUIs” to add UC11-T1 App EUI. -
Page 28: Configure Uc11-T1
4. Click “Register” to complete registration. 5.2.3 Configure UC11-T1 Connect T1 to PC and configure it via Toolbox. -
Page 29: Check Data Transmission On The Things Network
5.3 Check Data Transmission on The Things Network 1. Click “Gateways” to check the Gateways status. Click “Applications” and select the Applications, then go to “Data”, you can find the data from UC11-T1. -End-...
Need help?
Do you have a question about the UC11-T1 and is the answer not in the manual?
Questions and answers