Table of Contents
Advertisement
Quick Links
Advertisement
Table of Contents

Summary of Contents for MedKlinn PRO Series
- Page 1 PRO AS1 PRO AS2...
-
Page 2: Table Of Contents
CONTENTS SAFETY PRECAUTIONS ............................Warnings • ........................Cautions during operation • DEVICE IDENTIFICATION ........................GETTING STARTED ......................nstallation and placement of unit • OPERATION ..........................To turn the unit on • ........................To select various modes • ..........................To turn the unit o •... -
Page 3: Safety Precautions
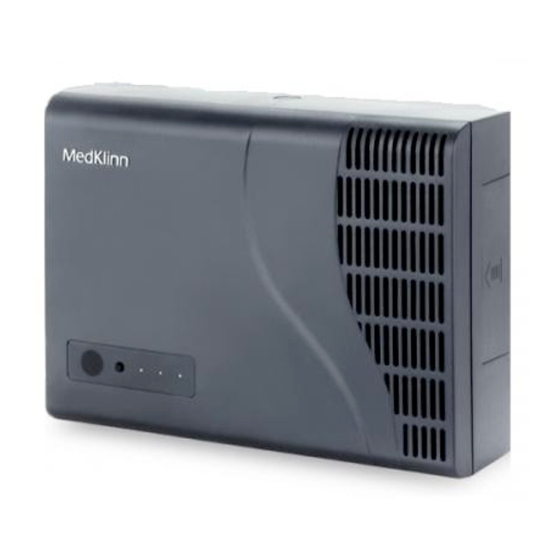
Congratulations on your purchase of the MedKlinn PRO AS1/AS2 Air Sterilizer! It incorporates the most innovative and latest air cleaning technology, the Cerafusion Technology. Please read the following instructions carefully before using the unit. With a little care, it will provide you with many years of clean, fresh and healthy air in any indoor environment. -
Page 4: Cautions During Operation
4. Consult the dealer or an experienced radio/TV technician for help. READ AND SAVE THESE INSTRUCTIONS. FOR FURTHER ASSISTANCE, PLEASE CONTACT OUR CUSTOMER SERVICE (WWW.MEDKLINN.COM) CAUTIONS DURING OPERATION 1. Place the unit at least 6 feet from radio, television or electronic equipment. This is to minimize the possibility of interference with the equipment or the remote controller. -
Page 5: Device Identification
DEVICE IDENTIFICATION PRO AS1/AS2 PRO AS1/AS2 unit Connector Control panel Cerafusion™ Cartridge Cartridge cover Ventilation holes Mounting bracket On/O switch... -
Page 6: Getting Started
GETTING STARTED INSTALLATION AND PLACEMENT OF UNIT: For best performance, install the unit near a source of air circulation such as an air conditioner or near the incoming air ventilation outlet. This will enable the activated oxygen produced by the unit to be quickly distributed throughout the room. -
Page 7: To Turn The Unit O
TO TURN THE UNIT OFF: 1. Press to turn the unit o . All LED lights will become unlit. (“ O ”) iKLINN FUNCTION The iKlinn function is specially designed to initiate instant cleaning as required. To activate iKlinn, press the Control button for ve (5) seconds. -
Page 8: Maintenance And Servicing
MAINTENANCE & SERVICING 1. To prevent dust/stain on the main unit, clean the unit with a slightly damp cloth as often as necessary. 2. If water stains appear on the surface, gently wipe and clean it. 3. Ensure that the ventilation holes are not clogged with dust or dirt. 4. -
Page 9: Troubleshooting Guide
First, check that the unit is properly installed to the existing power outlet, and that the switch is turned on. If the LED light is still unlit, contact your authorized MedKlinn Service Centre to have the unit serviced. 2. I have dropped the PRO AS1/AS2. Is it safe to continue using it? First, carefully check the whole unit casing to make sure there are no cracks or breaks. -
Page 10: Installation Guide
INSTALLATION GUIDE (Installation to be performed ONLY by a Certi ed Electrician) PRO AS1 PRO AS2 DESCRIPTION STEP 1 Wall/surface Wall/surface 1. Connect wires using the connector provided. 2. Use the two (2) screws provided to secure the mounting plate to the wall. - Page 11 PRO AS1 PRO AS2 DESCRIPTION STEP 3 (PRO AS1) 1. Push the plastic cover securely into place. (PRO AS2) 1. Insert the stainless steel cover and fasten screw into place. OPTIONAL CARTRIDGE LOCK (Only applicable for PRO AS1) 1. To lock the cartridge cover, insert the catridge lock as shown after Step 3.
- Page 12 PRO AS1 PRO AS2 DESCRIPTION STEP 4 Bracket Bracket 1. Attach PRO AS1/AS2 to the mounted bracket. STEP 5 1. To secure the unit to the wall mounting, insert the screws provided and fasten.
-
Page 13: Specifications
/ 28m Weight 700 gram 1,100 gram Warranty 1 year limited 1 year limited Optional Items Remote control Remote control * 1. Depending on the pollution level 2. Ceiling height of 9 feet For more information, please log on to www.medklinn.com...


Need help?
Do you have a question about the PRO Series and is the answer not in the manual?
Questions and answers