
Related Manuals for Fast & Fluid Management Harbil HA180


Summary of Contents for Fast & Fluid Management Harbil HA180
- Page 1 Operating and Safety manual Harbil HA180 V. 2.0 Fast & Fluid Management B. V. PO Box 220 2170 AE Sassenheim The Netherlands www.fast-fluid.com...
- Page 2 © Fast & Fluid Management B.V. This manual or parts thereof may not be reproduced, stored in a retrieval system, or transmitted, in any form or by any means, electronic, mechanical, photocopying, recording, nor otherwise, without the prior written permission of Fast & Fluid Management B.V.
-
Page 3: Table Of Contents
Table of Contents HA180 V. 2.0 Table of Contents About this manual......................5 How to work with the manual.................... 5 Record of changes ......................5 Safety ..........................6 Intended use........................6 Liability..........................6 2.2.1 General liability ..................... 6 2.2.2 Machine-specific liability ..................6 User qualification for installation.................. - Page 4 Table of Contents HA180 V. 2.0 Installation ........................26 Unpack the machine....................... 26 4.1.1 Remove the cardboard..................26 4.1.2 Remove the transport bracket of the turntable at the rear........26 4.1.3 Remove the wooden beams................26 4.1.4 Remove the transport brackets at the bottom ............ 27 4.1.5 Remove the plastic protection on the canisters..........
-
Page 5: About This Manual
About this manual HA180 V. 2.0 About this manual The manual shows the information necessary to: install operate perform basic maintenance correct small problems. The HA180 and all its versions are referred to in the manual as the ’machine’. This manual contains the original instructions. The original language of the manual is English. All other language versions are translations of the original instructions. -
Page 6: Safety
Safety HA180 V. 2.0 Safety WARNING Read the manual before you install or use the machine. Failure to do so can result in personal injury, death or property damage. Intended use The machine is designed to dispense colorants into a can. Any other use of the machine is strictly forbidden. Liability 2.2.1 General liability... -
Page 7: User Qualification For Installation
Safety HA180 V. 2.0 Read and strictly comply with the safety data sheets for all colorants, (base) paint and brush liquids. WARNING The use of flammable colorants or colorants that diffuse potential explosive vapours may present fire and explosion risks. You are responsible for ensuring there is no build-up of explosive vapours both inside or around the dispenser. -
Page 8: Safety Symbols On The Machine
Safety HA180 V. 2.0 Safety symbols on the machine Rotating parts hazard Pinch hazard for your hand Read the manual Electrical hazard Pinch hazard for your foot Can table switch up/down Return this part to its original position. Do not use flammable liquids in the brush container. -
Page 9: Safety Symbols In The Manual
Safety HA180 V. 2.0 Safety symbols in the manual WARNING WARNING Can cause personal injury. Pinch hazard for your foot. CAUTION Note Can cause damage to the machine. Shows further information. Disposal of the machine 1. Sort the machine, the accessories and the packaging for environmentally friendly recycling. -
Page 10: Operator Manual
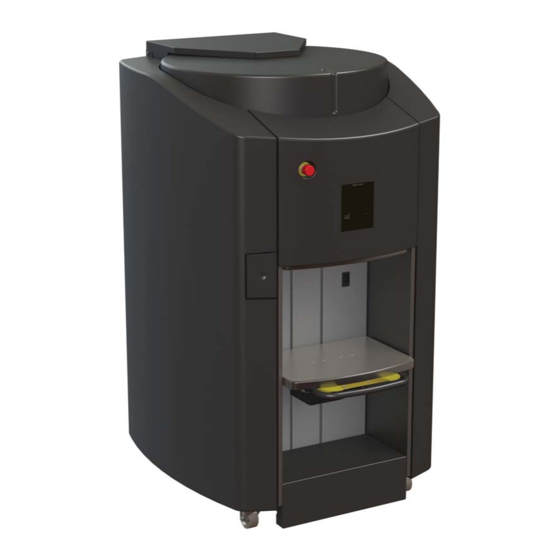
Operator manual HA180 V. 2.0 Operator manual Description 3.1.1 Overview of the machine (front) - manual can table version Top cover Computer cover Canister Can table Pump with nozzle Wheels Front cover Brush container Switch plate... -
Page 11: Overview Of The Machine (Front) - Electrical Can Table Version
Operator manual HA180 V. 2.0 3.1.2 Overview of the machine (front) - electrical can table version Top cover Computer cover Canister Can table Pump with nozzle Wheels Front cover Brush container Switch plate... -
Page 12: Overview Of The Machine (Back)
Operator manual HA180 V. 2.0 3.1.3 Overview of the machine (back) Side cover Power socket Net entry Type plate Knock-out plate for ventilation interface... -
Page 13: Overview Of The Controls (Manual Can Table Version)
Operator manual HA180 V. 2.0 3.1.4 Overview of the controls (manual can table version) Emergency stop switch Display with indicators and keys Can table switch... -
Page 14: Overview Of The Controls (Electrical Can Table Version)
Operator manual HA180 V. 2.0 3.1.5 Overview of the controls (electrical can table version) Emergency stop switch Display with indicators and keys Can table switch... -
Page 15: Overview Of The Display
Operator manual HA180 V. 2.0 3.1.6 Overview of the display Emergency stop indicator Can indicator Canister refill indicator Computer switch key Error / counter display Brush refill indicator Error indicator and Error / function key Brush monitor indicator Item Function Indicator When the indicator is on, it shows the status of the item or problem. -
Page 16: Type Plate: Serial Number
Operator manual HA180 V. 2.0 3.1.7 Type plate: serial number Fast & Fluid Management B.V. IDEX Dispensing P.O. Box 220 2170 AE Sassenheim The Netherlands THE TINTING COMPANY www.fast-fluid.com Model XXXXX-XX Xxxxxxxx Xxxxx Brand Xxxxxxxx Serial Number XXXXXXXXX-XXXXXX Production week XX-XXXX 3.1.8 Type plate: details... -
Page 17: General Dispensing Procedure
Operator manual HA180 V. 2.0 Note The computer switch only turns the computer on and off. 3.2.1 General dispensing procedure For all the software instructions: see the software documentation. 1. Place the can. See § 3.2.2. 2. Move the can table up. See § 3.2.3. 3. -
Page 18: Move Down The Can Table
Operator manual HA180 V. 2.0 3.2.4 Move down the can table 1. Hold the handle (C) and push down the can table switch (A). Keep the can table switch pushed down. 2. Manually move down the can table (B). 3. Release the can table switch. The can table locks into position. -
Page 19: Place The Can
Operator manual HA180 V. 2.0 3.3.2 Place the can 1. Place the can (A) at the centre of the mark (B) on the can table. 3.3.3 Move up the can table 1. Push and hold the upper part of the can table switch (A). The can table (B) moves up and stops when the can is in front of the can sensor (C). -
Page 20: Maintenance
Operator manual HA180 V. 2.0 Maintenance 3.4.1 General cleaning: after every dispensing operation 1. Clean the machine with a cloth and remove all spilled colorant or other liquid. CAUTION Do not use cleaning agents based on organic solvents to clean painted or plastic parts of the machine. - Page 21 Operator manual HA180 V. 2.0 Remove the brush 1. Remove the brush from the brush container. Clean the brush container 1. Remove the liquid from the brush container. For the disposal of the liquid, follow the local regulations. Fill the brush container 1.
- Page 22 Operator manual HA180 V. 2.0 Put back the brush 1. Put back the brush into the brush container. Put back the brush container 1. Put back the brush container (A) in the brush drawer (B). Note Make sure that the brush container is correctly put in its position, otherwise the machine does not function properly.
-
Page 23: Cleaning Of The Switch Plate: Monthly
Operator manual HA180 V. 2.0 3.4.3 Cleaning of the switch plate: monthly Remove the switch plate 1. Remove the switch plate (A). a. Push the switch plate upward and then forward. This way the hooks (B) are disconnected from the machine. b. -
Page 24: Using The Emergency Stop Switch
Operator manual HA180 V. 2.0 Note The software checks the level of colorant in each canister. The software on the machine shows when you need to refill a canister. 1. In the software, activate the fill canister option. 2. Open the top cover (A). 3. - Page 25 Operator manual HA180 V. 2.0 CAUTION When the machine is shut down, the stirring mechanism, which is necessary to keep the colorant in optimal condition, is also shut down. 3. Reset the emergency stop switch by turning the emergency stop switch. The machine restarts automatically. Note After the reset of the emergency stop switch, the machine is operational.
-
Page 26: Installation
Installation HA180 V. 2.0 Installation Unpack the machine 4.1.1 Remove the cardboard 1. Remove the cardboard (A) and the plastic from the outside of the machine. 4.1.2 Remove the transport bracket of the turntable at the rear 1. Remove the fasteners. 2. -
Page 27: Remove The Transport Brackets At The Bottom
Installation HA180 V. 2.0 4.1.4 Remove the transport brackets at the bottom 1. Remove the transport brackets (A). 4.1.5 Remove the plastic protection on the canisters 1. Open the top cover. See § 3.4.4. 2. Remove the cardboard sheet (A) and the protective foam (B). 3. -
Page 28: Put The Machine In Position
Installation HA180 V. 2.0 Put the machine in position 4.2.1 Move the machine to the final location, with a ramp (optional) WARNING Mind the minimum requirement of the load capacity of the floor. See § 6.2. WARNING Do not use a forklift. Note Make sure that the final location is well-lit and well- ventilated. -
Page 29: Install The Computer
Installation HA180 V. 2.0 Install the computer 4.3.1 Open the side cover 1. Remove the fasteners (A). 2. Remove the side cover (A). 4.3.2 Install the computer Note Usually, the computer already has the correct software and drivers installed. If not, see the instructions in the installation manuals of your software provider. -
Page 30: Turning On The Machine
Installation HA180 V. 2.0 1. Put the computer (A) in the machine. 2. Connect the power cable of the computer to the power socket. WARNING The maximum output of the socket is 1000 W. 3. Connect an USB cable between the computer and the power board. -
Page 31: Troubleshooting
Troubleshooting HA180 V. 2.0 Troubleshooting General troubleshooting procedure 1. Try to solve the problem with the information in this manual. See § 5.2 and § 5.3. 2. If it is not possible to solve the problem with the information in this manual, contact service. -
Page 32: Error Messages And Other Faults
Troubleshooting HA180 V. 2.0 Error messages and other faults Note For all error messages on the computer: see the help topic in the dispense software. Note See the column Possible solution to solve the problem. When the problem persists, contact service. -
Page 33: Indicators On The Display
Troubleshooting HA180 V. 2.0 Indicators on the display Indication Possible cause Possible solution The error indicator is on See § 5.3. See § 5.3. Canister refill indicator is on The canister is empty Refill the canister. See § 3.4.4. Can indicator blinks and is red The can is missing. -
Page 34: Technical Data
Technical data HA180 V. 2.0 Technical data General specifications Parameter Specification Number of canisters (max.) Dispensing Sequential Pump type Harbil piston pump Cleaning system Automatic Materials used are suitable for Water-, universal- and solvent-based colorants Canister sizes [L] 2.3 and 4.6 Pump capacity [mL] Maximum can height [cm] Can table dimensions [cm]... -
Page 35: Noise Level
Technical data HA180 V. 2.0 Parameter Specification Temperature [°C], when in use +10 to +35 Temperature [°C], when not in use -25 to +55 Altitude above sea level [m], operational -10 to 2000 Altitude above sea level [m], out of operation -10 to 12000 Maximum relative humidity [RH], without condensation [%]... -
Page 36: Electrical Diagram
Technical data HA180 V. 2.0 Electrical diagram...
Need help?
Do you have a question about the Harbil HA180 and is the answer not in the manual?
Questions and answers