Table of Contents
Advertisement
Quick Links
MODEL
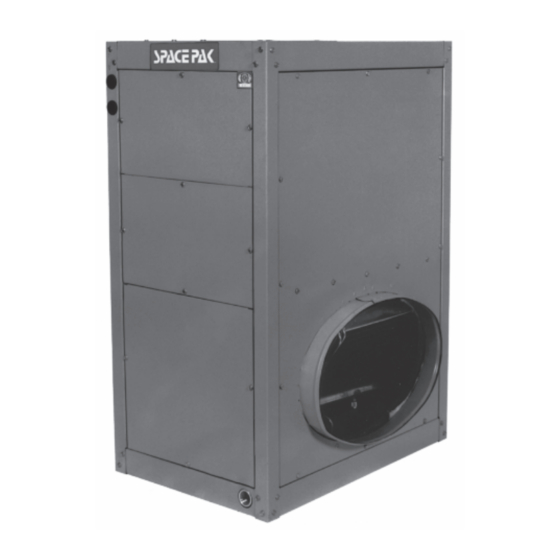
WCSP-JV SYSTEM
INSTALLATION,
OPERATION
& MAINTENANCE
MANUAL
Central Hydronic Coil Series
2 to 5 Tons
Fan Coil Unit/Air Supply
Components
SECTION 1: INTRODUCTION
SpacePak System Design.......................................
Code Compliance....................................................
Air Distribution Requirements..................................
Air Distribution Components....................................
Warranty Information...............................................
Shipment of Unit......................................................
Step 1: Locating The Unit........................................
Step 2: Cutting Return Air Opening........................
Step 3: Attaching Supply Air Plenum Adaptor.............
Step 4: Setting The Unit..........................................
Step 5: Connecting Water Lines..............................
IN UNITED STATES: 260 NORTH ELM ST. WESTFIELD, MA 01085 800-465-8558 / FAX (413) 564-5815
IN CANADA: 7555 TRANMERE DRIVE, MISSISSAUGA, ONTARIO, L5S 1L4 (905) 670-5888 / FAX (905) 670-5782
Step 7: Wiring The Unit.......................................
2
2
2
Sequence Of Operation.......................................
3
Back Cover
Prior To Start-Up..................................................
5
System Start-Up & Adjustments..........................
Operating Setpoints.............................................
5
8
9
Biannual Maintenance Checklist..........................
If System Fails To Operate..................................
9
Service/Troubleshooting Form.............................
10
Parts List..............................................................
11
Warranty...............................................................
WCSPV2-0118
45W30-WG0706-01
11, 12
13
18
18
18
19
22
23
23
24
25, 26
27
Advertisement
Table of Contents

Related Manuals for SpacePak WCSP JV Series


Summary of Contents for SpacePak WCSP JV Series
-
Page 1: Table Of Contents
2 to 5 Tons Fan Coil Unit/Air Supply Components SECTION 1: INTRODUCTION Step 7: Wiring The Unit........11, 12 SpacePak System Design........Step 8: Installing Air Distribution Components..Code Compliance............ Air Distribution Requirements........SECTION 3: START UP & OPERATION Air Distribution Components........ -
Page 2: Spacepak System Design
Air distribution components installation must conform to the requirements of local authority having jurisdiction The SpacePak WCSP-J V unit is a hydronic fan coil unit or, in the absence of such requirements, to the National which utilizes chilled or heated water from a chiller or Fire Protection Association 90A or 90B. - Page 3 SECONDARY DRAIN PAN: Specifically sized for installing contractor. Above layout is shown as an illustrative assembly reference only. SpacePak horizontal fan coil units. Constructed of durable polyethylene. Fan coil unit sets directly on top R6 SUPPLY TUBING (AC-ST6-100): Flexible, R6 and can be installed with threaded rod.
- Page 4 Plenum Duct For systems with a bullhead tee installed as on Unit No. 1 (Figure 1.3), the best results are obtained if not more The plenum duct can be run in practically any location than 60% of the total number of system outlets are accessible for the attachment of the supply tubing (see attached to any one branch of the tee.
-
Page 5: Shipment Of Unit
Supply Tubing In the case of two-story or split-level applications, supply tubing may run from one story to another. It is small enough to go in stud spaces, but this is often difficult in older homes because of hidden obstructions in stud spaces. - Page 6 Connections Cond. Return Bottom System Drain Inlet Electrical Water Water capacity (NPT) (Dia.) Characteristics Model (Nom. Tons) WCSP-2430JV 2 - 2-1/2 230/1/60 7/8" 7/8" 3/4" 15" WCSP-3642JV 3 - 3-1/2 230/1/60 7/8" 7/8" 3/4" 19" WCSP-4860JV 4 - 5 230/1/60 7/8"...
-
Page 8: Step 2: Cutting Return Air Opening
Check the opening for proper fit of the return air box. Do Refer to the "Installation Tip" supplied with the return not install the return air box until the installation of the air box. entire SpacePak system is completed, if you want to fit materials up through this hole. -
Page 9: Step 3: Attaching Supply Air Plenum Adaptor
Measure return air box dimension "A" to determine length of opening. Height = 14-5/16" 14-5/16" DWG0045 FIGURE 2.7: RETURN AIR BOx FRAME DIMENSIONS STEP 4: SETTING THE UNIT STEP 3: ATTACHING SUPPLY AIR PLENUM ADAPTOR Construct a platform for the fan coil unit, as shown in Figure 2.10. -
Page 10: Step 5: Connecting Water Lines
STEP 5: CONNECTING WATER LINES LUMBER SIZE 2 x 4 2 x 6 2 x 8 2 x 10 Connect water lines from outdoor chiller unit to the fan MAXIMUM coil unit in accordance with the chiller manufacturer’s HORIZONTAL FIGURE 2.11: CONDENSATE PIPING RUNS recommendations. -
Page 11: Step 6: Installing The Condensate Trap & Line
Connect a ground wire to the as shown in figure 2.13. equipment ground terminal located next to the high volt- age terminal block. Set DIP switches according to application. See page 13, SpacePak JV Series Control DIP switch settings. - Page 12 FIGURE 2.13: MODEL WCSP-JV WIRING SCHEMATIC...
-
Page 13: Step 8: Installing Air Distribution Components
NOTICE: Refer to duct installation instructions supplied with fan coil unit or follow manufacturers instructions supplied with other duct system types. SpacePak V Series Control Dip Switch Settings SpacePak V Series Control Variable Time Delay Settings... - Page 14 Push the free end of the sound attenuating tube through the 4" hole until the two toggle springs on the room OPTION: Using a SpacePak Kwik Connect Wall terminator snap into place. Elbow (Model Number: AC-KCWE) addresses this...
- Page 15 Center the two spring clips on a line parallel to the comes in 50-foot sections and R6 tubing comes in 75-foot direction of the tubing routing from the room terminator sections) and may be cut to length with a knife or fine (see Figure 2.21).
- Page 16 Hand insert the four plenum take off GASKET fasteners one at a time such that each clip reaches the interior of the duct. Using the SpacePak pliers, snap the fasteners into place until they lock in place (see Figure 2.26).
- Page 17 Return Air Box & Duct Installation Direct Mount Filter Box & Ductless Returns Remove the return air grill from the return air box and remove the air filter from the return air grill. Center filter box over the eliptical flange of fan coil unit (see Figure 2.26).
-
Page 18: Section 3: Start Up & Operation
SECTION 3: START-UP & OPERATION SEQUENCE OF OPERATION NOTE: IF NO AIRFLOW DURING W OR Y CALL, POTENTIOMETER MAY BE IN “OFF” POSITION. When power is turned on and thermostat fan switch is TURN CW TO ACHIEVE AIRFLOW set to ON and the cooling indicator is set to OFF, the c. -
Page 19: Operating Setpoints
OPERATING SETPOINTS FIGURE 3.2 SpacePak XXX-2430JV System Curves 5.0VDC 4.0VDC 3.0VDC 2.5VDC 2.0VDC Nominal operating 1.7VDC point, 550 CFM at 1.2" 1.5VDC 1.3VDC 1.0VDC 0 0 . 0.0 Airf Airfl Airflo Airflow Airflow Airflow C Airflow CF Airflow CFM Airflow CFM FIGURE 3.21... - Page 20 FIGURE 3.3 SpacePak XXX-3642JV System Curves 5.0VDC 4.0VDC 3.0VDC 2.5VDC N N o Nomi Nomin Nomina Nominal Nominal Nominal o Nominal op Nominal ope Nominal oper Nominal opera Nominal operat Nominal operati Nominal operatin Nominal operating Nominal operating Nominal operating p...
- Page 21 FIGURE 3.4 SpacePak XXX-4860JV System Curves 5.0VDC 4.0VDC 3.0VDC N N o Nomi Nomin Nomina Nominal Nominal Nominal o Nominal op Nominal ope Nominal oper Nominal opera Nominal operat Nominal operati Nominal operatin Nominal operating Nominal operating Nominal operating p...
-
Page 22: Factors Affecting The Balance Of The System
2" SUPPLY TUBING LENGTH ADJUSTMENT FACTOR CHART supply tubing has a significant effect on the over-all system performance. It is highly recommended that the adjustment factors outlined in the SpacePak Application Manual are accounted for prior to any installation. FACTOR 1.18... -
Page 23: Section 4: Maintenance
SECTION 4: MAINTENANCE The SpacePak system has been designed to provide 3. Check that unit condensate drain is clear and free years of trouble-free performance in normal installations. running, and plug is in cleanout. Examination by the homeowner at the beginning of each cooling season, and in mid-season should assure 4. -
Page 24: Service/Troubleshooting Form
Temp: °F; Superheat: °F Equipment Data: Approximate time running before taking readings: Hrs. SPACEPAK Model # ESP / WCSP - Did you adjust the TXV? (Y/N); (If yes, explain): SPACEPAK Serial # SPACEPAK Date of Installation: Cond Unit Mfr:... - Page 25 NOT SHOWN APPLIES ONLY WHEN 115VAC CONVERSION KIT IS USED FIGURE 4.1: MODEL WCSP-V GENERAL ASSEMBLY SPL-WG0997_A...
-
Page 26: Parts List
SPACEPAK WCSP-V REPLACEMENT PARTS LIST ITEM PART DESCRIPTION UNIT SIZE PART NUMBER 2430 462RWG0691-02 BLOWER ACCESS PANEL ASSEMBLY 3642 462RWG0691-03 4860 462RWG0691-04 SIDE ACCESS PANEL ASSEMBLY 462RWG1007-01 2430 463RWG0708-02 RETURN AIR PANEL ASSEMBLY 3642 463RWG0708-03 4860 463RWG0708-04 CONTROL BOX ACCESS PANEL ASSEMBLY... -
Page 27: Warranty
LIMITED WARRANTY Central Air Conditioning Products The “Manufacturer” warrants to the original owner at the original installation site that the Central Air Conditioning Products (the “Product”) will be free from defects in material or workmanship for a period not to exceed one (1) year from the startup or eighteen (18) months from date of shipment from the factory, whichever occurs first. - Page 28 IN UNITED STATES: 260 NORTH ELM ST. WESTFIELD, MA 01085 800-465-8558 / FAX (413) 564-5815 IN CANADA: 7555 TRANMERE DRIVE, MISSISSAUGA, ONTARIO, L5S 1L4 (905) 670-5888 / FAX (905) 670-5782...
Need help?
Do you have a question about the WCSP JV Series and is the answer not in the manual?
Questions and answers