
Related Manuals for Millipore M Air T


Summary of Contents for Millipore M Air T
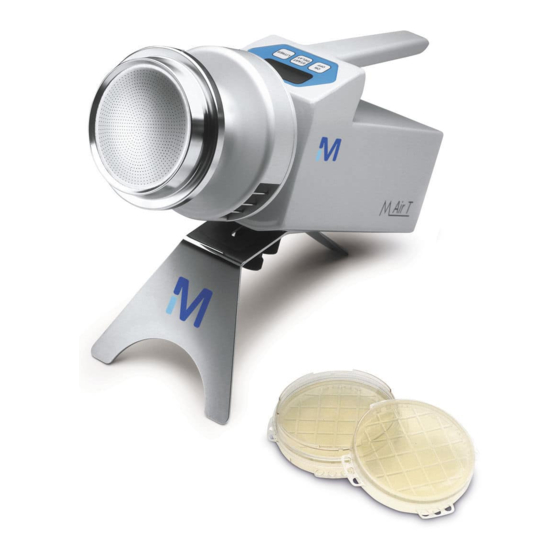
- Page 3 The sieve of the Tester contains close to 1,000 micro–perforations. This minimizes colony overlapping. During incubation, a dynamic process re–hydrates the impacted agar surface, providing faster results and higher recoveries. The M Air T is ideal for performing environmental surveys in a variety of applications *Patent pending. •...
- Page 4 Each M Air T Kit includes: M Air T Apparatus Battery Charger Spare Micro–perforated Sieve with Cover Tripod Carrying Case Box of Sanitization Wipes Operation and Maintenance Instructions Manual Allen Key Tripod fixation Screw Free space...
- Page 5 Glossary Micro–perforated Sieve Batteries M Air T Cassette Electronic Circuits Agar Medium Tripod fixation Hole Aspiration Turbine Air Outlet Motor Aerodynamic Sleeve LCD Display Bayonet Lock Handle Air Inlet Charger plug for Batteries...
- Page 6 Push the ON / OFF button. Previously selected air sample volume retained in memory appears on the display to make successive sampling easier. Press the START / DELAY button quickly twice. The display flashes, Tester starts and counts down the volume of air that remains to be processed. At the end of the process the display indicates EOC (End Of Cycle).
- Page 7 Start sampling by pressing the START / DELAY button twice. Litres Cubic Feet Litres Cubic Feet Litres Cubic Feet Litres Cubic Feet " 0.88 4.24 8.47 19.4 1.06 4.59 8.83 21.2 " 1.24 4.94 9.71 22.9 " 1.41 5.30 10.6 24.7 "# 1.59...
- Page 8 To modify the time setting, hold down the START / DELAY button. The display shows previously selected value and starts to count down the time. (LCD display flashes.) Time can be changed in increments of 5 minutes up to one hour. To validate and start the count down, press down on the START / DELAY button again.
- Page 9 Define the location of the Tester according to GMP requirements. The Tester works in the upright position or, by using a tripod, in the horizontal or inclined position. For testing above bench level, the Tester may be supported by a commercial tripod. Ensure pre–filled cassettes are at room temperature before starting the test.
- Page 10 Retain the cassette in position by holding on to its wings. Remove the lid and place it on the bench, internal face down. Peel off the inert film from the agar surface (Fig. 3). Fig. 3 Lock the micro–perforated sieve into position. Press the ON / OFF button.
- Page 11 When the display indicates EOC, unlock the sieve, remove it, and put the lid back on the cassette (Fig. 5). Fig. 5 To remove the cassette from the Tester head, lift the cassette while firmly holding the edge (Fig. 6). Fig.
- Page 12 The micro–perforated sieve can be cleaned with mild detergent, decontaminated with 70° alcohol or autoclaved. Do not use bleach solution. The surface of the Tester is compatible with mild detergent and can be decontaminated with alcohol, quaternary ammonium or 250 ppm bleach. •...
- Page 13 Millipore provides a Certificate of Calibration with each Tester. Tests are done in a laboratory certified by an official body of control and measurement. Millipore recommends you return the Tester to the nearest Millipore subsidiary at least once a year for re– calibration.
- Page 14 255 mm height; 105 mm depth; 125 mm length (10” x 4”x 5”). Weight (including batteries): 1.9 kg (4 lb). Micro–perforated Sieve: Stainless Steel 316. Tester Head: Anodized aluminum. Tester Body: Epoxy–coated aluminum. 140 L/min for the first 500 litres, then 180 L/min. 1000 litres in less than 7 minutes.
-
Page 15: Remedial Action
If the Tester is not functioning correctly, refer to the following table. If this is not sufficient, contact your local Millipore Support Office. See the list of addresses on the rear cover of this manual. PROBLEM CAUSE REMEDIAL ACTION Display indicates ER 1... - Page 16 Description Qty/Pk Catalogue No. M Air T Kit, 230 V/50 Hz, complete ATAS 220 01 with carrying case, including: M Air T Apparatus ATAS PLR 01 Battery Charger, 230 V/50 Hz ATAC 220 01 Micro–perforated Sieve with Cover ATAH EAD 01...
- Page 17 Millipore warrants its products against defects in manufacturing and workmanship for a period of one (1) year from the date of delivery, provided that they have been used under the conditions described in this manual. Millipore offers no other warranty neither explicit nor implicit, in particular no warranty of merchantability or fitness for a particular purpose.
Need help?
Do you have a question about the M Air T and is the answer not in the manual?
Questions and answers