Table of Contents
Advertisement
Quick Links
Advertisement
Table of Contents

Related Manuals for Ryf AG Ash INSPEX II

Summary of Contents for Ryf AG Ash INSPEX II
-
Page 2: Table Of Contents
Inspex II User Manual Contents Introduction ............................4 Package Contents: ..........................6 Optional INSPEX II System Components: .................... 7 Installation: ............................8 Setup: ..............................8 Cabling (Fig. 2a) ........................... 8 Connections ............................9 Initial Start-up: ............................ 9 System Navigation: ........................... 10 The Toolbar ............................ - Page 3 Inspex II User Manual To Create An Overlay: ........................23 Using existing Overlay(s): ........................23 Alternative Method of Creating Overlays Using An Image Editor ............ 24 Save Merged Overlay Image ......................24 Measurement & Annotation: ......................25 Measurement Settings (Fig 14): ......................25 Grid Settings: .............................
-
Page 4: Introduction
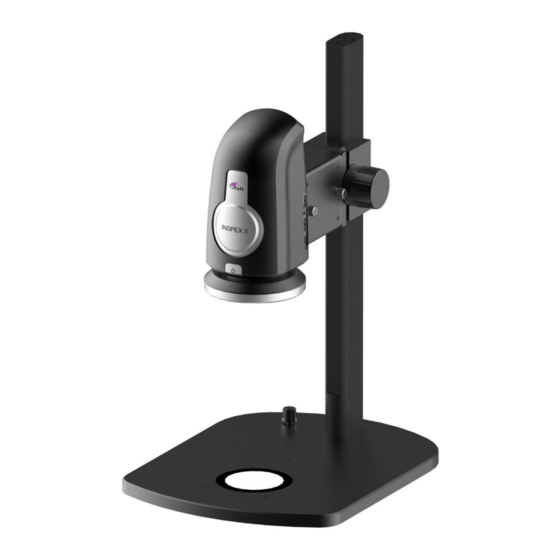
Inspex II User Manual Introduction The INSPEX II (Fig 1.) is a full HD (1080p) digital microscope inspection system that operates without a PC. The INSPEX II platform has a powerful image processing and control engine that delivers superb full live video image quality at 50/60 frames per second. - Page 5 Inspex II User Manual GUI: • The INSPEX II GUI (Graphical User Interface) is a custom designed, mouse-controlled interface, delivering intuitive and efficient operation and control of the full application suite. Camera control functions: • Auto and manual focus, exposure, gain, brightness, and white balance customization ensure ultra-sharp, high contrast imaging.
-
Page 6: Package Contents
Inspex II User Manual Package Contents: Your INSPEX II package contains: • INSPEX II • Quadrant Controllable Ring Light (attached) • Lens +5 (attached) • Mouse • Mouse Mat • Keyboard • Power Supply • HDMI to HDMI Cable • Mini USB Cable •... -
Page 7: Optional Inspex Ii System Components
Inspex II User Manual Optional INSPEX II System Components: Lens: • +10 Plan 1x Lens (AI 100-055) • +25 Lens (AI 280-053) External Keypad KPII : ( FI806-002) • Optional extra for use with Preset function. • Useful to improve workflow speed and for user access control. External Keypad KPIII : ( FI 806-003) •... -
Page 8: Installation
Inspex II User Manual Installation: Never look directly at the LED light source for any prolonged period of time. Setup: Attach the Arm Receiver to the Stand Focus block using the 4 screws provided (Fig. 2). Hook the Arm Bracket onto the Arm Receiver using the 4 hooks. Tighten the two thumb screws at the rear of the Arm Receiver. -
Page 9: Connections
Inspex II User Manual Connections Rear: 1. HDMI connector to TV/Monitor 2. 2 x USB Ports 3. Ethernet Connection for Networking 4. DC Power Jack to Power Supply 5. 3 x Auxiliary Communications Ports 6. Grounding Connection (for grounding cable supplied) Side: 7. -
Page 10: System Navigation
Inspex II User Manual System Navigation: The Toolbar INSPEX II toolbar icons (Fig 3): Zoom in Zoom out Toggle between live and static image Take snapshot of a live image Auto Focus Camera Overview Settings Save File Open File Overlay Measurement Image Stacking Log On/Off... -
Page 11: Toolbar Icons Explained
Inspex II User Manual Toolbar Icons Explained: Toggle Use the toggle icon to switch between LIVE and Saved/Captured images. Snapshot To capture an image from a Live video feed, click on the Snapshot icon. A still image from the camera is captured and displayed. To switch back to the Live video feed, use the Toggle icon as explained above. -
Page 12: Settings
Inspex II User Manual Settings: Camera: Fig 4. Exposure: Switch between Auto & Manual exposure modes. In Auto Exposure mode, the Gain and Iris settings are automatically adjusted, the user can adjust the image brightness if required. In Manual Exposure mode the user can adjust both the gain and the iris settings of the camera. -
Page 13: Lighting Control
Inspex II User Manual Lighting Control: Select which ringlight LED quadrant to turn on/off. Set the intensity value of the LEDs and toggle all the LEDs ON/OFF. The Inspex II will auto-detect the type of ringlight that is connected. * When the Inspex II Diffused Domelight is connected, the quadrant buttons are disabled. Settings: System Settings: Fig 5. - Page 14 Inspex II User Manual Auto-Hide Main Toolbar: To auto-hide the toolbar on the main window, enable this option. To reveal the toolbar, move the mouse over the toolbar area. Show Crosshair: Display full screen Crosshair when selected. System: Start-up Settings: (Fig.
-
Page 15: Network
Inspex II User Manual Settings: Network: Fig 6. The Inspex II supports Networking via the Ethernet port on the back. The network settings (Fig. 6) can be configured automatically using (DHCP) Dynamic Host Configuration Protocol or manually by assigning a Static IP, Network Mask and Default Gateway. To configure the DHCP ,the Inspex II must be connected to a network via a straight ethernet cable. -
Page 16: Nfs Configuration (Fig 7)
Inspex II User Manual NFS Configuration (Fig 7): The Inspex II can connect to a Network File System (NFS) server running on a Linux/Windows machine. To connect to the NFS server you will need the IP Address of the server and the full Path to the shared folder. -
Page 17: Users
Inspex II User Manual Users: Fig 8. User Settings There are 3 levels of access on the INSPEX II. Superuser, Admin and User. Superuser: Complete control of all functions with no restrictions. The Superuser can create, edit and limit all “Admin” and “User” accounts. Please see Fig. 8a. The Superuser can enable/disable a login requirement at startup. -
Page 18: Users Continued
Inspex II User Manual Users Continued: Fig 8a. User details 18 | P a g e INSPEX II English Rev 1.06, SW Rev 1.06... -
Page 19: System Upgrades
Inspex II User Manual Settings: System Upgrades: To perform a system upgrade, insert a USB Memory Stick containing the upgrade file*. Click on the “Upgrade System Software” button to upload the files. Upgrades should be installed individually for System Software and ringlight firmware. (Fig. 9) *Upgrade files, if available, can be obtained from Ash. -
Page 20: Settings
Inspex II User Manual Settings: Info: Fig. 10 Info System Information: System information shows details of the software, firmware and language versions, serial number, MAC address and Ring Light Version (if attached). NB* Please note or screenshot this detail if system update or troubleshooting is required. -
Page 21: Save File
Inspex II User Manual Save File Fig. 11 Save File If using external storage, ensure that the device is formatted to FAT32.USB When saving images, choose to save to Internal Storage, USB Key or NFS folder location. A file can be saved in the following formats: a. -
Page 22: Open File
Inspex II User Manual b. Image: An image is saved as a .bmp or .jpg. Any measurement, text, shapes or grids are saved onto the image and are not editable when the image is reopened. The .bmp and .jpg are standard image formats and can be opened on any computer. -
Page 23: Overlay (Graticule)
Inspex II User Manual Overlay (Graticule): The Overlay feature can be used to show an overlay of reference edges or dimensions, giving the operator a Go/No-Go tool for multiple part inspections. To Create An Overlay: • Place the sample under the INSPEX II and set the focal point. Do this by zooming to full magnification. -
Page 24: Alternative Method Of Creating Overlays Using An Image Editor
Inspex II User Manual Alternative Method of Creating Overlays Using An Image Editor • Create a new image 1920 pixels wide and 1080 pixels high in your image editor application. • Flood-fill the image with 0xFFAEC9 color in RGB format. •... -
Page 25: Measurement & Annotation
Inspex II User Manual Measurement & Annotation: Add measurements, drawing objects or annotations when the Measurement and Annotation Application is used. Simply draw lines, measurements or insert text onto a static or live image. Save these drawings and notes with the image, directly to the INSPEX II memory, network location or to a USB key. -
Page 26: Grid Settings
Inspex II User Manual Grid Settings: Grid Spacing: Sets to a multiple of a unit type. Depending if the Measurement Settings are set to inches or mm, the grid will have a spacing of 1mm or 1 inch. Grid Line Width: Pixel width of the line. -
Page 27: System Setup For Measurement
Inspex II User Manual System Setup for Measurement: • To set the focal point of the lens to the area being measured, follow the steps below. • Click the Overview icon (see page 11). • Move the area of interest of your object to the crosshair on screen. •... -
Page 28: Image Stacking
Inspex II User Manual Image Stacking: When viewing an object with different component heights at a higher magnification, all parts will not be in focus at the same time (Fig. 16), to overcome this you can switch the focus from auto to manual and move the camera closer or further away from the object. This however does not solve the issue of having all components in focus on the one image at the same time. - Page 29 Inspex II User Manual Click on the Go to Bottom Focus button and then manually adjust the height of the camera until the bottom of the image is in focus (Fig. 18). This is done by using the height adjustment mechanism on the stand the Omni is mounted on. Bottom In focus Fig.
- Page 30 Inspex II User Manual The processed image will now be displayed in static form with all components (heights) in-focus (Fig.20) . Fig. 20 For better image quality you can increase the number of images taken in the stack and/or you can increase the quality (Fig.21).
-
Page 31: Measurement Accuracy
INSPEX II User Manual Measurement Accuracy: The accuracy of a measurement is specified as ±1% within the working range of each calibrated lens. The recommended working-range of each lens is shown in green in the table below fig. 22 (magnification values refer to a 24” monitor).The min and max horizontal FOV (Field Of View) for measurements are shown in bold (this table should be used as a guide when deciding what lens to use for a particular application). -
Page 32: Magnification Table
INSPEX II User Manual Magnification Table: Fig. 24 Specifications obtained using a 24” Monitor. Depth of Field measured with optimal image settings INSPEX II English Rev 1.06, SW Rev 1.06... -
Page 33: Presets
INSPEX II User Manual Presets: A preset can be customised to hold specific system settings and measurement detail. Up to 5 presets can be added. • If using the preset function, first enable the Show Preset Toolbar function (*refer to settings page 13). -
Page 34: Technical Specifications
INSPEX II User Manual Technical Specifications: Zoom Range 2.5x – 122x (with supplied +5 Lens) Camera Resolution 1920 x 1080 Resolution 50/60 fps 30x Optical, 2x Digital Monitor Connections HDMI / DVI Monitor Requirements HD Ready or Full HD (recommended) HDMI Output USB 2.0 Port x 4 Input / Output... -
Page 35: Declaration Of Conformity
INSPEX II User Manual Declaration Of Conformity: We, Ash Technologies Ltd., declare under our sole responsibility that this product INSPEX II, of the brand Ash Technologies to which this declaration relates, is in conformity with the following standards or other normative documents: EN 60601-1-2:2007 Medical Electrical Equipment –... -
Page 36: End User Licence Agreement - Ash Technologies Ltd. 2016
INSPEX II User Manual End User Licence Agreement – Ash Technologies Ltd. 2016 This End User Software Licence Agreement (the “EULA”) is a contract between the user of the Software (the “End User”) and Ash Technologies Limited (the “Licensor”), a company incorporated in Ireland under registration number 220749 whose principal place registered office is at B5, M7 Business Park, Naas, Co Kildare, Ireland. - Page 37 INSPEX II User Manual Obligations. The End User shall at all times: (a) effect and maintain adequate security measures to safeguard the Software from unauthorised access, use, and disclosure; (b) supervise and control access to and use of the Software in accordance with the provisions of this EULA; (c) provide the Licensor from time to time on request with contact details for the person responsible for supervising and controlling such access and use;...
- Page 38 INSPEX II User Manual Further support. If the End User requires any further support and/or maintenance services in respect of the Software, the End User shall notify the Licensor in writing and the Parties may discuss the possibility of entering into a support agreement. No such obligation in certain circumstances.
- Page 39 INSPEX II User Manual The Licensor does not seek to exclude or limit liability where such exclusion or limitation is precluded from applicable law, including any liability that may arise in respect of (i) death or personal injury resulting from the Licensor’s negligence, or (ii) fraud. Subject to the rest of the provisions of this Clause 0, the cumulative liability of the Licensor in respect of any and all claims made under or in connection with this EULA shall not exceed an amount that is equal to the price paid for the Ash Product excluding VAT and other applicable taxes.
- Page 40 INSPEX II User Manual General Amendments. This EULA may only be amended in writing signed by duly authorised representatives of the Licensor and the End User. Invalid clauses. If any provision or part of this EULA is held to be invalid, amendments to this EULA may be made by the addition or deletion of wording as appropriate to remove the invalid part or provision but otherwise retain the provision and the other provisions of this EULA to the maximum extent permissible under applicable law.
- Page 41 INSPEX II User Manual Exhibit A Definitions Confidential The Software, and all information, data, drawings, designs, Information specifications, documentation, and other items (in any form whatsoever) which the Licensor may (directly or indirectly) disclose or otherwise make available to the End User during the course of or in anticipation of this EULA.
Need help?
Do you have a question about the Ash INSPEX II and is the answer not in the manual?
Questions and answers