Table of Contents
Advertisement
Advertisement
Table of Contents

Related Manuals for Phanteks ENTHOO PRO II


Summary of Contents for Phanteks ENTHOO PRO II
- Page 1 EN THO O PRO I I U S E R M A N U A L V 1 . 1...
- Page 3 Thank you f o r c h o o s i n g...
-
Page 4: Table Of Contents
TABLE OF CONTENTS ENTHOO PRO II 1. WHAT ’S INS IDE? Introduction Optional Upgrades: Specifications Installing a Vertical GPU Exploded View Installing the 5.25 inch bay Accessories Installing a Dual System 2. CHOOS E YOUR SE TUP 3. SUPPORT Configure your Enthoo Pro 2... -
Page 5: Introduction
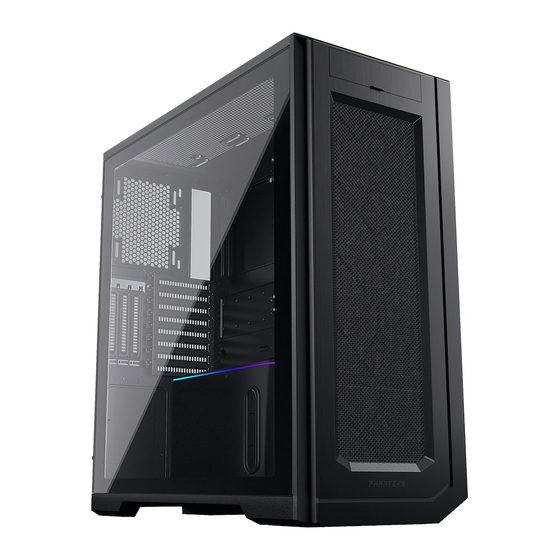
ENTHOO PRO II Welcome to Phanteks! The Enthoo Pro 2 has been designed with extreme performance in mind, featuring Phanteks’ innovative ‘High-Performance Fabric’ that sets a new airflow performance standard in the PC enclosure industry. With an extremely spacious and versatile interior design and state-of-the-art features, the Pro 2 is ready to house any high-end configuration. -
Page 6: Specifications
SPECIFICATIONS ENTHOO PRO II C ASE S PE C IFIC ATIONS INCLUDED ACCESSO RIES Dimension 240 mm x 580 mm x 560 mm 3.5” Stackable HDD Bracket (WxDxH) (9.45 x 22.83 x 22.05 in) Vertical GPU Mount Form Factor Full Tower... -
Page 7: Exploded View
EXPLOADED VIEW ENTHOO PRO II 1. Chassis 2. Front Panel 3. Right Side Panel 4. Left Side Panel* 5. Dual PSU Bracket 6. SSD Cover 7. Front Dust Filter 4* PH-ES620PC_BK version is not 8. Top Dust Filter equipped with a tempered glass panel 9. -
Page 8: Accessories
ACCESSORIES ENTHOO PRO II 3 . 5 ” M ODUL AR HD D B R ACKE T DUA L PSU COVER - 4 included in accessory box - Pre-installed - For 3.5” or 2.5” Drive - Allows for an optional second Power Supply... -
Page 9: Configure Your Enthoo Pro Ii
CONFIGURE YOUR ENTHOO PRO II ENTHOO PRO II The Enthoo Pro 2 has the most versatile chassis design, providing you with a myriad of options. With so many possibilities to pick from, you can use this overview to choose and plan the best configuration for your build. -
Page 10: Getting Started
GETTING STARTED ENTHOO PRO II PREPARATIONS The Enthoo Pro 2 case is designed to support installation in a standing position. Don’t turn on the power to your system until installation is complete. Discharge your body’s static electric charge by touching a grounded surface before performing any hardware procedure. - Page 11 GETTING STARTED ENTHOO PRO II R E M O V I N G L E F T S I D E PA N E L * S L I D E LOO SE N : R E M O V I N G R I G H T S I D E PA N E L...
-
Page 12: Installing The Motherboard
INSTALLING MOTHERBOARD ENTHOO PRO II Use the motherboard screws from the toolbox to install your motherboard on the R EQU IRE S: pre-installed standoffs. S TAN D OFF P O S IT I ON I N G AT X / E-AT X... -
Page 13: Installing The Power Supply
INSTALLING POWER SUPPLY ENTHOO PRO II The power supply can be installed by opening the cable cover. RE QUIRE S: 1. Open the Cable Cover. 2. Place the Power Supply. 3. Secure the Power Supply with 4x PSU screws. LOOSE N:... -
Page 14: Installing A Second Power Supply
INSTALLING A SECOND POWER SUPPLY ENTHOO PRO II A second power supply can be installed by removing the cover in the rear panel. RE QU IRE S: 1. Remove the rear PSU Cover. 2. Place the 4x rubber pads from the toolbox. -
Page 15: Installing Fans
INSTALLING FANS ENTHOO PRO II Configure your airflow-path with this overview. Some fan locations allow you to choose between FRO NT storage or cooling to offer more flexibility. The bottom radiator bracket is removed by loosening the thumb screw and sliding it forward. -
Page 16: Installing Drives
INSTALLING DRIVES ENTHOO PRO II 2. 5” S S D IN S TA LL AT I O N RE QU IRE S: Three SSDs can be installed on the 3x dedicated SSD bracket and two on each of the 4x SSD covers for a total of 11 SSD drives. - Page 17 INSTALLING DRIVES ENTHOO PRO II MAI N COMPA RTME N T RE QUIRE S: A total of 8 Stackable HDD brackets can be installed on the side fan positions. Before installation please remove the SSD Covers. 1. Mount the bracket in the chassis.
- Page 18 ENTHOO PRO II 3 .5” HDD INS TA LL AT I O N RE QUIRE S: 4x Phanteks Stackable 3.5” HDD Brackets are included. Additional brackets are sold separately (PH-HDDKT_03). B OT TO M CO M PA RTM EN T H DD I NSTA LL ATION 4x HDD Brackets can be positioned in the bottom compartment.
-
Page 19: Installing Water Cooling
INSTALLING WATER COOLING ENTHOO PRO II This overview shows all possible radiator form-factors, locations and clearances. 1 2 0 FORM FACTOR SIDE max 120x460mm 1 2 0 FORM FACTOR max 135x530x32mm *max motherboard component height: 55mm REAR FRONT 1 2 0 FORM FACTOR... -
Page 20: Radiator Clearance
INSTALLING WATER COOLING ENTHOO PRO II R A DI ATOR CL E A R ANC E Some radiator clearances depend on other hardware installed. Subtracting the radiator and fan thickness shows the remaining clearance for other radiators. I NTERNA L D IMEN SI ON S :... -
Page 21: Drain Port
INSTALLING DRAIN PORT ENTHOO PRO II We highly recommend installing a drain port if you plan to install a custom water-cooling configuration. This will ensure an easy maintenance in the future. DR AIN P O R T The Drain Port is installed in the Front Panel using a Passthrough Fitting and a Stop Fitting / Ball Valve. -
Page 22: Installing The Gpu Anti-Sag Bracket
INSTALLING GPU ANTI-SAG BRACKET ENTHOO PRO II To prevent your GPU from tipping down you can install the GPU Anti-Sag Bracket. RE QU IRE S: INSTA LLING GPU A NT I- SAG BR ACKE T IN S TAL L A L L G PU A ND P CI C A RDS... -
Page 23: Connecting Front I/O
CONNECTING FRONT I/O ENTHOO PRO II Please consult the motherboard manual for additional instructions. Please make sure to consult your motherboard manual before connecting the front I/O. * Only PH-ES620PTG model TO MOTHE RB OA RD POWE R B U T TON Power SW 4 X U SB 3 .0... -
Page 24: Lighting Control
LIGHTING CONTROL ENTHOO PRO II The Digital-RGB lighting can be easily controlled with the 2 buttons on the front of the chassis. D -RG B M ODE B UT TON* * Only PH-ES620PTG model D -RG B COLOUR BUT TON *... -
Page 25: Cable Management
CABLE MANAGEMENT ENTHOO PRO II Use the double-loop Velcro ties to route your cables. Zip ties are included in the accessory bag to manage any excess cables. Use the double-loop Velcro ties to split the cables into 2 channels. Use the cable cover to hide all your... -
Page 26: Dust Filters
DUST FILTERS ENTHOO PRO II The Enthoo Pro 2 is equipped with a front, bottom, side, top and PSU filter. We recommend to clean these filters every month to keep your cooling performance optimized. If cleaning the dust filters with water, make sure... -
Page 27: Optional Upgrades
PH-NELEDKT_M5 / PH-NELEDKT_CMBO / PH-NELEDKT_M1 PH-FF120DRGBA_BK01 / PH-FF140DRGBA_BK01 Phanteks’ NEON Digital-RGB LED STRIPS provide the The Phanteks’ Halos D-RGB fan frames complements any smoothest lighting effect with many mounting positions system build with ambient illumination. Using high density to highlight your system. Its easy to use and secure... - Page 28 With the optional Riser Cable you can place provides lighting solution that seamlessly any 2-slot or 3-slot GPU vertically. Compatible integrate to your Phanteks’ D-RGB products with PCI-E 3.0 standard, the riser cable and compatible D-RGB motherboards to features a slim cable design for more flexibility enhance your lighting experiences.
-
Page 29: Installing A Vertical Gpu
INSTALLING A VERTICAL GPU ENTHOO PRO II There are 2 vertical GPU positions available for System 1. RE QU IRE S: We recommend the first position using the Vertical GPU Bracket. I N S TA L L U S I N G T H E V E R T I C A L G P U B R AC K E T Vertical GPU Bracket with riser cable included sold separately. -
Page 30: Installing The 5.25 Inch Bay
INSTALLING A 5.25” BAY ENTHOO PRO II I N S TA L L A N Y 5 . 2 5 ” D E V I C E S I N T O T H E 5 . 2 5” B AY F I R S T P L AC E T H E 5. -
Page 31: Installing A Dual System
RE M OVE: I N S TA L L T H E D U A L - S Y S T E M B R AC K E T The Revolt X power supply from Phanteks is required for this configuration. - Page 32 INSTALLING A DUAL SYSTEM ENTHOO PRO II I N S TA L L 4 X M OT H E R B O A R D S TA N D - O F F S RE QU IRE S: I N S TA L L T H E M OT H E R B O A R D W I T H...
- Page 33 INSTALLING A DUAL SYSTEM GPU ENTHOO PRO II I N S TA L L R I S E R C A B L E O N T H E V E R T I C A L G P U M O U N T...
-
Page 34: Contact Us
CONTACT US ENTHOO PRO II As a Phanteks customer, you are priority number one. We have a dedicated team of employees across the globe working hard every day to make sure we deliver the superior experience you deserve. We are here for you. If you have a question or a concern about our products, we have numerous ways you can reach us. -
Page 35: Warranty
WARRANTY ENTHOO PRO II PHANTEKS warrants its products to be free from defects in material and workmanship during the warranty period; when given normal, proper and intended usage. If a product proves to be defective in material or workmanship during the warranty period, PHANTEKS will, at its sole option, repair or replace the product with same product or similar product.
Need help?
Do you have a question about the ENTHOO PRO II and is the answer not in the manual?
Questions and answers