Table of Contents
Advertisement
Installation Manual
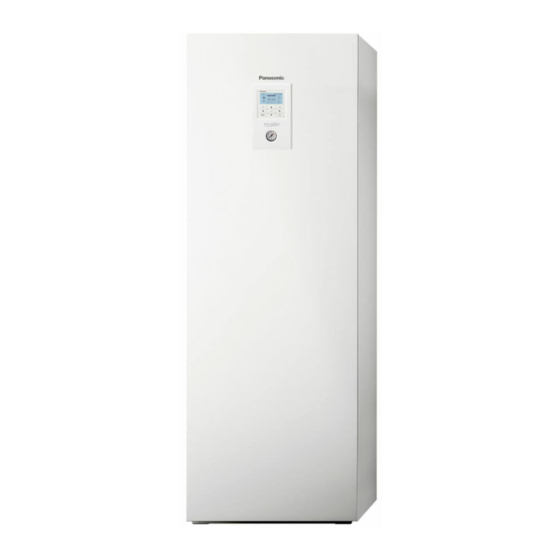
AIR-TO-WATER HYDROMODULE + TANK
WH-ADC0309J3E5UK
CAUTION
R32
REFRIGERANT
This AIR-TO-WATER HYDROMODULE + TANK contains and
operates with refrigerant R32.
THIS PRODUCT MUST ONLY BE INSTALLED OR SERVICED
BY QUALIFIED PERSONNEL.
Refer to National, State, Territory and local legislation,
regulations, codes, installation & operation manuals, before
the installation, maintenance and/or service of this product.
SAFETY PRECAUTIONS
•
Read the following "SAFETY PRECAUTIONS" carefully before installation of Air-To-Water Hydromodule + Tank (here after referred to as "Tank Unit").
•
Electrical works and water installation works must be done by licensed electrician and licensed water system installer respectively. Be sure to use
the correct rating and main circuit for the model to be installed.
•
The caution items stated here must be followed because these important contents are related to safety. The meaning of each indication used is as
below. Incorrect installation due to ignorance or negligence of the instructions will cause harm or damage, and the seriousness is classifi ed by the
following indications.
•
Please leave this installation manual with the unit after installation.
WARNING
This indication shows the possibility of causing death or serious injury.
CAUTION
This indication shows the possibility of causing injury or damage to properties only.
The items to be followed are classifi ed by the symbols:
Symbol with white background denotes item that is PROHIBITED.
Symbol with dark background denotes item that must be carried out.
•
Carry out test run to confi rm that no abnormality occurs after the installation. Then, explain to user the operation, care and maintenance as stated in instructions.
Please remind the customer to keep the operating instructions for future reference.
•
If there is any doubt about the installation procedure or operation, always contact the authorized dealer for advice and information.
Do not use means to accelerate the defrosting process or to clean, other than those recommended by the manufacturer. Any unfi t method or using incompatible material
may cause product damage, burst and serious injury.
Do not use unspecifi ed cord, modifi ed cord, joint cord or extension cord for power supply cord. Do not share the single outlet with other electrical appliances. Poor contact,
poor insulation or over current will cause electrical shock or fi re.
Do not tie up the power supply cord into a bundle by band. Abnormal temperature rise on power supply cord may happen.
Keep plastic bag (packaging material) away from small children, it may cling to nose and mouth and prevent breathing.
Do not use pipe wrench to install refrigerant piping. It might deform the piping and cause the unit to malfunction.
Do not purchase unauthorized electrical parts for installation, service, maintenance and etc.. They might cause electrical shock or fi re.
Do not pierce or burn as the appliance is pressurized. Do not expose the appliance to heat, fl ame, sparks, or other sources of ignition.
Else, it may explode and cause injury or death.
ACXF60-37631-AB
Required tools for Installation Works
1 Philips screw driver
2 Level gauge
3 Electric drill, hole core drill
(ø70 mm)
4 Hexagonal wrench (4 mm)
5 Spanner
6 Pipe cutter
7 Reamer
8 Knife
9 Gas leak detector
10 Measuring tape
Explanation of symbols displayed on the indoor unit or outdoor unit.
WARNING
CAUTION
CAUTION
CAUTION
WARNING
11 Thermometer
12 Megameter
13 Multimeter
14 Torque wrench
18 N•m (1.8 kgf•m)
55 N•m (5.5 kgf•m)
58.8 N•m (5.8 kgf•m)
65 N•m (6.5 kgf•m)
117.6 N•m (12.0 kgf•m)
15 Vacuum pump
16 Gauge manifold
This symbol shows that this equipment uses
a fl ammable refrigerant. If the refrigerant is
leaked, together with an external ignition
source, there is a possibility of ignition.
This symbol shows that the Installation
Manual should be read carefully.
This symbol shows that a service personnel
should be handling this equipment with
reference to the Installation Manual.
This symbol shows that there is information
included in the Operation Manual and/or
Installation Manual.
1
Advertisement
Table of Contents

Subscribe to Our Youtube Channel
Related Manuals for Panasonic WH-ADC0309J3E5UK


Summary of Contents for Panasonic WH-ADC0309J3E5UK
- Page 1 Installation Manual AIR-TO-WATER HYDROMODULE + TANK WH-ADC0309J3E5UK Required tools for Installation Works CAUTION 1 Philips screw driver 11 Thermometer 2 Level gauge 12 Megameter 3 Electric drill, hole core drill 13 Multimeter (ø70 mm) 14 Torque wrench 4 Hexagonal wrench (4 mm) 18 N•m (1.8 kgf•m)
- Page 2 Do not add or replace refrigerant other than specifi ed type. It may cause product damage, burst and injury etc. Do not place containers with liquids on top of the Tank Unit. It may cause Tank Unit damage and/or fi re could occurs if they leak or spill onto the Tank Unit. Do not use joint cable for Tank Unit / Outdoor Unit connection cable.
- Page 3 Ensure the correct polarity is maintained throughout all wiring. Otherwise, it will cause electrical shock or fi re. After installation, check the water leakage condition in connection area during test run. If leakage occurs, it will cause damage to other properties. If the Tank Unit not operates for long time, the water inside the Tank Unit should be drained.
- Page 4 Table I – Maximum refrigerant charge allowed in a room Table II – Minimum floor area Minimum floor area Maximum refrigerant charge in a room ) (kg) (kg) min total room H =0.6m H =0.6m 0.138 1.84 28.81 1.86 29.44 0.276 1.88 30.08...
- Page 5 Attached accessories Field Supply Accessories (Optional) Accessory part Qty. No. Accessory part Qty. Part Model Specifi cations Maker 2-way valve kit Electromotoric Actuator SFA21/18 AC230V Siemens Adjustable Feet Packing *Cooling model 2-port Valve VVI46/25 Siemens Room thermostat Wired PAW-A2W-RTWIRED AC230V –...
- Page 6 TO DRILL A HOLE IN THE WALL SELECT THE BEST LOCATION AND INSTALL A SLEEVE OF Before choosing the installation site, obtain user approval. PIPING Install the Tank Unit in indoors with frost free weather proof 1. Make a Ø70 mm through hole. location only.
- Page 7 Refrigerant Piping Installation metal powder entering the pipe. 3. Please make fl are after inserting the fl are nut onto the copper pipes. This Tank Unit is designed for combination with Panasonic Spanner Air-to-Water Heat Pump Outdoor Unit. If Outdoor Unit from...
- Page 8 • Guides this hose outlet to outdoor only. WH-UD05JE5 12.9 14.3 WH-ADC0309J3E5UK • Do not insert this hose into sewage or drain pipe that may WH-UD07JE5 17.6 20.1 generate ammonia gas, sulphuric gas, etc.
- Page 9 Expansion vessel WH-UD03JE5, (fi eld supply) WH-UD05JE5 3 x min 1.5 mm 15/16A 30mA, 2P, type AC <600mm WH-ADC0309J3E5UK 3 x min 2.5 mm 30mA, 2P, type A WH-UD07JE5, WH-UD09JE5 3 x min 1.5 mm 15/16A 30mA, 2P, type AC Tee Joint (fi...
- Page 10 CHARGING AND DISCHARGING CHECK PRESSURE RELIEF VALVE b THE WATER • Check for correct operation of Pressure Relief Valve b by turning on the lever to become horizontal. • Make sure all the piping installations are properly done before • If you do not hear a clacking sound (due to water drainage), contact carry out below steps.
- Page 11 • Remote Controller cable shall be (2 x min 0.3 mm²), of double For embedded type Preparation: Make 2 holes for screws using a driver. insulation PVC-sheathed or rubber sheathed cable. Total cable length shall be 50 m or less. •...
- Page 12 Relief Valve b lever UP, so that water pressure drop below 0.5 bar. 4. Take off the clip, then gently pull out the mesh. Beware of small COLK100080 - Panasonic G3 Unvented Control Kit amount water drain out from it.
- Page 13 Control of Water Temperature : PCB, Limit Thermostat WIRING DIAGRAM WHITE WHITE WHITE 80±3°C 80±3°C ELCB ELCB 230V 30A~40A REACTOR REACTOR I n=30mA LEAD WIRE FIXING LEAD WIRE FIXING FOR HEATER GROUNDING GROUNDING FOR HEATER ELCB ELCB (GRN) TERMINAL BOARD (WHT) (WHT) TERMINAL BOARD...
- Page 14 APPENDIX 1 Variation of system This section introduces variation of various systems using Air-To-Water Heatpump and actual setting method. 1-1 Introduce application related to temperature setting. Temperature setting variation for heating 1. Remote Controller Indoor Setting of remote controller Installer setting Outdoor System setup Optional PCB connectivity - No...
- Page 15 Connect fl oor heating or radiator directly to Tank Unit. Remote controller is installed on Tank Unit. Install separate external room thermistor (specifi ed by Panasonic) in the room where fl oor heating is installed. This is an application that uses external room thermistor.
- Page 16 Connects pool heat exchanger directly to Tank Unit without using buffer tank. Install pool pump and pool sensor (specifi ed by Panasonic) at secondary side of the pool heat exchanger. Remove remote controller from Tank Unit and install in room where fl oor heating is installed.
- Page 17 T for buffer tank Floor heating This is an application that connects the buffer tank to the Tank Unit. Buffer tank’s temperature is detected by buffer tank thermistor (specifi ed by Panasonic). This system requires Optional PCB (CZ-NS4P). Solar thermistor...
- Page 18 2 How to fi x cable • For connection to Optional PCB 6 1. By connecting Optional PCB, 2 Zone temperature control can be achieved. Please connect mixing valves, water pumps and Connecting with external device (optional) thermistors in zone 1 and zone 2 to each terminals in Optional All connections shall follow to the local national wiring standard.
- Page 19 Connection of the main PCB Zone 1 room sensor Outdoor air sensor Tank sensor External control Remote controller Boiler contact / Optional cables: Defrost Signal • 2-way valve cable Extra pump • Extra pump cable • • Power Supply 1 cord Boiler contact cable •...
- Page 20 Recommended External Device Specifi cation 15.604 0.511 • This section explains about the external devices (optional) 19.70 0.686 recommended by Panasonic. Please always ensure to use the 25.05 0.932 correct external device during system installation. • For optional sensor. 32.10 1.279...
- Page 21 3. On the wall near the Tank Unit, attach the adaptor by WARNING screwing screws through the holes in the back cover. This section is for authorized and licensed electrician/water system installer only. Work behind the front plate secured by screws must only be carried out under supervision of qualifi...
- Page 22 3 System installation 3-1. Remote Controller Outline Name Function A: Main screen Display information B: Menu Open/Close main menu C: Triangle (Move) Select or change item D: Operate Start/Stop operation E: Back Back to previous item F: Quick Menu Open/Close Quick menu G: OK Confi...
- Page 23 First time of power ON (Start of installation) Initialization 12:00am,Mon When power is ON, fi rstly initialization screen appears (10 sec) Initializing. « 12:00am,Mon When initialization screen ends, it turns to normal screen. Start « Language 12:00am,Mon ENGLISH When any button is pressed, language FRANÇAIS setting screen appears.
- Page 24 3-2. Installer Setup System setup Optional PCB connectivity Yes/No Only when the selection for Optional PCB is Yes Zone & Sensor 1 Zone system / 2 Zone system Zone settings Heater capacity Capacity select Anti freezing Yes/No DHW Capacity Variable/Standard ...
- Page 25 Compensation Operation setup Heat Water temp. for heating ON Compensation curve curve setup Direct Direct temp. setup Outdoor temp. for heating OFF Heating OFF Temp. setup T for heating ON T for heating setup Heater ON/OFF O/D temp for heater ON setup Heater ON Delay Time T of target temperature for Heater ON T of target temperature for Heater OFF...
- Page 26 3-3. System Setup 1. Optional PCB connectivity System setup 12:00am,Mon Initial setting: No Optional PCB connectivity If function below is necessary, please purchase and install Optional PCB. Zone & Sensor Please select Yes after installing Optional PCB. Heater capacity • 2-zone control •...
- Page 27 6. Buffer Tank connection System setup 12:00am,Mon Initial setting: No Heater capacity Select whether it is connected to buffer tank for heating or not. Anti freezing If buffer tank is used, please set Yes. Connect buffer tank thermistor and set, T (T use to increase primary side temp Tank connection against secondary side target temp).
- Page 28 Alternative mode Parallel mode operate boiler only operate heat pump only operate boiler and heat operate heat pump only pump simultaneously Outdoor temp. Outdoor temp. -10°C (setting from remote controller) -10°C (setting from remote controller) Advanced Parallel mode For heating For DHW tank operate boiler and heat operate heat pump only...
- Page 29 12. External Error Signal System setup 12:00am,Mon Initial setting: No Bivalent connection Set when external error display unit is installed. External SW Turn on Dry Contact SW when error happened. Solar connection (NOTE) Does not display when there is no Optional PCB. External error signal When error occurs, error signal will be ON.
- Page 30 15. External Compressor SW System setup 12:00am,Mon Initial setting: No External error signal Set when external compressor SW is connected. Demand control SW is connected to external devices to control power consumption, ON signal will stop compressor’s operation. (Heating operation etc. are not cancelled). SG ready External compressor SW (NOTE) Does not display if there is no Optional PCB.
- Page 31 20. Defrost signal System setup 12:00am,Mon Initial setting: No Heat-Cool SW Defrost signal sharing same terminal as bivalent contact in main board. When Force heater defrost signal set to YES, bivalent connection reset to NO. Only one function can Force defrost be set between defrost signal and bivalent.
- Page 32 25. Heater ON/OFF a. Outdoor temp. for heater ON Initial setting: 0°C Set outdoor temp when back-up heater starts to operate. Setting range is -20°C ~ 15°C 0°C User shall set whether to use or not to use heater. Heater ON b.
- Page 33 29. Outdoor temp. for (Cool to Heat) Initial setting: 10°C Heat Outdoor temp. dropping Set outdoor temp that switches from Cooling to Heating by Auto setting. Setting range is 5°C ~ 25°C Cool Timing of judgement is every 1 hour 10°C Tank 30.
- Page 34 3-5. Service Setup 34. Pump maximum speed 12:00am,Mon Service setup Initial setting: Depend on model Flow rate Max. Duty Operation Normally setting is not necessary. Please adjust when need to reduce the pump sound etc. Air Purge 88:8 L/min 0xCE Besides that, it has Air Purge function.
- Page 35 Custom menu 4 Service and maintenance Setting method of Custom menu When connect CN-CNT connector with computer 12:00am,Mon Custom menu Please use optional USB cable to connect with CN-CNT connector. Cool mode After connected, it requests for driver. If PC is under Windows Vista or later version, it automatically installs the driver under Back-up heater internet environment.
- Page 36 ACXF60-37631-AB Printed in the Czech Republic...
Need help?
Do you have a question about the WH-ADC0309J3E5UK and is the answer not in the manual?
Questions and answers