Table of Contents

Subscribe to Our Youtube Channel
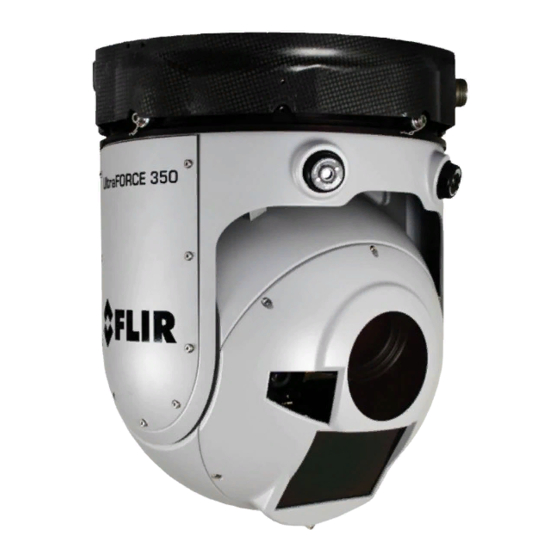
Related Manuals for FLIR UltraFORCE 350-HD


Summary of Contents for FLIR UltraFORCE 350-HD
- Page 1 SYS11000OM Rev G [UF 350-HD, Generic Template] Owner’s Manual (Operation & Maintenance Manual) (Note: Picture layout is typical. May vary depending on system configuration) Page 1 of 70 FLIR Systems Polytech AB Antennvägen 6 SE-187 66 Täby Sweden...
- Page 2 UltraFORCE 350-HD Operation ............5 1.1 Scope ....................5 1.2 1 Line Maintenance ................. 5 1.3 UltraFORCE 350-HD Operation ............9 1.4 Controls and functionality..............13 1.5 Screen Symbology ................41 1.6 Auto Tracker Functionality .............. 45 1.7 Laser Range Finder ................ 49 1.8 Laser Pointer and Illuminator ............
- Page 3 1.2.4, 1.2.5, 2.5.1, 2.5.4: Added clarifications and spare part numbers for desiccant checks and maintenance. 1.3.3: Added instructions for flying the TCU in an unpowered state. Page 3 of 70 FLIR Systems Polytech AB Antennvägen 6 SE-187 66 Täby Sweden...
- Page 4 Not Applicable No Change NFOV Narrow Field Of View Non-Uniformity Correction Night Vision Goggles Turret Camera Unit Thermal Imager WFOV Wide Field Of View Weight On Wheels Page 4 of 70 FLIR Systems Polytech AB Antennvägen 6 SE-187 66 Täby Sweden...
- Page 5 SYS11000OM Rev G [UF 350-HD, Generic Template] UltraFORCE 350-HD Operation Scope General This document details the methods and procedures used to operate the UltraFORCE 350-HD system, operational level maintenance, and storage considerations. Audience The expected audience for this document is trained System Operators and Maintenance...
- Page 6 It is especially important to remove fuel and oil deposits from the daylight window since these fluids refract the light, which may cause an out of focus effect in the image. Page 6 of 70 FLIR Systems Polytech AB Antennvägen 6 SE-187 66 Täby Sweden...
- Page 7 If just the two Desiccator Breathers (not the Indicator) are indicating that moisture is present, then just the Breathers needs to be dried using FLIR Systems Polytech AB GEN00035 Desiccator Dryer Kit or P990024 Refill Kit for Breathers, or replaced with new P990002 Desiccant Breather(s).
- Page 8 A Purging Kit (GEN00035) is available as an option for this purpose. For detailed instructions regarding the purging process; See the Maintenance section of this manual. (§ 2.5.2) Page 8 of 70 FLIR Systems Polytech AB Antennvägen 6 SE-187 66 Täby Sweden...
- Page 9 SYS11000OM Rev G [UF 350-HD, Generic Template] 1.3 UltraFORCE 350-HD Operation 1.3.1 Power-on (start-up) procedure: Ensure that the TCU has mechanical freedom of movement and that no interference from surrounding objects/obstructions is present. Ensure that the TCU is placed in STOW position before the system is powered ...
- Page 10 Set Time & Date 1.4.11 Set Azimuth Joystick Gain 1.4.8 Set Elevation Joystick Gain 1.4.16 Adjust HCU NVG Backlight 1.4.22 Change Elevation Joystick 1.4.7 Sense Point Mode 1.4.13 Page 10 of 70 FLIR Systems Polytech AB Antennvägen 6 SE-187 66 Täby Sweden...
- Page 11 This phenomenon is caused by the sudden fast changing IR levels. 1.3.7 Tracker Functions Reference Section/Paragraph Function Track 1.4.15 Track Mode 1.4.16 Track Gate 1.4.16 Aimpoint Refinement 1.4.2 Page 11 of 70 FLIR Systems Polytech AB Antennvägen 6 SE-187 66 Täby Sweden...
- Page 12 IR cut-off filter activated. It is also possible to see the Laser beam with night vision goggles. (NVG) 1.3.12 Inertial Navigation System Functions (IMU) Reference Section/Paragraph Function Target Altitude 1.9.3 Geo-Target 1.9.4 Aimpoint Refinement 1.9.6, 1.4.2 Page 12 of 70 FLIR Systems Polytech AB Antennvägen 6 SE-187 66 Täby Sweden...
- Page 13 [UF 350-HD, Generic Template] 1.4 Controls and functionality The UltraFORCE 350-HD has been designed for ease of use with all functionality directly available using hardware controls, eliminating the need to navigate menu selections. The following section explains the function of all HCU controls. With reference to the Hand Controller Unit (HCU) switch layout in §...
- Page 14 COAST mode (See § 1.4.16 and 1.5.1) c) Scene Lock – Text field 11: SCENE Auto Tracker aimpoint refinement d) Geo-Target – Text field 1: GEO Aimpoint refinement Page 14 of 70 FLIR Systems Polytech AB Antennvägen 6 SE-187 66 Täby Sweden...
- Page 15 No function with TV, IR and Spotter payloads. For control/cycling of sensors, See § 1.4.11 3) In menu mode; “ENTER” Confirms a command in menu mode. Page 15 of 70 FLIR Systems Polytech AB Antennvägen 6 SE-187 66 Täby Sweden...
- Page 16 When the function “matched field-of- views” is ON; (See § 1.4.21) When switching to another sensor the zoom values automatically sets to the approximate same FOV. Page 16 of 70 FLIR Systems Polytech AB Antennvägen 6 SE-187 66 Täby Sweden...
- Page 17 (#FOV is reflecting the current between x2 and no E-Zoom of the optical field-of-view) current optical zoom. 3) Spotter sensor selected; No function (No E-Zoom available on Spotter) Page 17 of 70 FLIR Systems Polytech AB Antennvägen 6 SE-187 66 Täby Sweden...
- Page 18 OFFSET joystick (JOYSTICK CALIBRATION) NOTE: It is a recommended best practice to perform this action before a mission is started. Page 18 of 70 FLIR Systems Polytech AB Antennvägen 6 SE-187 66 Täby Sweden...
- Page 19 F button is pushed again. 2b) TI sensor selected; Text field 5: AF AUTO Momentary push causes the TI FOCUS camera to switch to “one shot” auto focus. Page 19 of 70 FLIR Systems Polytech AB Antennvägen 6 SE-187 66 Täby Sweden...
- Page 20 JOYSTICK Press and hold FUNC button and GAIN See § 1.4.16 for setting of the rotate the Focus Dial to set Azimuth Elevation gain Joystick gain. Page 20 of 70 FLIR Systems Polytech AB Antennvägen 6 SE-187 66 Täby Sweden...
- Page 21 Momentary push causes the TV low NOTE: Applies to Hitachi light color (see FLT, § 1.4.11) to SC-120R only. toggle. 3) In menu mode; “CANCEL” Cancels a command in menu mode. Page 21 of 70 FLIR Systems Polytech AB Antennvägen 6 SE-187 66 Täby Sweden...
- Page 22 NUC procedure. The Scene NUC will normally take more than 1 minute to perform, while the normal NUC will take 15-20 seconds. Page 22 of 70 FLIR Systems Polytech AB Antennvägen 6 SE-187 66 Täby Sweden...
- Page 23 ►FRZ 1b) TI sensor selected; Text field 6: FREEZE TI IMAGE Momentary push to FRZ causes FREEZE the current image to toggle between frozen and active. Page 23 of 70 FLIR Systems Polytech AB Antennvägen 6 SE-187 66 Täby Sweden...
- Page 24 The ranges are; <10°C, 10 to 30°C and >30°C. The re-calibration between the different ranges will take several minutes. The system remembers range settings after power cycle. Page 24 of 70 FLIR Systems Polytech AB Antennvägen 6 SE-187 66 Täby Sweden...
- Page 25 Time/Date set mode. If GPS data is present local time offset can be adjusted in menu “LOCAL.HOUR” Press Pol (Cancel) button to leave the menu mode. Page 25 of 70 FLIR Systems Polytech AB Antennvägen 6 SE-187 66 Täby Sweden...
- Page 26 When target data is adjusted, highlight GEOPOS NO and Text field Menu: change to GEOPOS YES, to GEOPOS YES activate the Geo-Target mode to the adjusted target position. Page 26 of 70 FLIR Systems Polytech AB Antennvägen 6 SE-187 66 Täby Sweden...
- Page 27 Actual Gain value Gain to revert to manual mode. The TI (1 to 100%) Gain will then remain in manual mode until the Auto button is pushed. Page 27 of 70 FLIR Systems Polytech AB Antennvägen 6 SE-187 66 Täby Sweden...
- Page 28 TV performed. (See § 1.4.7) DRIFT sensor and zoom in to NFOV. Adjustments are updated and saved in the systems non-volatile memory every 10 seconds. Page 28 of 70 FLIR Systems Polytech AB Antennvägen 6 SE-187 66 Täby Sweden...
- Page 29 TI will ### = Actual Level value then remain in manual mode until (-256 to 255) the Auto button is pressed. Page 29 of 70 FLIR Systems Polytech AB Antennvägen 6 SE-187 66 Täby Sweden...
- Page 30 CAGE position. Joystick deflection past the threshold position will disable a CAGE condition and cause a change in mode to STEER (normal joystick operation). Page 30 of 70 FLIR Systems Polytech AB Antennvägen 6 SE-187 66 Täby Sweden...
- Page 31 3) STEER mode is selected when Text field 1: STEER the switch is positioned in the STEER centre setting. In STEER mode the system is manually steerable using the joystick. Page 31 of 70 FLIR Systems Polytech AB Antennvägen 6 SE-187 66 Täby Sweden...
- Page 32 Text field 11: CORR its available modes as follows; Text field 11: CENTR TRACK Text field 11: SCENE MODE Standby Correlation Centroid Scene Standby See § 1.15 Page 32 of 70 FLIR Systems Polytech AB Antennvägen 6 SE-187 66 Täby Sweden...
- Page 33 POWER ON Laser is now ready to fire when Text field 17 = RTF If Text field 17= INH then LOS is out of fire zone. Page 33 of 70 FLIR Systems Polytech AB Antennvägen 6 SE-187 66 Täby Sweden...
- Page 34 Function: Momentary pushes will Text field 18: LP or LI SELECT cycle the selected Laser sensor: LASER Laser Illuminator Laser SENSOR Pointer Laser Illuminator Page 34 of 70 FLIR Systems Polytech AB Antennvägen 6 SE-187 66 Täby Sweden...
- Page 35 Push Switch on HCU. LP ON In this position the switch is spring FIRE biased (non-latching) On selection of FIRE the Laser will point at LOS target Page 35 of 70 FLIR Systems Polytech AB Antennvägen 6 SE-187 66 Täby Sweden...
- Page 36 Push Switch on HCU. LI ON In this position the switch is spring FIRE biased (non-latching) On selection of FIRE the Laser will illuminate LOS target Page 36 of 70 FLIR Systems Polytech AB Antennvägen 6 SE-187 66 Täby Sweden...
- Page 37 TV camera. When the feature is "Off", cameras will keep separate Zoom levels stored, and switching between cameras is fully manual. Note: Not available on all systems. (Dependent on payload selection) Page 37 of 70 FLIR Systems Polytech AB Antennvägen 6 SE-187 66 Täby Sweden...
- Page 38 Offset accuracy. (In degrees) ±YAW Offset accuracy. (In degrees) SAVE Save settings. Note: Unless this is pressed, the settings will be reset when the gimbal is restarted. Page 38 of 70 FLIR Systems Polytech AB Antennvägen 6 SE-187 66 Täby Sweden...
- Page 39 Target latitude minutes. LAT.DEC Target latitude decimal minutes. LON.HEMI Target longitude hemisphere [E/W]. LON.DEG Target longitude degrees. LON.MIN Target longitude minutes. LON.DEC Target longitude decimal minutes. Page 39 of 70 FLIR Systems Polytech AB Antennvägen 6 SE-187 66 Täby Sweden...
- Page 40 The UltraFORCE 350-HD is NOT APPROVED for flying in known icy conditions. Note: FLIR Systems Polytech AB is not prohibiting flying in icy conditions, but it’s not recommended from a performance point of view. Therefore the Operator needs to take the impact of the current weather conditions into account.
- Page 41 TV/M: Indicates that the TV is in the manual mode. SP/AI: Indicates that the Spotter is in automatic iris mode. SP/MI: Indicates that the Spotter is in the manual iris mode. Page 41 of 70 FLIR Systems Polytech AB Antennvägen 6 SE-187 66 Täby Sweden...
- Page 42 INIT: Indicates Thermal Imager is cooling down and initializing. The message is removed when initializing is done. During INIT the camera cannot be controlled from the HCU. Page 42 of 70 FLIR Systems Polytech AB Antennvägen 6 SE-187 66 Täby...
- Page 43 CORR: Indicates auto tracker is in Correlation mode. CENTR: Indicates auto tracker is in Centroid mode. SCENE: Indicates auto tracker is in Scene lock mode. GEO: Indicates INS is used for Geo-Target mode. Page 43 of 70 FLIR Systems Polytech AB Antennvägen 6 SE-187 66 Täby Sweden...
- Page 44 Indicates the Laser Pointer and Laser Illuminator status. 1.5.19 Symbol area 19 Not in use 1.5.20 Symbol area 20 If IMU function is included this area is used to display Target Altitude. Page 44 of 70 FLIR Systems Polytech AB Antennvägen 6 SE-187 66 Täby Sweden...
- Page 45 This is the default mode at power up. In STANDBY the tracker is transparent to the system and does not overlay the symbology. STANDBY can be entered at any time by cycling sequentially through the available modes. Page 45 of 70 FLIR Systems Polytech AB Antennvägen 6 SE-187 66 Täby Sweden...
- Page 46 MODE AIMPOINT REFINEMENT STANDBY CORRELATION YES SCENE LOCK CENTROID Page 46 of 70 FLIR Systems Polytech AB Antennvägen 6 SE-187 66 Täby Sweden...
- Page 47 This allows the system operator to select a tracking area appropriate to the mission requirement. Gate size control shall be implemented as follows: MODE MANUAL GATE CONTROL STANDBY CORRELATION SCENE LOCK CENTROID Page 47 of 70 FLIR Systems Polytech AB Antennvägen 6 SE-187 66 Täby Sweden...
- Page 48 SYS11000OM Rev G [UF 350-HD, Generic Template] 1.6.8 Tracker Symbology Correlation and Centroid Mode Correlation and Centroid Mode Page 48 of 70 FLIR Systems Polytech AB Antennvägen 6 SE-187 66 Täby Sweden...
- Page 49 • Do not aim the LRF at highly reflective objects or surfaces (windows, mirrors or reflective sign boards) within a radius of <100m since the powerful laser reflection will damage the LRF sensitive detector. Page 49 of 70 FLIR Systems Polytech AB Antennvägen 6 SE-187 66 Täby Sweden...
- Page 50 The Lasers may not at any time be aimed directly against personnel or targets containing personnel. The Lasers must be Off and safe guarded when the aircraft in close proximity of personnel or other vehicle. Page 50 of 70 FLIR Systems Polytech AB Antennvägen 6 SE-187 66 Täby Sweden...
- Page 51 Tracker Mode the Geo-Target Mod also ends the function. 1.9.5 Heading alignment INS solution is factory aligned but this alignment might need an adjustment to the helicopter heading alignment. Contact your FLIR service center if this one time alignment needs to be changed. 1.9.6 Aimpoint Refinement When the Geo-Target is engaged and tracking it provides the possibility to move the Target Point with the Thumb Joystick.
- Page 52 - Fault codes are not stored in non-volatile memory and will therefore be lost on cycling power. - Fault codes should be recorded and reported to maintenance personnel. Page 52 of 70 FLIR Systems Polytech AB Antennvägen 6 SE-187 66 Täby Sweden...
- Page 53 CDT: too short calibration time Internal start-up Fault CDT: too long calibration time Internal start-up Fault CDT: incomplete calibration Internal start-up Fault (missing key values) Page 53 of 70 FLIR Systems Polytech AB Antennvägen 6 SE-187 66 Täby Sweden...
- Page 54 Thermal contrast can be affected by a number of environmental factors that the operator does not have any control over but must be aware of in order to maximize system potential. Page 54 of 70 FLIR Systems Polytech AB Antennvägen 6 SE-187 66 Täby Sweden...
- Page 55 The operator will see the effect of the diurnal cycle as a reduction in image quality for a short period twice a day. Page 55 of 70 FLIR Systems Polytech AB Antennvägen 6 SE-187 66 Täby Sweden...
- Page 56 Wind tends to be an additional contrast-reducing mechanism. Unlike some contrast reducers however wind not only lowers contrast but also tends to modify thermal shapes due to its directional effects. Page 56 of 70 FLIR Systems Polytech AB Antennvägen 6 SE-187 66 Täby Sweden...
- Page 57 - When using TV camera always try to position the aircraft so that the target is illuminated by the sun rather than viewing the target into the sun Page 57 of 70 FLIR Systems Polytech AB Antennvägen 6 SE-187 66 Täby...
- Page 58 Fig 1 Screen Symbology – General 1.13 Page 58 of 70 FLIR Systems Polytech AB Antennvägen 6 SE-187 66 Täby Sweden...
- Page 59 1.4.12 Azimuth Drift Dial 1.4.4 Change Sensor 1.4.13 Elevation Drift Dial 1.4.11 4-Way 1.4.10 Auto 1.4.1 Power On/Off 1.4.7 Inv/Cal 1.4.14 Cage/Stow Switch 1.4.3 Function 1.4.2 Thumb Joystick Page 59 of 70 FLIR Systems Polytech AB Antennvägen 6 SE-187 66 Täby Sweden...
- Page 60 1.15 Fig 3 Hand Control Unit (Side View) 1.4.19, 1.4.20 Laser Pointer/Illuminator 1.4.17 Laser Range Finder Page 60 of 70 FLIR Systems Polytech AB Antennvägen 6 SE-187 66 Täby Sweden...
- Page 61 [UF 350-HD, Generic Template] Maintenance Scope General This document provides information on the UltraFORCE 350-HD to diagnose and correct problems down to module level. Audience The expected audience for this document is approved Technicians that have attended an appropriate training course.
- Page 62 Technician level. This level can only be carried out by the supplier’s personnel at the factory premises. It is recommended to have a thorough factory level inspection every 12 years Page 62 of 70 FLIR Systems Polytech AB Antennvägen 6 SE-187 66 Täby Sweden...
- Page 63 Inspect Wire Damper: Look for broken wire parts or loose dampers dampers) Inspect Linear Mount Linkage: Look for smooth movement excessive wear or play 2.4.6 Fig 1 Page 63 of 70 FLIR Systems Polytech AB Antennvägen 6 SE-187 66 Täby Sweden...
- Page 64 TCU internal components are still warm from previous operation. 5) On completion of the purge process replace all 3 desiccators. Page 64 of 70 FLIR Systems Polytech AB Antennvägen 6 SE-187 66 Täby Sweden...
- Page 65 NOTE: NOTE: BOTTLE AND BOTTLE REGULATOR IS NOT SUPPLIED BY FLIR SYSTEMS. BOTTLE AND BOTTLE REGULATOR NOT SUPPLIED BY FSL MAX. INPUT PRESSURE TO PRECISION REGULATOR IS 10 BAR MAX INPUT PRESSURE TO REGULATOR ITEM 4 IS 12 BAR...
- Page 66 The listed spare parts below are the parts replaceable at Line Maintenance level. This inventory is recommended to be purchased by the customer. Polytech will retain a comprehensive spare part inventory for the purpose of prompt maintenance action at FLIR Systems Polytech premises. 2.5.4 Spare Part List Item...
- Page 67 1) Refit in the reverse order as described above making sure original alignment is maintained. 2) Use torque limits recommended for installation. (See §2.7.3) 3) The 4 fixing bolts (AN4) are locked by self-locking threads when attached to any FLIR System Polytech AB manufactured Belly Mount. Page 67 of 70 FLIR Systems Polytech AB Antennvägen 6...
- Page 68 Verify with (Enter). SAVE IMU Rotation parameters to be adjusted: ROLL deg. YAW deg. PITCH deg. ROLL deg. YAW accuracy in deg (normally 5.00dgr). SAVE press (Enter) Page 68 of 70 FLIR Systems Polytech AB Antennvägen 6 SE-187 66 Täby Sweden...
- Page 69 Verify with (Enter). SAVE Antenna-Offset parameters to be adjusted: RIGHT m. UP m. RIGHT m. FWD m UP m (accuracy) SAVE press (Enter) Specification lever arms axis Page 69 of 70 FLIR Systems Polytech AB Antennvägen 6 SE-187 66 Täby Sweden...
- Page 70 SYS11000OM Rev G [UF 350-HD, Generic Template] 2.6.3 Recommended torque values Bolt size Page 70 of 70 FLIR Systems Polytech AB Antennvägen 6 SE-187 66 Täby Sweden...
Need help?
Do you have a question about the UltraFORCE 350-HD and is the answer not in the manual?
Questions and answers