Table of Contents
Advertisement
Quick Links
Advertisement
Table of Contents

Related Manuals for Leader EASY 2000


Summary of Contents for Leader EASY 2000
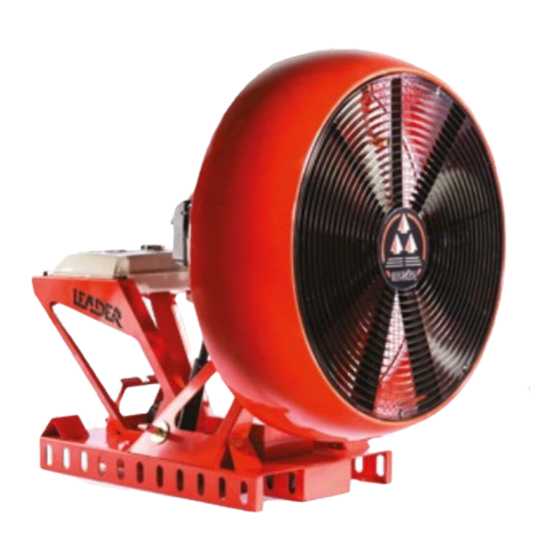
- Page 1 EASY 2000...
- Page 3 Product number: I60.30.120 EASY 2000 ON TRAILER + 1200 MM LIFT I60.30.123 EASY 2000 ON TRAILER + 600 MM LIFT I60.30.124 EASY 2000 ON TRAILER WITHOUT LIFT I60.30.126 EASY 2000 ON SKID + 1200 MM LIFT I60.30.125 EASY 2000 ON SKID + 600 MM LIFT I60.30.121...
-
Page 4: Table Of Contents
INTRODUCTION SAFETY INSTRUCTIONS VERSION AND OPTION GENERAL CHARACTERISTICS & PERFORMANCE General characteristics Manufacturer’s plate DESCRIPTION Engine instrument panel Fuel valve Circuit breaker and charger socket Remote console COMMISSIONING INSTRUCTIONS Fan stabilization for the trailer version Starting the engine Stopping the fan Gasoline failure Recharging the battery Misting... -
Page 5: Introduction
1 INTRODUCTION This manual was made in order to enable safe use of the EASY 2000 fans. The instructions for use and maintenance must be followed in order to prevent any incident. In order to improve this booklet, LEADER will be happy to read your suggestions. - Page 6 ATTENTION – ATTENTION – ATTENTION R=15m Area of occasional presence Wear protective equipment...
-
Page 7: Version And Option
3 VERSION AND OPTION TRAILER VERSION TRAILER VERSION without lift with lift Gasoline Jerrican 20L (Option) Storage box Trailer (Option) SKID VERSION SKID VERSION Tilt +20°/- with lift 10° Fuel tank Engine control Remote Misting console supply Charger socket Lift table battery (option) SKID chassis... -
Page 8: General Characteristics & Performance
4 GENERAL CHARACTERISTICS & PERFORMANCE 4.1 General characteristics ❖ Manufacturer: LEADER SAS ZI des hautes vallées Chemin N°34 76930 OCTEVILLE SUR MER France ❖ Fan characteristics: Model EASY 2000 on trailer EASY 2000 Skid Lifting system Without 600mm 1200mm Without 600mm 1200mm References I60.30.124... -
Page 9: Manufacturer's Plate
I60.30.130 Truck Truck in aluminium with handle and brake system for easy movement of I60.30.119 the EASY 2000 skid (without lifting system). W 1.2 x D 0.8 x H 1.1 m. Supply Duct 5 m spiral Ø 900 mm I60.30.122 Suction duct 6 m spiral Ø... -
Page 10: Description
5 DESCRIPTION 5.1 Engine instrument panel Oil warning light: The Oil Alert system protects the motor against damage Throttle Lever due to the lack of oil in the engine crankcase. Before the engine crankcase oil level drops below a security threshold, STARTER the Oil Alert warning light (red) will light up and the Oil Alert system automatically stops the engine (the engine... -
Page 11: Remote Console
5.4 Remote console The remote console allows you to control the EASY 2000 from a distance. It is equipped with an 8m cable. This console allows you to control the following functions: Tilt adjustment, lift adjustment (optional), area lighting (optional) and "STOP” punch switch which allows you to switch off the engine. -
Page 12: Commissioning Instructions
6 COMMISSIONING INSTRUCTIONS 6.1 Fan stabilization for the trailer version On the trailer version, the central rear strut is for stabilising the trailer on sloped or uneven ground. Its installation is essential to avoid the device tipping over when using the lift. Check that the engine is not tilted more than 20°... - Page 13 ➢ To start a cold engine, pull the choke pull knob on the CLOSED position. Starter ➢ To start a warm engine, push the choke knob in. Starter ➢ Move the throttle lever from the MIN position. To approximately 1/3 from the MAX position. Throttle lever ➢...
-
Page 14: Stopping The Fan
6.3 Stopping the fan In an emergency situation to stop the EASY 2000, push the emergency stop of the Remote console. Emergency stop To stop the fan according to the standard procedure: ➢ Decrease the engine speed to the minimum by placing the gas control lever on the MIN position. -
Page 15: Gasoline Failure
6.4 Gasoline failure After a gasoline failure, you must re-prime the fuel pump by using the following procedure: Activate the starter. If the engine does not start within 5 seconds, release the key and wait at least 10 seconds before activating the starter again. This is due to priming the fuel pump. When the engine starts, release the key;... -
Page 16: Suction Duct (Option)
6.7 Suction duct (Option) Exhaust manifold It is imperative to install it before installing the start-up. 3 mounting hooks are provided on the rear grid for protection (series) mounting the suction duct as well as a protection in order to avoid contact with the exhaust manifold. 3 hooks (series) 6M Suction... -
Page 17: Maintenance Operations
7 MAINTENANCE OPERATIONS Maintenance programme Maintenance level: Level 1: Can be performed by users. Level 2: done only by a Qualified mechanic. Operations Check fuel level Cf.4.2 Check engine oil level Cf.7.3 (Add oil if necessary) • Complete fuel level •... -
Page 18: Replacing The Battery
No disassembly must be performed before the emergency stop pressed and the ignition turned off. All interventions must be performed on a cold engine. Before any intervention on the lift table, install the security mechanism as described in paragraph cf.6.4. 7.1 Replacing the battery Battery cover Remove the battery cover by unscrewing the 4 screws. -
Page 19: Information On Engine Oil Level And Changing
7.3 Information on engine oil level and changing ➢ Frequency of oil level checks: Before every start-up. Engine oil level: Never open the engine oil tank cap when the engine is hot. Wait at least 25 min after stopping the engine. The engine oil level is visible on the gauge. -
Page 20: Lift Table Maintenance (Option)
7.4 Lift table maintenance (option) ➢ Frequency: Every 100 hours or every 6 months. • Put the table in the upper stop. • Lift the bellow and hold it in place by using the straps (not included). • Positioning the safety bar (supplied with the device) Position the safety bar in the holes of the lower rails of the table Lower rail Straps... -
Page 21: Front Grid Disassembly
7.5 Front grid disassembly • Loosen the 9 nuts. • Unlock the grid by turning clockwise. • Remove the grid. • Re-assemble the front grid by performing the steps in the opposite direction. 7.6 Checking the propeller ➢ Frequency: After every use. •... -
Page 22: Fuel Filter
7.11 Changing the engine coupling bearing There is a specific procedure which is the subject of an independent maintenance instruction notice. To get it, please contact our after-sales LEADER service. Please note the frequency: Every 200 hours or every 2 years... -
Page 23: Troubleshooting
8 TROUBLESHOOTING Maintenance level: Level 1: Can be performed by users. Level 2: done only by a qualified mechanic. Symptoms Possible origins Solutions Level Trailer brake sensor not activated Activate the brake The battery is discharged Recharge the battery "Ready to Start" indicator OFF The emergency stop button is Unlock the emergency stop engaged... -
Page 24: Spare Parts
9 SPARE PARTS Photos Description Designation Reference Air filter Air Filter 2007510 Oil filter Oil filter 2007511 Fuel filter Fuel filter 2007513 Spark plug Spark plug 2007512 Battery Battery 2007439 10A Fuse 10A Fuse 2004630 Propeller Propeller 2007401 Female Female Connector 2001072 Connector Male... -
Page 25: Maintenance Service Booklet
10 MAINTENANCE SERVICE BOOKLET Date Technician Hour Operation performed meter... - Page 26 Date Technician Hour Operation performed meter...
- Page 27 Date Technician Hour Operation performed meter...
-
Page 28: Annex
11 ANNEX ➢ Wiring diagram 1... - Page 29 ➢ Wiring diagram 2 Remote console 2007267...
-
Page 30: Warranty
This warranty is specifically limited to replacing or repairing the equipment (or its parts) which after examination proves to be defective for causes attributable to LEADER. To use this warranty, the applicant with LEADER’S agreement will need to return the equipment to LEADER, as soon as possible following the discovery of the defect. - Page 32 Package leaflet Code: EASY2000.0.ZN3.67.EN.0...
Need help?
Do you have a question about the EASY 2000 and is the answer not in the manual?
Questions and answers