
Subscribe to Our Youtube Channel
Related Manuals for StoneAge BADGER BA-LKD-P4

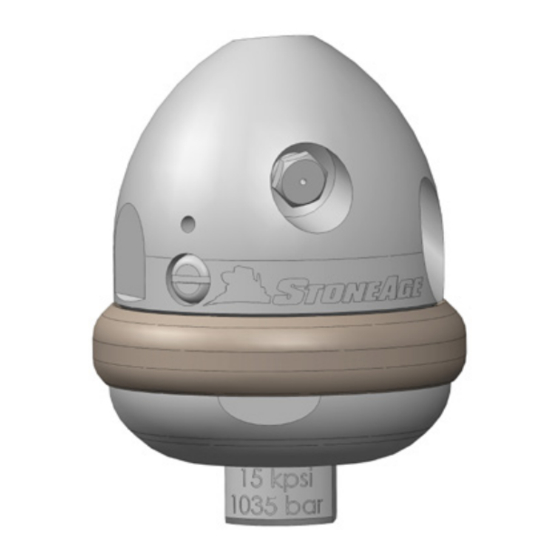
Summary of Contents for StoneAge BADGER BA-LKD-P4
- Page 1 BADGER FAMILY SELF ROTARY SWIVELS USER MANUAL *EXCLUDES BA-H6 4” 40K MODEL 2 INCH 6 INCH 4 INCH PL 663 REV P (06/2020)
-
Page 2: Table Of Contents
TABLE OF CONTENTS MANUFACTURER’S INFORMATION ............3 SPECIFICATIONS FOR ALL MODELS . -
Page 3: Manufacturer's Information
MANUFACTURER’S INFORMATION StoneAge Inc. StoneAge NL 466 S. Skylane Drive Reedijk 7Q Durango, CO 81303, USA 3274 KE Heinenoord Phone: 970-259-2869 Netherlands Toll Free: 866-795-1586 (+31) (0) 85 902 73 70 www.stoneagetools.com sales-NL@stoneagetools.com Badger Model Specifications Tool Tool Model Inlet... -
Page 4: Warning And Safety Instructions
StoneAge has designed and manufactured this The risk assessment MUST consider potential equipment considering all hazards associated material or substance hazards including: with its operation. StoneAge assessed these risks Aerosols • and incorporated safety features in the design. Biological and microbiological (viral or •... -
Page 5: Pre-Run Safety Check
WARNING AND SAFETY INSTRUCTIONS PRE-RUN SAFETY CHECK WARNING Refer to WJTA-IMCA’s, Recommended Practices Operations with this equipment can be potentially For The Use Of High-pressure Waterjetting hazardous. Caution MUST be exercised prior Equipment and/or The Water Jetting Association’s, to and during equipment and water jet tool use. WJA Code of Practice for additional safety Please read and follow all of these instructions, information. -
Page 6: 2" Badger
Operators can swap the drilled heads quickly to meet the unique demands of each job. Specification assistance is available through one of our StoneAge customer service reps at 1-866-795-1586. Or on line at www.stoneagetools.com... -
Page 7: Backout Prevention
Make sure there is an operator controlled dump in the system, operated by the person closest to the cleaning job. The StoneAge ABX-500 and ABX-PRO Hose Tractors can be used to achieve safe and consistent feed rates for line cleaning. -
Page 8: Operation And Troubleshooting
2” BADGER OPERATION AND TROUBLESHOOTING NOTICE The most important item in maintaining the Badger tool is flushing high pressure hoses before use. This keeps debris from entering the tool and preventing a loss in rotation. OPERATION 1. Make sure the operator has a controlled 6. -
Page 9: Head Replacement Information
2” BADGER HEAD REPLACEMENT INFORMATION Product training and proper tools are required to service this tool. If you are uncomfortable performing the service, bring the nozzle to your authorized dealer. Please go to the link below for more information and service videos for the 2 inch Badger. https://www.stoneagetools.com/2inch-badger BA 612-LK TOOL KIT INCLUDES: RECOMMENDED GENERAL TOOLS:... - Page 10 2” BADGER TOOL SERVICE INFORMATION ASSEMBLY: 1. Apply 2-4 drops of BA 185 Red Loctite ® 4. Insert the WV 181 Spanner Wrench into the around the circumference of the threads on Shaft. the Replacement Head prior to screwing it 5.
-
Page 11: Assembly And Parts
2” BADGER ASSEMBLY AND PARTS NEVER REMOVE SET SCREW FROM HEAD BA 546-LKD-A BA 546-LKD-B BA546-LKD-C Head BA 503 Body Accessories GP 200-BSPP4 Copper Seal Ring .250 BA 501-LK REQUIRED FOR BSPP INLETS ONLY Shaft BA 002-P4 (15k) BA 002-BSPP4 (15K) *Optional BA 530 Fairing BA 502-MP6R (22K) -
Page 12: 4" Badger
Refer to the StoneAge Jetting App Calculator to aid in proper head selection. If the resulting pressure and flow is below the correct range for a head offset the tool may not rotate;... -
Page 13: Backout Prevention
4” BADGER BACKOUT PREVENTION WARNING Because of the short length of the Badger, the tool can turn around in large lines and come back at the operator at a high rate of speed. If cleaning larger lines, a rigid “stinger” should be used between the hose and the tool. -
Page 14: Operation And Troubleshooting
Refilling the viscous fluid can be deformed if tool is reassembled every 80-100 hours of operation is important when discs are not properly aligned with the for proper speed control. Only use StoneAge internal flats inside the head. recommended viscous fluid. WEEP... -
Page 15: Tool Service And Viscous Fluid Information
• Clean lint free rags or shop towels • Arbor Press (recommended) • Anti-Seize - Swagelok Blue Goop ® ® StoneAge PN (GP 043 Blue Goop) • 18” adjustable wrench (such as Crescent C718 ® Automatic Adjustable Pipe Wrench) • Grease - Chevron Multifak ®... -
Page 16: Disassembly
4” BADGER DISASSEMBLY DISASSEMBLY 5. Use a small screw driver or pick to remove 1. Use an adjustable end or BAE 181 wrench the Retaining Ring from the shaft. on the flats of the Nut and remove it from the 6. - Page 17 4” BADGER DISASSEMBLY 7. Use an arbor press to press the Bearing off 9. Remove both Port Plugs from the Head. of the Shaft. Be sure the bearing is set flat on 10. Use a flat head screwdriver to remove the the press before applying pressure.
-
Page 18: Assembly
4” BADGER ASSEMBLY ASSEMBLY BAE 017 Retaining Ring = Chevron Multifak EP1 Tan ® GREASE BAE 015 Inner Disc (4) = Swagelock Blue Goop or Equal ® ANTI-SEIZE 1. Grease the open side of the Bearing. BAE 016 2. Note the orientation of the Bearing before Outer Disc (3) pressing it onto the Shaft. - Page 19 4” BADGER ASSEMBLY 8. Apply grease to the H.P. Seal and install into 12. Install the Shaft Seal into the Head with the the bore of the Shaft. lip spring side up. 9. Apply grease to the Flat Face of the Seat and Lip Spring BA 006 place into the bore of the Shaft, on top of H.P.
-
Page 20: Part Numbers And Service Kits
4” BADGER PART NUMBERS AND SERVICE KITS AP2-XXX RJ 011-C Nozzles (5) Carbide Seat BJ 026 Port Plug (2) RJ 012-TO H.P. Seal BAE 017 Retaining Ring BRLM 109 Bearing BA 006 040-Rxx Shaft Seal Head BA 007 Shaft Seal BAE 030 Wear Ring BAE 016... -
Page 21: 6" Badger
135˚ 100˚ Once you have confirmed the required jetting configuration, use the StoneAge Jetting App to determine nozzle sizes: Jetting.stoneagetools.com HEAD OFFSET OPTIONS Engraved on each head is R21, R31, or R40; this number is the offset of the head that makes it rotate. -
Page 22: Backout Prevention
6” BADGER WARNING AND SAFETY INSTRUCTIONS WARNING Because of the short length of the Badger, the tool can turn around in large lines and come back at the operator at a high rate of speed. If cleaning larger lines, a rigid “stinger” should be used between the hose and the tool. -
Page 23: Operation And Troubleshooting
Refilling the viscous fluid are not properly aligned with BA 018 Pins. every 30-40 hours of operation is important for proper speed control. Only use StoneAge recommended viscous fluid. WEEP TOOL SPINS TOO FAST: HOLES •... -
Page 24: Speed Control Adjustment
6” BADGER SPEED ADJUSTMENT THE SPEED CONTROL The adjustable speed control feature allows for rotational speed adjustment within the speed ranges of the selected viscous fluid. For the fastest speed setting, the Shaft Adjust Sleeve (BA 303) is backed out all the Slower way against the shoulder of the shaft. -
Page 25: Tool Service And Viscous Fluid Information
• Anti-Seize - Swagelok Blue Goop ® ® C718 Automatic Adjustable Pipe Wrench) StoneAge PN (GP 043 Blue Goop) • 1¼” Open End Wrench • Grease - Chevron Multifak ® StoneAge PN (GP 049) • Medium size flat-head screw driver •... -
Page 26: Disassembly
6” BADGER DISASSEMBLY DISASSEMBLY 4. Remove the Bearing and Retaining Ring from 1. Unscrew the Nut from the Head. the Shaft. 2. Pull the Shaft/Bearing/Disc Assembly out of 5. Pull the Inner and Outer Discs and O-Rings the Head. off of the Shaft. BA 302 BA 311 Bearing... - Page 27 6” BADGER DISASSEMBLY 6. Press the Bearing off of the Shaft Adjust 9. Remove the Shaft Seal and inspect for Sleeve. damage. 7. There is no need to remove the Pins from 10. Remove the Port Screw from the Nut. the Shaft;...
-
Page 28: Assembly
6” BADGER ASSEMBLY ASSEMBLY BA 311 Bearing = Chevron Multifak EP1 Tan ® GREASE = Swagelock Blue Goop or Equal ® ANTI-SEIZE CST 141 1. Press Bearing onto Shaft Adjust Sleeve. Retaining Ring 2. Check that Pins are installed in Shaft. BA 318 Pins (2) BA 303... - Page 29 6” BADGER ASSEMBLY 13. Install Shaft Seal into the bore in the Head 9. Insert Wave Spring into bore of Shaft. and the O-Ring over threads and into groove 10. Apply grease to and install the H.P. Seal in of Head. bore of Shaft.
-
Page 30: Part Numbers And Service Kits
6” BADGER PART NAMES/NUMBERS BA 340-RXX Head BA 309 Bearing CST 141 Retaining Ring BA 310 O-Ring (2) BA 318 Pins (2) BA 301-P8 BA 316 Outer Disc (4) BJ 026 BA 301-M9 Port Plug BA 301-M24x1.5 BA 312 Shaft O-Ring SM 116 BA 318... - Page 31 NOTES PAGE LEFT INTENTIONALLY BLANK 866-795-1586 • WWW.STONEAGETOOLS.COM...
-
Page 32: Terms And Conditions And Warranty
Terms and Conditions of Sale (“Terms and Conditions”) shall specified date, but will always use its best efforts to make operate as the acceptance by StoneAge, Inc. (“Seller”) of the delivery within the time requested. The proposed shipment order submitted by the purchaser (“Buyer”). Such acceptance date is an estimate. - Page 33 STONEAGE TRADEMARK LIST View the list of StoneAge’s trademarks and service marks and learn how the trademarks should be used. Use of StoneAge trademarks may be prohibited, unless expressly authorized. http://www.StoneAgetools.com/trademark-list/ STONEAGE PATENT DATA View the list of StoneAge’s current U.S.
- Page 34 DEFECT OF THE PRODUCT COVERED BY THIS LIMITED com/service. Unauthorized service, repair or modification of WARRANTY. STONEAGE FURTHER DISCLAIMS ALL IMPLIED the Product or use of parts not approved by StoneAge will void INDEMNITIES. this Limited Warranty. StoneAge reserves the right to change...
- Page 35 In no event you specific legal rights, and you may also have other rights shall StoneAge be responsible for any injuries to persons or which vary from jurisdiction to jurisdiction. If any provisions property caused directly or indirectly by the operation of the...
- Page 36 1-866-795-1586 • www.STONEAGETOOLS.com © 2020 StoneAge, Inc. All Rights Reserved...
Need help?
Do you have a question about the BADGER BA-LKD-P4 and is the answer not in the manual?
Questions and answers