Table of Contents

Subscribe to Our Youtube Channel
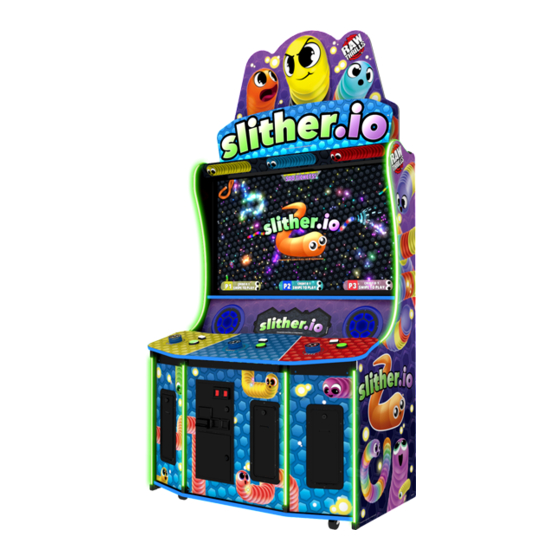
Related Manuals for Lowtech Studios slither.io

Summary of Contents for Lowtech Studios slither.io
- Page 1 For More Sales And Product Information, Please Visit : BMIGaming.com 04-00066-01 REV 7 slither.io Operator’s Manual © Copyright 2018, Lowtech Studios, LLC. All Rights Reserved Software™ & © 2019 Raw Thrills, Inc. All Rights Reserved.
- Page 2 For More Sales And Product Information, Please Visit : BMIGaming.com This Page Left Blank Intentionally...
-
Page 3: Table Of Contents
For More Sales And Product Information, Please Visit : BMIGaming.com slither.io Table of Contents Safety ................................5 Operation ..............................5 Transporting .............................. 5 Handling Components ..........................5 Disconnect Power ............................. 5 Grounding ..............................5 Electrical Shocks ............................5 Monitor ..............................5 Power Cord ............................... - Page 4 For More Sales And Product Information, Please Visit : BMIGaming.com slither.io Diagnostic and Adjustments ........................17 Basic Functional Test on Initial Power Up ....................18 Test Menus .............................. 19 Main Menu ............................19 Diagnostics ............................20 Pricing and Payout Adjustments (Cash) ....................21 Pricing and Payout Adjustments (Tokens) ..................
-
Page 5: Safety
For More Sales And Product Information, Please Visit : BMIGaming.com slither.io Safety Operation Before operating game, read this manual. Failure to properly install and operate this game could result in malfunction or accident. Operate the game in accordance with the manual. -
Page 6: Water And Other Liquid Sources
For More Sales And Product Information, Please Visit : BMIGaming.com slither.io Water and Other Liquid Sources Do not install game near sprinkler or other water jet sources. Do not use water jet to clean game. Keep minimum clearance behind game and wall for proper ventilation but also prevent access of liquid from spills and sprays from entering ventilation holes. -
Page 7: Product Specifications
For More Sales And Product Information, Please Visit : BMIGaming.com slither.io Product Specifications Electrical Power United States, International and Japan Operating AC Current: 5/2.5 Amps Voltage: 120/230 ~ VAC 50/60Hz Temperature 50° F to 104° F (10° C to 40° C) -
Page 8: Setup
For More Sales And Product Information, Please Visit : BMIGaming.com slither.io Setup Unpack Materials 1. Place the shipping crates on a flat, stable surface. 2. Cut the banding straps and remove the cardboard lids. 3. Lift off the large cardboard containers surrounding the cabinet assembly and remove any shipping cleats. -
Page 9: Cabinet Assembly
For More Sales And Product Information, Please Visit : BMIGaming.com slither.io Cabinet Assembly Note: 2 people are required, and ladders are recommended. Marquee assembly is top heavy and can tip over if not fully secured! 1. Place cabinet in desired floor location. Remove upper back door and carefully place such that it will not fall over or be damaged. -
Page 10: Card Reader Installation And Setup
Due to the rising popularity of aftermarket debit card systems (i.e. Embed, Intercard, Semnox, etc.) for cashless/coinless operation of amusement machines in addition to E-Ticket payouts on redemption games, this slither.io cabinet is equipped with UCL compatible harnessing to ensure that the installation process is easier and less prone to miswiring. - Page 11 For More Sales And Product Information, Please Visit : BMIGaming.com slither.io You can choose to use 1 or 3 card readers in the pricing adjustments section of the test menu. It is recommended to use 3 card readers for best results and player access.
- Page 12 NOTE: If your location will use E-Tickets, skip this section. The ticket door completion kit for slither.io contains all additional parts required to support dispensing paper tickets from all 3 player positions on cabinet. After completing installation (including all harness connections), continue with the remainder of setup process, specifically choosing optimal settings for your location.
- Page 13 For More Sales And Product Information, Please Visit : BMIGaming.com slither.io Locate ticket dispensers (boxed in kit) and attach to upper studs on inner surface of ticket doors with (4) M4 keps nuts using 7mm nut driver (or wrench), being sure to not crush dispenser wires or wires from bundles attached to ticket door.
- Page 14 For More Sales And Product Information, Please Visit : BMIGaming.com slither.io Feed 4 position female connector from main cabinet harness through wireway and connect to mating 4 position male connector wired to ticket dispenser. Connect mating 2 position connectors from ticket door bundle and main harness.
- Page 15 For More Sales And Product Information, Please Visit : BMIGaming.com slither.io After all connections are made, place adhesive-backed cable tie mount on inner surface of door just below dispenser as shown in photos below. Using wire ties, secure wires to mount such that they will not be damaged or prevent door closing or obstruct operation of dispenser.
-
Page 16: Check Electrical Settings
For More Sales And Product Information, Please Visit : BMIGaming.com slither.io Check Electrical Settings 1. Verify the voltage in the nearest AC outlet. 2. Verify the AC outlet ground connection is present and working. Startup Game 1. Plug the line cord into an AC outlet. -
Page 17: Diagnostic And Adjustments
For More Sales And Product Information, Please Visit : BMIGaming.com slither.io Diagnostic and Adjustments The Service Button Panel has four buttons, three of which can navigate the menu system. The control panel buttons and joysticks/guns can also advance through test menu screens. -
Page 18: Basic Functional Test On Initial Power Up
For More Sales And Product Information, Please Visit : BMIGaming.com slither.io Basic Functional Test on Initial Power Up 1. Enter the Input Test and verify all switch inputs are working. 2. Enter the Video Test and verify the monitor is working properly. -
Page 19: Test Menus
For More Sales And Product Information, Please Visit : BMIGaming.com slither.io Test Menus Main Menu Choose from all available operator settings and menus here. You can use the test menu bracket and volume buttons to navigate. The spinners/boost/start buttons also are available to use for easier navigation through these menus. -
Page 20: Diagnostics
For More Sales And Product Information, Please Visit : BMIGaming.com slither.io Diagnostics This menu allows all game functions to be verified or diagnosed. You can improve collections by periodically verifying proper game function and operation. This includes periodic Hard Drive checks to verify that software has not been corrupted or reporting an error. -
Page 21: Pricing And Payout Adjustments (Cash)
For More Sales And Product Information, Please Visit : BMIGaming.com slither.io Pricing and Payout Adjustments (Cash) Set pricing and payout adjustments for game operation. PRICING AND PAYOUT ADJUSTMENTS (CASH) CURRENCY INPUT CURRENCY TYPE COIN VALUE COINS TO PLAY PAYOUT PERCENT... -
Page 22: Pricing And Payout Adjustments (Tokens)
For More Sales And Product Information, Please Visit : BMIGaming.com slither.io Pricing and Payout Adjustments (Tokens) Set pricing and payout adjustments for game operation. PRICING AND PAYOUT ADJUSTMENTS (TOKEN) CURRENCY INPUT CURRENCY TYPE TOKEN VALUE TOKENS TO PLAY PAYOUT PERCENT... -
Page 23: Pricing And Payout Adjustments (Swipes)
For More Sales And Product Information, Please Visit : BMIGaming.com slither.io Pricing and Payout Adjustments (Swipes) Set pricing and payout adjustments for game operation. PRICING AND PAYOUT ADJUSTMENTS (SWIPES) CURRENCY INPUT CURRENCY TYPE SWIPE VALUE (IMPORTANT SETTINGS) NUMBER OF CARD READERS... -
Page 24: Game Settings
For More Sales And Product Information, Please Visit : BMIGaming.com slither.io Game Settings This menu allows for customization of game settings. GAME SETTINGS TARGET CYCLE TIME AMUSEMENT MODE ATTRACT MUSIC FREQUENCY QUICKSTART EXIT Target Cycle Time: Set your targeted cycle time. Game defaults to 40 seconds which is the recommended setting. -
Page 25: System Settings
For More Sales And Product Information, Please Visit : BMIGaming.com slither.io System Settings This menu allows for customizations of various system settings. SYSTEM SETTINGS CABINET LED BRIGHTNESS TRADESHOW MODE QR CODE DATE & TIME LANGUAGE EXIT Cabinet LED Brightness: Adjust the brightness of the cabinet lighting. -
Page 26: Audits
For More Sales And Product Information, Please Visit : BMIGaming.com slither.io Audits Audit screens help assess game performance, find intermittent problems, decide whether to adjust game difficulty and help maximize game earnings. AUDITS SYSTEM AUDITS COIN AUDITS GAME AUDITS EXIT ... -
Page 27: Resets Menu
For More Sales And Product Information, Please Visit : BMIGaming.com slither.io Resets Menu Resets menu allows for resetting of various settings and adjustments. RESETS MENU RESET CREDITS RESET PLAYER 1 TICKETS RESET PLAYER 2 TICKETS RESET PLAYER 3 TICKETS RESET PRICING ADJUSTMENTS... -
Page 28: Volume
For More Sales And Product Information, Please Visit : BMIGaming.com slither.io Volume Set volume for all aspects of game. VOLUME GAME VOLUME ATTRACT VOLUME CREDIT VOLUME MINIMUM VOLUME EXIT Game Volume: Adjusts the volume level during gameplay Attract Volume: Adjusts the volume during the attract mode sequences ... -
Page 29: Calibration
For More Sales And Product Information, Please Visit : BMIGaming.com slither.io Calibration Calibrate spinners. CALIBRATION SPINNER CALIBRATION EXIT Spinner Calibration: Calibrate the spinners. (Follow onscreen instructions) 29 | P a g e... -
Page 30: Utilities Menu
For More Sales And Product Information, Please Visit : BMIGaming.com slither.io Utilities Menu Allows for copying and viewing of audits and system/error logs. UTILITIES MENU COPY AUDITS, LOGS, & SCORES TO USB VIEW MESSAGE LOG VIEW ERROR LOG QR CODE SERVICE INFO EXIT ... -
Page 31: System Information
For More Sales And Product Information, Please Visit : BMIGaming.com slither.io System Information This screen allows you to see various information about the software and hardware, such as: Serial Number Software Revision Build Date RIO PCB ... -
Page 32: Choosing The Right Pricing Adjustments For Your Location
For More Sales And Product Information, Please Visit : BMIGaming.com slither.io Choosing the Right Pricing Adjustments for Your Location Card Swipe Locations Make Sure Your Game is Set to Swipes Mode: 1. Hold the Test Button for 2 seconds to enter the Test Menu. -
Page 33: Pc Hardware
For More Sales And Product Information, Please Visit : BMIGaming.com slither.io PC Hardware Your slither.io™ uses a HP Elitedesk 705 G3 MT computer with a GeForce GTX 1050 graphics card. Listed below are the recommended BIOS settings for the computer. NOTE 1 The computer shipped with the correct BIOS settings. -
Page 34: Hp Elitedesk 705 G3 Mt Bios
For More Sales And Product Information, Please Visit : BMIGaming.com slither.io HP Elitedesk 705 G3 MT BIOS To Access BIOS Settings: With the computer powered off, plug a USB keyboard into an open USB slot. Hold the ‘F10’ key and turn computer on. -
Page 35: Pc Hard Drive Recovery
4. Turn cabinet power switch to OFF. Wait 30 seconds. 5. Turn cabinet power switch to ON. 6. Select the slither.io restore version from the menu and follow on screen instructions. 7. If recovery does not begin, check to ensure USB Drive is inserted correctly and is not damaged. -
Page 36: Troubleshooting
For More Sales And Product Information, Please Visit : BMIGaming.com slither.io Troubleshooting Warning: Review the Safety section before making any adjustments to the game. Problem Possible Cause Solution Game not plugged in. Plug game into AC outlet. Game not turned on. - Page 37 For More Sales And Product Information, Please Visit : BMIGaming.com slither.io Problem Possible Cause Solution To test a USB port, turn off the game, disconnect the device from the port, and then connect the game dongle to the port. PCB connected to faulty USB Neither buttons nor audio Reboot the game.
- Page 38 For More Sales And Product Information, Please Visit : BMIGaming.com slither.io Problem Possible Cause Solution Check external DC supply and Faulty power supply. the PC supply. Constant low audio hum. Check all ground wires in Open ground. cabinet. Ensure AC wall outlet is properly grounded Game does not load.
- Page 39 For More Sales And Product Information, Please Visit : BMIGaming.com slither.io Problem Possible Cause Solution Find dongle cable and reseat in Dongle missing or disconnected. USB port. Dongle Not Present Insert dongle cable in different Faulty USB port. USB port.
-
Page 40: Technical Support
For More Sales And Product Information, Please Visit : BMIGaming.com slither.io Technical Support For an authorized distributor near you, check the Raw Thrills website at www.rawthrills.com Betson’s Raw Thrills Technical Support Hotline Phone: 1-800-753-2513 FAX: 1-201-438-5019 Email: rtsupport@betson.com 40 |... -
Page 41: Electrical And Mechanical Illustrations
For More Sales And Product Information, Please Visit : BMIGaming.com slither.io Electrical and Mechanical Illustrations 41 | P a g e...
Need help?
Do you have a question about the slither.io and is the answer not in the manual?
Questions and answers