
Summary of Contents for Taxa Outdoors Mantis 2021
- Page 1 Mantis owner’s manual 2021 M A N TI S www.taxaoutdoors.com 1830 west 15th street houston, tx 77008 usa (rev.08262020)
- Page 2 HEADS UP! Tent Side: Please read chapter SITE SELECTION AND SETUP for instructions on raising, lowering and properly stowing your tent side to avoid damage when lowering roof. Plumbing: Please read chapter PLUMBING SYSTEM for instructions in filling and draining the tanks and lines of the Mantis. Check chapter TROUBLESHOOTING for common mishaps.
-
Page 3: Welcome To The 2021 Mantis
WELCOME TO the 2021 MANTIS! Congratulations on your new Mantis! We hope you go somewhere we have never been. Then we hope you share it with us and our community. We hope you stay safe and sane and make the best of every new adventure. These days are strange and hard but the outdoors always beckons and always refreshes. -
Page 4: Table Of Contents
YOUR OWNER’S MANUAL (AND OTHERS) Make this Owner’s Manual a permanent part of your habitat, download it to a smart device you carry with you or print it out to keep it with the habitat at all times. Keep the manuals, stickers and tags associated with your habitat’s items, add-ons, appliances and equipment in the habitat as well for easy reference. -
Page 5: Table Of Contents
WELCOME TO the 2021 MANTIS! ..............3 Table of Contents YOUR OWNER’S MANUAL (AND OTHERS) ..........4 SAFETY TERMS ..................... 5 OVERVIEW OF SAFETY PRECAUTIONS ..........6 HITCHING ........................7 LOADING ........................10 TOWING........................12 BRAKES ........................15 TIRES .......................... 16 MANTIS DESCRIPTION .................. -
Page 6: Overview Of Safety Precautions
OVERVIEW OF SAFETY PRECAUTIONS You’ll find various safety-related references, discussions and instructions throughout this owner’s manual, and all of them are important. This overview is not an exhaustive list of the safety issues discussed or contemplated in this manual. Please carefully read and follow all safety issues discussed in this manual. -
Page 7: Hitching
HITCHING Our habitats require a 2” diameter hitch ball. ( Overland editions are outfitted with a Lock And Roll coupler). Use of any other hitch ball diameter size will create an extremely dangerous condition that can result in separation of the coupler and ball, and/or hitch ball failure. - Page 8 - for Lock and Roll (Overland)l: (1) crank the tongue of the habitat jack until the hitch coupler is raised enough to clear the tow vehicle; (2) back the tow vehicle to the habitat until the hitch ball or ‘pin’ is directly under the habitat coupler. The use of a backing aid mirror may be helpful, especially if you are hitching alone;...
- Page 9 SHOWN: 2” ball coupler habitat wiring plugged securely into tow vehicle, lights tested chains crossed and securely attached to frame of hitch breakaway switch cable attached to tow vehicle separate from chains (9) adjust side mirrors; (10) check all lights on habitat and tow vehicle, ensuring that they are working properly. (11) confirm the brakes are working properly prior to towing the habitat on a public road.
-
Page 10: Loading
LOADING The process of safely and properly loading your habitat should become easier with practice and experience. Please first get familiar with and understand the following terms related to your habitat’s weight, carrying capacity, and rating: gross vehicle weight rating (GVWR) is the maximum permissible weight of the habitat when fully loaded and equipped/outfitted. It includes but is not limited to all weight at the habitat axle(s) and tongue or pin as well as all add-ons, appliances, accessories, potable water, etc. - Page 11 example of poor weight distribution proper ~10 to 15% of habitat on car coupler and or introduction of ‘weight distributing’ hitch system M A N TI S www.taxaoutdoors.com 1830 west 15th street houston, tx 77008 usa (rev.08262020)
-
Page 12: Towing
TOWING We want your towing experiences and practices to be safe and enjoyable. Please take your time, avoid being in a rush and give special attention to all safety matters prior to and during the towing of your habitat. As previously indicated, we recommend that you practice towing your Mantis in, for example, an empty parking lot before going on your first camping trip. - Page 13 maintaining a length of at least three cars and a habitat (approximately 65 ft.) between you and the car in front of you for every 10 mph of speed you are traveling (for example, at 60mph, you should maintain approximately 390 ft. of distance between your vehicle and the vehicle in front of you).
- Page 14 vehicles. Let the momentum of the tow vehicle and habitat carry you through the problem area. If stuck, the habitat and tow vehicle should be towed out while hitched. dirt, gravel, washboard roads … go slow, use caution, your habitat will move an vibrate more than the tow vehicle, a good rule of thumb is 25 mph or less, MUCH less on severely rutted roads.
-
Page 15: Brakes
BRAKES overview …. your Mantis is equipped with electric brakes and a wireless proportional brake controller. Under normal driving/towing conditions, the habitat brakes will operate only in conjunction with a properly installed brake controller (which is also discussed below). Please also obtain and read the separate manual of the brake controller. Important Note: in an emergency uncoupling of your tow vehicle and habitat, your habitat electric brakes will automatically engage even without a brake controller. -
Page 16: Tires
TIRES size: ST 235/75 R 15 pressure: max 50psi cold, LT 225/75 R 16 pressure: max 80 psi cold (Overland) overview… Properly maintained tires improve the steering, stopping, traction, and load-carrying capability of your vehicle. Under-inflated tires and overloaded vehicles are a major cause of tire failure. Maintaining proper tire pressure, tire and vehicle load limits, avoiding road hazards, and regularly inspecting tires for cuts, slashes, and other irregularities are important steps in avoiding tire failure, such as tread separation or blowout and flat tires. - Page 17 The tire inflation pressure number indicates the amount of air pressure– measured in pounds per square inch (psi)–a tire requires to be properly inflated. Vehicle manufacturers determine this number based on the vehicle’s design load limit, that is, the greatest amount of weight a vehicle can safely carry and the vehicle’s tire size.
- Page 18 stage 1 Set your torque wrench to the 1st stage value on the Wheel Nut Torque Table. Begin with the appropriate bolt for your wheel (12 o’clock position for 8 and 6 hole wheels and 2 o’clock position for 5 hole wheels) and apply torque to all wheel nuts following the star pattern as shown in the Wheel Nut Torqueing Sequence illustration shown here.
-
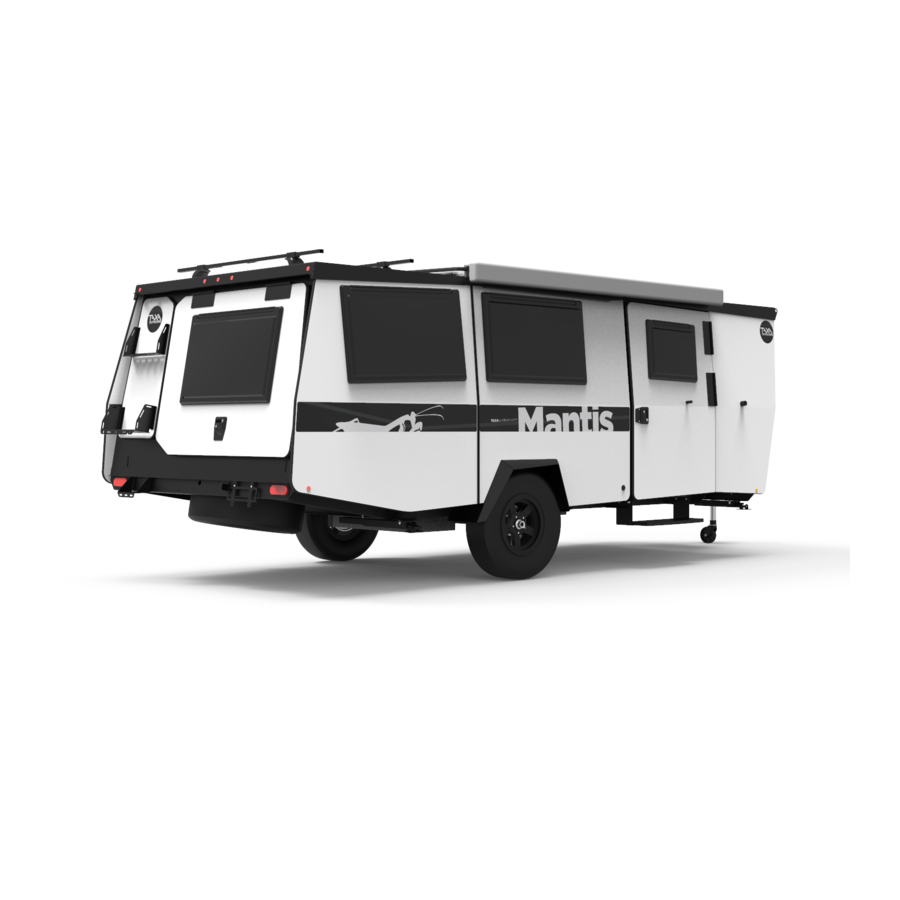
Page 19: Mantis Description
MANTIS DESCRIPTION TAXA IS CONSTANTLY MAKING VIDEOS TO HELP YOU GET TO KNOW AND USE OUR HABITATS SEE TAXA OUTDOORS CHANNEL ON YOUTUBE - https://www.youtube.com/channel/UCMsYph44ocmHwLkD1F685JA M A N TI S www.taxaoutdoors.com 1830 west 15th street houston, tx 77008 usa (rev.08262020) - Page 20 M A N TI S www.taxaoutdoors.com 1830 west 15th street houston, tx 77008 usa (rev.08262020)
- Page 21 M A N TI S www.taxaoutdoors.com 1830 west 15th street houston, tx 77008 usa (rev.08262020)
- Page 22 M A N TI S www.taxaoutdoors.com 1830 west 15th street houston, tx 77008 usa (rev.08262020)
- Page 23 FUSE AND SWITCH PLATE AT KITCHEN M A N TI S www.taxaoutdoors.com 1830 west 15th street houston, tx 77008 usa (rev.08262020)
- Page 24 FUSE AND SWITCH PLATE AT SIDE DOOR M A N TI S www.taxaoutdoors.com 1830 west 15th street houston, tx 77008 usa (rev.08262020)
- Page 25 STORAGE TOWER BAG BIN M A N TI S www.taxaoutdoors.com 1830 west 15th street houston, tx 77008 usa (rev.08262020)
- Page 26 REAR LADDER REAR DOOR STRAP USAGE M A N TI S www.taxaoutdoors.com 1830 west 15th street houston, tx 77008 usa (rev.08262020)
- Page 27 TENT WINDOW / SCREEN M A N TI S www.taxaoutdoors.com 1830 west 15th street houston, tx 77008 usa (rev.08262020)
- Page 28 AC SHROUD AND LOCKS FOR OPERATION M A N TI S www.taxaoutdoors.com 1830 west 15th street houston, tx 77008 usa (rev.08262020)
- Page 29 KITCHEN PLUMBING DIAGRAM (all dimensions are subject to change) M A N TI S www.taxaoutdoors.com 1830 west 15th street houston, tx 77008 usa (rev.08262020)
- Page 30 KITCHEN PLUMBING DIAGRAM (all dimensions are subject to change) M A N TI S www.taxaoutdoors.com 1830 west 15th street houston, tx 77008 usa (rev.08262020)
- Page 31 CHASSIS PLUMBING DIAGRAM (all dimensions are subject to change) M A N TI S www.taxaoutdoors.com 1830 west 15th street houston, tx 77008 usa (rev.08262020)
- Page 32 overview …. your habitat’s fresh water system is a vital part of your traveling life while on the road. Your MANTIS is equipped with a dual supply water system: (1) the demand fresh water system operates from the habitat’s supply tank and water pump; and (2) the “city water”...
- Page 33 turned off. If the indicator light is ON at the kitchen switch panel, the water pump is operational. Many campers only turn the pump on when using the plumbing - turning it off after usage. The pump vibrates and makes a humming noise when in operation. prepping fresh water tank for use …...
- Page 34 Your TRUMA COMBI is located at the bottom of your kitchen core behind a vented access panel (that same panels holds your propane and CO detector module!). To the left of the TRUMA is the battery compartment If your TRUMA is mysteriously not working despite all your attempts at following directions the most likely culprit, after checking that propane is turned on, is a small switch on top of the unit that must be in the ON position for gas to flow and ignite.
- Page 35 camping at a site with a water well, look for labels and other markings that reflect testing and approval dates. If you are unable to determine this information, be on guard and use caution before using the water supply provided at the site. city water (connecting) …...
- Page 36 “This faucet contains backflow prevention. Faucet must be drained for storage or if freezing weather is expected. To drain: 1. Disconnect water supply to the vehicle. 2. Open both Hot and Cold valves. 3. Insert flexible spout or coil hose with spray nozzle removed into quick disconnect.
- Page 37 M A N TI S www.taxaoutdoors.com 1830 west 15th street houston, tx 77008 usa (rev.08262020)
-
Page 38: Electrical System
ELECTRICAL SYSTEM Your Mantis habitat’s electrical system is a primarily a 12 Volt Direct Current (DC) system and has 120V AC outlets that operate only when attached to shore power. This is explained as follows: 12V DC OVERVIEW Your habitat 12 Volt system is powered by a 12V battery or batteries (see “Battery” section). All installed appliances, aside from air conditioning, operate fully with 12V power. - Page 39 ELECTRIC CHASSIS OVERVIEW M A N TI S www.taxaoutdoors.com 1830 west 15th street houston, tx 77008 usa (rev.08262020)
- Page 40 CABIN OVERVIEW M A N TI S www.taxaoutdoors.com 1830 west 15th street houston, tx 77008 usa (rev.08262020)
- Page 41 CHASSIS HARNESS M A N TI S www.taxaoutdoors.com 1830 west 15th street houston, tx 77008 usa (rev.08262020)
- Page 42 CHASSIS SECONDARY RUNNING LIGHTS AT REAR M A N TI S www.taxaoutdoors.com 1830 west 15th street houston, tx 77008 usa (rev.08262020)
- Page 43 M A N TI S www.taxaoutdoors.com 1830 west 15th street houston, tx 77008 usa (rev.08262020)
- Page 44 M A N TI S www.taxaoutdoors.com 1830 west 15th street houston, tx 77008 usa (rev.08262020)
- Page 45 WARNING: NEVER REPLACE INSTALLED CIRCUIT BREAKERS OR FUSES WITH CIRCUIT BREAKERS OR FUSES OF HIGHER AMPERAGE RATING THAN THOSE ORIGINALLY INSTALLED. THIS COULD OVERHEAT THE WIRING AND START A FIRE. ND ELE M A N TI S www.taxaoutdoors.com 1830 west 15th street houston, tx 77008 usa (rev.08262020)
-
Page 46: Battery
BATTERY overview … a single DEEP CELL 12-volt battery may be supplied with your habitat. It is specified and installed by your dealer. There is room for two (2) batteries of Group 24 or 27 size. You may purchase a second battery separately or from your dealer. See below battery specifications and technical information as well as such information provided by the manufacturers of any additional and/or replacement batteries you purchase. - Page 47 (3) connected to shore power … when you are connected to shore power (an external 120V power source), all batteries will charge automatically and will be regulated by your converter/charger so they don’t overcharge. This is the fastest method of recharging your habitat.
- Page 48 dead batteries …. If your battery is dead, plug into shore power if available. Reduce the loads on the battery by turning off any lights, 12-volt DC powered equipment and all non-essential items to allow rapid recharge. You may also connect the 7-way connector to your tow vehicle and run the engine at high idle to increase charging current and possibly reduce charging time.
- Page 49 SAFETY OVERVIEW M A N TI S www.taxaoutdoors.com 1830 west 15th street houston, tx 77008 usa (rev.08262020)
-
Page 50: Pre-Travel Checklist
PRE-TRAVEL CHECKLIST interior … - turn off all switches at kitchen switch panel or on ceiling. - turn off and close all appliances, if not in use. You may keep the refrigerator on while driving. - be sure your cargo berths are secured, and close and latch all windows - be sure roof top is closed and latched properly at all locations from inside and outside. -
Page 51: Site Selection And Set Up
SITE SELECTION AND SET UP With time and experience, you will get better at spotting and identifying good camping sites. Although they will vary to some degree, all good sites will (a) be level (at least ‘ish’) and (b) have a firm, not soft, ground that will support the weight of jacks and/or other support devices. - Page 52 CLOSING ROOF …. follow these simple steps: 1. While inside the habitat, pull the hanging straps that are attached at the highest point of the roof down; 2. The roof will close slowly as the force is dampened by two gas springs. Pull slowly and steadily. 3.
- Page 53 INSTRUCTIONS TO TAKE OUT AND INSTALL A TENT SIDE …… Your Mantis tent side is your friend. It keeps you dry in the rain and shaded from the sun. Sometimes a bird may poop on it, or maybe your daughter heaves a mud ball, it misses their brother and hits the tent side ……...
-
Page 54: Ventilation
VENTILATION overview …. good ventilation and indoor air quality is essential to long-term enjoyment of your habitat. Inadequate ventilation can increase indoor pollutant levels. To maintain good air quality, be attentive to proper ventilation of your habitat, keep it clean, and prevent and avoid unnecessary air pollutants. - Page 55 Other tips to minimize condensation When, for example, washing dishes, hair drying, laundering, cooking and using appliances and non-vented gas burners, keep a window partially or fully open turn on your fan, if any; Keep all doors and vents open when practicable; Allow air to circulate inside cabinets (leave doors partially open) so the temperature inside the cabinet is the same as in the rest of the unit.
-
Page 56: Four Season Use / Extreme Weather
FOUR SEASON USE / EXTREME WEATHER Your habitat was NOT designed for use in extreme climates or weather situations. It was designed to be used any season you wish. Some conditions require special consideration or preparations. If conditions are extreme due to weather or other natural or unnatural causes BE SAFE! Get yourselves to safety. - Page 57 SPRING: - no special considerations unless you are up high or far north where temps may drop below zero at night. SUMMER: - your habitats roof is insulated! on the hottest of days being inside is like being on a porch – shady and with great cross- ventilation.
-
Page 58: General Care And Maintenance
GENERAL CARE AND MAINTENANCE Regular care & maintenance of your habitat is important in furthering safety and dependability. Keep good records of all service and maintenance performed on your Mantis. These records may be necessary for limited warranty purposes or may assist in future repairs. - Page 59 repaired at the first sign of fraying or tearing. Take care to protect the fabric from metal parts. ceiling, interior walls, countertop and table … clean with soap or other mild, non-abrasive cleaner, warm water, and a damp cloth. Do NOT use strong, harsh chemicals, and limit water/moisture exposure to ceiling and walls when cleaning. Excessive moisture may damage ceiling and walls.
-
Page 60: Storage, Winterization & Bringing Out Of Storage
STORAGE, WINTERIZATION & BRINGING OUT OF STORAGE If storing your habitat in persistently cold weather (less than 20 degrees F), you must prepare your habitat appropriately. We recommend that you store your habitat in a dry, level, well-ventilated area protected from the elements. Use blocks, chocks or ramps for the wheels, if necessary. -
Page 61: Troubleshooting
Inc. for information regarding repair or service options. The following checklist assumes that you stored your habitat with care: Thoroughly inspect the habitat exterior, looking for animal nests in, for example, wheel wells, compartments or openings. - Open all doors and compartments, checking for animal or insect intrusion, water damage, or other deterioration - Check charge level in all batteries and recharge as needed. - Page 62 is being regulated by pressure regulator at inlet. Tighten line by checking connections back to water tank from sink; tighten or re-connect. Low water pressure Check connection also beneath habitat. Sometimes you can Drawing air in water hear air entering line when water supply line pump is turned on.
- Page 63 - a charging battery is ~13.4V if position. Check for loose or habitat is plugged in to 120v burnt wires in connector. - + ~.2V if solar or vehicle charging) Check habitat end connection Converter/ Test converter charger; replace charger converter element if necessary Check 30 amp fuses at WFCO Battery charge...
-
Page 64: List Of Authorized Dealers
Key will not turn in cylinder dirt or grit Lubricant such as WD40 Lift window to full open position. It should now go all the way Window will not close dirt or grit down. Repeat if required interior latches have two locked positions, one closes to weather Window gap adjust latches... -
Page 65: Your Mantis Limited Warranty
your Mantis LIMITED WARRANTY We want you to enjoy your Mantis without problems. As the owner, you are responsible for regular care and proper maintenance of your Mantis. Proper use, care, and maintenance will help avoid situations under which the Limited Warranty will not cover items due to neglect or misuse. - Page 66 SOLE AND EXCLUSIVE REMEDY TO THE MAXIMUM EXTENT PERMITTED BY LAW, THIS LIMITED WARRANTY AND THE REMEDY EXPLAINED HEREIN ARE EXCLUSIVE AND IN LIEU OF ALL OTHER WARRANTIES, REMEDIES AND CONDITIONS, WHETHER ORAL OR WRITTEN, EXPRESS OR IMPLIED. TO THE MAXIMUM EXTENT PERMITTED BY LAW, TAXA INC. SPECIFICALLY DISCLAIMS ANY AND ALL IMPLIED WARRANTIES, INCLUDING WITHOUT LIMITATION, WARRANTIES OF MERCHANTABILITY AND FITNESS FOR A PARTICULAR PURPOSE.
- Page 67 (12) Damage or loss caused in whole or in part by the willful or negligent acts of the driver of the tow vehicle, an accident involving the habitat, the condition of any road surface over which the habitat is pulled, or the striking or driving over or through a curb or any other object;...
- Page 68 NOTES M A N TI S www.taxaoutdoors.com 1830 west 15th street houston, tx 77008 usa (rev.08262020)
Need help?
Do you have a question about the Mantis 2021 and is the answer not in the manual?
Questions and answers