Table of Contents
Advertisement
Advertisement
Table of Contents

Related Manuals for Yolink YS7103-UC


Summary of Contents for Yolink YS7103-UC
- Page 1 User Guide YS7103-UC Siren Alarm...
-
Page 2: Table Of Contents
What’s In The Box······································ ················· Introduction············································· ················· Features··································································4 Product Required·······················································4 Set Up Siren Alarm ···························· ··· ···· ·· ·· ··················5 Using YoLink App with Siren Alarm·········· ··· ························9 YoLink Control ··········· ················· ······ ·· ····· ················15 Maintaining the Siren Alarm ···················... -
Page 3: What's In The Box
What’s In The Box Quick Start Guide * 1 Siren Alarm * 1 AC/DC Adapter * 1 USB Cable * 1... -
Page 4: Introduction
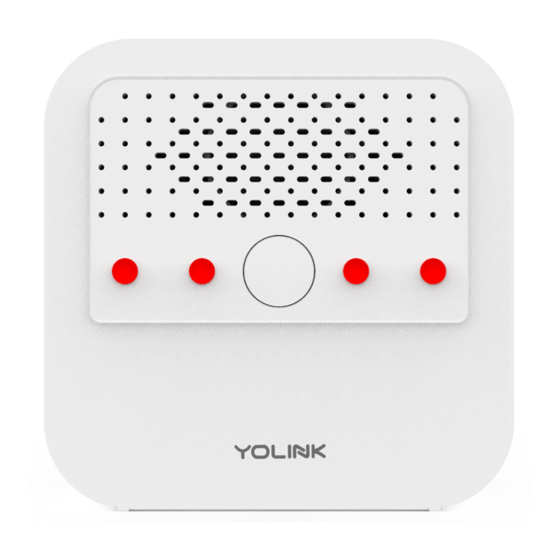
Control settings or automation settings. It can also alarm itself through button control on the device or through the YoLink App. When an alarm occurs, the device emits a loud sound and a red light. If the alert is caused by a relative device, not on its own, you can tell from its history logs on YoLink APP which device triggers a warning. - Page 5 LED lights and beeping sound can show the current status of device. See the explanation below: BLINKING GREEN Connecting to cloud. FAST BLINKING GREEN Set up connection with devices. SLOW BLINKING GREEN Updating. FAST BLINKING RED Remove connection with devices. BLINKING RED AND GREEN ALTERNATELY ALARM LIGHT Factory resetting.
-
Page 6: Features
Automation - Set up rules for “if this then do that” function via YoLink App. YoLink Control - No internet required, trigger an alarm when you pair Siren Alarm with a YoLink sensor or a YoLink Remote. Voice Control - Use Alexa or Google Assistant to alarm or diable alarm with voice commands. -
Page 7: Set Up Siren Alarm
Set Up Siren Alarm Follow the steps below to set up your Siren Alarm via YoLink App. Step 1: Set up YoLink App Download the YoLink App from the Apple App Store or Google Play. - Page 8 Step 2: Log in or sign up with YoLink account Open the App. Use your YoLink account to log in. If you don’t have a YoLink account, tap Sign up for an account and follow the steps to sign up for an account.
- Page 9 Room - Choose a room for Siren Alarm. c. Favourite - Click “ ” icon to add to/remove from Favourite. Tap the “Bind Device” to add the device to your YoLink account. SN: 7103123456 Siren Alarm Model: YS7103-UC Voltage: 5V/1A DC (USB) / 3V DC (2 - AA Battery)
- Page 10 Turn on the Siren Alarm, set the toggle button to H(high), M(medium), L(low) level, and the device will be ready to use. Note YoLink Hub is required to set up Siren Alarm. Please set up your YoLink Hub first. DATA DATA DATA (Internet)
-
Page 11: Using Yolink App With Siren Alarm
Only devices that are set up connection with Siren Alarm will trigger alarm of Siren Alarm. You will need to set up YoLink control or automation first. If the alert is caused by a relative device, not on its own, you can tell from its history logs on YoLink App which device triggers a warning. - Page 12 Press the SET button on the Siren Alarm. Click Disable button in YoLink App. Press the relative OFF button on the YoLink Remote. Automatically disable alarm according to the Alarm Duration setting via YoLink APP, the default setting is 30 seconds.
- Page 13 Alarm Disable Alarm History...
- Page 14 Details You can customize the name, set the room, Set alert time, add to/remove from favourite, check device history. a. Name - Name Siren Alarm. b. Room - Choose a room for Siren Alarm. c. Favourite - Click “ ” icon to add to/remove from Favourite. d.
- Page 16 Automation Automation allows you to set up “if this then do that” rules so the devices could act automatically. Tap “Smart” to switch to Smart screen and tap “Automation”. Tap “ ” to create an automation. To set an Automation, you will need to set a trigger time, local weather condition, or choose a device with certain stage as a triggered condition.
-
Page 17: Yolink Control
If you set a new YoLink control by changing the action status of controller or responder, the devices will only act the new YoLink control, and the original YoLink control will no longer work. - Page 18 Controller List YS7704-UC Door Sensor YS7705-UC Garage Door Sensor YS7804-UC Motion Sensor YS7903-UC Water Leak Sensor YS3603-UC YoLink Remote YS7706-UC Garage Door Sensor 2 Continuously updating...
- Page 19 After pairing succeed, the light will stop flashing. When the controller alerts, the Siren Alarm will alarm with sound and light as well. Pairing Status YoLink Control Action Controller Responder when the door is opened, the Siren Alarm will alarm.
- Page 20 Trigger an alarm when the controller alert. (Take a Motion Sensor for example) SET BUTTON Hold the SET button on the for 5-10s, till the green light blinks quickly ALERT SET BUTTON ALARM Hold the SET button on the for 5-10s, When a movement is detected, the Siren till the green light blinks quickly Alarm will alarm with sound and light...
- Page 21 , t h e l i g h t w i l l fl a s h r e d q u i c k l y. After unbundling, the light stops flashing. When the controller alerts, the Siren Alarm will no longer alarm with sound and light. Un-pairing Status YoLink Control Action Controller Responder when the door is opened, the Siren Alarm will not alarm.
- Page 22 Disable connection with the controller device. (Take a Motion Sensor for example) SET BUTTON Hold the SET button on the for 10-15s, till the red light blinks quickly ALERT SET BUTTON NO ALARM Hold the SET button on the for 10-15s, When a movement is detected, the Siren Alarm till the red light blinks quickly will no longer alarm with sound and light...
-
Page 23: Maintaining The Siren Alarm
Maintaining the Siren Alarm Firmware Update To ensure the best user experience, we strongly recommend that you can update to our latest version of the firmware. Tap the “Siren Alarm” in App to go to its controls. Tap the “ ”... - Page 24 Factory Reset will clear all settings and restore them to the default settings. After the factory reset, your Siren Alarm will remain in your YoLink account. H o l d t h e s e t b u t t o n o f y o u r S i r e n A l a r m f o r 2 0 - 2 5 s e c o n d s u n t i l t h e L E D b l i n k s r e d a n d g r e e n a l t e r n a t e l y.
- Page 25 SN: 7103123456 SN: 7103123456 FCC ID: 2ATM77103 Siren Alarm Siren Alarm Model: YS7103-UC Model: YS7103-UC Voltage: 5V/1A DC (USB) / 3V DC (2 - AA Battery) Voltage: 5V/1A DC (USB) / 3V DC (2 - AA Battery) Made in China...
-
Page 26: Specifications
Specifications Voltage: DC 5V/1A (Micro USB) / DC 3V (2-AA Battery) Alarm Volume: H(high): 110db M(medium): 104db L(low): 100db Environment: Temperature: 0°C~50°C (32°F~122°F) Humidity: 0%~95% non-condensing... -
Page 27: Troubleshooting
Please follow the “User Guide of YS1603-UC Hub is offline. YoLink Hub” for troubleshooting. R e m o t e / A u t o m a t i o n c o n t r o l f a i l e d . -
Page 28: Warning
Warning P l e a s e u s e t h e p o w e r a d a p t e r p r o v i d e d . P l e a s e d o n o t c o n n e c t t h e p r o d u c t t o t h e h i g h v o l t a g e . Do not install the device near places where people frequently pass by to avoid noise and damage to hearing. - Page 29 If you are unable to get your Siren Alarm working Please contact Our Customer Service during business hours US Live Tech Support: 1-949-825-5958 M-F 9am - 5pm PST Email: service@YoSmart.com YoSmart Inc. 17165 Von Karman Avenue, Suite 105, Irvine, CA 92614 WARRANTY 1 Year Limited Electrical Warranty YoSmart warrants to the original residential user of this product that it will be free from defects in materials...
- Page 30 FCC Statement This equipment has been tested and found to comply with the limits for a Class B digital device, pursuant to part 15 of the FCC Rules. These limits are designed to provide reasonable protection against harmful interference in a residential installation. This equipment generates, uses and can radiate radio frequency energy and, if not installed and used in accordance with the instructions, may cause harmful interference to radio communications.
- Page 31 FCC RF Radiation Exposure Statement This equipment complies with FCC RF radiation exposure limits set forth for an uncontrolled environment. This device and its antenna must not be co-located or operating in conjunction with any other antenna or transmitter. “To comply with FCC RF exposure compliance requirements, this grant is applicable to only Mobile Configurations.
Need help?
Do you have a question about the YS7103-UC and is the answer not in the manual?
Questions and answers