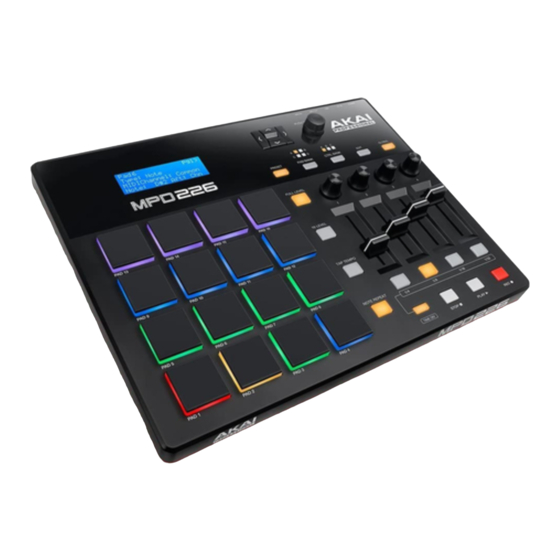
Akai MPD226 User Manual
Hide thumbs
Also See for MPD226:
- User manual (57 pages) ,
- Service manual (45 pages) ,
- Quick start manual (2 pages)
Summary of Contents for Akai MPD226
- Page 1 User Guide English ( 3 – 12 ) Guía del usuario Español ( 13 – 22 ) Guide d’utilisation Français ( 23 – 32 ) Guida per l’uso Italiano ( 33 – 42 ) Benutzerhandbuch Deutsch ( 43 – 52 ) Appendix English ( 54 )
-
Page 2: Box Contents
For additional product support, visit: akaipro.com/support. Quick Start 1. Use the included USB cable to connect MPD226’s USB port to an available USB port on your computer (powered on). 2. On your computer, open your digital audio workstation (DAW). - Page 3 USB Port: Use a standard USB cable to connect this USB port to your computer. The computer’s USB port provides ample power to MPD226. If you connect it to a USB hub, make sure it is a powered hub. This connection is also used to send and receive MIDI data to and from your computer.
- Page 4 Use the included 1/8”-to-MIDI adapter to connect MIDI devices only. ® Kensington Lock: You may use this Kensington lock slot to secure the MPD226 to a table or other surface. Display: Use this display to view MPD226’s menus, options, parameters, and settings.
- Page 5 17. Pads: Use these pads to trigger drum hits or other samples in your software or external MIDI sound module. The pads are pressure- and velocity-sensitive, which makes them very responsive and intuitive to play. 18. Pad Bank: Use this button to select one of four independent banks of pads. This lets you access up to 64 different pads (16 pads across 4 pad banks).
-
Page 6: Operation
Preset Mode section to learn more. Edit Mode: This mode allows you to edit the configuration of MPD226. Edit Mode is a powerful tool for customizing your set-up. In this mode, you can make changes to how the pads, faders and other features behave. For example, you may want a fader to transmit only a limited range of MIDI data, or you may want the pads to transmit on a different MIDI channel from the faders. -
Page 7: Edit Mode
MSB (Most Significant Bit) and LSB (Least Significant Bit). The available range is 000–127. MIDI to DIN: Determines whether or not MIDI data is sent to the MIDI Out (On) or not (Off). MIDI data will be sent to MPD226’s USB connection regardless of this setting. - Page 8 MIDI to DIN: Determines whether or not MIDI data is sent to the MIDI Out (On) or not (Off). MIDI data will be sent to MPD226’s USB connection regardless of this setting. Min / Max: If Aftertouch is the selected Type, these determine the lowest (Min) and highest (Max) values.
-
Page 9: Note Repeat
MIDI to DIN: This determines whether or not MIDI data is sent to the MIDI Out (On) or not (Off). MIDI data will be sent to MPD226’s USB connection regardless of this setting. Min / Max: If MIDI CC or Aftertouch is the selected Type, these determine the lowest (Min) and highest (Max) values. -
Page 10: Global Mode
Express only. MIDI to DIN: Determines whether or not MIDI data is sent to the MIDI Out (On) or not (Off). MIDI data will be sent to MPD226’s USB connection regardless of this setting. Global Mode To enter Global Mode, press Global. -
Page 11: Save Globals
Tap Average: The number of times you would need to press Tap Tempo to enter a new tempo. The available range is 2–4. Tempo LED: When MPD226 is using its internal MIDI clock, the Tap Tempo LED will flash in time with the current tempo setting. You can set this feature to On or Off.


