Table of Contents
Advertisement
Quick Links
__________________________________________________________________________________________________________
Tools Required
Be careful when using step ladders – always face the direction you are working.
A drill may be required if cavity fixings are being used.
Always make sure the correct drill bits and screwdrivers are used.
Installation
1.
Remove the cover by twisting it off the base.
2.
Select the best location and securely fix the base to the ceiling with 2 screws.
Note: the alarm pullcord is not designed for wall mounting.
3.
If possible screw into a wooden joist, if not cavity fixings will be required.
4.
Knot the cord so one triangle is within normal reach and the other just above floor level.
5.
Cut off the excess cord.
Registering the Alarm Pullcord
It is necessary to register an alarm pullcord onto the Reach at‐home alarm unit, Advent xt warden call
or Altec Response. See the following pages for how to put each of these products into registration mode.
The range of all radio devices can be affected by the working environment ‐ always take care during installation and
perform several test calls from all extremes of the building.
Battery Life
The alarm pullcord contains a long life Lithium battery. The battery is checked once a day, if the voltage falls and stays below a
preset level for 7 consecutive days a low battery alert is automatically transmitted. Once a low battery call is received the alarm
pullcord should be replaced within 7 days. Alarm pullcords must be returned to Tynetec/Aidcall for battery replacement.
Detailed information on battery management for all Tynetec/Aidcall products is available ‐ request Doc No. FM0630.
Maintenance
Alarm pullcord should be activated once a month to check the battery and verify operation.
Doc No. FM0466 issue F Page 1
169MHz Telecare Devices
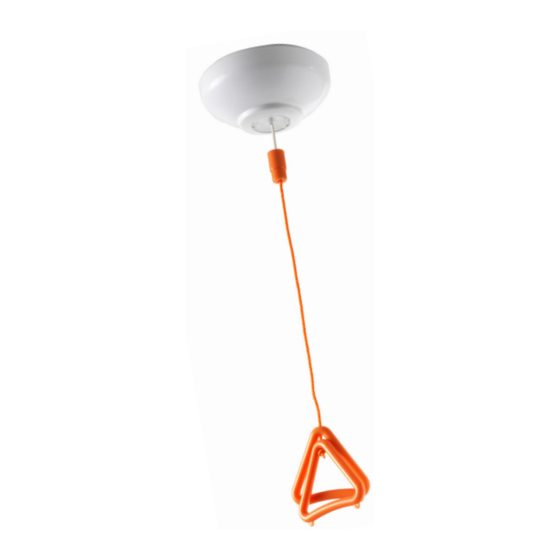
Alarm Pullcord
Compatible with Reach at‐home alarms, Advent xt warden call
and Altec Response local carer alarms
Ceiling mounted momentary action switch
2.7 metre orange cord with 2 triangular grips
Anti‐ligature safety break
Low battery warning
Dimensions: 87mm diameter x 35mm deep
Weight: 85 grams
Product Code: ZXT435
Where should Alarm Pullcords be fitted?
Alarm pullcords should be ceiling mounted in bathrooms, alongside the
bed or anywhere personal pendants are not usually worn.
They can also be used to speed the installation in homes where it
would be difficult or time consuming to wire a standard pullcord.
An emergency call is made by simply pulling the cord once.
Fixings Required
2 suitable length screws (1½" typical)
Plasterboard cavity fixings may be required.
Northumberland, NE24 5TF. Tel: 01670 352 371 Fax: 01670 362 807
Tynetec and Aidcall are business units of Legrand Electric Ltd
Unit 10 Cowley Road, Blyth Riverside Business Park, Blyth
Email: sales@tynetec.co.uk Web: www.tynetec.co.uk
Advertisement
Table of Contents

Related Manuals for LEGRAND Tynetec AidCall Alarm Pullcord


Summary of Contents for LEGRAND Tynetec AidCall Alarm Pullcord
- Page 1 Note: the alarm pullcord is not designed for wall mounting. If possible screw into a wooden joist, if not cavity fixings will be required. Knot the cord so one triangle is within normal reach and the other just above floor level. Cut off the excess cord. Registering the Alarm Pullcord It is necessary to register an alarm pullcord onto the Reach at‐home alarm unit, Advent xt warden call or Altec Response. See the following pages for how to put each of these products into registration mode. The range of all radio devices can be affected by the working environment ‐ always take care during installation and perform several test calls from all extremes of the building. Battery Life The alarm pullcord contains a long life Lithium battery. The battery is checked once a day, if the voltage falls and stays below a preset level for 7 consecutive days a low battery alert is automatically transmitted. Once a low battery call is received the alarm pullcord should be replaced within 7 days. Alarm pullcords must be returned to Tynetec/Aidcall for battery replacement. Detailed information on battery management for all Tynetec/Aidcall products is available ‐ request Doc No. FM0630. Maintenance Alarm pullcord should be activated once a month to check the battery and verify operation. Tynetec and Aidcall are business units of Legrand Electric Ltd Unit 10 Cowley Road, Blyth Riverside Business Park, Blyth Northumberland, NE24 5TF. Tel: 01670 352 371 Fax: 01670 362 807 Email: sales@tynetec.co.uk Web: www.tynetec.co.uk Doc No. FM0466 issue F Page 1 ...
- Page 2 Registering an Alarm Pullcord onto a Reach at‐home alarm unit 1. Put the Reach unit into radio device learn mode… “Trigger Press and HOLD the GREEN button on the Reach unit. Radio Device” When the front light FLASHES FAST GREEN release the button and the Reach will announce “Trigger Radio Device”. You now have 1 minute to activate the alarm pullcord. ...
- Page 3 Registering an Alarm Pullcord onto an Advent xt warden call system 1. Put the Advent xt system into radio device learn mode… “Ready” Using the Manager’s DECT telephone; Press the LINE key and wait for the “Ready” prompt. Enter 5 0 0 0 followed by the key. ...
- Page 4 Registering an Alarm Pullcord onto an Altec Response local carer alarm unit 1. Put the Altec Response unit into radio device learn mode… tynetec Press ENTER to activate the wake‐up display then ENTER again to display the main menu. Press ENTER to select Radio Devices Press ENTER to select Learn Device ...
Need help?
Do you have a question about the Tynetec AidCall Alarm Pullcord and is the answer not in the manual?
Questions and answers