Subscribe to Our Youtube Channel
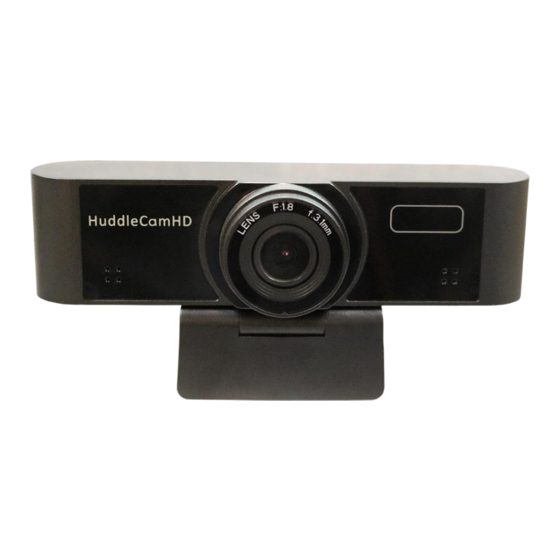
Summary of Contents for HuddleCamHD HC-WEBCAM-104-v2
- Page 1 HuddleCamHD Webcam USB 2.0 Webcam INSTALLATION & OPERATION MANUAL Please check HUDDLECAMHD.com for the most up to date version of this document Ver 1.0 9/20...
- Page 2 Precautions…………………………………………………………………………………………. Safety Tips……………………………………………………………………………………………. • Please read this manual carefully before using the webcam. • Avoid damage from stress, violent vibration or liquid intrusion during transportation, storage or installation. • Take care of the webcam during installation to prevent damage to the webcam case, ports, or lens.
- Page 3 Physical Description……………………………………………………………………… Front View………………………………………………………………………………… Lens 104° field of view lens Power LED Blue LED lights when unit is powered and on. Microphone array Internal microphone array with up to a 15-foot range Top Mount Used for resting the webcam on a monitor Page 2 of 10 Ver 1.0 9/20...
- Page 4 2. Rear View……………………………………………………………………………………………………. Built in USB 2.0 cable For connection to PC USB 2.0 port. Bottom Mount Used for securing the webcam in position on monitor 1/4-20 Mount Used for mounting to any standard 1/4-20 mounting screw Page 3 of 10 Ver 1.0 9/20...
- Page 5 Connection Instructions……………………………………………………………………… Connect USB 2.0 cable from webcam to an available USB port on the PC. Select and configure webcam in your software of choice. NOTE: Failure to follow this sequence may result in no connection to PC. Care Of The Unit…………………………………………………………………………………. Remove dust or dirt on the surface of the lens with a blower (commercially available).
- Page 6 Tripod Installation………………………………………………………………………………………. When using the HuddleCam with a tripod, screw the tripod to the bottom of the webcam mount. The tripod screw must fit below specifications: Note: Tripod must stand on a level surface. Page 5 of 10 Ver 1.0 9/20...
- Page 7 Troubleshooting………….………………………………………………………………………… • No image o Check whether the USB cable is connected properly to the PC. o Check whether the LED glows when USB is connected to the PC. • Abnormal display of image o Check OSD of webcam through the OSD Menu app. o Check settings of software you’re viewing the video feed in.
- Page 8 USB webcam connectivity. HuddleCam Cameras All HuddleCamHD cameras utilize the UVC (USB Video Class) drivers that are built into Windows, Mac OS and Linux to stream HD video to your device via your device’s USB port (USB 2.0 or USB 3.0 depending upon HuddleCam model). When your device successfully recognizes the camera, your device will register the HuddleCam as an “imaging device”.
- Page 9 In this example, you can see the HuddleCam model in use connected as a fully functional USB 2.0 device (HuddleCamHD). If your device has not connected to or has not recognized the HuddleCam as an imaging device (in which case, you may see a new “unknown device”, “Westbridge” or “CYTFX3”...
- Page 10 Similarly, you can see a connected device in System Information on a MAC. See screenshot below: In this example, you can see the HuddleCam model in use connected as a fully functional USB 2.0 device (HuddleCamHD). Page 9 of 10 Ver 1.0 9/20...
- Page 11 • Working Environment Indoor only Warranty……………………………………………………………………………………………… HuddleCamHD includes a limited parts & labor warranty for all HuddleCamHD manufactured cameras. Warranty lengths are shown below. The warranty is valid only if HuddleCamHD receives proper notice of such defects during the warranty period. HuddleCamHD, at its option, will repair or replace products that prove to be defective.


Need help?
Do you have a question about the HC-WEBCAM-104-v2 and is the answer not in the manual?
Questions and answers