
Related Manuals for Kolida S680N


Summary of Contents for Kolida S680N
- Page 1 Innovative Network RTK Receiver S680N GNSS Network RTK Receiver User Manual Copyright ©Guangdong KOLIDA Instrument CO.,LTD. *All Rights Reserved...
-
Page 2: Table Of Contents
Innovative Network RTK Receiver Directory Chapter Ⅰ Brief Introduction ............................4 1.1. Preface ................................4 1.2. Introduction ..............................4 1.3. Main Features ............................... 4 1.3.1. Smart platform ........................... 4 1.3.2. WiFi performance ..........................4 1.3.3. Intelligent storage ability ........................5 1.3.4. - Page 3 6.1. How to connect with GIStar for Android ....................60 6.2. How to connect with EGSTAR ........................65 6.3. How to connect with SurvCE ........................67 6.4. How to use FieldGenius to configure S680N ....................72 Chapter Ⅶ Static Measurement ..........................76 7.1. Antenna Height Measuring ......................... 76 7.2.
-
Page 4: Chapter Ⅰ Brief Introduction
GNSS receiver, which greatly improves the working efficiency and the flexibility. The WiFi of S680N is not only able to be a wifi hotspot that allows users to connect it and access to the web UI management of S680N, but also can work as datalink that makes S680N have a quick connection to internet for corrections from CORS network. -
Page 5: Intelligent Storage Ability
Innovative Network RTK Receiver 1.3.3. Intelligent storage ability KOLIDA S680N is equipped with 8GB Solid State Disk that make sure enough storage space for data collection, as well as to the stability of data recording speed. With the smart storage technology, S680N is able to connect an external storage for data collection or downloading data to this external storage directly. -
Page 6: Chapter Ⅱ Hardware Component
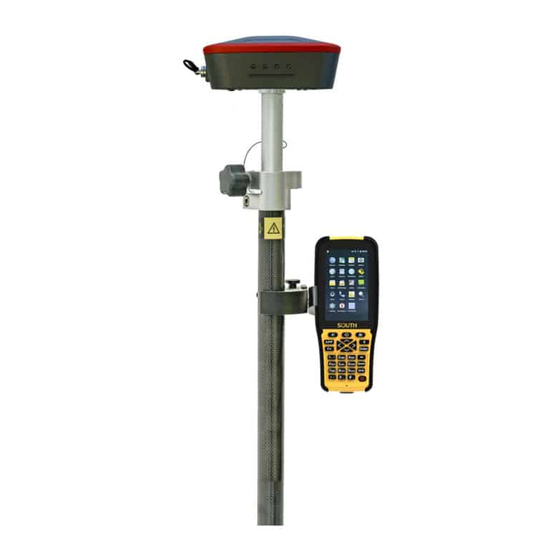
Innovative Network RTK Receiver Chapter Ⅱ Hardware Component In this chapter, the appearance of S680N will be presented in detail, you can grasp detail information about each component as your expectation. 2.1. Main Structure S680N receiver is similar to a flat structure box with concave-convex texture upper cover. Concentrate on the... -
Page 7: Front Control Panel
Innovative Network RTK Receiver 2.2. Front Control Panel The control panel of S680N adopts the LED design to indicate working status and charging state, which are intuitive to understand well. There is detail description for each indicator in following table. -
Page 8: User Interface
Innovative Network RTK Receiver Holder screw cave QR code for GIStar Serial number label Control panel Power button Reset button LEMO port 2.4. User Interface This part is mainly to introduce the communication port which is mainly used for data downloading and battery charging. -
Page 9: Chapter Ⅲ Hardware Operation
Innovative Network RTK Receiver Chapter Ⅲ Hardware Operation 3.1. Switch ON/OFF 3.1.1. Switch ON To switch on the receiver, you only need to press the power button for short time until you can hear beeping from receiver once and all indicators light up, at this moment, release the power button and the receiver will switch on. Then the receiver will complete initialization automatically around 8 seconds, and the unit starts to work in normal situation. -
Page 10: Reset
3.2. Reset At the bottom of S680N receiver, there is a small key besides to Power button, that is the Reset key mainly used to force turning off receiver if there is something block with power button to switch off the receiver. -
Page 11: Factory Reset
3.4. Factory Reset Factory reset is a new interactional operation on S680N receiver, it is mainly used to bring internal configuration of receiver back to factory default setting. Such as reset the function of LEMO port from normal USB to Ethernet function, and reset the WIFI function from client mode to AP mode (WiFi hotspot). -
Page 12: Charging
6-8 hours at the first several times, and fully discharged, so that to maximize the battery capacity and extend the battery life at the same time. When plug charger to S680N, the power indicator lights up all the time during charging, after the Bluetooth indicator lights up, that means the battery is full charged. -
Page 13: Chapter Ⅳ Internal Web Ui Operation
4.1.1. WIFI hotspot connection mode First of all, the WIFI hotspot is default broadcasted by S680N, search the WIFI hotspot with the name of KOLIDA_xxxx using smartphone, tablet or laptop, then establish the WIFI connection and input the default IP (10.1.1.1) into explorer, apply the default username and password for login. -
Page 14: Usb Connection Mode
Innovative Network RTK Receiver 4.1.2. USB connection mode On this mode, the LEMO port of S680N must work as an Ethernet port, then internal web UI shall be accessed via L7U50 cable connects to computer. The LEMO port of S680N is default set as Ethernet function, then connect S680N receiver to computer via L7U50 cable. - Page 15 Innovative Network RTK Receiver At the first time to connect to a computer, a corresponding driver is required to install to the computer, then this function could be activated.
- Page 16 Innovative Network RTK Receiver NOTE: The driver can be downloaded from official website automatically or please contact with us for more supports.
- Page 17 Innovative Network RTK Receiver If the driver has been successfully installed, the LEMO port of S680N will be recognized as Linux USB Ethernet/RNDIS Gadget, and a local area connection will generate in Network Connections on the computer. For example, Local Area Connection 138 generates after connecting S680N receiver to computer via LEMO Ethernet port.
-
Page 18: Web Ui Main Interface
Innovative Network RTK Receiver 4.2. Web UI Main Interface As shown in the following screenshot, this is the main interface of web UI of S680 while login, it contains the common used operation menu and the information window including detail information and settings. For example, the operation menu is listed at the left column that includes Status, Configuration, Satellite Information, Data Record, Data Transfer, Network Config, Firmware Update, User Management and Help. -
Page 19: Status
System Information, Work Status and Position Information are listed under Status menu. System Information In this page, all the information of S680N is diplayed such as serial number, hardware ID, MAC address, firmware version, registation information and so on. Work Status The physical state of S680N is displayed at the right field including working mode, battery type, storage type, remaining power and the free memory. -
Page 20: Configuration
General Config, Base Setup, Antenna Setup, Satellite Tracking, Receiver Operate and System Setup are contained under Configuration menu. Users are able to configure all kinds of parameters for S680N under Configuration menu, and all the settings are immediate effect after saving. - Page 21 The registration for receiver and working mode setting can be completed in this general configuration page. If the code of S680N has expired or is going to be run out, please provide the serial number of your S680N receiver for us, then we will supply another available code, then apply the code to receiver by inputting the code into the blank or register the receiver online.
- Page 22 Innovative Network RTK Receiver Work Mode: There are Rover, Base and Static options contained in this dropdown list, S680N now owns the ability to work as Base because of the WIFI module integrated on receiver. Datalink: Pull down the list, there are only two options for datalink, Bluetooth and WIFI, because unlike traditional RTK receiver, S680N is without any other datalink module inside except Bluetooth and WIFI module.
- Page 23 Base Setup Due to the WIFI module is equipped on S680N receiver, this unit is able to work as Base, then transmits corrections via WIFI connection. Therefore, the basic configuration for base can be setup in this page. Users can input the correct coordinates or capture a current position for the base.
- Page 24 Innovative Network RTK Receiver Antenna Setup The antenna parameters are configured in this page including the antenna height, measuring method. Antenna Height: This is the value for height of antenna while surveying. Measuring Method: Here provides several methods for measuring the antenna height such as carrier phase center, slant height, antenna edge, height plate and to the bottom.
- Page 25 Innovative Network RTK Receiver Receiver Operate The page provides all kinds of operations to control the receiver such as self-check operation, clean epochs, factory reset and power off.
- Page 26 Power: Configure the receiver to use the power saving mode or not. USB: This is used to configure S680N receiver what kind of mode output from LEMO port when connect the receiver with computer via L7U50 cable. USB and network port for optional.
-
Page 27: Satellite Information
Innovative Network RTK Receiver 4.2.3. Satellite Information The ―Satellite Information‖ provides all kinds of tables, graph and the skyplot to view the information of tracking satellites. And it is allowed to configure to use which satellite in constellation on/off page by checking on the corresponding box. - Page 28 GPS on/off For all the running GNSS constellations or the augmentation system, S680N allows to configure to use which satellite or not. In gnss on/off page, all the running satellites are listed, and unselect the box corresponding to the satellite to not...
-
Page 29: Data Record
4.2.4. Data Record The ―Data Record‖ performance is mainly used to configure all the parameters for receiver in static mode. Much more operations can be done on S680N receiver such as storage path, interval, data format and data files download. Recording Config... - Page 30 Interval: This is the sampling interval for data storage, 20Hz(0.05s) sampling interval now is supported on S680N. File Interval: This is used to define the data storage time for the static file. Data Format: Here are 3 options to select for S680N to store what kind of format data, STH, Rinex2.0 and Rinex3.0.
-
Page 31: Data Transfer
Navigation Data: This is the navigation data output from receiver such as NMEA-0183, GSV, AVR, RMC and so on. It is configured in Data Flow Config page. SIC Observation Data: This is the user-defined format observation data from KOLIDA. OpenSIC Observation Data: This is the open version of KOLIDA user-defined format observation data for secondary development. - Page 32 Caster and Server working mode for this performance. Caster: If this working mode is selected, S680N will be a client to upload the data to a specify server if it connects to the internet by WIFI connection. Input the specified IP and port for server, and the data format what is uploaded.
- Page 33 Authentication Mode: These three modes use different protocol standard for the connection, Eagle Mode is KOLIDA standard mode, and TCP/IP Mode is for private network use, usually, choose the Eagle mode for the default setting. LARK Mode is a totally new communication mode for network connection, it is similar to the CSD function that establishes connection between Base and Rover via GPRS network type, rather than GSM.
- Page 34 Innovative Network RTK Receiver NtripServer This configuration is used in Base+WIFI mode that Base station will transfer its correction onto the server as long as it connects to internet, then Rover can download the base’s correction from server for use. Ntrip Version: This field provides NTRIPv1.0 and NTRIPv2.0 for optional.
- Page 35 Innovative Network RTK Receiver NtripCaster This feature is realized on S680N as well, the receiver is equivalent to a CORS system that it generates and broadcasts the user-defined correction for rover if S680N connects a static IP address. Port: This is the specify port for the access.
-
Page 36: Network Config
This is mainly used on the WIFI configuration for S680N, there are AP mode and Client mode for optional. This is used to enable the WIFI hotspot for S680N receiver to broadcast for mobile terminals such as smartphone or tablet to connect and access the Web UI. - Page 37 Scan: Click this button to search the surrounding available WIFI hotspot. Password: This is the password which the WIFI hotspot requires. IP fields: If S680N successfully connects to the WIFI, there will be an LAN IP address generated by S680N itself. ClearSSID: Click this button to clear the SSID list.
- Page 38 In this page, users can view the information and connection status of Bluetooth, such as MAC of Bluetooth, discoverable or not, the PIN code, and the connection devices in following table. Port Forwarding This page is mainly used to view and configure the internet transmission port for S680N, customize and debug receiver.
- Page 39 Network Testing This function is mainly used to test network status for S680N after logging on the internet via WIFI connection. How to do: Input an IP address into, then click PING button, the testing information will be displayed in the...
-
Page 40: Firmware Update
Update the latest firmware for receiver or for corresponding modems can be done in ―Firmware Update‖. Firmware Update This page displays all the information of the firmware which current installed on S680N, and allows to update the latest version firmware for receiver. To get latest version firmware please contact with KOLIDA technician. - Page 41 Innovative Network RTK Receiver Online Update: S680N supports to update the firmware online anytime if there is something update or optimized. Local Update: Update the latest firmware by using a firmware file. How to upgrade the firmware with Local Update Click on ―Browse‖...
- Page 42 Module Update This page is used to update the firmware for corresponding modem such as OEM board, for S680N, there is only the OEM board firmware can be updated on Module Update page, the others module are not available for S680N.
-
Page 43: User Management
Innovative Network RTK Receiver 4.2.8. User Management This page is used to manage the authority of login Web UI for users, including the username, password and add users. 4.2.9. Help In this page, users can get help and check the log book of receiver (the log book can help to backtrack the working status of receiver). -
Page 44: Chapter Ⅴ How To Achieve The Wifi Functions
Equipped with the most advanced WIFI module, this technology help S680N receiver not only can work as a WIFI broadcaster that allows users to connect it and access to the web UI management of S680N, but also can work as a datalink that makes S680N have a quick and stable connection to internet for corrections from CORS network. - Page 45 Innovative Network RTK Receiver 2, Using tablet PC Search the WIFI SSID with a tablet PC, then click on the correct WIFI SSID, such as KOLIDA_6834, after the connection is established, run a browser on tablet PC and input the accessing IP address into the address bar.
-
Page 46: Wifi Client (Datalink)
5.2.1. Configure on Web UI Due to the WIFI hotspot (AP) is the default WIFI mode on S680N receiver, and the WIFI AP mode and WIFI client mode can’t exist at the same time, therefore, WIFI client mode must be switched into from WIFI AP mode, and switch the datalink into WIFI for S680N receiver. - Page 47 Innovative Network RTK Receiver Unfold the sub-menus under Network Config, and go to WIFI Config, switch the WIFI working mode from AP into Client, then click on button to make sure the WIFI working mode is successfully switched. At this moment, click on button to search the surrounding WIFI hotspot, once finish searching the hotspots, choose one of the proper access point and enter the access password if required, then click on button to confirm the settings on this page.
- Page 48 Innovative Network RTK Receiver After a while, the WIFI signal bar appears and a LAN IP address is obtained, that indicates that S680N has connected to the WIFI and had an access to internet already.
- Page 49 Innovative Network RTK Receiver After that, move steps to Data Transfer—NTRIP Config, on this page, make sure if NtripClient is activated, then input the CORS accessing information into corresponding fields, click on button to download the mount points from CORS server. List out the mount points and choose a proper one, then click on button to confirm all settings, and the receiver begins to connect and logon server, receive correction from CORS station.
- Page 50 Innovative Network RTK Receiver Base + WIFI mode The operation on this mode is similar to Rover, go to Go to Configuration—General Config, switch the working mode into Rover or Base, and datalink as WIFI, click on button to confirm the settings. Unfold the sub-menus under Network Config, and go to WIFI Config, switch the WIFI working mode from AP into Client, then click on button to make sure the WIFI working mode is successfully switched.
- Page 51 Innovative Network RTK Receiver After a while, the WIFI signal bar appears and a LAN IP address is obtained, that indicates that S680N has connected to the WIFI and had an access to internet already. After that, move steps to Data Transfer—NTRIP Config, on this page, make sure if NtripServer is activated, then...
- Page 52 Innovative Network RTK Receiver And the next step is to configure parameters for Base, move to Configuration—Base Setup page, input the coordinates for base with known point or capture the current position for base by clicking on button, as shown at the red frame circle in below screenshot.
- Page 53 Innovative Network RTK Receiver And move to Base Start Mode, choose the starting mode for base station. In dropdown list, there are 3 options for starting mode, Manually Start Base, Automatically Start Base by Fixed Point, and Automatically Start Base by Current Point.
-
Page 54: Configure On Controller Software
Innovative Network RTK Receiver At this moment, observe the fourth indicator on receiver, check if it is flashing at this time, and input server’s IP address onto the browser to check if there is the predefined mount point locates among the mount points. 5.2.2. - Page 55 Innovative Network RTK Receiver Tap on Network Setting option to configure receiver to internet and access to CORS server. The first step is to make receiver successfully connect to WIFI. The WIFI Setting option locates at last option, tap on this option and a dialog pop-up, tap on Refresh WIFI list to search the surrounding WIFI hotspot, after the message of Refresh WIFI list successfully appears, tap on WIFI Setting again to pick up one of the proper hotspot from the list to connect.
- Page 56 CORS server, choose one of them and return to network setting interface, then tap on the setting button at the bottom of this interface, once appears the message ―Successful Setting‖, and the button turns to red and shows disconnect, it means S680N successfully logins CORS server and begins to obtain correction.
- Page 57 Innovative Network RTK Receiver At this time, return to the main interface of LBS Manage program, there will be fixed display for solution type. Base+WIFI mode As same to Rover setting, after establishing the Bluetooth connection, switch the working mode into Base on setting interface, then go to Datalink option and set the datalink as WIFI.
- Page 58 Refresh WIFI list successfully appears, tap the WIFI Setting again to pick up one of the proper hotspot from the list to connect. Input the access password for WIFI connecting if it is required, then click on ok, after the ―Successful connection‖ message appears, that means S680N has successfully connected to WIFI and access to internet.
- Page 59 When appears the message ―Successful Setting‖, and the button turns into red and shows disconnect, it means S680N successfully logins CORS server and begins to transmit correction through the internet. At this time, return to the main interface of LBS Manage program, and observe the status of last indicator.
-
Page 60: Chapter Ⅵ Rtk Measurement
Depending on the design of S680N, the receiver only can obtain correction through the internet. According to such performance, S680N is able to work in Bluetooth mode and WIFI mode. In this chapter, we will emphatically introduce how to do RTK measurement with S680N receiver in Bluetooth mode. - Page 61 Device interface, tap on search button, the Android device will search the surrounding Bluetooth devices. 4) Choose the correct Bluetooth device SN and return to KOLIDAGnssServer (LBS Manage) main interface, tap on Connect button to establish Bluetooth connection between S680N receiver and controller, at this point, the Bluetooth indicator lights up on receiver.
- Page 62 Innovative Network RTK Receiver 5) Enter setting interface to switch working mode of receiver into Rover and choose the datalink as Data Collector Internet. 6) Get into NTRIP Broadcaster interface by tapping on Network option, then input the CORS network IP address and port, assigned username and password, then tap Sourcetable and Refresh to request the source table.
- Page 63 CORS server. Return to LBS Manage main interface and observe the fourth indicator on S680N receiver if it is flashing. 9) Return to GIStar main interface and there you will have high accuracy coordinates with fixed solution, now start a new job.
- Page 64 Innovative Network RTK Receiver 10) make sure that the instrument is leveling on a point, and the coordinates are stable at this position, tap on button to collect the coordinates for this position.
-
Page 65: How To Connect With Egstar
6.2. How to connect with EGSTAR In this section we will teach you how to connect S680N with the latest version of EGStar. First of all, establish an ISP connection on controller and make sure that the controller is able to access to internet successfully. - Page 66 Innovative Network RTK Receiver 5) Enter the IP address of network, the port, the assigned name and password, after that click on ―Get sourcetable‖ button to obtain mount point list from server, and select a proper one then click on ―Connect‖ button to access. 6) After getting the available Fixed solution, you can start your job.
-
Page 67: How To Connect With Survce
6.3. How to connect with SurvCE In this section, you will get the method of how to use SurvCE to connect with S680N and configure parameters for it. First, install SurvCE software onto controller (Ver.4.04 or higher version is recommended). Then run Carlson SurvCE program on controller. - Page 68 Innovative Network RTK Receiver 3) In Current tab, select KOLIDA in Manufacturer dropdown list and choose S680 driver to use on S680N receiver. The driver of S680 is suitable to S680N receiver as well. 4) Move to Comms tab and pick Bluetooth in Type box. Use Windows Mobile in BT Type then tap on icon...
- Page 69 Innovative Network RTK Receiver 5) Configure more settings in Receiver tab, which involve Antenna Height, Elevation Mask, etc. 6) Move to RTK tab, select Data Collector Internet in Device box, then click on icon , in ISP box, select the connection previously defined in Windows menu (eg.
- Page 70 Innovative Network RTK Receiver 8) Then the internet connection will start, and the available services/mount points for corrections will be downloaded to your controller, select the suited service and confirm. 9) Choose a proper mount point you intend to access, click on icon to confirm.
- Page 71 Innovative Network RTK Receiver 10) Tap on Monitor/Skyplot option to check data quality. 11) When you get the available FIXED solution, you can start your job.
-
Page 72: How To Use Fieldgenius To Configure S680N
6.4. How to use FieldGenius to configure S680N As FieldGenius version 7.2.12.14 released, the S680 driver was built and we are able to configure S680N with this driver as well in latest version of FieldGenius. In this section, we will take version 8.3.17.2 for example. Next you will get the method how to use FieldGenius on S680N receiver. - Page 73 S680 driver to use on S680N receiver. 4) And select ―Bluetooth‖ in Port dropdown list, and choose the correct serial number of S680N has been stored in Device box, and then click on ―Connect‖ button to bond with the Bluetooth. If it is the first connection, click on ―Bluetooth Device List‖...
- Page 74 Innovative Network RTK Receiver 6) Choose ―Date Collector Internet‖ as your link device and click on ―Setup‖ to go on. Verify that the Data Port of Port Options is Shared, then enter the IP address, port, assigned name and password for NTRIP connection, after that, when you back on Link Configure page then click ―Connect‖...
- Page 75 Innovative Network RTK Receiver 8) Choose a proper correction format and click on ―Select‖ button to confirm, then return to Link Configure page and click on ―Connect‖ button to process the final step, and the receiver will start accessing to internet and obtain correction from CORS server, at this moment, pay your attention to the fourth indicator on receiver, check if it is flashing at the same time, then check the data quality on the right side of main interface.
-
Page 76: Chapter Ⅶ Static Measurement
GPS positioning measurement by installed three (or more) GNSS receivers to perform simultaneous observation and determine the relative position between the stations. In this chapter, we are going to introduce how to do Static measurement with S680N receiver. 7.1. Antenna Height Measuring After fixed the instrument, user should measure antenna height at the beginning and the end of every period of time to ensure the accuracy ―mm‖... -
Page 77: Field Operation Procedure
7.3. Mode Configuration Static mode of S680N receiver is able to be set on internal web UI or on controller software (eg.GIStar for Android). In this section, we will respectively introduce how to configure static mode on web UI and controller software (GIStar). - Page 78 Innovative Network RTK Receiver Input the measured antenna height on Antenna Setup interface. Move to Data Record and get into Recording Config interface, choose the storage type, setup the sampling interval, file interval, static file format, then choose the recording mode automatic record or manual record. After all the parameters are set, click on button to confirm and then click on button to start...
- Page 79 S680N. Configure on GIStar Switch on S680N receiver and establish Bluetooth connection between S680N and controller which has GIStar program installed, then get into Setting interface and switch working mode of receiver into Static.
- Page 80 Innovative Network RTK Receiver After the working mode is set, move to Static Setting and set up all the parameters for S680N receiver, such as sampling interval, antenna height, mask angle, PDOP, as well as to set automatic record mode for receiver by tapping on the switch.
-
Page 81: Data Download
The other way is to switch the LEMO port of S680N receiver into normal USB port, connect the receiver to computer, it will be recognized as a removable disk. - Page 82 In this section, we will take KOLIDA Total Control (STC) program for example, to introduce how to simply process the static data from S680N receiver. Processing static data from S680N is same to normal static data processing as usual, run STC program on computer, and set up the coordinate system parameters for processing, then click on button to load observation raw data to the program.
- Page 83 Innovative Network RTK Receiver Choose the files and click on OK button, a window pop-up along with the information of the static data, including point ID, start time, end time, data type (Static or Kinematic), manufacturer, antenna height and the others. Verify if all the information is correct, then click on OK button to finish loading data.
- Page 84 If there are the other data files loaded at the same time, then click on button to process baselines combined with the observation stations. Tips: To get more information about static data processing, please refer to KOLIDA Total Control user manual.
-
Page 85: Chapter Ⅷ Standard Configuration
Innovative Network RTK Receiver Chapter Ⅷ Standard Configuration Item No Name model name Quantity Receiver host S680N Data cable L7U50 Holder TP-S650 Adapter PSAI10R-050Q Packaging box ⑵USB cable ⑶ Holder Receiver host ⑷Adapter ⑸ Packaging box 1) This receiver host is integrated with high precise GNSS antenna inside, market proved OEM board, battery and Bluetooth4.0 module. -
Page 86: Chapter Ⅸ Technical Specification
Innovative Network RTK Receiver Chapter Ⅸ Technical Specification GNSS Channels L1 C/A, L2E, L2C, L5, with carrier phase smoothing GLONASS L1 C/A, L2 C/A B1, B2 Galileo E1, E5A, E5B, E5AltBOC QZSS L1 C/A, L1 SAIF, L2C, L5 SBAS L1 C/A, L5 Data Output NMEA-0183, TSIP I/O Protocol...
Need help?
Do you have a question about the S680N and is the answer not in the manual?
Questions and answers