Table of Contents
Advertisement
Advertisement
Table of Contents

Related Manuals for Kolida S680


Summary of Contents for Kolida S680
- Page 1 User Guide for KOLIDA GNSS Receiver -----S680...
-
Page 2: Table Of Contents
ROFILE 1.2 S ....................................3 PECIFICATIONS 1.3 S ................................4 TANDARD CONFIGURATION 1.4 I GNSS S680 ......................5 NTRODUCTION OF HIGH PRECISION RECEIVER CHAPTER 2. HARDWARE OPERATION ............................7 2.1 B ..................................7 ATTERY CHARGING 2.2 P ON/OFF ....................................8 OWER 2.3 B... -
Page 3: Chapter 1. General Introduction
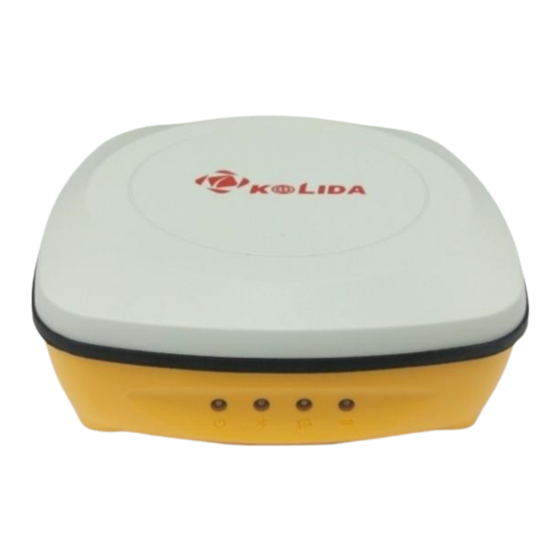
Chapter 1. General Introduction 1.1 Profile Fig.1.1-S680 mainframe Fig.1.2-Power key Fig.1.3-Indicators Fig.1.4-MiniUSB port... -
Page 4: Specifications
1.2 Specifications ITEMS S680 specifications Channels L1 C/A, L2E, L2C, L5, with carrier phase smoothing L1 C/A, L2 C/A GLONASS B1, B2, B3(optional) E1, E5A, E5B, E5AltBOC Galileo QZSS L1 C/A, L1 SAIF, L2C, L5 L1 C/A, L5 SBAS Data Output... -
Page 5: Standard Configuration
1.3 Standard configuration Item No Name model name Quantity Receiver host S680 MicroUSB Cable Mini USB-2.0 S680 Holder TP-S650 S680 Adapter PSAI10R-050Q Packaging box ⑴ Receiver host ⑵Mini USB cable ⑶ Holder ⑷Adapter ⑸ Packaging box 1) This receiver host is a small box only in 11.5cm ×... -
Page 6: Introduction Of High Precision Gnss Receiver S680
1.4 Introduction of high precision GNSS receiver S680 Positioning principle High-precision GNSS receiver S680 is integrated with high-precision GNSS motherboard, professional and high sensitive satellite antenna, general bidirectional communication Bluetooth, high frequency power board, high capacity of battery and intelligent control system. The highest Real-time positioning accuracy can achieve the centimeter level (static and post-processing precision can reach the millimeter). - Page 7 Firstly, connect the PDA(such as mobile phone/tablet with Android/IOS system) with high precision GNSS receiver S680 via Bluetooth, then the high precision antenna inside the receiver will receive GPS + GLONASS + BeiDou satellite signals, and transmit the satellite data to the main board; at the mean time, the PDA controller acquires the differential data from the CORS stations using the built-in GPRS module or Wi-Fi, and then send the differential data to the main board of the high-precision GNSS receiver via Bluetooth;...
-
Page 8: Chapter 2. Hardware Operation
Chapter 2. Hardware Operation 2.1 Battery charging High precise GNSS receiver S680 adoptbuilt-in6800mAh large capacity battery, typically it can work10 hours. Equipped with a specified charging socket and charger, ensure the safety of the equipment during charging, it also can be charged when connect with a computer via a USB cable. -
Page 9: Power On/Off
Fig.2.1-Charging 2.2 Power ON/OFF Power on the receiver by holding on POWER key about 3seconds, the POWER light would light up. To Power OFF, hold on power key for several seconds until all indicators are off, then the receiver will switch off. Fig.2.2-Power indicator 2.3 Bluetooth connection Successfully pair the receiver with controller (mobile phone or tablet) via Bluetooth, the indicator (second one) -
Page 10: Satellite Signals
Fig.2.3-Bluetooth indicator 2.4 Satellite signals If the satellite indicator flashes, it means the receiver has already begun searching the signal from satellite. The flashing number of indicator represents the quantity of satellite the receiver searched, this status repeats after a while. -
Page 11: Chapter 3. Software Operation
3.1 How to connect with GIStar for Android This chapter will introduce you how to connect an RTK receiver with GIStar program, here take Kolida S680 for example. Before connecting the receiver, please make sure that the GIStar program has been installed on your Android device. - Page 12 Fig.3.1.3-Bluetooth searching 5) Then pick the correct serial number from the list. 6) Tap on connect button to establish the Bluetooth connection with S680 receiver, at this point, you can hear beep once from the receiver. 7) Tap on setting button to setup NTRIP parameters. When you tap on Datalink and select data collector internet option, Datalink setting will appear and allow you to configure the parameter for NTRIP broadcaster.
- Page 13 9) Select the mountpoint and tap on connect button, at this time; you have successfully connected to server and begin to get correction from server. You can check the fourth indicator on S680 receiver, if it is blinking, that means the receiver already get data stream from server and computes high accuracy coordinates for your position.
-
Page 14: How To Connect With Gistar On Windows Mobile
Fig.3.1.7-New job 11) Click on common used menu and tap on new option, choose an entity type (point/polyline/polygon) to start your collection. Fig.3.1.8-Common used menu 3.2 How to connect with GIStar on Windows Mobile Before connecting to the receiver, it needs to establish a network connection (ISP) in controller system setting. 1) Insert a SIM card into controller (the SIM card slot is located in battery house) and then power on it. - Page 15 Fig.3.2.1-windows mobile 3) Tap on Add a new modem connection to enter make new connection interface, input a name for the connection and then select Cellular Line (GPRS) in next dropdown list. Then click on “Next” button to continue. Fig.3.2.2-ISP 4) Input the APN (Access point name) of your SIM card for this connection (for example, cmnet is the APN for SIM card in China), and click on “Next”...
- Page 16 Fig.3.2.3-APN 5) Nothing is required in this interface, then you can click on “Finish” button to complete the connection. Fig.3.2.4-APN 6) Go to Manage existing connections and hold on your connection for about 3 seconds, a selection dialog appears, then tap on connect to make your connection available.
- Page 17 Fig.3.2.5-ISP connection After that, we will establish the connection of S680 and GIStar on handheld GPS. 7) Click on Start menu—Settings—Bluetooth, in the Devices tab, tap on “Add new device” to search all the nearby Bluetooth devices. Fig.3.2.6-Bluetooth bonding 8) Select your device’s series number, and enter passcode (usually we input 1234 for the passcode, or 0000...
- Page 18 Fig.3.2.7-Bluetooth bonding 9) After adding your device to the list, move to COM Ports to new a outgoing port. Fig.3.2.8-Bluetooth bonding 10) Select the correct device serial number, and choose an available COM port in the list (COM8 is recommended). Due to COM4 and COM5 are occupied as inner port for handheld GPS, so these two ports are not available.
- Page 19 Fig.3.2.9-Bluetooth bonding 11) Run GIStar program on your handheld GPS, Click on Manager—GPS—Basic Setting. Fig.3.2.10-GIStar configuration 12) Select “OTHER(NMEA)” in Model list, then set Location Port and Differential Port as the COM port you have created before. The Baud Rate of both ports should be 19200.
- Page 20 13) Choose RTCM3 in the Diff Mode list and the “CORS Config” button shall be show, then click on this button and enter the IP address of your CORS network, the port, the assigned name and password. Then click “OK” button, the handheld will connect with the S680 device. Click on icon you can see the satellites information.
- Page 21 Fig.3.2.13-Sourcetable request 15) Choose a proper mount point and click on “Start” button to access, check the receive progress bar you will start getting differential from CORS station, a moment later, you will get the fixed solution, and start your job.
-
Page 22: How To Connect With Egstar
3.3 How to connect with EGSTAR In this section we will teach you how to connect S680 with the latest EGStar ver.20150325. First of all, establish an ISP connection on controller as part 3.2. 1) Run EGStar program on your controller. - Page 23 4) Go to Config/Mobile difference interface, and then click on “Open mobile differential mode” to activate this function, move to “Cellphone differential mode setting” and go into parameter configuration interface. Fig.3.3.3-configuration 5) Enter the IP address of network, the port, the assigned name and password, after that click on “Get sourcetable”...
-
Page 24: How To Connect With Survce
3.4 How to connect with SurvCE In this section, you will get the method of how to use SurvCE to connect with S680 and configure parameters for it. First, install SurvCE software onto your controller (Ver.4.04 or higher version is recommended). - Page 25 receiver. Fig.3.4.2-Model selection 4) Move to Comms tab and pick Bluetooth in Type box. Use Windows Mobile in BT Type then tap on icon to enter Bluetooth device dialog, select the correct serial number of your device or tap on Find Receiver to search all nearby Bluetooth devices, pick up a correct one then tap on the icon at the top of interface to bond with.
- Page 26 Fig.3.4.3-Bluetooth bonding 5) Configure more settings in Receiver tab, which involve Antenna Height, Elevation Mask, etc. Fig.3.4.4-Receiver tab 6) Move to RTK tab, select Data Collector Internet in Device box, then click on icon , in ISP box, select the connection previously defined in Windows menu (eg. My connection), check that if it shows connected. On the contrary push Connect, then confirm with icon Fig.3.4.5-ISP configuration 7) Select NTRIP in Network box.
- Page 27 usual way. Fig.3.4.6-NTRIP broadcaster 8) Then the internet connection will start, and the available services/mount points for corrections will be downloaded to your controller, select the suited service and confirm. Fig.3.4.7-Mountpoint loading 9) Choose a proper mountpoint you intend to access, click on icon to confirm.
- Page 28 Fig.3.4.8-Successful connection 10) Tap on Monitor/Skyplot option to check data quality. Fig.3.4.9-Quality 11) When you get the available FIXED solution, you can start your job.
-
Page 29: How To Use Fieldgenius To Configure S680
3.5 How to use FieldGenius to configure S680 As FieldGenius version 7.2.12.14 released, we are able to configure S680 unit with its own driver. Next you will get the method how to use FieldGenius on S680 receiver. 1) Run FieldGenius program on your controller, then open an existing project or create a new one for your job. - Page 30 Fig.3.5.3-Bluetooth bonding 4) And select “Bluetooth” in Port dropdown list, and choose the correct serial number of your S680 has been stored in Device box, and then click on “Connect” button to bond with the Bluetooth. If it is the first “Bluetooth Device List”...
- Page 31 it is lit. Fig.3.5.5-Bluetooth bonding 6) Choose “Date Collector Internet” as your link device and click on “Setup” to go on. Verify that the Data Port of Port Option is Shared, then enter the IP address, port, assigned name and password for NTRIP connection, after that, when you back on Link Configure page then click “Connect”...
- Page 32 services/mountpoints for corrections will be downloaded to your handheld. Or reconnect your assigned mountpoint has been stored on your handheld. Fig.3.5.7-Sourcetable request 8) Choose a proper correction format and click on “Select” button to confirm, After that you will hear beeping from receiver during connecting, that means that it starts the connection with CORS network, and you will see the fourth indicator is blinking on receiver, the receiver already gets corrections from server.
-
Page 33: Chapter 4. Update
Chapter 4. Update In the section, you will know how to update a new firmware for this high precise GNSS receiver S680 while you get a new firmware released by Kolida. Updating firmware would help this receiver fix some defects and make it work perfect under your job. Follow... - Page 34 d) Tap on Local Update button, a dialog will pop-up and request to choose a firmware, select a proper firmware and then tap on Update Now. Fig.4.3-Firmware select e) After that, search the surrounding Bluetooth devices and select the correct serial number of receiver from the list, and the device will update the firmware automatically in 5 seconds (if a password is required, input 1234 to try).
-
Page 35: Chapter 5. Registration
Fig.5.1.1-GnssServer 3) It is easy to know that this menu is used to make a registration for S680 receiver. When you get a registration code from us, you are able to use this function to register S680 receiver by entering the code. -
Page 36: Register By Iphone/Ipad
With EGStar for IOS operating system released on the authoritative online app store of Apple, the user of Kolida can use their iPhone or iPad to operate the RTK device conveniently, as well as registration for receiver with this software. - Page 37 4) Input the registration code into the blank and then tap on Done on the upper right corner, at the meantime, the S680 receiver would beep once and a message “Device registered OK”,appears at the top of screen, which means the receiver is registered successfully.
-
Page 38: Register By Pc
5.3Register by PC Note: In this method, an external Bluetooth device or a laptop with Bluetooth is required, because the receiver needs to connect with PC via Bluetooth as well. 1) Connect receiver with PC via Bluetooth and remember which port (eg.COM8) is supplied for the connection. - Page 39 Fig.5.3.2 Instar Fig.5.3.3 Successful Registration...
-
Page 40: Chapter 6. Safety Warnings And Attentions
Chapter 6. Safety Warnings and Attentions 6.1 Safety Warnings ●please shut down this product when near the high precision control electronic equipment; otherwise it may lead to electronic equipment fault. ●The equipments may effected by those products: hearing- AIDS, pacemakers, fire alarm, automatic doors and other automatic control equipment. - Page 41 ●Please do not use the product (battery and charger) in the area of high temperature, or low temperature region, otherwise it may lead to the products, battery and charger failure, fire or explosion. ●Please charge the battery in a safe environment (not inflammable and explosive places, dangerous situations), should try to hold the battery temperature at between 0℃...
Need help?
Do you have a question about the S680 and is the answer not in the manual?
Questions and answers