Advertisement
Quick Links
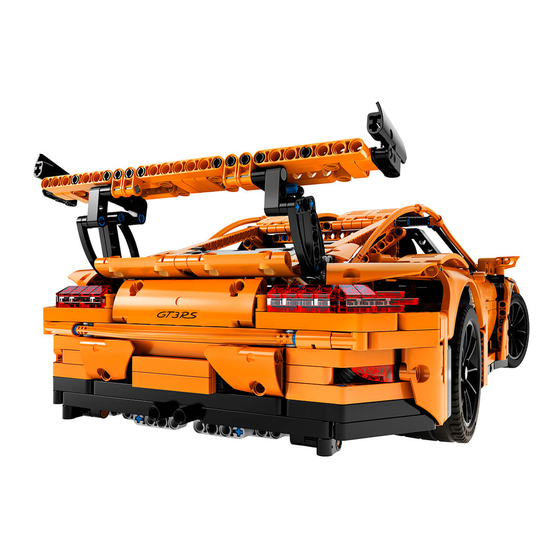
Light My Bricks: Porsche 911 GT3
RS
Light My Bricks
Feb 26, 2017 · 23 min read
Please read and follow the instructions carefully to ensure this lighting kit is
installed properly.
Package contents:
16x White 15cm Bit Lights
1x LED Strip Light
1x 50cm Connecting Cable
2x 30cm Connecting Cables
6x Adhesive Squares
Advertisement

Subscribe to Our Youtube Channel
Related Manuals for LIGHT MY BRICKS 42056


Summary of Contents for LIGHT MY BRICKS 42056
- Page 1 Light My Bricks: Porsche 911 GT3 Light My Bricks Feb 26, 2017 · 23 min read Please read and follow the instructions carefully to ensure this lighting kit is installed properly. Package contents: 16x White 15cm Bit Lights 1x LED Strip Light...
- Page 2 1x 6-port Expansion Board 1x 8-port Expansion Board 1x 12-port Expansion Board 1x AA Battery Pack (Requires 3x AA Batteries) Important things to note: Laying cables in between and underneath bricks Cables can fit in between and underneath LEGO® bricks, plates, and tiles providing they are laid correctly between the LEGO®...
- Page 3 CAUTION: Forcing LEGO® to connect over a cable can result in damaging the cable and light. Connecting cable connectors to Strip Lights Take extra care when inserting connectors to ports on the Strip Lights. Connectors can be inserted only one way. With the Strip Light facing up, ensure the side of the connector with the wires exposed is facing down.
- Page 4 Connecting cable connectors to Expansion Boards Take extra care when inserting connectors to ports of Expansion Boards. Connectors can be inserted only one way. With the expansion board facing up, look for the soldered “=” symbol on the left side of the port. The connector side with the wires exposed should be facing toward the soldered “=”...
- Page 5 When installing Bit Lights under LEGO® pieces, ensure they are placed the correct way up (Yellow LED component exposed). You can either place them directly on top of LEGO® studs or in between. OK, Let’s Begin! Instructions for installing this kit...
- Page 6 Let’s start at the back of the vehicle. Grab the 12 Port Expansion Board and move the car around so you have easy access to the boot. There are a few options for mounting the 12 Port Expansion Board. I am going to mount mine on top of the 1 x 4 tile.
- Page 7 Remove it from the base and stick it on the car where you want to mount your 12 Port Expansion Board. Grab another Adhesive Square and peel it like the previous one. Also stick it where you want the 12 Port Expansion Board to be. Mount the 12 Port Expansion Board on top the Adhesive Squares.
- Page 8 Look for the Trans-Red Bionicle 1 x 3 Tooth with Axle Hole piece. Gently pry apart the orange technic pieces above and below it.
- Page 9 Grab a White 15cm Bit Light and feed it down through the boot and out near the Trans-Red Bionicle 1 x 3 Tooth with Axle Hole piece. Jiggle and manoeuvre the LED until it is face down and inside the Trans- Red Bionicle 1 x 3 Tooth with Axle Hole piece.
- Page 10 Remove the orange technic fairing piece that sits above the brake light. Do this by pulling it backwards towards you. Grab the plug end if the White 15cm Bit Light and feed it through a side hole in the black technic liftarm piece.
- Page 11 Plug the White 15cm Bit Light into an available port on the 12 Port Expansion Board. I have chosen the furthest port on the left to minimise the amount of slack in the wire. There are two sets of transparent pieces on each side of the car that represent brake lights.
- Page 12 The wire will likely run through and out the bottom of the car which is fine. Grab the top of the LED on the White 15cm Bit Light and carefully bend it so that it faces upwards. You want it to sit flat on top of the blue technic 1/2 pin.
- Page 13 The blue technic 1/2 pins sit inside a black L-Shaped technic lift arm. There is a black technic pin in the corner of the black L-Shaped technic lift arm. Grab a White 15cm Bit Light and rest it on top of the black technic pin with the yellow LED element facing upwards.
- Page 14 Remove the other set of transparent pieces the represent brake lights.
- Page 15 Again, two blue technic 1/2 pins will now be exposed. Grab a White 15cm Bit Lightand feed the white plug end through the blue technic 1/2 pin closest to the centre of the car. Let the cable run down underneath the car. Grab the top of the LED on the White 15cm Bit Light and carefully bend it so that it faces upwards.
- Page 16 Grab a White 15cm Bit Light and feed the white plug end through the available gap between the orange technic liftarm (that holds the blue 1/2 technic pins) and the black technic liftarm that runs back towards the engine. Rest the LED end of the White 15cm Bit Light on top of the black technic pin in the orange technic liftarm piece.
- Page 17 Replace the transparent brake light pieces. Each White 15cm Bit Light LED will sit comfortably inside the cavity of the Lego plate being fixed on top of it. No extra resistance should be encountered when refitting the brake light pieces. You will have four White 15cm Bit Lights that need to be plugged into the 12 Port Expansion Board.
- Page 18 Plug the wires into available ports on the 12 Port Expansion Board. Repeat the process for all remaining wires. When you have finished this side, there should be five wires plugged into the 12 Port Expansion Board. Repeat the above process for the lights on the left hand side of the car.
- Page 19 When both sides are wired up, your boot will look something like the pictures above. Replace the orange technic fairing pieces on both sides .
- Page 20 Close up the boot, take the car off blocks and turn it around so we can start on the front. Open up the bonnet and grab the 8 Port Expansion Board and a couple of Adhesive Squares. Turn the 8 Port Expansion Board face down, peel the two Adhesive Squares and stick them on to the 8 Port Expansion Board.
- Page 21 Mount the 8 Port Expansion Board on top of the rectangle technic piece as shown in the picture above. I will go through the steps for installing LEDs on the right hand side of the car. When finished, repeat the same steps for the left hand side of the car. Pinch the orange technic fairing piece as seen on the picture above and remove it by pulling it towards you.
- Page 22 Detach the orange technic fairing piece from the other pieces.
- Page 23 Hold on to the transparent plates and tiles and remove them from the black plate they are attached to. The transparent slope piece and plate it is attached to will probably stay in place, which is ok. Grab a White 15cm Bit Light and feed it through the black technic pin with stop bush.
- Page 24 Gently bend the end of the White 15cm Bit Light so that it will sit flat inside the black technic pin with stop bush. Reattach the transparent plates and tile.
- Page 25 Reattach the orange technic fairing piece. Run the plug end of the cable into the car first as you prepare to replace the orange technic fairing piece and attached pieces.
- Page 26 Reattach the orange technic fairing piece and attached pieces. Grab the plug end of the White 15cm Bit Light and feed it through available holes in the side of the black technic lift arms as seen in the picture above.
- Page 27 Now run the plug end of the White 15cm Bit Light up and through the double size holes on the black technic liftarms near the 8 Port Expansion Board.
-
Page 28: Expansion Board
Plug the White 15cm Bit Light into and available port on the 8 Port Expansion Board. Remove the transparent headlight piece. The other transparent pieces under it should come off as well, but if they don’t, remove them also. There are two blue technic 1/2 pins now visible. - Page 29 Carefully bend the end of the LED element so that it will sit flat on top of the blue technic 1/2 pin when it is pulled through. Grab another White 15cm Bit Light and feed it through the bottom blue technic 1/2 pin.
- Page 30 Reattach the transparent headlight piece, including the pieces under it. Each White 15cm Bit Light LED will sit comfortably inside the cavity of the Lego plate being fixed on top of it. No extra resistance should be encountered when refitting these pieces. Run the plug ends of the White 15cm Bit Lights we just installed up and through the double size holes on the black technic liftarms near the 8 Port Expansion Board.
- Page 31 Wrap them around the black technic liftarms and feed them through the double size holes again (to consume the slack in the wires). Plug them into available ports on the 8 Port Expansion Board. Repeat the above process for the lights on the left hand side of the car.
- Page 32 Remove the stylish Porsche suitcase. Grab the 30cm Extension Cable and plug it in to an available port on the 8 Port Expansion Board.
- Page 33 Feed the other end of the 30cm Extention Cable through the centre hole in the bottom of the same rectangle technic piece that the 8 Port Expansion Board is attached to. Look for the cable coming through to the bottom of the car. Gently pull it through.
- Page 34 Feed the 30cm Extension Cable through available centre holes in the rectangle technic piece near where the cable has come down. Pull the 30cm Extension Cable through and feed it through the available centre holes in the rectangle technic piece that is roughly in the centre of the car.
- Page 35 Grab the 6 Port Expansion Board and a couple of Adhesive Squares. Turn the 6 Port Expansion Board face down. Peel the Adhesive Squares off the base and stick them to the back of the 6 Port Expansion Board. Remove the top bits of paper to expose the other sticky side of the Adhesive Squares.
- Page 36 Stick the 6 Port Expansion Board on to the side of the 1 x 3 black technic liftarm, which is inside the rectangle technic piece that is roughly in the centre of the car. Grab the 30cm Extension Cable and plug it into the best port on the 6 Port Expansion Board that leaves the least amount of slack in the cable.
- Page 37 Open the boot, grab the 50cm Extension Cable and plug it into an available port on the 12 Port Expansion Board. Feed the other end of the 50cm Extension Cable underneath the black technic pieces that are joined with the red technic axle.
- Page 38 Pull the cable through and then feed it down through the hole in the side of the technic rectangle piece. Keep feeding the cable through and as it comes out the bottom of the car, pull it through until you can feel a tiny bit of resistance from pulling. Close the boot and lie the car down so you can access underneath the car.
- Page 39 Grab the end of the 50cm Connecting Cable and feed it through the holes in the side of the technic panel plate. Run the cable from the outside of the technic panel plate towards the centre of the car.
- Page 40 Now run the 50cm Connecting Cable towards the front of the car. Feed the cable through the side holes of the black technic panel plate. Continue to feed the 50cm Connecting Cable through the 1 x 3 black technic liftarm and into the technic rectangle piece.
- Page 41 Pull the wire through and it should reach somewhere near the 6 Port Expansion Board. Feed the 50cm Connecting Cable through the centre hole in the side of the technic rectangle piece that has the 6 Port Expansion Board in it. Depending how much excess cable you have, wrap the 50cm Connecting Cablearound the technic rectangle piece and feed it through the centre hole again.
- Page 42 Plug the 50cm Connecting Cable into the 6 Port Expansion Board. Grab the other 30cm Connecting Cable and connect it to an available port on the 6 Port Expansion Board.
- Page 43 Feed the 30cm Connecting Cable up through the available hole in the side of the technic rectangle piece. The cable runs vertically up and away from the 6 Port Expansion Board. The 30cm Connecting Cable will feed through the black technic liftarm and the black technic panel plate above the technic rectangle piece.
- Page 44 The black technic panel plate is the footwell when looking inside the vehicle. Set the car on its wheels again and open the door. Look for the other end of the 30cm Connecting Cable and pull it through. Run the 30cm Connecting Cable back towards the centre of the car making sure it goes underneath the steering CV joint pieces (these are the light grey pieces near the floor that turn when you turn the steering wheel).
- Page 45 Run the 30cm Connecting Cable in between the drivers seat and centre console. Pull it out the back “window” above where the two orange technic liftarms cross over. Feed the 30cm Connecting Cable through an available hole in the orange technic liftarm that runs underneath the roof line.
- Page 46 Pull the 30cm Connecting Cable out through the back “window” again and loop it back through the same orange technic liftarm. Grab the Strip Light.
- Page 47 Connect the Strip Light to the 30cm Connecting Cable. (In hind sight, it would be easier to pull the cable out the back “window” again and connect the strip light to it while it is outside the car.) We are going to stick the strip light to the very centre of the roof which is seen by the gap in the orange technic panel plate.
- Page 48 Peel the adhesive backing off the Strip Light. Pass the strip light through to the cabin and stick it to the roof. Grab the AA Battery Pack and give yourself access to the back of the vehicle.
- Page 49 Rest the AA Battery Pack on the back of the car between the rear “window” and the boot. Open the boot. Feed the AA Battery Pack wire underneath the boot and plug it in to the last available port on the 12 Port Expansion Board.
- Page 50 Now all you need to do is put the batteries in, turn the AA Battery Pack on and enjoy the lights!!
Need help?
Do you have a question about the 42056 and is the answer not in the manual?
Questions and answers