Table of Contents
Advertisement
Quick Links
Advertisement
Table of Contents

Related Manuals for Lonza CytoSMART 2

Summary of Contents for Lonza CytoSMART 2
- Page 1 Bioscience Solutions CytoSMART™ 2 System Manual...
-
Page 3: Table Of Contents
Content 1 The CytoSMART™ 2 Technology 2 Getting Started 2.1 What’s in the Box 3 Installing the CytoSMART™ 2 Device 4 Setting up Your Tablet 4.1 Setting up the Internet Connection 4.2 Starting a Project 4.3 Ending a Project 4.4 Running an Offline Project 4.5 Cell Counting 5 CytoSMART™... -
Page 4: The Cytosmart™ 2 Technology
(WiFi) or Ethernet (LAN). or growth factors) For each CytoSMART™ Project started, you will receive an email link that www.lonza.com/cytosmart allows you to monitor your cell culture remotely and in real-time. All image files are intermediately stored on the tablet, in case your internet access is interrupted, to assure full data safety. -
Page 5: Getting Started
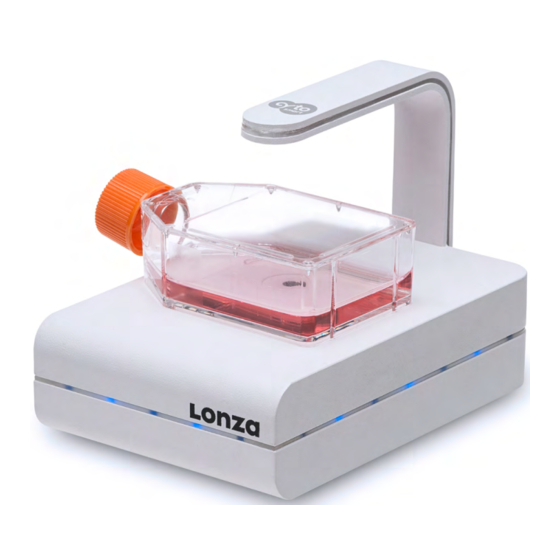
2 Getting Started 2.1 What’s in the Box Ensure the following items are included: – Manual – Tablet – CytoSMART™ 2 Device – Power adaptor – Power cord – Cable clips (3 pieces) – License key – USB Ethernet hub Tablet hybrid CytoSMART™... -
Page 6: Installing The Cytosmart™ 2 Device
3 Installing the CytoSMART™ 2 Device Items required for installation: – Incubator – CytoSMART™ 2 Device – Tablet – Power adaptor – Power cord – Cable clips Cable Placement Check the incubator for a cable opening. If your incubator has one, thread the CytoSMART™... - Page 7 Attachment of Tablet to Incubator Door The tablet can be attached to the incubator with the Velcro tape in the tablet box. To do so, peel off the plastic strip of the loop side and stick the tape to the back of the tablet. Peel off the plastic strip of the hook side. To remove the tablet from the keyboard base, hold the keyboard and lift one corner of the tablet to release it.
-
Page 8: Setting Up Your Tablet
4 Setting up Your Tablet To set up your system, have the following available: – Login details of a stable WiFi internet or LAN connection (no guest network) – CytoSMART™ 2 Device – Tablet (connected to power source) – A valid license key 4.1 Connecting to the Internet Figure 8: Power adaptor and power cord for charging tablet Charging the Battery... - Page 9 How to Minimize the CytoSMART™ App Use the minimize button to get to the Windows desktop, enabling access to Windows features and applications like Edge (internet browser). To minimize the CytoSMART™ App, select the “Menu” button (3) followed by the “Minimize” (4). To go back to the CytoSMART™ App, select the application in the task bar.
-
Page 10: Starting A Project
4.2 Starting a Project Place a culture vessel containing cells on top of the CytoSMART™ 2 Device. You should now see the cells on the screen. Setting Focus Use the slider (7) to adjust the focus. The plus and minus buttons can be used for more precise adjustments. -
Page 11: Ending A Project
Selecting the Recording Frequency Select the desired recording frequency (13). Use the drop down menu to select an interval between 1 and 60 minutes. Please remember that biological cells can be susceptible to light. It is advised not to use a higher recording frequency than needed. -
Page 12: Cell Counting
4.5 Cell Counting Cell counting can be done with the CytoSMART™ 2 System by selecting „Count“ in the „Menu“ (19). Cells in suspension (adherent cells after having been detached from their culture vessel or cells growing in suspension) are to be diluted (typically 1:2) with Trypan Blue (use a ready-to-use 0.4% solution, available from many suppliers). -
Page 13: Cytosmart™ Connect Cloud
– A device able to run an internet browser (e.g. computer, smart From: Lonza Bioresearch Solutions [mailto:noreply@cytomate.com] Sent: Thursday, 6 July, 2017 14:23 phone or tablet) To: Technical Support - Verviers <scientific.support.EU@lonza.com> Subject: New Project Started: 2017-07-06_AoSMC_CytoSMART 2 – An internet connection – CytoSMART™ Project Email A new project started at 12:23 on Thursday 6th July 2017 UTC(London Winter Time). - Page 14 @lonza.com Project: B15W0003 Summary Video View Tracking Fri, 9 Jan 2015 Project Start Date: Project Note: @lonza.com Project Owner: 5d:22h:22m Duration: Average Temperature: 36.98°C Snapshot Interval: 7.5 minutes Snapshot Count: 1128 Notifications Edit To set notification, press the edit button...
- Page 15 Summary Pane Logbook Pane The summary pane provides an overview of your project (i.e. project The logbook pane provides a in front of historic log of all changes start date, duration, average temperature and number of images made to your CytoSMART™ 2 System. taken (snapshot count)).
-
Page 16: Image Analysis Settings
5.3 Image Analysis Settings Depending on the size and morphology of your cells it may make sense to change the image analysis settings. You can do so by changing the tracking settings to a different grade. This will alter the algorithm used to calculate confluency. - Page 17 Refreshing your Web-browser If tracking grade settings are changed, the previous cell coverage will be shown in brackets (26). Your web-browser can store the old CytoSMART™ Connect Project Page in the cache memory. To ensure you see the results of the re- Select “Apply”...
-
Page 18: Troubleshooting
(3). Select “Restart” (4). – Verify the WiFi or LAN connection has access to the internet by opening the CytoSMART™ Website www.lonza.com/cytosmart. This can be done by minimizing the CytoSMART™ Application (see above) and selecting the browser on the task bar. Please ensure the website is loading. -
Page 19: Cannot Charge Tablet
6.3 Cannot Charge Tablet Please connect charger A warning indicating the tablet is not charging (6), is typically the result of either the power adaptor not being well connected, the power cord not having good connection in the power outlet, or the power outlet being turned off. -
Page 20: Technical Specifications
7 Technical Specifications Feature Technical Data Power Supply AC 100-240V, 3A, 15W, 50/60Hz Field of View 2.4 x 1.4 mm Magnification Image Resolution 1280 x 720 pixels (converted to 640 x 360 on webpage) Exported Formats JPEG, CSV, AVI Light Source Camera 5 MP CMOS Display... -
Page 21: Warnings
8 Warning To avoid damage or malfunction: Shut down equipment immediately if it produces smoke, a strange odor, or unusual noise. Continued use may lead to fire. Discontinue use immediately if water or other liquid enters this equipment. Continued use may lead to fire. Unplug the power cord immediately. Do not drop the product or allow objects to fall onto it. - Page 24 The buyer assumes all risks of use and/or handling. Any user must make his own determination and satisfy himself that the products supplied by Lonza Group Ltd or its affiliates and the information and recommendations given by Lonza Group Ltd or its affiliates are (i) suitable for intended process or purpose, (ii) in compliance with environmental, health and safety regulations, and (iii) will not infringe any third party’s...
Need help?
Do you have a question about the CytoSMART 2 and is the answer not in the manual?
Questions and answers