Table of Contents
Advertisement
Quick Links
GB
Programming and usage instructions
Contents
1 Safety rules ...................................................................................................................................................................... 2
2 Description of ZWMP weather module ...........................................................................................................................3
3 Installation of ZWMP module ..........................................................................................................................................4
4 Module programming .....................................................................................................................................................5
4.1 Associating weather module to the Z-Wave network (LEARN MODE function)....................................................6
4.2 Associating device with ZWMP module (ASSOCIATE function)..........................................................................7
4.2.1 Device operating by means of "OPEN" and "CLOSE" buttons .......................................................................7
4.3 Device deleting from ZWMP weather module (DELETE function) ........................................................................8
4.4 Return to default settings of the ZWMP weather module (DEFAULT function)......................................................9
4.5 Removing the ZWMP weather module from the network.........................................................................................9
4.6 Additional functions................................................................................................................................................10
4.6.1 Configuring the Z-Wave network using the ZWMP weather module (INCLUDE function)..........................10
4.6.2 Excluding a device from the Z-Wave network using the ZWMP weather module (EXCLUDE function) ....11
5 Technical parameters......................................................................................................................................................11
6 LED signalling of digital inputs and 12V DC power.....................................................................................................12
7 WARRANTY................................................................................................................................................................. 12
11.09.21 NC815
ZWMP weather module
1/16
©2011, FAKRO
Advertisement
Table of Contents

Related Manuals for fakro ZWMP


Summary of Contents for fakro ZWMP
-
Page 1: Table Of Contents
4.6 Additional functions..............................10 4.6.1 Configuring the Z-Wave network using the ZWMP weather module (INCLUDE function)......10 4.6.2 Excluding a device from the Z-Wave network using the ZWMP weather module (EXCLUDE function) ..11 5 Technical parameters..............................11 6 LED signalling of digital inputs and 12V DC power.....................12 7 WARRANTY................................. -
Page 2: Safety Rules
● Plastic containers used for packing should be kept out of children's reach as thy may be a potential source of hazard. ● The ZWMP module should be used for its intended purpose in agreement with its design. The FAKRO Company shall not be held responsible for any consequences resulting from improper module use. -
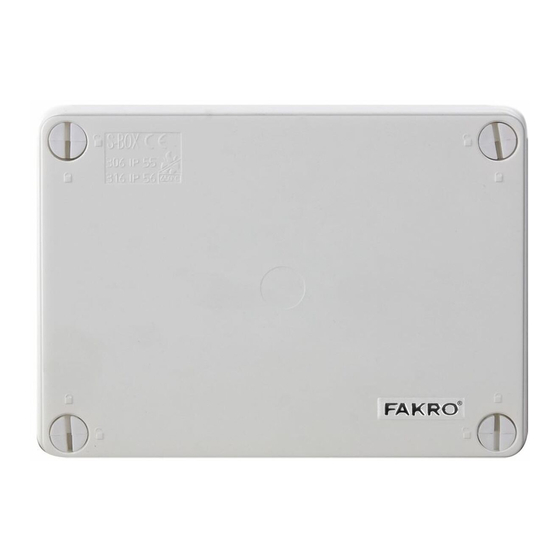
Page 3: Description Of Zwmp Weather Module
The ZWMP weather module is equipped with two-way ”Z - Wave” communication system. For communication, the Z-Wave system utilises radio wave frequency of 868,43 Mhz. In Figure 1, there is presented a general view of the ZWMP weather module with description of available buttons and signals. 230VAC... -
Page 4: Installation Of Zwmp Module
3 Installation of ZWMP module The ZWMP module should be mounted onto a wall or other permanent element of the building by means of screws driven into cylindrical plugs inserted into openings drilled in the wall. In order to install the ZWMP module, it is necessary to: 1. -
Page 5: Module Programming
4 Module programming In order to operate electric FAKRO accessories equipped with the Z-WAVE system by means of the ZWMP weather module, it is necessary to: 1. Add the device to be operated by means of the module to the “Z-Wave” system – see ZWP15 remote control and ZWK15, ZWK1 keyboards manuals, chapter “Adding device to the network (INCLUDE... -
Page 6: Associating Weather Module To The Z-Wave Network (Learn Mode Function)
Figure 3: Associating ZWMP module with Z-Wave network *) Programming error results from failure to receive any reply from the device which can be caused by: failure to enter LEARN MODE in the ZWMP weather module by pressing the “In/Ex” button three •... -
Page 7: Associating Device With Zwmp Module (Associate Function)
In order to stop the device, it is necessary to keep the button pressed for longer than 1 second. CAUTION: The ZWMP module does not provide a possibility to operate the device “both ways” (e.g. blind lowering and raising from the same digital input (channel). -
Page 8: Device Deleting From Zwmp Weather Module (Delete Function)
4.3 Device deleting from ZWMP weather module (DELETE function) This function removes from the module's memory the device which has been associated with a selected channel. It does not remove the device from the “Z-Wave” network. The procedure of deleting the device from a given channel is presented in Figure 5. -
Page 9: Return To Default Settings Of The Zwmp Weather Module (Default Function)
LEDs for app. 2-3 sec. Figure 6: Restoring default settings in ZWMP controller 4.5 Removing the ZWMP weather module from the network Removing the ZWMP module from the network consists in restoring default settings in this module. 11.09.21 NC815 9/16... -
Page 10: Additional Functions
(e.g. keyboard ZWK15, ZWK1, ZWP15, ZWPTV). The ZWMP module should be associated with the network as SECONDARY. However, there is a possibility of programming the module for the network as PRIMARY. The procedure of device adding to the network with the use of the ZWMP module is presented in Figure 7. In/Ex In/Ex 1. -
Page 11: Excluding A Device From The Z-Wave Network Using The Zwmp Weather Module (Exclude Function)
(e.g. keyboard ZWK15, ZWK1, ZWP15, ZWPTV). If the ZWMP module in the Z-Wave network is marked as PRIMARY (network configuration as per section 4.6.1), then devices can be excluded only using that module. The procedure of device excluding from the network with the use of the ZWMP module is presented in Figure 8. -
Page 12: Led Signalling Of Digital Inputs And 12V Dc Power
14 days after accepting the product for repair. Warranty and post-warranty repairs are performed by the manufacturer i.e. FAKRO PP. Sp. z o.o.. Quality certificate: Device Model............................ - Page 13 11.09.21 NC815 13/16 ©2011, FAKRO...
- Page 14 11.09.21 NC815 14/16 ©2011, FAKRO...
- Page 15 11.09.21 NC815 15/16 ©2011, FAKRO...
- Page 16 FAKRO PP Sp. z o.o. ul. Wegierska 144A 33-300 Nowy Sącz Polska www.fakro.com tel. +48 18 444 0 444 fax. +48 18 444 0 333 11.09.21 NC815 16/16 ©2011, FAKRO...
Need help?
Do you have a question about the ZWMP and is the answer not in the manual?
Questions and answers