
Related Manuals for Berghoff Tronic Series


Summary of Contents for Berghoff Tronic Series
- Page 1 MA N UA L BergHOFF Customer Service. 2323 Merchant Avenue Odessa, Florida 33556 1.727.375.7523 cs@berghoff-usa.com...
- Page 2 1810027 2213735 1810003 2207123...
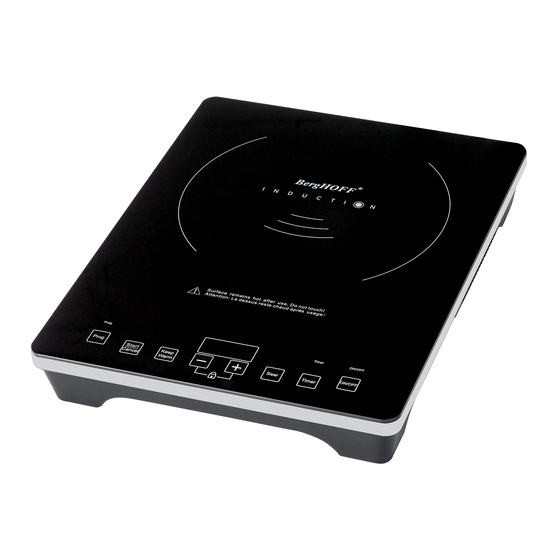
- Page 3 1. Power “ON/OFF” button 2. Function button toggles between POWER / TEMP COOK / TIMER (where applicable of course) 3. Power Cook 1-10 (300W-1800W - 2207123) 4. Temp Cook 60ºC – 200ºC (150°F - 450°F) 5. Timer (150’) 6. Arrow up raises TEMP or POWER, increase TIME 7.
- Page 4 Welcome to the World of BergHOFF BergHOFF is always ahead of the curve, a leading worldwide supplier of the induction cooktop, tableware and kitchenware in both the private and commercial sectors. Specializing in modern technology, defined quality and remarkable performance.
- Page 5 1. General information About this instruction manual - 6 - Symbols explained - 6 - Updates and translations - 7 - Copyright protection - 7 - Declaration of conformity - 7 - 2. Technical information Technical specifications - 8 - Control panel / keypad - 8 - 3.
-
Page 6: General Information
The BergHOFF manual is part of the product and should be kept at hand and should be easily accessible for anyone installing, operating, maintaining or cleaning the appliance. -
Page 7: Copyright Protection
The BergHOFF manual should be kept at hand and should be easily accessible for everyone who works with this appliance. We reserve the right to make technical changes for purposes of devel- oping and improving the appliance’s performance. -
Page 8: Technical Information
2. Technical information 2A. Technical specifications Name PRO Induction Cooking Unit Induction Stove Induction Stove Item No. 2207123 1810003 2213735 - 1810027 Model: BHI_01SS BH_003 BHI_01S - BHI_01B Cooking top: SCHOTT CERAN GLASS Black Glass Ceramic glass Temperature range: 60°C - 232°C 60°C - 200°C 60°C - 200°C Power:... -
Page 9: Delivery Check
3. Packing, storage & transport 3A. Delivery check Please check the delivery upon completion and report transport damage immediately upon receipt. In case of visible damage, do not accept or accept the delivery with reservation, only marking the shipping documents with the indication of the extent of damage. Send the complaint to the freight company. -
Page 10: Electrical Installation Requirements
4B. Electrical Installation Requirements: Because every installation site is wired differently, and your local codes may vary, it is the owner’s responsibility to comply with those codes. BergHOFF is not responsible for any damages resulting from failure to comply with proper installation. - Page 11 5. Safety This segment provides a summary of important safety aspects. Every chapter provides specific safety tips to avoid danger which is highlighted by the abovementioned symbols. In addition, pay attention to all pictograms, markers and labels on the appliance, which must always be perfectly legible.
- Page 12 5C. Expected use Safe operation is only guaranteed when using the appliance for its intentional purpose. Any tech- nical interventions, as well as assembly and maintenance are to be made by BergHOFF certified service representatives. The induction cooktop may not be used for: heating and warming inflammable, harmful, volatile or similar liquids or materials ...
- Page 13 Once you remove the cookware from the cooking surface, the appliance automatically switches to standby mode. The appliance detects whether suitable cookware is placed on the cooking surface. If the cookware is not suitable for induction stoves, no energy is transferred. 6B.
- Page 14 When you require a high intense heat, or you need a quick temperature increase, the Power cook mode should be used. Make sure that the electrical cord does not come in contact with any heat source or sharp edge. Do not let the cord hang over the table or counter edge. Some parts get hot during operation.
- Page 15 Do not place any articles on the unit other than inductive cookware. Do not strike the unit causing damage. Do not put the unit into luggage. Throwing or dropping the unit can cause internal damage therefore voiding the warranty. If the unit becomes cracked, unplug it immediately and do not use.
-
Page 16: Connection And Installation
Non-induction cookware cookware with a diameter of less than 12 cm (4 ¾“) ceramic, glass stainless steel, aluminum, bronze or copper unless it is specificly marked as suitable for induction cookware with feet pan with rounded base (an uneven base such as a Wok) ... -
Page 17: Operating The Cooktop
6E. Operating the cooktop Plug the power cord into a suitable outlet. A beep signal sounds when the cooktop is in standby mode. Place induction suitable cookware in the center of the cooking surface. Now press the ON/OFF switch to turn the induction cooktop on. The control lamp ... -
Page 18: Safety Advice
change the settings at any time, ranging from 1-10. LED-display “POWER” appears. • “Temp” (2x pressing the “Function” button) The pre-set temperature stage “120°C” is selected and the device turns on. With the arrow keys, you can change the settings at any time, ranging from . -
Page 19: Maintenance
or dirt. In exceptional cases, you may use commercial non-abrasive agents or commercial agents that are used for cleaning the glass top. After the cleaning procedure, you should use a soft and dry cloth to wipe dry and polish the surface. -
Page 20: Warranty Information
BergHOFF’s discretion, with new or recertified products or parts. This is the sole remedy for any breach of this warranty. In no way will BergHOFF be liable for damages of any kind, whether direct or indirect, special or consequential. This warranty is the complete and only warranty, expressed or implied in law or fact, including but not limited to, war- ranties of merchantability, suitability, quality, or fitness for any particular purpose. -
Page 21: Error Code List
This warranty is valid in countries in which BergHOFF products are sold and void elsewhere. For ad- ditional information and other details concerning warranty, please contact our service department at: BergHOFF Customer Service Department, 2323 Merchant Ave, Odessa, FL 33556 or cs@berghoff-usa.com <mailto:cs@berghoff-usa.com>. - Page 22 Induction cooktop Diagram 1 Feet Motor Base Control Panel Frame Control panel Glass Thermostat Device Coil Electrical Board Plug - 22 -...
- Page 23 Induction cooktop Diagram 2 Feet Base Motor Electrical Board Coil Thermostat Device Control Panel Frame Control panel contact Glass Plug - 23 -...
- Page 24 Induction cooktop Diagram 3 Black glass Frame Control Panel Thermostat Device Coil Plug Electrical Board Motor Base Feet - 24 -...
- Page 25 Induction cooktop Diagram 4 Feet Base Support for Electrical Board Motor Nut for Control Panel Screw for Control Panel Control Panel Frame Control panel contact Glass slot Thermostat Device Coil Electrical Board Plug - 25 -...
-
Page 26: Important Safeguards
IMPORTANT SAFEGUARDS When using electrical appliances, basic safety precautions should always be followed including the following: Read all instructions. 1. Do not touch any hot surfaces. Use the handles or knobs. 2. To protect against electrical shock, do not immerse cord, plugs, or appliance in water or other liquid. -
Page 27: Specification
18. Allow sufficient space around the cooking area. 19. Never use the unit on low-heat-resistant materials (carpet, vinyl). 20. Do not place a sheet of paper between the pot or the pan and the unit. The paper may get burnt. 21. - Page 28 4. To select temperature setting, press the” TEMP” button once (defaults=120°C), the tem- perature light will turn a steady red, and press the REDUCE or INCREASE until the correct temperature setting is achieved. 5. To select automatic timer setting, press the” TIMER” button twice (defaults =0mins), the timer light will turn a steady red, and press the REDUCE or INCREASE button until the correct timer setting is achieved.
Need help?
Do you have a question about the Tronic Series and is the answer not in the manual?
Questions and answers