
Related Manuals for Philco PTL7145D


Summary of Contents for Philco PTL7145D
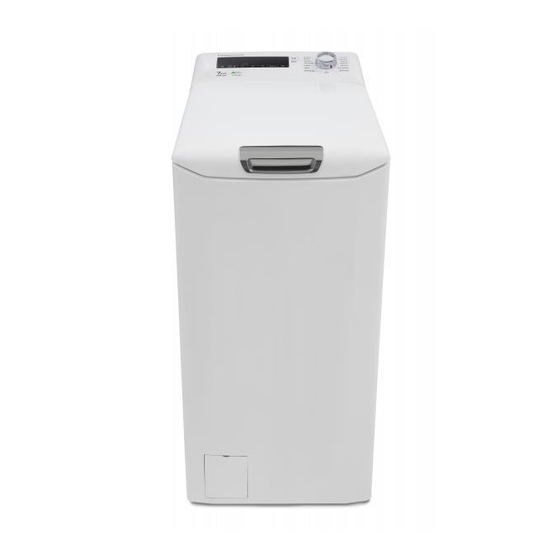
- Page 1 Instruction and installation manual P T L71 4 5 D Please read and save these instruction 請仔細閱讀並妥善保存此說明書...
-
Page 3: Table Of Contents
Introduction Read this manual carefully as it offers practical advice to help you get the most from your washing machine. This «Instruction and Installation Manual» contains everything you need to know about the everyday running of your machine. Please refer to this manual for installation and maintenance instructions. - Page 4 • The manufacturer fits all the machines with an earth connection. Ensure that the electrical installation has an earth connection and that it is connected; if not, call a qualified Service Center. The earth connection is essential for user safety as it elimi- nates the risk of electrical discharge.
-
Page 5: Setting Up - Installation
Setting up - Installation • Unpack the appliance. • Remove the 4 screws (A) from • Replace the 4 screws (A) and both clamps and the 4 fit the trims provided (D). screws (B). If your model offers this function: Position the protection sheet as shown in the diagram. - Page 6 If your model offers this function: • To move the washing machine easily, turn the trolley lever to the right. Once you have finished moving the machine, return the lever to its original position. • Level the machine by adjusting the front feet. a) Turn the nut clockwise to release the screw on the foot.
-
Page 7: Preparing The Wash. Opening/ Closing The Drum
Preparing the wash. Opening/ closing the drum ATTENTION: IT IS IMPORTANT TO MAKE SURE THAT THE DRUM IS CAREFULLY OPENED AND CLOSED, OTHERWISE THE MACHINE OR LAUNDRY COULD GET DAMAGED. ENSURE THAT THE DOORS FIT TOGETHER PERFECTLY AND ARE PROPERLY CLOSED. Loading Open the washing machine lid. -
Page 8: Detergent Load
Detergent load Maximum Main wash Maximum pre-wash washing powder washing powder recommended Maximum Main wash washing liquid Maximum scenting agent The detergent dispenser is divided into 3 compartments: .- Compartment I is for the pre-wash detergent. .- Compartment II is for the main wash detergent. .- The compartment is for fabric conditioners, scenting agents and special additives such as starch, blueing, etc. -
Page 9: Description Of Controls
Description of controls A Programme selector with OFF position B START/PAUSE button C SPIN SPEED button D TEMPERATURE SELECTION button E DELAY START button F WASH TIME button G EXTRA RINSE button H OPTIONS button EASY IRON button L Digital display M DOOR LOCKED indicator light... - Page 10 The programme selector must be returned to the OFF position at the end WARNING: of each cycle or when starting a Don’t touch the display while inserting subsequent wash cycle prior to the next plug because machines programme being selected and started. calibrates the systems during the first seconds: touching the display, the machine couldn’t work property.
- Page 11 It is not possible to raise the temperature The option buttons should be selected over the maximum allowed for every before pressing START/PAUSE programme, in order to save the fabrics. button. option selected that compatible with selected programme then the option indicator DELAY START button first flashes and then goes off.
- Page 12 soiled loads (can be used only on some WASH TIME button programmes as shown in the table of programmes). By selecting this button there is a choice of 3 levels of wash intensity, depending We recommend you use only 20% of the on how much the fabrics are soiled (can recommended quantities shown on the be used only on some programmes as...
- Page 13 the wash cycle has finished and the Digital Display DOOR LOCKED light has gone out before opening the door. At the end of the cycle turn the programme selector to OFF. The display’s indicator system allows you to be constantly informed about the status of the machine.
- Page 14 5) WASH TIME 9) DELAY START Once the programme has been selected This flashes when delay start has been set. the indicator light will automatically show the wash time set for that programme. 10) Kg MODE (function active only on Selecting a different wash time the Cotton and Synthetics programmes) relevant indicator will light up.
- Page 15 Table of programmes TEMP.°C DETERGENT PROGRAM (MAX.) Recommended Max. 20° 20° Eco 20°C Baby 60°C 60° 60° 40° 40° Daily 59 30° 30° Rapid 30 30° 30° Rapid 14 Dark Colours 40° 40° Auto Clean Rinse Drain & Spin Shirts 30°...
- Page 16 Only with PREWASH option selected (programmes with PREWASH option available). For the programmes shown you adjust duration intensity of the wash using the WASH TIME button. Technical data mod. PTL 7145D Pump Heating Mains Water Energy Wash Spin Motor element Max.
-
Page 17: Programmes Selection
to start the program exclusively without laundry in Programmes selection the machine, using only powder detergent for washing machine. When the washing cycle To clean different types of fabrics and finishes, open the door of the washing machine various levels of dirt, the washing machine to dry the drum. -
Page 18: General Recommendations
General recommendations CLEANING AND MAINTENANCE OF THE MACHINE Do not use abrasives, spirits or solvents when cleaning the exterior of the washing machine. It is sufficient to use a damp cloth. The washing machine requires very little maintenance. • Drying the rubber seal of the drum. •... - Page 19 CLEANING THE DETERGENT DISPENSER AND ITS COMPARTMENTS .- It is advisable to clean the three compartments of the detergent dispenser (pre-wash, wash, and fabric conditioner) from time to time. To do this, remove the detergent dispenser and after cleaning it, fit it back in place. To remove and fit the detergent dispenser, follow the steps indicated in the images.
-
Page 20: Troubleshooting
Troubleshooting FAULT CAUSE SOLUTION 1.- No programme works • The appliance is not plugged • Plug it in. • The general switch is discon- • Activate the general switch. nected. • There is no electricity. • Check. • The fuses in the electric insta- •... -
Page 21: Washing Hints
Washing hints Hints on the most economical, most environmentally friendly way to use your washing machine. HINTS ON USING YOUR WASHING MACHINE Wait until you have a full load before using the machine: this will avoid the use of more water and power than necessary. - Page 22 Please record the following information: Model Serial No. Name of distributor Date of purchase The manufacturer reserves the right to make any technical modifications due to product improvement. No prior notice will be given.If you have any enquiry,please contact our after-sales department and forgive for any inconvenient.
- Page 23 /F, Shing Dao Industrial Building, 232 Aberdeen Main Road,Hong Kong : 8210 8210 Service Hotline : 8210 8210...
- Page 26 簡介 請仔細閱讀本手冊,因為它提供了實用 建議,幫助你認識你的洗衣機。 這《操作指南與安裝手冊》已包括洗衣 機的日常運行操作。 請參閱本手冊的安裝和保養說明。該手 冊還包含有關可能的工作問題,建議對 清理衣服洗滌,解釋和提示符號的標籤 如何去除頑固污漬。 1 .- 控制板面 2 .- 機蓋 3 .- 滾桶 4 .- 洗衣劑抽屜 5 .- 底板 5 .- 過濾網 內容 安全的措施 設置 - 安裝 準備清洗衣物。打開 / 關閉滾桶 放入洗衣劑 電子裝置 - 控制不同洗衣量 - 快思邏輯 面板詳述...
- Page 27 •製造商所有的機器符合與地線連接。 確保用電的安裝有連接地線 ; 如不是,請召喚一個合規格 的服務中心。 連接地線對使用者安全是有需要的 , 因為此可減少漏電的 風險。 •電插座應設置在洗衣機容易 接的地方,萬一有任何問 題可即時拔除。 •如果電線損壞更換要由製造商或官方售後服務所提供原 本的一套(電線和插頭)。 備註 : 當發生事故需要更換電線期間,請確保遵從以下顏色代碼 圖連接 : 藍色 中線 啡色 火線 黃綠色 地線 製造商概不負責未能遵守該設備的安裝和安全規則所造 。 成人或事物的任何損害 •濕手或腳請不要觸摸電器。 •請不要赤腳使用洗衣機。 •請小心使用延長線。 •不要使用連接器或多個插頭。 •不要讓兒童或體弱者在缺乏應有的監督下使用。 •不要拉扯電源線或洗衣機本身,以從插座移除插頭。 •不要遺棄洗衣機在戶外或暴露於大氣成分(雨,太陽, 等等)。 •當洗衣機正在運行中,不要用布或塑膠覆蓋著。 •不要安裝本產品在潮濕的地方或任何可能淋浴噴灑到 的地方。 •不要安裝洗衣機在表面上會妨礙地面之間的空間及機 器的底部。...
- Page 28 設置 - 安裝 除去包裝 由螺絲夾移除 4 個螺絲 更換 4 個螺絲 (A) 和安 • • • (A) 及 4 個螺絲 (B)。 放所提供的裝飾 (D)。 如果你的型號提供了此功能: 放置保護片於圖中所示。 1 .- 洗衣機有滑輪手推車。 2 .- 洗衣機沒有滑輪手推車。 重要 : 在這時不要開啟水龍頭。 •洗衣機應用機器 ( 內桶 ) 所提供新的膠管接駁到水 源。不要使用舊膠管接駁。 •使用肘部曲頭,連接水管一端至電磁閥(洗衣機頂 部後方),另一端連接水龍頭或直徑...
- Page 29 如你的型號提供此功能; •要移動洗衣機很容易,打開手推車槓桿到右面。一 旦你完成了移動的,把槓桿推回到原來的位置。 •使用洗衣機的前機腳調較水平。 a) 順時針轉動螺絲帽鬆開機腳螺絲。 b) 旋轉機腳升高或降低,直至它平穩安放在地面上。 c) 逆時針方向轉動螺絲帽鎖定機腳位置,直到它碰上 了洗衣機的底部。 檢查洗衣機是否平穩。 試圖同一時間移動洗衣機頂部斜對面角落,檢查洗衣 機是否移動。 •如果您將洗衣機從一個地方移到另一個地方,你必 須再次調校機腳。 •連接洗衣機...
- Page 30 準備洗衣 - 打開 / 關閉滾桶 注意 : 確保小心地打開和關閉滾桶,否則會損壞洗衣機或洗 衣物。 確保機門完全關閉好。 ˙ 放入衣物...
- Page 31 放入洗衣劑 最高量主要洗衣粉 最高量預洗洗衣粉 建議用量 最高量主要洗衣液 最高量香味劑 洗衣劑的儲存格層分為三格: - 格層 I - 預洗器皿 ( 粉沫 ) - 格層 II - 清洗器皿 ( 粉沫或液體 ) - 格層 - 是織物柔順劑,香味劑和特殊添加劑,如澱粉,藍色漂白劑等。 清洗劑的儲存有兩個參考標記: - 建議用量(下參考標記)。表示預洗和主清洗的洗衣液建議用量。 - 最高量 這表示了最高水平,絕不應超越。 重要事項: - 不要使用洗衣液用於一個預洗整個過程和 / 或定時啟動的程式。 - 當衣服污漬是目前需用漂白劑液體產品處理,您可以用開洗衣機進行初步的清洗。為 此:介紹了漂白產品中的“格層Ⅱ” ,並設置清洗程式。當完成後程式設置到關閉位置,...
- Page 32 面板詳述...
- Page 39 溫度 設定 使用衣粉 最多 洗衣量 ℃ 程式 千克 20° 20° Eco 20°C Baby 60°C 60° 60° 40° 40° Daily 59 Rapid 30 30° 30° Rapid 14 30° 30° Dark Colours 40° 40° Auto Clean Rinse Drain & Spin Shirts 30° 30°...
- Page 40 P T L71 4 5 D 技术资料型号 Amp. rating EN60456 EN60456 220-230V. 0,05-0,8 175 W. 400 W. 30 W. 1950 W. 2150 W. 10 A. 0,75 Kw. 1300 1500 52 L. 50Hz.
- Page 41 Eco 20°C Baby 60°C Daily 59 Rapid 30 Rapid 14 Dark Colours Auto Clean...
- Page 42 Rinse Drain & Spin Shirts Lingerie Wool & Silk Delicates Mixed...
- Page 43 一般建議 清潔過濾網 洗衣機設有特別過濾網隔阻大物件,它位於機器背後的前面板底座,它們會阻塞排水管,如 錢幣,衣鈕等。這樣可容易隔除。 提議最好清潔過濾網當洗衣機未能適當沖洗衣服及它不能正常排出污水。 有需要清潔過濾網時, 過程如下; 用底部作托盤收集過濾網流出的水。 移除和清潔過濾網。 清潔後,重置過濾網以反次序重覆以上步驟。...
- Page 44 清潔洗衣劑抽屜和格層...
- Page 45 排除疑難 故障 原因 處理 1. 程式不能開始 電源插頭沒有插進插座 插回插頭 ● ● 主要電掣沒有開動 開動主要電掣 ● ● 沒有電源 檢查 ● ● 電路保險絲斷毀 檢查 ● ● 打開了機門 關好機門 ● ● 2. 不能注水 參考故障 1 檢查 ● ● 注水水龍頭關掉 開啟注水水龍頭 ● ● 3. 不能排水 排水管淤塞了 檢查過濾網...
- Page 46 清洗貼士...
- Page 48 20.10.2015/M-43011300...
Need help?
Do you have a question about the PTL7145D and is the answer not in the manual?
Questions and answers