
Related Manuals for CEWAL enjoy


Summary of Contents for CEWAL enjoy
- Page 1 Il comfort in un clic USER MANUAL For installation and immediate start-up use the QUICK GUIDE MEASURING INSTRUMENTS TO CONTROL T E M P E R AT U R E A N D P R E S S U R E...
-
Page 2: Table Of Contents
INDEX PRESENTATION OF ENJOY ............4 – Outer dimensions ..............4 – Device description..............4 – Control elements ..............5 – Electrical connections ..............6 – Display – icon meanings............6 – Technical features..............8 – Reference standards ..............8 – Versions ...................8 – Additional probe (optional) ............9 INSTALLATION ................9... - Page 3 – PROGRAM menu for setting automatic (programmed) operation parameters ............21 – Temperature setpoint value settings for comfort, economy, frost ...............22 – Choice of using ENJOY as daily or weekly Chrono ....23 – PROG 24H programming ENJOY as a daily thermostat ............24 – PROG WK programming ENJOY as a weekly thermostat ............25...
-
Page 4: Presentation Of Enjoy
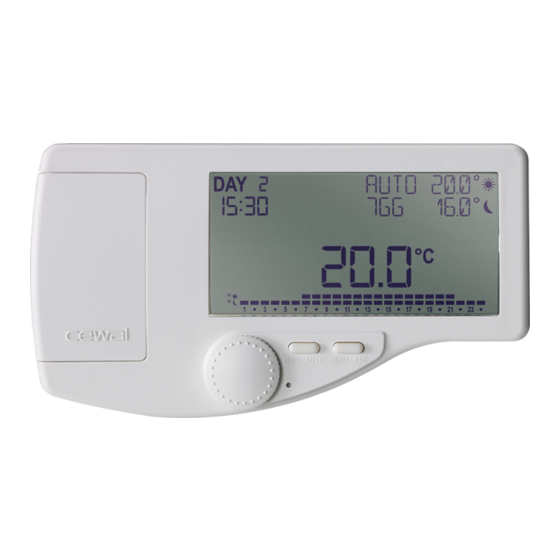
PRESENTATION OF ENJOY OUTER DIMENSIONS DEVICE DESCRIPTION display MENU•ESC key MAN•AUTO key selector battery reset key (turn and click) compartment - 4 -... -
Page 5: Control Elements
By pressing the knob (click) you confirm the highlighted option. RESET key: you can access by inserting a point in the hole. By pressing you take ENJOY back to the factory settings. - 5 -... -
Page 6: Electrical Connections
ELECTRICAL CONNECTIONS DISPLAY – ICON MEANINGS - 6 -... - Page 7 Selector (turn and click knob). Turn to choose, press (click) to confirm. OFF-FROST. The frost function stays active. Language choice Clock - set hours, minutes, day of the week. Programming Advaced Manual function mode Controls blocked with password Low batteries signal WINTER - Heating active SUMMER - Air conditioner active COMFORT setpoint...
-
Page 8: Technical Features
TECHNICAL FEATURES - power supply: two AA LR6 1.5 V batteries - battery duration: one year minimum - adjustable temperature 5 ÷ 35 °C - measurable temperature -10 ÷ +50 °C - storage temperature -20 ÷ +70 °C - frost function (adjustable +1 ÷ +10 °C) - relative humidity 10 ÷... -
Page 9: Additional Probe (Optional)
ADDITIONAL PROBE (OPTIONAL) An external probe can be connected (AUX input) to ENJOY, which can be used for the simple indication of a temperature different to that detected by ENJOY’s internal probe, or for adjustment, as an alternative to the internal probe (see page 34). -
Page 10: Fitting
FITTING 1. Free the case from the base using a screwdriver on the lower clip and pulling it upwards. 2. Using the screws and plugs supplied fix the base to the wall (or onto the electrical system’s junction box prepared for the purpose) after having passed the wires through the slot. -
Page 11: Batteries
ENJOY is installed in a second home. A specific procedure for displaying the batteries’ charge state is available from ADVANCED SETTINGS (see page 44). -
Page 12: Quick-Start Sequence
- by pressing the left key this will take ENJOY back to the initial mode -M1- - by pressing the right key will take you to the previous... - Page 13 Screen -M2- from -M2- turn and click to set the language and move automatically to -M3- Screen -M3- from -M3- turn and click to set the hour and move automatically to -M4- Screen -M4- from -M4- turn and click to set the minutes and move automatically to -M5- - 13 -...
- Page 14 Screen -M5- from -M5- turn and click to set the day of the week and move automatically to -M6- Screen -M6- from -M6- turn and click to set WINTER or SUMMER and move automatically to -M7- Screen -M7- Standard manual operation mode - 14 -...
- Page 15 Having completed this initial Quick-Start sequence, ENJOY is in -M7- that is its standard manual operation mode where the elements just set such as day, hour and minutes appear. In manual mode, recognizable through the specific icon on the display...
-
Page 16: Turning Off And Restarting
TURNING OFF AND RESTARTING TURNING OFF When ENJOY is turned off it goes into stand-by during which the temperature is still monitored and the frost function kept active at the default temperature (6 °C) or at that set by you (see page 22/23). -
Page 17: Operation In Manual Mode
5 °C is set, then click In all cases once ENJOY returns to being active it will return to the same operating mode it was in before being turned off. OPERATION IN MANUAL MODE... -
Page 18: Operation In Automatic (Programmed) Mode
Many other parameters than those mentioned can be set individually. They can be seen in detail further ahead in this User Manual. - During operation in programmed mode you can use ENJOY’s following controls: - with the left key you can go to manual mode... -
Page 19: Setup
FIRST LEVEL SETTINGS SETUP MENU The Quick-Start procedure lets you operate ENJOY and you have learnt how to use the left key to switch between automatic (programmed) mode and the manual one. - Page 20 LANGUAGE that lets you change the menu language that lets you turn ENJOY off from the menu (page 28) You can click on to choose the one that interests you.
-
Page 21: Operation Parameters
PROGRAM MENU FOR SETTING AUTOMATIC (PROGRAMMED) OPERATION PARAMETERS This menu will guide you in customizing ENJOY’s operation in the 24 hours during the seven day week. It allows you to choose the three levels at which you want to set the three operating temperatures COMFORT, ECONOMY, FROST in advance. -
Page 22: Economy, Frost
SET TEMP that will guide you in setting the three temperature levels PROG 24H that will guide you in setting ENJOY as a daily chronothermostat PROG WK that will guide you in setting ENJOY as a weekly chronothermostat Make your choice by pressing (click) -
Page 23: Choice Of Using Enjoy As Daily Or Weekly Chrono
CHOICE OF USING ENJOY AS DAILY OR WEEKLY CHRONO In the previous steps, you’ve chosen the three temperature levels that best suit your needs. Now you can programme ENJOY to switch between one temperature and another at various times of the day and on different days of the week according to your own schedule and lifestyle. -
Page 24: Prog 24H Programming Enjoy As A Daily Thermostat
P1, P2 … P7 will be scrolled and at the same time, the bar graph showing the temperatures over that programme’s 24-hour period will appear. Once you have chosen the programme you prefer you can save it with a click . Enjoy will come back to the last operational mode. - 24 -... -
Page 25: Prog Wk Programming Enjoy As A Weekly Thermostat
ENJOY AS WEEKLY CHRONOTHERMOSTAT PROG WK PROGRAM If you have chosen from the menu, you will be before the following screen: Screen -M10.3.1- PROG 7GG allows you to view the programmes associated with each day of the week and if necessary to change this association. - Page 26 Screen -M10.3.1.1- Now by turning you will see scrolled in field 16 on the display (see page 6), the programme names P1, P2 … P7 and at the same time, each programme’s bar graph showing the temperatures over that programme’s 24 hour period will appear. Once you have chosen the programme you prefer you can save it with a click and you will have created the new association...
-
Page 27: Winter/Summer Season Change
-M10- (page 20) you will enter the WINTER/SUMMER setting that you have already used during the Quick-Start procedure and which, if you use ENJOY both for heating and air conditioning, you should use at each season change, entering from this menu. -
Page 28: Language Change
OFF FOR SHUTDOWN SETTINGS SETUP From the settings menu -M10- (page 20), to turn off the device, turn the selector in the second character row and click. For more information on turning off and restarting ENJOY (see page 16). - 28 -... -
Page 29: Advanced Menu To Switch To Advanced Settings
ADVANCED SETTINGS The advanced menu that is activated from screen -M10- SETUP (page 20) will let you carry out many further settings. SETUP ADVANCED From by choosing and confirming turning and clicking you will be presented the following screen: Screen -M13.1- Where the two character rows indicate the setting you can make from that screen. -
Page 30: Alter Default Programmes
PROBE INNER Control probe selection Selecting temperature unit of TEMPERA. CELSIUS measurement Keypad lock and unlock with PASSWORD BLOCK password AUTO SAVE-YES AUTO - SAVE function Winter/summer working WIN 0000 SUM 0000 hours display Battery charge percentage BATTERY display ALTER DEFAULT PROGRAMMES CHANGE PROGRAM You saw in programming that seven programmes could be used... - Page 31 and you have to click again to confirm that you wish to operate on this menu. This other screen will appear: Screen -M13.1.1- In which field 16 (see page 6) shows you the programme name and its bar graph. By turning the selector you will see the various programme names scrolled P1, P2 …...
- Page 32 change blink, and then click Now by turning the selector you will notice that in the sector concerned, first the basic square blinks (ECONOMY), then the highest one (COMFORT) then alternately the lowest and highest square (FROST). By clicking during one of the three active modes, you choose the temperature level corresponding to that sector and then the cursor passes to the next segment.
-
Page 33: Differential Intervention Change
INTERNAL TEMPERATURE PROBE CORRECTION ADJPROBE INNER You might want ENJOY to regulate your room temperature not to the actual temperature at which the internal probe is calibrated but, for example, based on the temperature perceived by you - 33 -... -
Page 34: Auxiliary Input - Outer Probe
AUXILIARY INPUT – EXTERNAL PROBE INPUT EXTPROBE ENJOY is prepared for the connection of a second probe, external to the device. This probe’s function could be the simple detection of the temperature of a place different to that where you installed ENJOY, for example outside the home or another room. - Page 35 Screen -M16- This probe can however also act as a control probe as an alternative to ENJOY’s internal one. See later in detail, the parameter “Control probe selection” (see page 37). The parameter that you are dealing with now “Enabling external probe”...
-
Page 36: External Probe Temperature Correction
Screen -M13.4- The actual parameter value appears in the second character EXTPROBE row (default if you have not yet changed it). If you wish to change it click to enter the menu. If you wish to proceed with the change turn the selector EXTPROBE until the desired value is found ( ) and... -
Page 37: Control Probe Selection
(see above parameter “Outer probe activation”). If you decide to use the external probe to regulate ENJOY, once you have completed the selection procedure you are dealing with, the display will show at the beginning of the character rows: 16.0... - Page 38 Screen -M17- SETUP PROCEDURE: From the settings menu, using the ADVANCED selector select and click . Turn the selector until you find the next screen. Screen -M13.6- On the second character row the actually set parameter appears INNER default setting if you have not already altered it). If you wish to alter it click to enter the menu.
-
Page 39: Changing Temperature Unit Of Measurement
CHANGING TEMPERATURE UNIT OF MEASUREMENT TEMPERA. CELSIUS This parameter lets you decide whether you want the temperature display in degrees Celsius (default) or in degrees Fahrenheit. SETUP PROCEDURE: From the settings menu, select and click ADVANCED . Turn the selector until you find the next screen. -
Page 40: Keypad Block And Unblock With Password
KEYPAD BLOCK AND UNBLOCK WITH PASSWORD PASSWORD BLOCK This parameter allows you to block ENJOY’s controls and unblock them with a password so that they cannot be used accidentaly or by unauthorized persons (typical of public places). If you try to... - Page 41 ENJOY is unblocked. In case you have forgotten the password you will have to reset ENJOY (see page 4/5). It’s therefore a good idea to memorize your password if you intend using the control block. You could use the box below.
-
Page 42: Autosave Function
AUTOSAVE FUNCTION AUTO SAVE-YES You are by now familiar with the use of and clicking to confirm the choice should come naturally. However this parameter, activated by default, means that if you select a parameter without then clicking within 10”, the parameter will still be saved. -
Page 43: Winter/Summer Working Hours Display
WINTER/SUMMER WORKING HOURS DISPLAY WIN 0000 SUM 0000 for statistical or control reasons, you may want to know how many hours ENJOY has asked your system to provide heat (or conditioning). You can discover it with this function. SETUP PROCEDURE: From the settings... -
Page 44: Battery Charge Percentage Display
Screen -M13.11- On the second character row the display will show you the DEPLETED battery’s state of charge. It will show when the charge is less than that necessary for ENJOY’s proper function. - 44 -... -
Page 45: Check Relay Connections
CN-RELAY appear on the display: - if the discharged battery icon is lit replace the batteries - check that ENJOY’s body and base are properly clipped together - make sure that oxide or foreign bodies (dust, paint, cement etc.) have not isolated the four moving contacts electrically connecting ENJOY’s body with the base. -
Page 46: Daily Preset Programmes (Changeable)
DAILY PRESET PROGRAMMES All daily preset programmes may be altered if need be (see page 30). - 46 -... - Page 48 CEWAL S.p.a. Via Gramsci, 42 30010 Camponogara (VE) Italy Tel. +39 041 462155 Fax +39 041 4174282 cewal@cewal.com www.cewal.com...
Need help?
Do you have a question about the enjoy and is the answer not in the manual?
Questions and answers