Sign In
Upload
Download
Table of Contents
Contents
Add to my manuals
Delete from my manuals
Share
URL of this page:
HTML Link:
Bookmark this page
Add
Manual will be automatically added to "My Manuals"
Print this page
×
Bookmark added
×
Added to my manuals
Manuals
Brands
Snapper Manuals
Chainsaw
XD Series
Owner's manual
Snapper XD Series Owner's Manual
Cordless chain saw
Hide thumbs
Also See for XD Series
:
Owner's manual
(87 pages)
,
User manual
1
2
3
4
5
6
7
8
9
10
11
12
13
14
15
16
17
18
19
20
21
22
23
24
25
26
27
28
29
30
31
32
33
34
35
36
37
38
39
40
41
42
43
44
45
46
47
48
49
50
51
52
53
54
55
56
57
58
59
60
61
62
63
64
65
66
67
68
69
70
71
72
73
74
75
76
77
78
79
80
81
82
83
84
85
86
87
88
89
90
91
92
93
94
95
96
97
98
99
100
101
102
103
104
105
106
107
108
109
110
111
112
113
114
115
116
117
118
119
120
121
122
123
124
125
126
127
128
129
130
131
132
133
134
135
136
137
138
139
140
141
142
143
144
145
146
147
148
149
150
151
152
153
page
of
153
Go
/
153
Contents
Table of Contents
Troubleshooting
Bookmarks
Table of Contents
English
Table of Contents
Important Safety Instructions
Symbols
Know Your Chainsaw
Assembly
Operation
Battery&Charger
Maintenance
Environmentally Safe Battery Disposal
Troubleshooting
Limited Warranty
Exploded View
Important Safety Instructions
Symbols
Know Your Hedge Trimmer
Assembly
Operation
Battery & Charger Maintenance
Maintenance
Environmentally Safe Battery Disposal
Troubleshooting
Limited Warranty
Exploded View
Parts List
Important Safety Instructions
Symbols
Know Your Charger
Operation
Maintenance
Troubleshooting
Limited Warranty
Français
Consignes de Sécurité Importantes
Symboles
Veiller À Bien Connaître Votre Chargeur
Utilisation
Entretien
Dépannage
Garantie Limitée
Español
Instrucción de Seguridad Importante
Símbolos
Familiarícese con Su Cargador
Funcionamiento
Mantenimiento
Solución de Problemas
Garantía Limitada
Important Safety Instructions
Symbols
Know Your Battery
Operation
Maintenance
Troubleshooting
Environmentally Safe Battery Disposal
Limited Warranty
Consignes de Sécurité Importantes
Symboles
Familiarisez-Vous Avec Votre Batterie
Utilisation
Entretien
Dépannage
Mise Au Rebut de la Batterie de Façon Écologique
Garantie Limitée
Instrucción de Seguridad Importante
Símbolos
Conozca Su Batería
Funcionamiento
Mantenimiento
Solución de Problemas
Eliminación Segura de la Batería
Garantía Limitada
Advertisement
Quick Links
1
Know Your Chainsaw
2
Assembly
3
Battery&Charger
4
Maintenance
5
Troubleshooting
6
Maintenance
7
Parts List
8
Maintenance
Download this manual
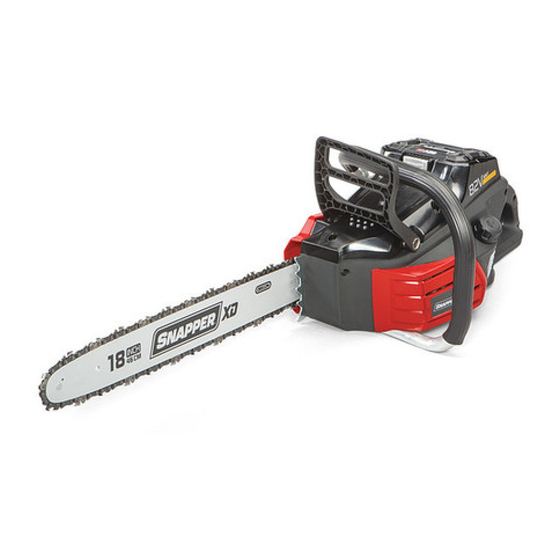
82V CORDLESS CHAIN SAW
1696773
(SXDCS82)
Owner's Manual
TOLL-FREE hELPLinE: 1-800-317-7833
www.snapper.com
Read all safety rules and instructions carefully before operating this tool.
Table of
Contents
Previous
Page
Next
Page
1
2
3
4
5
Advertisement
Chapters
English
2
Français
85
Español
99
Table of Contents
Troubleshooting
Troubleshooting
38
Troubleshooting
62
Troubleshooting
80
Troubleshooting
121
Need help?
Do you have a question about the XD Series and is the answer not in the manual?
Ask a question
Questions and answers
Related Manuals for Snapper XD Series
Vacuum Cleaner Snapper XD Series Owner's Manual
82v wet / dry vacuum (87 pages)
Snapper XD Series, 1688061, 80083157, SXDWSV82K Manual
(article)
Chainsaw Snapper SC60V Instruction Manual
60v cordless chainsaw (49 pages)
Chainsaw Snapper S1634 LE, S1838 LE Instruction Manual
Poulan chain saw instruction manual (19 pages)
Chainsaw Snapper XD ESXDCS82 User Manual
82v cordless chain saw (412 pages)
This manual is also suitable for:
Sxdcs82
1696773
Table of Contents
Print
Rename the bookmark
Delete bookmark?
Delete from my manuals?
Login
Sign In
OR
Sign in with Facebook
Sign in with Google
Upload manual
Upload from disk
Upload from URL


Need help?
Do you have a question about the XD Series and is the answer not in the manual?
Questions and answers