Snapper XD Series, 1688061, 80083157, SXDWSV82K Manual
- Owner's manual (87 pages) ,
- Owner's manual (153 pages)
Advertisement
SPECIFICATIONS
 Read all safety rules and instructions carefully before operating this tool.
82V LITHIUM-ION WET / DRY VACUUM
Type: Cordless, battery-operated
Motor: 82V*
Tank size: 9 us gal. (34 L)
Air volume: 70 CFM
Suction: 15 kPa (1530 mm wc)
Hose: 6' (2 m)
Weight (Without Battery): 17.4 lbs. (7.9 kg)
Disclaimer: *Maximum initial battery voltage (measured without a workload) is 82 volts. Nominal voltage is 72.
For household use only.
The recommended ambient temperature range:
| Item | Temperature |
| Machine storage temperature range | -4°F (-20°C) - 158°F (70°C) |
| Machine operation temperature range | -4°F (-20°C) - 104°F (40°C) |
| Machine charging temperature range | 39°F (4°C) - 104°F (40°C) |
| Battery charging temperature range | 39°F (4°C) - 104°F (40°C) |
| Charger operation temperature range | 39°F (4°C) - 113°F (45°C) |
| Battery storage temperature range | 1 year: 32°F (0°C) - 73°F (23°C) |
| 3 months: 32°F (0°C) - 113°F (45°C) | |
| 1 months: 32°F (0°C) - 140°F (60°C) | |
| Battery discharging temperature range | 6.8°F (-14°C) - 113°F (45°C) |
SAVE THESE INSTRUCTIONS
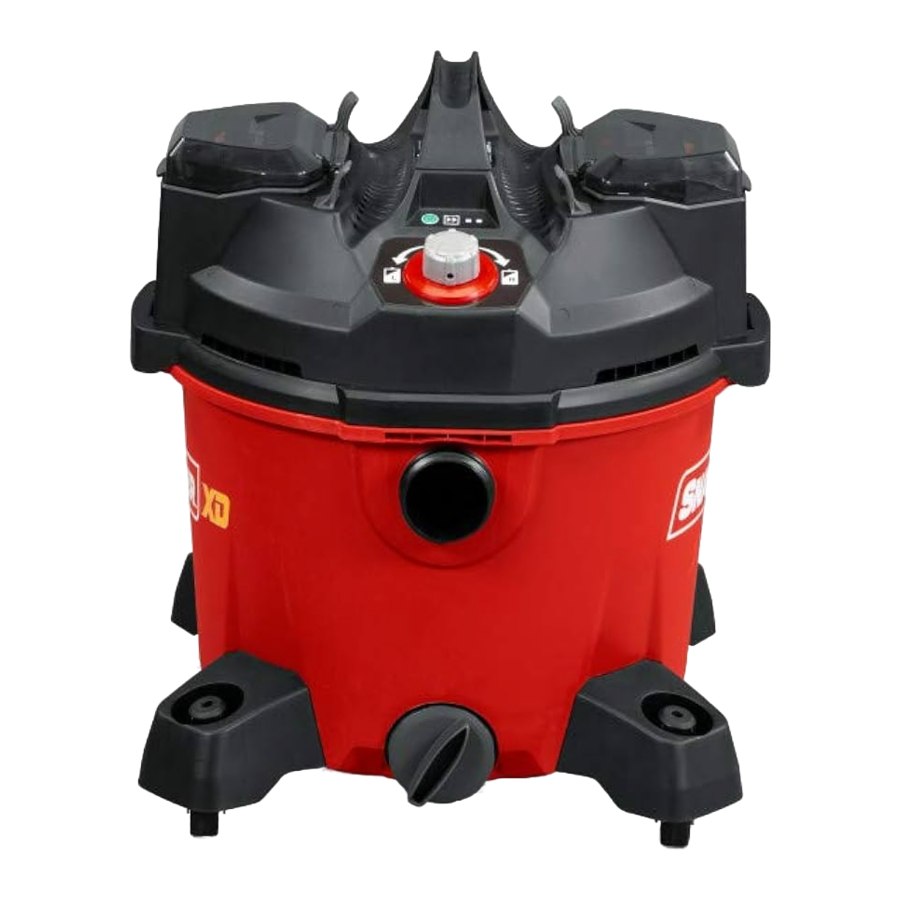
KNOW YOUR VACUUM CLEANER

- Handle
- Switch
- Battery door
- Collection tank
- Drain cap
- Vacuum port
- Wheel assembly
- Blowing port
- Latch
- Accessory holder
ASSEMBLY
UNPACKING
- This product requires assembly.
- Carefully remove the product and any accessories from the box. Make sure that all items listed in the packing list are included.
- Inspect the product carefully to make sure no breakage or damage occurred during shipping.
- Do not discard the packing material until you have carefully inspected and satisfactorily operated the product.
- If any parts are damaged or missing, please call 1-800-317-7833 for assistance.

If any parts are damaged or missing, do not operate this product until the parts are replaced. Use of this product with damaged or missing parts could result in serious personal injury.
Do not attempt to modify this product or create accessories not recommended for use with this vacuum cleaner. Any such alteration or modification is misuse and could result in a hazardous condition leading to possible serious personal injury.
ASSEMBLING THE WHEELS
(See Figure 1.1-1.3)
- Align the wheel assembly with the vacuum assembly and slide it into place.

- Insert the screw and tighten with screwdriver (not included).


- Repeat the above steps for the other three wheel assemblies.
![]()

ASSEMBLING THE ACCESSORY HOLDER
(See Figure 2.1-2.2)
- Align the accessory holder with the tank and slide it into place.

- Insert the screws and tighten with a screwdriver (not included).

Fig. 2.2


FILTER REMOVAL AND INSTALLATION
(See Figure 3.1-3.4)
Filter Removal:
- Press the latch on both sides of the top cover assembly then lift it up.

- Turn the top cover assembly upside down.
- Remove the sponge.
- Turn the filter cap counterclockwise.
- Slide the filter off.


Filter Installation:

- Press the latch on both sides of the top cover assembly then lift it up.
- Put the sponge on the filter.
- Align the filter with the filter cage.
- Slide the filter on the filter cage.
- Turn the filter cap clockwise.
- Tighten the filter cap.
INSERTING THE HOSE
(See Figure 4)
- Align either of the grooves in the tube with the tabs on the hose.


- Insert the locking end of the hose into the port on the collection tank and turn clockwise to lock into place.
- Insert your desired accessory onto the end of the hose securely.
Included Accessories: Hose, (2) extension tubes, floor tool, brush tool, and crevice tool.
OPERATION
Do not allow familiarity with this product to make you careless. Remember that a careless fraction of a second is sufficient to inflict serious injury.
Do not use any attachments or accessories not recommended by the manufacturer of this product. The use of attachments or accessories not recommended can result in serious personal injury.
INSTALLING THE BATTERY PACK
(See Figure 5)

- Open the battery door.
- Align the lift ribs on the battery pack with the grooves in the battery compartment.
- Hold the machine firmly.
- Push the battery pack into the battery compartment until the battery pack locks into place.
- When you hear a click, the battery pack is properly installed.
REMOVING THE BATTERY PACK
(See Figure 6)

NOTE: The battery fits into the unit snugly in order to prevent accidental dislodging. It may require a strong pull to remove it.
- Open the battery door.
- Push and hold the battery release button.
- Remove the battery pack from the machine.
Make sure that the battery doors are locked into place or the machine will not start.
STARTING AND STOPPING
(See Figure 7)

- Press the power button.
- Turn the switch to the corresponding battery to be used. Note that a battery must be present in that location for the unit to function.
- Turn the switch to the center position and press the power button to turn off the machine.
- Press the speed control to adjust the suction power.
NOTE: If the switch is turned to the center position the suction stops but the machine is still powered on. The unit will remain on for a certain period of time without use or will turn off if the user presses the power button.
NOTE: The machine is built with a thermal protector to stop the motor when overload occurs. It's a device calibrated to open the motor circuit upon reaching a certain temperature/current. Re-setting the protector requires both cool down below the calibration point and removal of battery packs. When the protection happens, the operator should turn off the machine and remove the battery packs immediately, then restart operation after at least 30 minutes.
BLOWING FEATURE
(See Figure 8)

The vacuum can blow sawdust and other debris. Do the steps below to use your machine as a blower.
- Insert the hose into the blowing port.
- Insert the desired accessory into the end of hose.
- Start the machine.
Do not put any object into the openings when you use the machine as a blower. Do not use with any opening blocked. Keep free of dust, lint, hair, and anything that may reduce air flow.
VACUUMING TIPS
- The filter must always be in the correct position at all times to avoid leaks and possible damage to the motor.
- When using your machine to pick up fine dust, it will be necessary for you to empty the collection tank and clean the filter at more frequent intervals to maintain peak vacuum performance.
- The filter must be dried to avoid possible mildew and damage to the filter after you use the machine to pick up liquids.
- Leave a gap at the tip of the nozzle opening to allow air inflow when you vacuum large quanties of liquids.
- When the collection tank reaches the maximum capacity, the suction action will stop. When this happens, turn off the machine, turn the drain cap to drain the liquid.
MAINTENANCE
EMPTYING THE COLLECTION TANK
The collection tank must be emptied when it is full. Every now and then the dust collection tank and the filter need to be cleaned to maintain a high suction power.
- Turn off the machine.
- Remove the battery packs.
- Remove the top cover assembly.
- Dump the collection tank contents into the proper waste disposal container.
GENERAL MAINTENANCE
- Before each use, inspect the entire product for damaged, missing, or loose parts such as screws, nuts, bolts, caps, etc. Tighten securely all fasteners and caps and do not operate this product until all missing or damaged parts are replaced.
- Avoid using solvents when cleaning plastic parts. Most plastics are susceptible to damage from various types of commercial solvents and may be damaged by their use. Use clean cloths to remove dirt, dust, lubricant, grease, etc.
- Always store the machine clean and in a dry enclosure with the battery charged.
FILTER CLEANING
Your filter should be cleaned often to maintain peak vacuum performance. Allow the filter to dry before storing or picking up debris.

After cleaning, check the filter for tears or small holes. Do not use a filter with holes or tears in it. Even a small hole can allow dust to come out of your vacuum. Replace it immediately.
Cleaning A Dry Filter
- Cleaning should be done outdoors and not in the living quarters.
- You can use a small brush to clean the dust and debris.
- For thorough cleaning of dry filter with fine dust (no debris), run water through it as described under "Cleaning A Wet Filter"
Cleaning A Wet Filter
- Remove the filter from the machine.
- Run water through the filter from a hose or spigot.
NOTE: Check the filter for tears or small holes after cleaning. Do not use a filter with holes or tears in it. Even a small hole can allow dust to come out of your machine. Replace it immediately.
TROUBLESHOOTING
| PROBLEM | CAUSE | SOLUTION |
| The machine doesn't work. | The switch or motor is defective. | Contact customer service. |
| Dust discharges from exhaust. | The filter has damage. | Replace the filter. |
| The filter isn't installed. | Properly reinstall the filter. | |
| Filter clogged or dust is too fine. | Clean or replace the filter. | |
| The filter is not functional. | Clean or replace filter. | |
| The filter is clogged. | Clean or replace filter. | |
| Loss of suction | The hose connection is loose. | Tighten the hose connection. |
| The filter is clogged. | Clean or replace the filter. | |
| The collection tank is full. | Empty the collection tank. | |
| The hose has damage. | Replace the hose. | |
| Static shock | Dry environment | Add moisture to air (if practical, use a console or installed humidifier) |
EXPLODED VIEW

PARTS LIST
| ITEM NO. | PART NO. | DESCRIPTION | CONTEXT NOTE | QTY |
| 1 | 84004845 | BRACKET, Hose | 4 | |
| 2 | 84004846 | KIT, Battery Release | 1 | |
| 3 | 84004847 | RETAINER, Filter | 1 | |
| 4 | 84004848 | FILTER, Cartridge | 1 | |
| 5 | 84004849 | KIT, Filter Cage | 1 | |
| 6 | 84004850 | KIT, Cover | 1 | |
| 7 | 84004851 | KIT, Handle | 1 | |
| 8 | 84004852 | KIT, Inlet Deflector | 1 | |
| 9 | 84004853 | KIT, Cover, Drain | 1 | |
| 10 | 84004854 | KIT, Caster Wheel | 4 | |
| 11 | 84004855 | KIT, Hose | 1 | |
| 12 | 84004856 | WAND, Extension | 1 | |
| 13 | 84004989 | KIT, Cleaning | (Optional) | 1 |
| 14 | 1760266 | BATTERY, 2.0, 82V NA | (Optional) | 1 |
| 15 | 1760263 | CHARGER, Battery, NA | (Optional) | 1 |
IMPORTANT SAFETY INSTRUCTIONS
Read all safety warnings and all instructions. Failure to obey the warnings and instructions may result in electric shock, fire, and/or serious injuries.
To Reduce The Risk Of Electric Shock – Do not expose to rain. Store indoors.
Save all warnings and instructions for future reference.
The term "power tool" in all of the warnings listed below refers to your battery-operated (cordless) power tool.
- Do not charge the tool outdoors.
- Do not allow power tools to be used as a toy. Close attention is necessary when used by or near children.
- Use only as described in this manual. Use only manufacturer's recommended attachments.
- If tool is not working as it should, has been dropped, damaged, left outdoors, or dropped into water, return it to a service center.
- Do not handle the battery or the tool with wet hands.
- Keep hair, loose clothing, fingers and all body parts away from openings and moving parts.
- Use extra care when cleaning on stairs.
- Do not operate the tool in an explosive atmosphere, such as in the presence of flammable liquids, gases, or dust. Tools create sparks that may ignite the dust or fumes.
- Store indoors. Do not expose to rain or water. Avoid direct sunshine.
- Never allow children to operate the tool.
- Never allow adults to operate the tool without proper instruction.
- Wear heavy long pants, boots, and gloves. Avoid loose garments or jewelry that could get caught in moving parts of the tool or its motor.
- Do not force tool. Use the correct tool for your application. The correct tool will do the job better and safer at the rate for which it is designed.
- Keep firm footing and balance. Do not overreach. Overreaching can result in loss of balance.
- Do not use the tool if the switch does not turn it ON or OFF. Any tool that cannot be controlled with the switch is dangerous, and must be repaired.
- Do not operate this tool when you are tired, ill, or under the influence of alcohol, drugs, or medication.
- Do not operate in poor lighting. Do not use to pick up flammable or combustible liquids, such as gasoline, or use in areas where they may be present.
- Do not pick up anything that is burning or smoking, such as cigarettes, matches, or hot ashes.
- Do not use without collection tank, or tubes in place (if applicable).
- Do not handle battery pack or tool with wet hands.
- Do not use without dust bag and/or filters in place.
- Disconnect the battery pack from the tool before making any adjustments, changing accessories, or storing tool. Such preventive safety measures reduce the risk of starting the tool accidentally.
- Always turn off this tool before connecting or disconnecting either hose.
- Do not modify or attempt to repair the tool or the battery pack (as applicable) except as indicated in the instructions for use and care.
BATTERY TOOL USE AND CARE
- Do not use battery-operated tool in rain.
- Turn off all controls before removing the battery.
- Recharge only with the charger specified by the manufacturer. A charger that is suitable for one type of battery pack may create a risk of fire when used with another battery pack.
- Use only the charger supplied by the manufacturer to recharge.
- Use tool only with specifically designated battery packs. Use of any other battery packs may create a risk of injury and fire.
- Prevent unintentional starting. Make sure that the switch is in the off-position before connecting to battery pack, picking up or carrying the tool. Carry the power tool with your finger on the switch or energize power tool that have the switch on invites accidents.
- Disconnect the battery pack from the power tool before making any adjustments, changing accessories, or storing the power tool. Such preventive safety measures reduce the risk of starting the power tool accidentally.
- When battery pack is not in use, keep it away from other metal objects like paper clips, coins, keys, nails, screws or other small metal objects that can make a connection from one terminal to another. Shorting the battery terminals together may cause burns or a fire.
- Under abusive conditions, liquid may be ejected from the battery; avoid contact. If contact accidentally occurs, flush with water. If liquid contacts eyes, additionally seek medical help. Liquid ejected from the battery may cause irritation or burns.
- Do not incinerate the tool even if it is severely damaged. The batteries can explode in a fire.
- Do not use a battery pack or tool that is damaged or modified. Damaged or modified batteries may exhibit unpredictable behavior resulting in fire, explosion or risk of injury.
- Do not expose a battery pack or tool to fire or excessive temperature. Exposure to fire or temperature above 265°F (130°C) may cause an explosion.
- Have servicing performed by a qualified repair person using only identical replacement parts. This will make sure that the safety of the product is maintained.
- Don't modify or attempt to repair the tool or the battery pack (as applicable) except as indicated in the instructions for use and care.
- Obey all charging instructions and do not charge the battery pack or tool outside of the temperature range specified in the instructions. Charging improperly or at temperatures outside of the specified range may damage the battery and increase the risk of fire.
- Use only Briggs & Stratton batteries: SB2AH82 (2.0).
- Use only Briggs & Stratton chargers: BSRC82, BSSC82.
(PROPOSITION 65)
This product contains a chemical known to the state of California to cause cancer, birth defects or other reproductive harm.
Some dust created by power sanding, sawing, grinding, drilling, and other construction activities contains chemicals known to cause cancer, birth defects or other reproductive harm. Some examples of these chemicals are:
- Lead from lead-based paints
- Crystalline silica from bricks and cement and other masonry products, and
- Arsenic and chromium from chemically treated lumber.
Your risk of exposure to these chemicals varies depending on how often you do this type of work. To reduce your exposure to these chemicals, work in a well-ventilated area, and work with approved safety equipment, such as dust masks that are specially designed to filter out microscopic particles.
SYMBOLS
Some of the following symbols may be used on this product. Please study them and learn their meaning. Proper interpretation of these symbols will allow you to operate the product better and safer.

The following signal words and meanings are intended to explain the levels of risk associated with this product.
| SYMBOLS | SIGNAL | MEANING |
 | DANGER | Indicates an imminently hazardous situation, which, if not avoided, will result in death or serious injury. |
| | WARNING | Indicates a potentially hazardous situation, which, if not avoided, could result in death or serious injury. |
 | CAUTION | Indicates a potentially hazardous situation, which, if not avoided, may result in minor or moderate injury. (Without Safety Alert Symbol) Indicates a situation that may result in property damage. |
TOLL-FREE HELPLINE: 1-800-317-7833 www.snapper.com
Documents / Resources
References
Download manual
Here you can download full pdf version of manual, it may contain additional safety instructions, warranty information, FCC rules, etc.
Download Snapper XD Series, 1688061, 80083157, SXDWSV82K Manual
Advertisement


Need help?
Do you have a question about the XD Series and is the answer not in the manual?
Questions and answers