
Related Manuals for Klarstein MasterFresh


Summary of Contents for Klarstein MasterFresh
- Page 1 MasterFresh Dampfbackofen Steam Oven Horno de vapor Four à vapeur Forno a vapore 10033284...
-
Page 3: Table Of Contents
Sehr geehrter Kunde, wir gratulieren Ihnen zum Erwerb Ihres Gerätes. Lesen Sie die folgenden Hinweise sorgfältig durch und befolgen Sie diese, um möglichen Schäden vorzubeugen. Für Schäden, die durch Missachtung der Hinweise und unsachgemäßen Gebrauch entstehen, übernehmen wir keine Haftung. Scannen Sie den folgenden QR-Code, um Zugriff auf die aktuellste Bedienungsanleitung und weitere Informationen rund um das Produkt zu erhalten:... -
Page 4: Produktdatenblatt
PRODUKTDATENBLATT Angaben nach 66/2104 Symbol Wert Einheit Modellkennung Art des Backofens Elektrobackofen 19,5 Masse des Gerätes Anzahl der Garräume Wärmequelle je Garraum (Strom Strom oder Gas) Volumen je Garraum Energieverbrauch (Strom) bei der Erhitzung einer Standardbeladung im Garraum 0,59 eines Elektrobackofens während Elektrischer kWh/Zyklus eines Zyklus im konventionellen... -
Page 5: Sicherheitshinweise
SICHERHEITSHINWEISE Allgemeine Hinweise • Waschen Sie das Gehäuse niemals mit fl ießendem Wasser ab, um die elektrischen Komponenten nicht zu beschädigen. • Lassen Sie kein Wasser oder andere Flüssigkeiten in das Gerät eindringen, um einen Stromschlag zu vermeiden. • Kinder ab 8 Jahren, psychisch und körperlich eingeschränkte Menschen dürfen das Gerät nur benutzen, wenn sie vorher von einer für Sie verantwortlichen Aufsichtsperson ausführlich mit den Funktionen und den Sicherheitsvorkehrungen vertraut gemacht wurden. - Page 6 Hinweise zum sicheren Gebrauch VORSICHT Verbrennungsgefahr! Während des Gebrauchs wird das Gerät heiß. Achten Sie darauf, dass Sie die Heizelemente im Inneren des Ofens nicht berühren und benutzen Sie Ofenhandschuhe. • Ziehen Sie vor der Reinigung den Stecker aus der Steckdose und lassen Sie das Gerät komplett abkühlen.
-
Page 7: Geräteübersicht
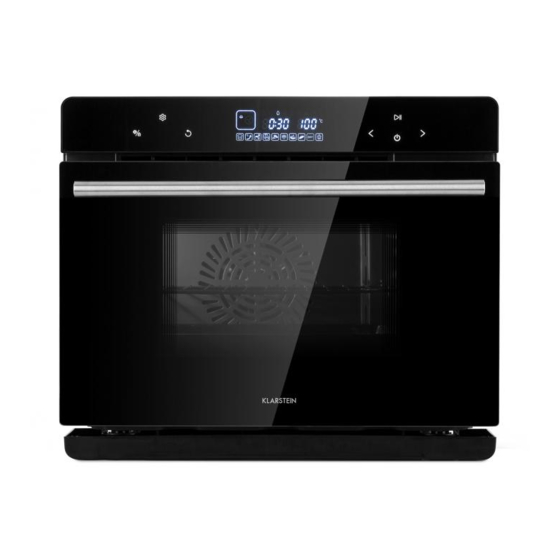
GERÄTEÜBERSICHT Bedienfeld Tür Rost Wasserwanne Backblech Gehäuse Wassertank Türverschluss Griff Ofenhandschuhe... -
Page 8: Bedienfeld Und Tastenfunktionen
BEDIENFELD UND TASTENFUNKTIONEN Licht/Kindersicherungs-Taste • Einmal drücken, um das Licht einzuschalten. Nochmal drücken, um das Licht wieder auszuschalten. • Nach dem Garen bleibt das Licht noch 3 Minuten an. • Nach dem Öffnen der Tür bleibt das Licht noch 3 Minuten an. •... -
Page 9: Displayanzeigen Und Programme
DISPLAYANZEIGEN UND PROGRAMME Zeit 88:88 Die vorderen beiden Ziffern zeigen die Stunden (0-24) an. Die hinteren beiden Ziffern zeigen die Minuten (0-59) an. Temperatur °C Einstellbarer Bereich: 30-230 °C. Timer Leuchtet wenn der Timer aktiv ist. Zeitverzögerung Zeigt eine aktive Zeitverzögerung an. Wasserstand Das Symbol leuchtet im Betrieb. - Page 10 Hohe Temperatur Warnung vor Verletzungsgefahr bei hohen Temperaturen. Fermentieren Für Teig, der vor der Verarbeitung gehen muss. Vorheizen Zum Vorheizen auf eine bestimmte Temperatur. Joghurt Programm zur Herstellung von Joghurt. Air Fryer (Fritteuse) Dieses Menü enthält 9 voreingestellte Programme und Rezepte. Trocknen und Rösten Dieses Menü...
-
Page 11: Bedienung 1
BEDIENUNG 1. Inbetriebnahme Stecken Sie den Stecker ein und drücken Sie die Ein/Aus-Taste. Es ertönt ein Piepton und alle Symbole leuchten auf, bevor das Gerät in den Standby-Modus wechselt. Hinweis: Wenn sich das Gerät länger als 3 Minuten im Einstellungsmodus befindet, ohne dass eine weitere Taste gedrückt oder eine Funktion gestartet wird, werden alle bisher vorgenommenen Einstellungen gelöscht und das Gerät wechselt in den Standby-Modus. - Page 12 Dünsten/Dampfgaren: Wenn Sie dieses Menü auswählen geht das entsprechende Symbol im Display an. Das Temperatur-Display zeigt [E-1] an, das Zeit-Display die entsprechende Arbeitszeit. Drücken Sie auf die Auswahltaste (>), um das gewünschte Programm [E-1] bis [E-9] auszuwählen (siehe MENÜS UND PROGRAMME). Drücken Sie auf die Start/Pause-Taste, um das Programm zu starten.
- Page 13 3. Arbeitszeit und Temperatur einstellen Nachdem die gewünschte Funktion ausgewählt wurde, drücken Sie die Start/Pause- Taste, um die Arbeitszeit einzustellen. Die Stundenanzeige blinkt. Drücken Sie die Auswahltaste (< >), um die Stunden einzustellen. Drücken Sie auf die Start/Pause- Taste. Die Minutenanzeige blinkt. Drücken Sie die Auswahltaste (< >), um die Minuten einzustellen.
- Page 14 Hinweis: Wenn sie ein Programm mit Dampf auswählen, leuchtet im Display das Wassertank-Symbol (siehe Bild). Während des Betriebs: • Pause: Drücken Sie auf die Start/Pause-Taste, um das Gerät während des Betriebs anzuhalten. Die Arbeitszeit wird nicht mehr weiter heruntergezählt. Das Display zeigt weiterhin die Programmdaten. Die Zeitanzeige blinkt und signalisiert, dass das Gerät gerade pausiert.
-
Page 15: Diy-Funktionsauswahl
DIY-FUNKTIONSAUSWAHL Dünsten/Dampfgaren Umluft + Oberhitze + Unterhitze Oberhitze Ober- und Unterhitze Umluft + Oberhitze Umluft Hochtemperatur-Dampfgaren (1) Dünsten/Dampfgaren Die Temperatur lässt sich in 5 °C-Schritten von 50-1 10 °C einstellen. Bevor Sie die Funktion benutzen, öffnen Sie die Ofentür, entnehmen Sie den Wassertank und befüllen Sie ihn bis zur MAX-Markierung mit Wasser. - Page 16 Hinweis: Falls der Wassertank nicht eingesetzt wurde oder sich zu wenig Wasser darin befindet, ertönt ein Alarm und das Symbol für den Wasserstand blinkt. Öffnen Sie die Ofentür, entnehmen Sie den Tank und befüllen Sie ihn bis zur MAX- Markierung mit Wasser. Sobald Sie ihn eingesetzt haben und die Tür schließen, fährt das Gerät automatisch mit dem Programm fort.
-
Page 17: Menüs Und Programme
MENÜS UND PROGRAMME Programme im Menü Dünsten/Dampfgaren Lebensmittelart Arbeitszeit (Minuten) Temperatur (°C) Gemüse Reis Fisch Shrimps Krabben Eier Hühnchen Papaya Kartoffeln Programme im Menü Rösten Lebensmittelart Arbeitszeit (Minuten) Temperatur (°C) Hühnchen Steak Hammel Lachs Hühnerschenkel Makrele Pommes Frites Shrimps Würstchen... - Page 18 Programme im Menü Backen Lebensmittelart Arbeitszeit (Minuten) Temperatur (°C) Baguette Weizenbrot Pizza Käsekuchen Tortenboden Schokokuchen Cookies Blätterteig Eierkuchen Programme im Menü Air Fryer (Heißluft-Fritteuse) Lebensmittelart Arbeitszeit (Minuten) Temperatur (°C) Schweinekoteletts Chicken Wings Hühnerkebap Fleischbällchen Pita Chips Pommes Frites Croutons Mini-Pizza Speck...
-
Page 19: Zusatzfunktionen
Programme im Menü Trocknen und Rösten Lebensmittelart Arbeitszeit (Minuten) Temperatur (°C) Banane Apfel Rosinen Kiwi Zitrone Mandeln Walnuss Macadamia Cashew ZUSATZFUNKTIONEN Entkalken Die voreingestellte Zeit beträgt 50 Minuten und kann nicht geändert werden. • Nachdem der Verdampfer etwa 100 Stunden in Betrieb war, erinnert das Gerät den Benutzer daran, eine Entkalkung durchzuführen. - Page 20 Einen Start-Timer einstellen Drücken Sie im Standby-Modus oder im eingeschalteten Zustand auf die Einstell- Taste, um einen Start-Timer einzustellen. Das Timer-Symbol erscheint im Display und die Stundenanzeige blinkt. Die Zeit kann zwischen 1-24 Stunden eingestellt werden. Drücken Sie auf die Start/Pause-Taste und stellen Sie die Minuten ein. Drücken Sie auf die Start/Pause-Taste, um zurück zur programmauswahl zu gelangen.
-
Page 21: Reinigung Und Pflege
REINIGUNG UND PFLEGE • Schalten Sie das Gerät aus und ziehen Sie den Netzstecker aus der Steckdose, bevor Sie den Garraum reinigen. • Reinigen Sie das Backblech nicht mit Metallschabern oder Scheuermittel, da sie die Antihaftbeschichtung auf der Oberfläche beschädigen. •... -
Page 22: Fehlerbehebung
FEHLERBEHEBUNG Problem Mögliche Ursache Lösungsansatz Fehlercode Er1 Fehler des oberen Sensors. Schalten Sie das Gerät aus, öffnen Sie die Tür und lassen Fehlercode Er2 Kurzschluss des oberen Sie das Gerät 10 Minuten Sensors. abkühlen. Starten Sie das Fehlercode Er3 Fehler des unteren Sensors. Gerät erneut. -
Page 23: Hinweise Zur Entsorgung
Problem Mögliche Ursache Lösungsansatz Der Dampfgarer funktioniert Die Tür ist nicht richtig Schließen Sie die Tür. nicht. geschlossen. Der Türverschluss ist defekt. Wenden Sie sich zu Kontrolle und Reparatur an einen Fachbetrieb. Im Bedienfeld blinkt die Stellen Sie sicher, dass der Zeitanzeige, die anderen Wassertank mit Wasser gefüllt Tasten reagieren nicht. - Page 25 Dear Customer, Congratulations on purchasing this equipment. Please read this manual carefully and take care of the following hints to avoid damages. Any failure caused by ignoring the items and cautions mentioned in the instruction manual is not covered by our warranty and any liability. Scan the QR code to get access to the latest user mannual and other information about the product CONTENT...
-
Page 26: Product Data Sheet
PRODUCT DATA SHEET Information according to 66/2104 Symbol Value unit Model identification Type of oven Domestic electric oven 19,5 Mass of the appliance Number of cavities Heat source per cavity (electricity Electricity or gas) Volume per cavity Energy consumption (electricity) required to heat a standardised load in a cavity of an electric 0,59... -
Page 27: Safety Instructions
SAFETY INSTRUCTIONS General information • Never wash the cabinet with running water to prevent damage to the electrical components. • To prevent electric shock, do not allow water or other liquids to enter the unit. • Children over the age of 8, mentally and physically handicapped persons may only use the device if they have been thoroughly familiarized with its functions and safety precautions by a supervisor responsible for them. - Page 28 Instructions for safe use CAUTION Danger of burns! The appliance becomes hot during use. Take care not to touch the heating elements inside the oven and use oven gloves. • Before cleaning, unplug the appliance from the wall outlet and allow it to cool completely.
-
Page 29: Product Overview
PRODUCT OVERVIEW Control Panel Door Grill Water tray Bakeware Body Water Tank Door switch Handle Glove... -
Page 30: Control Panel And Key Functions
CONTROL PANEL AND KEY FUNCTIONS Oven lamp/child lock key • Touch it once, oven lamp is ON; touch it again, oven lamp is OFF. • Oven lamp will be ON for three minutes after the work is over. • Oven lamp will be ON for three minutes when the oven door is opened. •... -
Page 31: Display Indicators And Programs
DISPLAY INDICATORS AND PROGRAMS Time 88:88 The front two digits indicate the hours (0-24). The two rear digits indicate the minutes (0-59). Temperature °C Adjustable range: 30-230 °C. Timer Lights up when the timer is active. Time delay Indicates an active time delay. Water level The symbol lights up during operation. - Page 32 High temperature Warning of danger of injury at high temperatures. Fermentation For dough that must go before processing. Preheating For preheating to a certain temperature. Yoghurt Program for the production of yoghurt. Air Fryer This menu contains 9 preset programs and recipes. Drying and roasting This menu contains 9 preset programs and recipes for various fruits and nuts.
-
Page 33: Operation
OPERATION 1. Start-up The machine enters the full-screen standby interface after a “beep” sound when it is energized firstly by touching power ON Note: During the setting process, if there is no operation for continuous in three minutes all current settings will be cancelled and the machine will return to the standby interface for a standby status. - Page 34 Steaming: If you select this menu, the corresponding symbol in the display will appear. The temperature display shows [E-1], the time display shows the corresponding working time. Press the selection key (>) to select the desired program [E-1] to [E-9] (see MENUS AND PROGRAMS). Press the Start/ Pause button to start the program.
- Page 35 3. Setting of working hours and temperature After the desired function is selected, it shall be confirmed by pressing the ENTER key to enter the setting of working hours. The hour bit will flash. Press the selection key to set the hour bit. After it is confirmed by pressing the ENTER key, the minute bit will flash, and then press the selection key to set the minute bit.
- Page 36 Note: If you select a program with steam, the water tank symbol lights up in the display (see picture). During the work: • Pause: Press the Start/Pause button to stop the unit during operation. The working time will no longer be counted down. The display continues to show the program data.
-
Page 37: Diy Function Modes
DIY FUNCTION MODES Steaming / Steam cooking circulating air + top heat + bottom heat top heat Top and bottom heat circulating air + top heat circulating air High-temperature steam cooking (1) Steam The temperature can be adjusted in 5 °C increments from 50-1 10 °C. Before using the function, open the oven door, remove the water tank and fill it with water to the MAX mark. - Page 38 Note: If the water tank has not been inserted or there is insufficient water in it, an alarm sounds and the water level icon flashes. Open the oven door, remove the tank and fill it with water to the MAX mark. As soon as you have inserted it and close the door, the appliance will automatically continue with the program.
-
Page 39: Menus And Programs
MENUS AND PROGRAMS Programs in the Steaming Menu Food Style Working Time Temperature (°C) (minutes) Vegetables Rice Fish Shrimps Crabs Eggs Chicken Papaya Potatoes Programs in the Roasting Menu Food Style Working Time Temperature (°C) (minutes) Chicken Steak Mutton Salmon Chicken legs Saury Chips... - Page 40 Programs in the Bake Menu Food Style Working Time Temperature (°C) (minutes) Baguette Wheat bread Pizza Cheesecake Cake base Chocolate cake Cookies Puff pastry Egg tart Programs in the Air Fryer Menu Food Style Working Time Temperature (°C) (minutes) Pork chops Chicken wings Chicken kabob Meatballs...
-
Page 41: Other Functions
Programs in the Drying and Roasting Menu Food Style Working Time Temperature (°C) (minutes) Banana Apple Raisins Kiwi Lemon Almonds Walnut Macadamia Cashew OTHER FUNCTIONS Descaling The preset time is 50 minutes and cannot be changed. • After the evaporator has been in operation for about 100 hours, the unit will remind the user to descale. - Page 42 Setting a Start Timer In standby mode or when on, press the SET button to set a start timer. The timer icon appears on the display and the hour indicator blinks. The time can be set between 1-24 hours. Press the Start/Pause button and set the minutes. Press the Start/Pause button to return to the program selection screen.
-
Page 43: Cleaning And Care
CLEANING AND CARE • Turn off the appliance and unplug the appliance from the wall outlet before cleaning the cooking chamber. • Do not clean the baking tray with metal scrapers or scouring agents as they will damage the non-stick coating on the surface. •... -
Page 44: Troubleshooting
TROUBLESHOOTING Problem Possible Cause Suggested Solution Error code Er1 Upper sensor error Switch off the appliance, open the door and let it cool Error code Er2 Short circuit of the upper down for 10 minutes. Restart sensor the appliance. If the problem Error code Er3 Error of the lower sensor persists, contact a service... -
Page 45: Hints On Disposal
Problem Possible Cause Suggested Solution Steam oven does not work Door is not closed tightly Re-close the oven door. Poor contact of door control Contact a specialist company switch for inspection and repair. Control panel Just time LED Be sure the water tank have flash, other buttons no water and tank is put into response. - Page 47 Estimado cliente, Le felicitamos por la adquisición de este producto. Lea atentamente las siguientes instrucciones y sígalas para evitar posibles daños. No asumimos ninguna responsabilidad por los daños causados por el incumplimiento de las instrucciones y el uso inadecuado. Escanee el siguiente código QR para obtener acceso a la última guía del usuario y más información sobre el producto: ÍNDICE...
-
Page 48: Ficha Técnica Del Aparato
FICHA TÉCNICA DEL APARATO Información de acuerdo con 66/2104 Símbolo Valor Unidad Denominación del modelo Tipo de horno Horno eléctrico 19,5 Dimensiones del aparato Número de cámaras Fuente de calor de cada cámara Alimentación (electricidad o gas) Volumen de cada cámara Consumo eléctrico por cámara al calentar una carga estándar en CE Horno... -
Page 49: Indicaciones De Seguridad
INDICACIONES DE SEGURIDAD Indicaciones generales • Nunca lave la carcasa con agua corriente para evitar dañar los componentes eléctricos. • No deje que el agua ni otros líquidos se fi ltren al interior del aparato para evitar una descarga eléctrica. •... - Page 50 Indicaciones para un uso seguro ATENCIÓN Riesgo de quemaduras. Durante el uso del aparato, este alcanzará temperaturas elevadas. Asegúrese de no tocar la resistencia del interior del horno y de utilizar guantes de cocina. • Antes de limpiar el aparato, desconecte el enchufe de la toma de corriente y deje que se enfríe por completo.
-
Page 51: Componentes Del Aparato
COMPONENTES DEL APARATO Panel de control Puerta Rejilla Bandeja colectora Bandeja de horneado Carcasa Depósito de agua Cierre de la puerta Guantes de cocina... -
Page 52: Panel De Control Y Botones
PANEL DE CONTROL Y BOTONES Botón luz/bloqueo para niños • Pulsar una vez para encender la luz. Pulsar de nuevo para volver a apagar la luz. • Tras la cocción, la luz permanece encendida 3 minutos. • Tras abrir la puerta la luz sigue encendida 3 minutos. •... -
Page 53: Indicadores Del Display Y Programas
INDICADORES DEL DISPLAY Y PROGRAMAS Hora 88:88 Los dos dígitos delanteros muestran las horas (0-24). Los dos dígitos traseros muestran los minutos (0-59). Temperatura °C Rango ajustable: 30-230 °C Temporizador Se ilumina cuando el temporizador está activado. Posposición Muestra una función pospuesta activa. Nivel del agua El símbolo se ilumina durante el funcionamiento. - Page 54 Temperatura elevada Advertencia del riesgo de lesiones a temperaturas elevadas Fermentar Para masa que debe crecer antes de trabajarla Precalentar Para precalentar a una temperatura determinada Yogur Para preparar yogur Air Fryer (freidora) Este menú contiene 9 programas y recetas predeterminadas Secar y tostar Este menú...
-
Page 55: Manejo
MANEJO 1. Puesta en marcha Conecte el enchufe y presione el botón encendido/apagado. Suena un pitido y todos los símbolos de iluminan antes de que el aparato pase al modo standby. Nota: si el aparato se encuentra en modo configuración durante más de 3 minutos sin que se presione ningún botón ni se inicie ninguna función, se eliminarán todos los ajustes realizados hasta el momento y el aparato entrará... - Page 56 Cocción al vapor: cuando selecciona este menú, se enciende el símbolo correspondiente en pantalla. El indicador de temperatura muestra [E-1], mientras que el indicador de tiempo muestra el tiempo correspondiente de duración. Pulse el botón de selección (>) para elegir el programa deseado entre [E-1] y [E-9] (consulte MENÚS Y PROGRAMAS).
- Page 57 3. Configurar tiempo de funcionamiento y temperatura Después de haber seleccionado la función deseada, pulse el botón Inicio/Pausa para configurar el tiempo de funcionamiento. El indicador de la hora parpadea. Pulse el botón de selección (<>) para regular las horas. Pulse el botón de inicio/pausa. El indicador de minutos parpadea.
- Page 58 Nota: si utiliza un programa con vapor, en pantalla se ilumina el indicador del depósito de agua (consulte imagen) Durante el funcionamiento: • Pausa: Pulse el botón inicio/pausa para detener el aparato durante su funcionamiento. El tiempo de funcionamiento detendrá su cuenta atrás. La pantalla continuará...
-
Page 59: Selección De Funciones Diy
SELECCIÓN DE FUNCIONES DIY Cocción al vapor Ventilación + calor arriba + calor abajo Calor arriba Calor arriba y abajo Ventilación + calor arriba Ventilación Cocción a vapor a altas temperaturas (1) Cocinar al vapor La temperatura se puede regular en intervalos de 5 °C desde 50 a 1 10 °C. Antes de utilizar la función, abra la puerta del horno, retire el depósito de agua y llénelo hasta la marca MAX. - Page 60 Nota: si no se ha colocado el depósito de agua o el agua es insuficiente, suena una alarma y parpadea el símbolo del nivel de agua. Abra la puerta del horno, retire el depósito y llénelo de agua hasta la marca MAX. En cuanto lo haya colocado y cerrado la puerta, el aparato continuará...
-
Page 61: Menús Y Programas
MENÚS Y PROGRAMAS Programas en menú cocinar al vapor Tipo de alimento Tiempo de Temperatura (°C) preparación (minutos) Verdura Arroz Pescado Gambas Cangrejos Huevos Pollo Papaya Patatas Programas en menú Asar Tipo de alimento Tiempo de Temperatura (°C) preparación (minutos) Pollo Filete Cordero... - Page 62 Programa en menú hornear Tipo de alimento Tiempo de Temperatura (°C) preparación (minutos) Baguette Pan de trigo Pizza Tarta de queso Base para tarta Tarta de chocolate Galletas Hojaldre Torta de huevo Programas en el menú Air Fryer (freidora de aire caliente) Tipo de alimento Tiempo de Temperatura (°C)
- Page 63 Programas en menú secar y tostar Tipo de alimento Tiempo de Temperatura (°C) preparación (minutos) Plátano Manzana Pasas Kiwi Limón Almendra Avellana Macadamia Anacardo FUNCIONES ADICIONALES Descalcificar El tiempo predeterminado es de 50 minutos y no se puede modificar. • Después de que el evaporador haya estado 100 horas en funcionamiento, el aparato le recuerda que debe realizar una descalcificación.
- Page 64 Configurar un temporizador de inicio Pulse en modo standby o con el aparato encendido el botón de configuración para ajustar un temporizador de inicio. El símbolo del temporizador aparece en pantalla y el indicador de las horas parpadea. El tiempo puede regularse entre 1 y 24 horas. Pulse el botón de inicio/pausa y configure los minutos.
-
Page 65: Limpieza Y Cuidado
LIMPIEZA Y CUIDADO • Apague el aparato y desconecte el enchufe de la toma de corriente antes de limpiar el compartimento de cocción. • No limpie la bandeja con rascadores metálicos o productos abrasivos, pues dañará el recubrimiento antiadherente de la superficie. •... -
Page 66: Resolución De Problemas
RESOLUCIÓN DE PROBLEMAS Problema Posible causa Solución Código de error Er1 Avería del sensor superior Apague el aparato, abra la puerta y deje que el aparato Código de error Er2 Cortocircuito del sensor se enfríe durante 10 minutos. superior Vuelva a encender el aparato. Código de error Er3 Avería del sensor inferior Si el problema persiste,... -
Page 67: Retirada Del Aparato
Problema Posible causa Solución El hervidor a vapor no La puerta no se ha cerrado Cierre la puerta. funciona. correctamente. El cierre de la puerta está Contacte con una empresa averiado. especializada para que examine y repare el aparato. El indicador de tiempo Asegúrese de que el depósito en el panel de control de agua esté... - Page 69 Chère cliente, cher client, Toutes nos félicitations pour l’acquisition de ce nouvel appareil. Veuillez lire attentivement et respecter les instructions de ce mode d’emploi afin d’éviter d’éventuels dommages. Nous ne saurions être tenus pour responsables des dommages dus au non-respect des consignes et à...
-
Page 70: Fiche De Données Produit
FICHE DE DONNÉES PRODUIT Données selon 66/2104 Symbole Valeur Unité Identification du modèle Type de four Four électrique 19,5 Dimensions de l'appareil Nombre d'espaces de cuisson Source de chaleur par espace de Électricité cuisson (électricité ou gaz) Capacité des espaces de cuisson Consommation d'énergie (électrique) lors du chauffage d'une charge standard dans... -
Page 71: Consignes De Sécurité
CONSIGNES DE SÉCURITÉ Consignes générales de sécurité • Ne lavez jamais le boîtier à l’eau courante pour ne pas endommager les composants électriques. • Ne faites pas entre de l’eau ou d’autres liquides dans l’appareil pour éviter une électrocution. • Les enfants à partir de 8 ans les personnes physiquement ou mentalement limitées ne peuvent utiliser l’appareil qu’après avoir été... - Page 72 Conseils pour une utilisation sûre ATTENTION Risque de brûlure ! Pendant le fonctionnement, l’appareil devient très chaud. Veillez à ne pas toucher les éléments chauffants à l’intérieur du four et utilisez des gants de cuisine. • Avant de nettoyer l’appareil, débranchez la fi che de la prise et laissez-le complètement refroidir.
-
Page 73: Aperçu De L'appareil
APERÇU DE L’ APPAREIL Panneau de commande Porte Grille Bac d’eau Plaque de pâtisserie Boitier Réservoir d’eau Fermeture de la porte Poignée Gants de four... -
Page 74: Panneau De Commande Et Touches
PANNEAU DE COMMANDE ET TOUCHES Touche d’éclairage et de verrouillage parental • Appuyez une fois pour allumer l’éclairage. Appuyez encore pour éteindre l’éclairage. • Après la cuisson l’éclairage reste encore allumé pendant 3 minutes • Après ouverture de la porte l’éclairage reste encore allumé pendant 3 minutes. -
Page 75: Affichages A L'ecran Et Programmes
AFFICHAGES A L’ECRAN ET PROGRAMMES Durée 88:88 Les premiers chiffres indiquent les heures (0-24), les chiffres suivants indiquent les minutes (0-59) Température °C Plage réglable : 30-230 °C Minuterie S’allume lorsque la minuterie est active Démarrage différé Indique que le démarrage différé est actif Niveau d’eau Pendant le fonctionnement le symbole est allumé. - Page 76 Température élevée Mise en garde contre le danger de brûlure en présence de hautes températures Fermentation Pour les pâtes qui doivent lever avant cuisson Préchauffage Pour préchauffer à une température donnée Yaourt Programme pour la fabrication de yaourt Air fryer (friteuse) Ce menu comprend 9 programmes prédéfinis et recettes Pour déshydrater et rôtir Ce menu comprend 9 programmes prédéfinis et recettes pour divers...
-
Page 77: Utilisation
UTILISATION 1. Mise en marche Branchez la fiche et appuyez sur la touche de marche / arrêt. Un signal retentit et tous les symboles s’allument, puis l’appareil passe en mode veille. Remarque : lorsque l’appareil se trouve depuis plus de 3 minutes en mode de paramétrage et que vous n’avez appuyé... - Page 78 Cuisson ragoût / vapeur : lorsque vous sélectionnez ce menu, le symbole correspondant s’affiche à l’écran. L’écran de la température affiche E1. L’écran de la durée affiche la durée de fonctionnement correspondante. Appuyez sur la touche de sélection (>) pour choisir le programme souhaité entre E1 et E9 (voir MENUS ET PROGRAMMES).
- Page 79 3. Réglage de la durée de fonctionnement et de la température Une fois que vous avez sélectionné la fonction voulue, appuyez sur la touche Start / Pause pour régler la durée de fonctionnement. L’affichage des heures clignote. Appuyez sur la touche de sélection (<>) pour régler les heures. Appuyer sur la touche Start / Pause.
- Page 80 Remarque : si vous choisissez un programme avec vapeur, le symbole de réservoir d’eau s’allume à l’écran (voir figure). Pendant le fonctionnement : • Pause : appuyez sur la touche Start / Pause pour arrêter l’appareil quand il est en fonctionnement mets plus décompter l’écran continue d’afficher les données du programme l’affichage de la durée clignote et signale que l’appareil est actuellement en pause appuyez à...
-
Page 81: Choix Des Fonctions Diy
CHOIX DES FONCTIONS DIY Cuisson ragoût vapeur Chaleur tournante plus chaleur de voûte plus chaleur de sole Chaleur de voûte Chaleur de voûte et de sole Chaleur tournante plus chaleur de voûte Chaleur tournante Température élevée cuisson vapeur (1) Cuisson ragoût /vapeur Vous pouvez régler la température par cran de 5 degrés entre 50 et 1 10 °C. - Page 82 Remarque : si le réservoir d’eau n’est pas installé ou s‘il se trouve trop peu d’eau à l’intérieur, un signal d’alarme retentit et le symbole de niveau d’eau clignote. Ouvrez la porte du four, retirer le réservoir et remplissez-le jusqu’à la marque MAX avec de l’eau.
-
Page 83: Menus Et Programmes
MENUS ET PROGRAMMES Programmes du menu de cuisson ragoût/vapeur Type d'aliment Durée de Température (°C) fonctionnement (minutes) Légumes Poisson Crevettes Crabe Œufs Poulet Papaye Pommes de terre Programmes du menu de cuisson rôtie Type d'aliment Durée de Température (°C) fonctionnement (minutes) Poulet Steak... - Page 84 Programmes du menu de cuisson au four Type d'aliment Durée de Température (°C) fonctionnement (minutes) Baguette Pain blanc Pizza Gâteau de fromage blanc Fond de tarte Gâteau au chocolat Cookies Pâte feuilletée Gâteau aux œufs Programmes du menu Air Fryer (friteuse à air chaud) Type d'aliment Durée de Température (°C)
- Page 85 Programmes du menu pour déshydrater et rôtir Type d'aliment Durée de Température (°C) fonctionnement (minutes) Banane Pomme Raisins secs Kiwi Citrons Amandes Noix Noix de macadamia Noix de cajou FONCTIONS SUPPLÉMENTAIRES Détartrage La durée par défaut est de 50 minutes et ne peut pas être modifiée. •...
- Page 86 Réglage d’une minuterie de démarrage automatique En mode veille ou bien avec l’appareil allumé, appuyez sur la touche de réglage pour programmer un démarrage différé. Le symbole de la minuterie apparaît à l’écran et l’affichage des heures clignote. Vous pouvez régler la durée entre 1 et 24 heures. Appuyez sur la touche Start / Pause et réglez les minutes.
-
Page 87: Nettoyage Et Entretien
NETTOYAGE ET ENTRETIEN • Éteignez l’appareil et débranchez la fiche de la prise avant de nettoyer l’espace de cuisson. • N’utilisez pas le grattoir métallique ou de produit abrasif pour nettoyer la plaque à pâtisserie car ils pourraient endommager la couche antiadhésive sur la surface. •... -
Page 88: Résolution Des Problèmes
RÉSOLUTION DES PROBLÈMES Problème Cause possible Solution Code erreur Er1 Défaut du capteur supérieur Eteignez l'appareil, ouvrez la porte et laissez l'appareil Code erreur Er2 Court-circuit du capteur refroidir 10 minutes. supérieur Redémarrez l'appareil. Si le Code erreur Er3 Défaut du capteur inférieur problème persiste, adressez- vous à... -
Page 89: Informations Sur Le Recyclage
Problème Cause possible Solution Le cuiseur vapeur ne La porte est mal fermée Fermez la porte fonctionne pas La fermeture de porte est Adressez-vous à un défectueuse professionnel pour contrôle et réparation L‘affichage de l‘heure sur Assurez-vous que le réservoir le panneau de commande d‘eau est rempli d‘eau et qu‘il clignote, les autres touches ne... - Page 91 Gentile cliente, La ringraziamo per aver acquistato il dispositivo. La preghiamo di leggere attentamente le seguenti istruzioni per l’uso e di seguirle per evitare possibili danni. Non ci assumiamo alcuna responsabilità per danni scaturiti da una mancata osservazione delle avvertenze di sicurezza e da un uso improprio del dispositivo.
-
Page 92: Scheda Dati Del Prodotto
SCHEDA DATI DEL PRODOTTO Indicazioni secondo 66/2104 Simbolo Valore Unità Contrassegno dispositivo Tipo di forno Forno elettrico 19,5 Dimensioni del dispositivo Numero dei vani di cottura Fonte di calore di ogni vano di Elettricità cottura (elettricità o gas) Volume di ogni vano di cottura Consumo energetico (elettricità) durante il riscaldamento di carichi standard nel vano di cottura di... -
Page 93: Avvertenze Di Sicurezza
AVVERTENZE DI SICUREZZA Avvertenze generiche • Non lavare mai l’alloggiamento con acqua corrente, in modo da non danneggiare i componenti elettrici. • Non lasciar penetrare nel dispositivo acqua o altri liquidi, in modo da evitare folgorazioni. • Bambini a partire da 8 anni, persone con limitate capacità fi siche e psichiche e persone con esperienza e conoscenze insuffi cienti possono utilizzare il dispositivo solo se sono stati istruiti in precedenza sulle funzioni e sulle procedure di sicurezza da parte di una persona responsabile del loro controllo. - Page 94 Avvertenze per un utilizzo sicuro ATTENZIONE Pericolo di ustione! Durante l’utilizzo il dispositivo diventa bollente. Assicurarsi di non toccare gli elementi riscaldanti all’interno del forno e di utilizzare guanti da forno. • Prima della pulizia, staccare la spina e far raffreddare completamente il dispositivo. •...
-
Page 95: Descrizione Del Dispositivo
DESCRIZIONE DEL DISPOSITIVO Pannello di controllo Sportello Griglia Vaschetta dell’acqua Teglia Alloggiamento Serbatoio Chiusura sportello Maniglia Guanto da forno... -
Page 96: Pannello Di Controllo E Tasti Funzione
PANNELLO DI CONTROLLO E TASTI FUNZIONE Luce/Protezione per bambini • Premere una volta per accendere la luce. Premere una seconda volta per spegnerla. • Dopo la cottura, la luce resta accesa per 3 minuti. • Tenere premuto il tasto per attivare la protezione per bambini. Premere di nuovo il tasto per disattivarla. -
Page 97: Indicazioni Display E Programmi
INDICAZIONI DISPLAY E PROGRAMMI Tempo 88:88 Le due cifre iniziali indicano le ore (0-24). Le due cifre finali indicano i minuti (0-59). Temperatura °C Intervallo di regolazione: 30-230 °C. Timer Si illumina quando il timer è attivo. Ritardo Indica un ritardo attivo. Livello dell’acqua Il simbolo si illumina durante il funzionamento. - Page 98 Temperatura elevata Avvertimento del pericolo di ustione in caso di temperature elevate. Fermentazione Per impasti che devono lievitare prima della lavorazione. Preriscaldare Per preriscaldare a una determinata temperatura. Yogurt Programma per preparare yogurt. Friggitrice ad aria Questo menu contiene 9 programmi predefiniti e ricette. Essiccare e arrostire Questo menu contiene 9 programmi predefiniti e ricette per diversi frutti e noci.
-
Page 99: Utilizzo
UTILIZZO 1. Messa in funzione Collegare la spina e premere On/Off. Viene emesso un segnale acustico e tutti i simboli si illuminano, prima che il dispositivo passi in standby. Avvertenza: se il dispositivo si trova per oltre 3 minuti in modalità di impostazione e non vengono premuti tasti o non viene attivata alcuna funzione, tutte le impostazioni precedenti vengono cancellate e il dispositivo passa in standby. - Page 100 Stufare/Cuocere a vapore: quando si seleziona questa modalità si illumina il simbolo corrispondente. Il display della temperatura mostra (E-1), il display della durata mostra il relativo tempo di funzionamento. Premere il tasto di selezione (>) per selezionare il programma desiderato da (E-1) a (E-9) (v. MENU E PROGRAMMI).
- Page 101 3. Impostare durata di funzionamento e temperatura Dopo aver selezionato la funzione desiderata, premere Start/Pausa per impostare la durata. L’indicazione delle ore lampeggia. Premere i tasti di selezione (< >) per impostare le ore. Premere Start/Pausa. L’indicazione dei minuti lampeggia. Premere i tasti di selezione (<...
- Page 102 Avvertenza: se si seleziona un programma con vapore, sul display si illumina il simbolo del serbatoio (v. immagine). Durante il funzionamento: • Pausa: premere Start/Pausa per fermare il dispositivo mentre è in funzione. Il conto alla rovescia della durata si ferma. Il display continua a mostra i dati del programma.
-
Page 103: Selezione Funzioni Fai-Da-Te
SELEZIONE FUNZIONI FAI-DA-TE Stufare/Cuocere a vapore Ventilazione + Calore dall’alto + Calore dal basso Calore dall’alto Calore dall’alto e dal basso Ventilazione + calore dall’alto Ventilazione Cottura a vapore ad alta temperatura (1) Stufare/Cuocere a vapore La temperatura può essere impostata tra 50 e 1 10 °C in intervalli di 5 °C. Prima di utilizzare la funzione, aprire lo sportello, togliere il serbatoio e riempirlo d’acqua fino al segno MAX. - Page 104 Avvertenza: se il serbatoio non è stato inserito o l’acqua è insufficiente, viene emesso un segnale acustico e il simbolo del livello dell’acqua lampeggia. Aprire lo sportello, togliere il serbatoio e riempirlo d’acqua fino al segno MAX. Non appena viene inserito e si chiude lo sportello, il dispositivo riprende automaticamente il programma.
-
Page 105: Menu E Programmi
MENU E PROGRAMMI Programmi nel menu Stufare/Cuocere a vapore Tipo di alimento Durata (minuti) Temperatura (°C) Verdure Riso Pesce Gamberetti Granchio Uova Pollo Papaya Patate Programmi nel menu Arrostire Tipo di alimento Durata (minuti) Temperatura (°C) Pollo Bistecca Montone Salmone Coscia di pollo Sgombro Patatine fritte... - Page 106 Programmi nel menu Cottura al forno Tipo di alimento Durata (minuti) Temperatura (°C) Baguette Pane di frumento Pizza Cheesecake Fondo per torte Torta al cioccolato Biscotti Pasta sfoglia Pancake Programmi nel menu Friggitrice ad aria Tipo di alimento Durata (minuti) Temperatura (°C) Costoletta di maiale Alette di pollo...
-
Page 107: Ulteriori Funzioni
Programmi nel menu Essiccare e arrostire Tipo di alimento Durata (minuti) Temperatura (°C) Banana Mela Uvetta Kiwi Limone Mandorle Noci Noci di macadamia Anacardi ULTERIORI FUNZIONI Decalcificare La durata predefinita è di 50 minuti e non può essere modificata. • Dopo 100 ore di funzionamento dell’evaporatore, il dispositivo ricorda all’utente di eseguire la decalcificazione. - Page 108 Impostare un timer per l’accensione Premere il tasto delle impostazioni a dispositivo in standby o acceso per impostar un timer di accensione. Il simbolo del timer compare sul display e l’indicazione dell’ora lampeggia. La durata può essere impostata tra 1 e 24 ore. Premere Start/Pausa per impostare i minuti.
-
Page 109: Pulizia E Manutenzione
PULIZIA E MANUTENZIONE • Spegnere il dispositivo e staccare la spina prima di pulire il vano di cottura. • Non pulire la teglia con raschietti in metallo o prodotti abrasivi, in modo da non rovinare lo strato antiaderente sulla superficie. •... -
Page 110: Correzione Degli Errori 1
CORREZIONE DEGLI ERRORI Problema Possibile causa Soluzioni Codice di errore Er1 Errore del sensore superiore. Spegnere il dispositivo, aprire lo sportello e lasciar Codice di errore Er2 Cortocircuito del sensore raffreddare il dispositivo superiore. per 10 minuti. Riavviare il Codice di errore Er3 Errore del sensore inferiore. -
Page 111: Smaltimento 1 1
Problema Possibile causa Soluzioni Il dispositivo non funziona. Lo sportello non è chiuso Chiudere lo sportello. correttamente. La chiusura dello sportello è Contattare un’azienda tecnica difettosa. per controllo e riparazione. L‘indicazione dell‘ora Assicurarsi che il serbatoio nel pannello di controllo dell‘acqua sia pieno d‘acqua lampeggia, gli altri tasti non e si trovi nel forno.
Need help?
Do you have a question about the MasterFresh and is the answer not in the manual?
Questions and answers