
Related Manuals for Radioddity GD-73


Summary of Contents for Radioddity GD-73
- Page 1 Getting ‘on air’ with your Radioddity GD-73 v1.0 Getting ‘on air’ in DMR-mode with your Radioddity GD-73 Page 1 of 23...
-
Page 2: Table Of Contents
Getting ‘on air’ with your Radioddity GD-73 v1.0 Contents Intention of this document ....................4 1. Requesting a DMR ID ....................4 2. Gather information about a DMR station ..............4 Radio controls ........................5 General ..........................6 Turning on the radio ..................... 6 Turning off the radio ..................... - Page 3 Getting ‘on air’ with your Radioddity GD-73 v1.0 Receive and answer a DMR group call ................. 21 Receiving DMR group calls ..................21 Answering a DMR group call ..................21 Initiating a DMR group call ..................... 22 Page 3 of 23...
-
Page 4: Intention Of This Document
This document can in no way replace the existing documentation for your Radioddity GD-73 but it is intended to get you ‘on air’ the direct way. Therefore this document only describes the mandatory steps to get you ‘on air’. In order to do so, just get along the following steps: 1. -
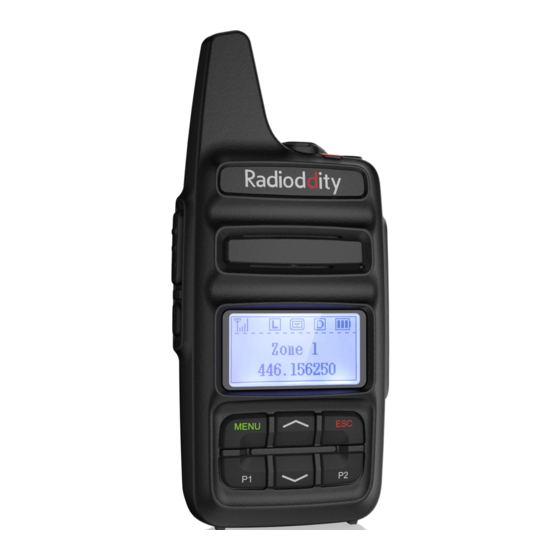
Page 5: Radio Controls
Getting ‘on air’ with your Radioddity GD-73 v1.0 Radio controls Page 5 of 23... -
Page 6: General
The power on/off switch is located on the right side of the radio. Press and hold it for about 3 seconds to turn on the radio. The Radioddity logo appears on the display, the status LED lights up red briefly and an ascending 4-tone sequence sounds. -
Page 7: Programming The Gd-73
Programming the GD-73 The GD-73 is a UHF radio with digital DMR (true tier I and II) as well as analogue FM. It offers a total of 1024 channels (analogue and digital), arranged in up to 64 zones. Each zone can accommodate a maximum of 16 channels each. In addition, up to 1024 contacts with the CPS can be stored on the radio. -
Page 8: Installation Of The Usb Driver
Getting ‘on air’ with your Radioddity GD-73 v1.0 3. Installation of the USB driver 1. Locate the file ‘usblib_hrc7000.exe’ in the software package. 2. Run this program as an Administrator 3. If possible, do not save the generated .inf driver on the desktop, but place a different directory of your boot drive. - Page 9 1.00 should always be used with the firmware version 1.00, etc. This firmware is specific to this model only. Loading a firmware from another model radio will not add extra functionality to the GD-73, but will most likely render it inoperable.
-
Page 10: Installation Of The Cps
Getting ‘on air’ with your Radioddity GD-73 v1.0 4. Installation of the CPS Before you may start programming your codeplug using the Radioddity CPS you need to install the USB-Driver as described in the previous chapter and the CPS as described in this chapter. - Page 11 Getting ‘on air’ with your Radioddity GD-73 v1.0 4. If you want to change the folder name (1) or don´t want the installer to create a startmenu folder (2), feel free to change those options before hitting the Next-key (3).
- Page 12 Getting ‘on air’ with your Radioddity GD-73 v1.0 5. It is a good idea to tick the checkbox in order to create a desktop shortcut before once more hitting the Next-key. 6. The final click on ‘Install’ now installs the CPS with the settings you provided.
- Page 13 Getting ‘on air’ with your Radioddity GD-73 v1.0 7. After just a few seconds, the installation process will be completed and a click on ‘Finish’ will get you right to the CPS. Congratulations, that´s it! Page 13 of 23...
-
Page 14: Create A Code Plug From Scratch
5. Create a code plug from scratch To begin creating a code plug for your GD-73, first read data from the radio to your PC to create a first CPS template, and at the same time save the factory data for future use. -
Page 15: Setup Digital Rx Groups
Getting ‘on air’ with your Radioddity GD-73 v1.0 Entry in the list of digital contacts (up to 1024 entries) Call Name Display name of the contact Call Type You can choose between the following call types: • Group Call •... -
Page 16: Setup Of Channels
Getting ‘on air’ with your Radioddity GD-73 v1.0 • Each Digital (DMR) channel must have a Digital RX Group List, with at least the transmit Talkgroup contact for the channel a member of the group you attach to the channel. - Page 17 Getting ‘on air’ with your Radioddity GD-73 v1.0 By clicking on the ‘Add’ button, you can add another channel. Here is a brief explanation of the different fields you can customize for each channel: Digital+Analog Mode Choose between ‘analogue’ and ‘digital’...
- Page 18 Getting ‘on air’ with your Radioddity GD-73 v1.0 Digital The Talkgroup (TG) which is assigned to this channel TX Contact Slot Selects which timeslot, 1 or 2, should be used. Often a particular Talkgroup is assigned to a particular timeslot.
-
Page 19: 4E. Bundling Of Channels Into Zones
Up to 16 radio channels can be stored in one zone of your GD-73. A total of up to 64 zones are possible. It makes sense to bundle channels according to their use. For example, it makes sense to bundle all channels of a DMR repeater within one zone. -
Page 20: Transfer The Codeplug To The Radio
After completing all the above steps, it is adviseable to save the data locally to the PC first (‘File’ ‘save’/’save as’) before you transfer the data from your PC to the GD-73. To do so, click on ‘Program’‘Write Data’... - Page 21 Getting ‘on air’ with your Radioddity GD-73 v1.0 Receive and answer a DMR group call In order to receive a DMR group call, a group (talkgroup or TG) must first be selected on the radio. Each DMR channel can be assigned exactly one group using the CPS.
- Page 22 Getting ‘on air’ with your Radioddity GD-73 v1.0 Initiating a DMR group call All radios that you wish to communicate with must be on the same group. 1. Select the desired channel using the buttons. Programming channel names with a name that associates with the Talkgroup is useful to facilitate this.
- Page 23 Getting ‘on air’ with your Radioddity GD-73 v1.0 Thank you for your purchase from Radioddity! TUTORIALS, SUPPORT AND MORE CAN BE FOUND AT: https://www.radioddity.com/ https://www.facebook.com/radioddity https://www.youtube.com/c/Radioddityradio Page 23 of 23...
Need help?
Do you have a question about the GD-73 and is the answer not in the manual?
Questions and answers