
Subscribe to Our Youtube Channel
Related Manuals for Monster Markut M7


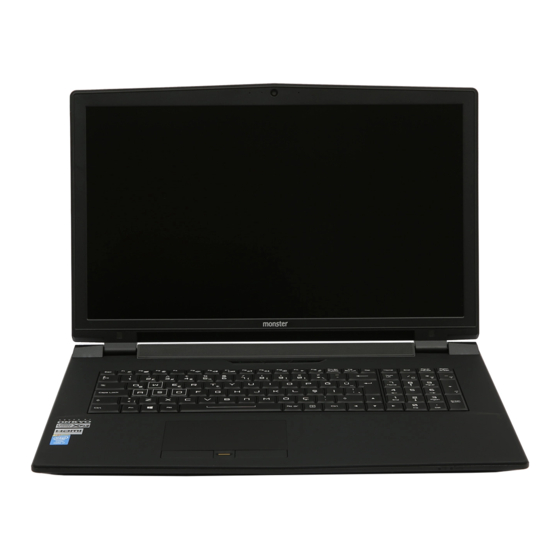
Summary of Contents for Monster Markut M7
- Page 1 M7 V3.1 U S E R M A N U A L B E N U T Z E R H A N D B U C H K U L L A N I M K I L A V U Z U...
-
Page 2: Table Of Contents
TABLE OF CONTENT CHAPTER 1 - Content ............02 FCC Conditions ................02 Safety Instructions ..............04 CHAPTER 2 - Introductions ..........07 Unpacking ...................07 Product Overview ..............07 Top-open View ................08 Front Side View ................09 Right Side View ................10 Left Side View ................11 Rear Side View ................12 Bottom Side View ..............13 How to Use the Keyboard ............14... -
Page 3: Chapter 1 - Content
NOTICE All marks and names mentioned may be trademarks of their respective owners. No warranty as to accuracy or completeness is expressed or implied. We reserves the right to make changes to this document without prior notice. CHAPTER 1 Content FCC-B Radio Frequency Interference Statement This equipment has been tested and found to comply with the limits for a Class B digital device, pursuant to part 15 of the FCC rules. - Page 4 CE Conformity This device is in compliance with the essential safety requirements and other relevant provisions set out in the European Directive. Battery Regulations European Union: Batteries, battery packs, and accumulators should not be disposed of as unsorted household waste. Please use the public collection system to return, recycle, or treat them in compliance with the local regulations.
-
Page 5: Safety Instructions
Upgrade and Warranty Please note that certain components, such as memory modules, HDD, SSD, ODD, and Bluetooth/WiFi combo card, etc., preinstalled in the product may be upgradable or replaceable by user’s request depending on the models users purchased. For any further information on the product users purchased, please contact the local dealer. - Page 6 Plug the power cord into an AC outlet that is easily accessible at • all times. Disconnect power from the notebook by unplugging the power • cord from the AC outlet. If a power cord with 3-prong plug came with the package, •...
- Page 7 Do not leave the notebook in an unconditioned environment with • a storage temperature above 60ºC (140ºF) or below 0ºC (32ºF), which may damage the notebook. This notebook should be operated under maximum ambient • temperature of 35ºC (95ºF). Never pour liquid into the opening that could damage the •...
-
Page 8: Chapter 2 Introductions
CHAPTER 2 Introductions Congratulations on becoming an user of this notebook, the finely designed notebook. You will have a delightful and professional experience in using this exquisite notebook. We are proud to tell users that this notebook is thoroughly tested and certified by our reputation for unsurpassed dependability and customer satisfaction. - Page 9 Webcam/ Webcam LED/ Internal Microphone This built-in webcam can be used for picture taking, video recording or • conferencing, and so on. Webcam LED indicator, next to the webcam, blinks when webcam • function is activated; LED goes out when this function is turned off. The built-in microphone and its function is the same with microphone.
-
Page 10: Front Side View
Power LED/ GPU Mode LED Glowing white when the notebook power is turned on, and the UMA GPU • mode is selected. Glowing amber when the optionally supported discrete GPU mode is • selected. LED flashes when the notebook goes to the sleep state. •... -
Page 11: Right Side View
Status LED Wireless LAN (WiFi) LED glows when WLAN (WiFi) function is enabled. • LED goes out when this function is disabled. • Battery Status LED glows when the battery is being charged. • LED turns glowing amber while the battery is in low capacity status. •... -
Page 12: Left Side View
Left Side View Kensington Lock This notebook provides a Kensington lock hole, which allows users to secure the notebook in place. RJ-45 Connector The Ethernet connector, with optionally supported transmitting rate of 10/100/1000/10000 megabits per second, is used to connect a LAN cable for network connection. -
Page 13: Rear Side View
Ventilator The ventilator is designed to cool the system. DO NOT block the ventila- tor for air circulation. HDMI Connector HDMI (High-Definition Multimedia Interface) technology is the indus- try-leading interface and de-facto standard connecting high-definition (HD) and ultra highdefinition (UHD) equipment. USB 3.2 Gen 1/ Gen 2 Port (optional) USB 3.2 Gen 1/ Gen 2, the SuperSpeed USB/ SuperSpeed USB 10Gbps, delivers the higher interface speeds for connecting various devices,... -
Page 14: Bottom Side View
Bottom Side View Ventilator The ventilator is designed to cool the system. DO NOT block the ventila- tor for air circulation. Stereo Speakers This notebook may be equipped with built-in stereo speakers which deliver the high quality sound, and supports the HD audio technology. Battery Reset Hole Whenever the system firmware (EC) is upgraded or the system hangs, please 1) power off the notebook;... -
Page 15: How To Use The Keyboard
How to Use the Keyboard This notebook provides a full functioned keyboard. To ensure that the keyboard will be functioning properly, it is a must to install the necessary applications before using the keyboard function keys. Windows Key You can find the Windows Logo key on the keyboard which is used to perform Windows-specific functions, such as opening the Start menu and launching the shortcut menu. -
Page 16: Disable Or Enable Touchpad
Disable or Enable Touchpad Enable or disable the touchpad function. Enter Sleep Mode Force the computer into sleep state (depending on the system configuration). Press the Power button to wake up the system from sleep state. Switch Display Switch the display output mode between the LCD, external monitor and both. -
Page 17: Adjust The Sound Level Of The Speaker
Adjust the Sound Level of the Speaker Increase the built-in speaker’s volume. Decrease the built-in speaker’s volume. Mute the built-in speakers. Adjust the Brightness Level of the Keyboard Increase the brightness level of the keyboard backlight LEDs. Decrease the brightness level of the keyboard backlight LEDs. Specifications The specifications listed here is reference only, and may change without notice. - Page 18 Power AC/DC Adapter Input: 100-240V~, 50/60Hz Output: 19.5V~, 9.23A Battery 6-cell RTC Battery Storage x1 SATA interface for 2.5” HDD device x1 M.2 slot, supports PCIe or SATA SSD device x1 M.2 slot, supports PCIe SSD device (optional) I/O Port x1 USB 3.2 Gen 2 x2 USB 3.2 Gen 1 x1 USB 3.2 Gen 2 Type C...
-
Page 19: Chapter 3 - How To Get Started
Security Intel® vPro™Technology (optional) Intel® vPro™ Technology offers an added layer of IT security with a complete set of hardware-based security measures. Such as Remote manageability by Intel® Active Management Technology, data security and encryption through In- tel® Trusted Execution Technology, IT policies of businesses can be well-tailored, managed and applied to wherever appropriate with vPro PCs. -
Page 20: How To Use The Notebook Comfortably
How to Use the Notebook Comfortably If you are a beginner to the notebook, please read the following instructions to assure your own safety, and make yourself comfortable during the operations. Good illumination is essential in the work area. • Choose a chair and desk with good ergonomics and adjust their heights •... - Page 21 AC/DC Adapter Ensure that your notebook is connected to an AC power source via the AC adapt- er before turning it on for the first time. If the notebook automatically shuts down due to low battery power, it is likely to cause system failure. Below are some Dos and Don’ts of an AC/DC adapter.
-
Page 22: How To Set Up A Power Plan In Windows 10
How to charge the battery properly Please pay attention to the following tips before recharging the battery: If a charged battery pack is not available, save your work and close all running • programs and shut down the system. Plug in an AC/DC adapter. •... - Page 23 Select [Additional power settings] under [Related settings]. The Power Plan of [Balanced] is selected as an example here. Click on the [Change plan settings] to the right of the power plan to customize a power plan. Choose the sleep and display settings you want your computer to use.
- Page 24 Create Your Own Power Plan You can create your own power plan and customize it as your requirement. How- ever, it will be recommended to use ECO Mode power saving function to optimize the battery life while using this notebook. Select Power Options in the menu.
-
Page 25: How To Use The Touchpad
How to Use the Touchpad The touchpad integrated in your notebook is a pointing device that is compat- ible with standard mouse, allowing you to control the notebook by pointing the location of the cursor on the screen. Configure the Touchpad You can customize the pointing device to meet your personal needs. -
Page 26: About Hdd And Ssd
Unlike the traditional pointing device such as the mouse, the whole touchpad can act as a left button, so that your each tap on the touchpad is equivalent to pressing the left button. Tapping twice more rapidly on the touchpad is to execute a double-click. -
Page 27: U S E R How To Connect The Internet
How to Connect the Internet Wireless LAN Wireless LAN is a wireless broadband connection that allows you to connect to the Internet without using any cables. Follow the instructions below to set up a Wireless LAN connection. Go to the desktop. Find the icon in the lower-right corner of the task bar and click on it to unfold the settings menu. - Page 28 Dynamic IP/PPPoE Connection Go to the desktop. Find the icon in the lower-right corner of the task bar, and then right click on it to select [Open Network & Internet settings]. Troubleshoot problems Choose [Change adapter options]. Right click on [Ethernet] to select [Properties] from the drop-down menu.
- Page 29 Broadband (PPPoE) Connection Go to the desktop. Find the Troubleshoot problems icon in the lower-right corner of the task bar, right click on it to select [Open Network & Internet settings]. Select [Network and Sharing Center] and then select [Set up a new connection or network] under [Change your networking settings].
- Page 30 Click [Broadband (PPPoE)]. Fills User name, Password, and Connection name fields. Then click [Connect]. Troubleshoot problems Static IP Connection 1. Follow the previous steps 1 to 4 in Dynamic IP/PPPoE Connection. 2. Select [General] tab and click [Use the following IP address] and [Use the following DNS server addresses].
-
Page 31: M A N U A L How To Set Up Bluetooth Connection
How to Set Up Bluetooth Connection Bluetooth pairing is a process in which two Bluetooth devices communicate with each other through an established connection. Activating Bluetooth Connection Checking the Bluetooth status When Airplane mode is enabled, Bluetooth connection will be turned off. - Page 32 Pairing the Bluetooth devices 1. Go to [Start/ Settings/ Devices], and then find [Bluetooth & other devices]. Click on [Add Bluetooth or other device]. Click on [Bluetooth]. Select a device to start pairing. Give the passcode as instructed by the device waiting to be connected, and then click on [Connect] to continue.
-
Page 33: How To Connect External Devices
How to Connect External Devices This notebook may be equipped with various connecting I/O (input/ output) ports, such as USB, HDMI, DisplayPort, and mini DisplayPort. Users will be able to connect diverse peripheral devices to the notebook. To connect these devices, refer to the instruction manuals of each device first, and then connect the device to the notebook. - Page 34 TABLE OF CONTENT CHAPTER 1 - Inhalt............34 FCC-Voraussetzungen .............34 Sicherheitshinweise ..............36 CHAPTER 2 - Einleitung ..........39 Auspacken ..................39 Produktübersicht ..............39 Ansicht von oben...............39 Ansicht von vorne ..............41 Ansicht von rechts ..............42 Ansicht von links ...............43 Ansicht von hinten ..............44 Ansicht von unten ..............45 Verwendung der Tastatur ............46 Windows-Taste ................46...
-
Page 35: Chapter 1 - Inhalt
Hinweis Alle erwähnten Warenzeichen gehören den entsprechenden Eigentümern. Eine Garantie für die Richtigkeit oder Vollständigkeit wird weder ausdrücklich noch stillschweigend übernommen. Wir behalten uns das Recht vor, Änderungen an diesem Dokument ohne vorherige Ankündigung vorzunehmen. CHAPTER 1 Content FCC-B-Erklärung zu Funkstörungen Dieses Gerät wurde getestet und entspricht den Grenzwerten für Digitalgeräte der Klasse B gemäß... - Page 36 CE-Konformität Dieses Gerät entspricht den wesentlichen Sicherheitsan- forderungen sowie anderen relevanten Bestimmungen der europäischen Richtlinie. Batterieverordnung Europäische Union: Batterien, Akkus und Akkumulatoren dürfen nicht als unsortierter Hausmüll entsorgt werden. Bitte nutzen Sie das öffentliche Sammelsystem, um sie zurückzugeben, zu recyceln oder gemäß den örtlichen Bestimmungen zu behandeln.
-
Page 37: Sicherheitshinweise
Aufrüsten und Garantie Bitte beachten Sie, dass bestimmte Komponenten, wie z.B. Speichermodule, Festplatten, SSD, ODD und Bluetooth/WiFi Combo-Karte usw., die im Produkt vorinstalliert sind, je nach den von den Benutzern erworbenen Modellen auf Wunsch individuell nachgerüstet oder ersetzt werden können. Für weitere Informationen über zusätzlich erworbene Produkte wenden Sie sich bitte an den örtlichen Fachhändler. - Page 38 Schließen Sie das Netzkabel an eine jederzeit leicht zugängliche • Steckdose an. Trennen Sie die Stromversorgung des Notebooks, indem Sie das • Netzkabel aus der Steckdose ziehen. Wenn ein Netzkabel mit 3-poligem Stecker mitgeliefert wurde, • stecken Sie das Netzkabel immer in eine geerdete Steckdose. Entfernen Sie nicht den Erdungsstift des Netzkabels, da dies ein wichtiges Sicherheitsmerkmal ist.
- Page 39 Nutzen und lagern Sie das Notebook nicht in einer Umgebung mit • Temperaturen über 60ºC (140ºF) oder unter 0ºC (32ºF), da dies das Notebook beschädigen könnte. Dieses Notebook sollte bei einer maximalen Umgebungstempera- • tur von 35ºC (95ºF) betrieben werden. Lassen Sie niemals Flüssigkeit auf das Notebook gelangen, da •...
-
Page 40: Chapter 2 Einleitung
CHAPTER 2 Einleitung Herzlichen Glückwunsch, dass Sie Besitzer unseres hochwertigen Notebooks geworden sind. Sie werden viel Freude im Umgang mit diesem hervorragenden Notebook haben. Das Gerät wurde gründlich getestet und auf unseren Wunsch für absolute Zuverlässigkeit und Kundenzufriedenheit zertifiziert. Auspacken Öffnen Sie zunächst den Versandkarton und prüfen Sie sorgfältig alle gelief- erten Artikel. - Page 41 Webcam/ Webcam-LED/ Internes Mikrofon Die integrierte Webcam kann für Bildaufnahmen, Videoaufnahmen oder • Konferenzen usw. verwendet werden. Die Webcam-LED neben der Webcam blinkt, wenn die Webcam-Funktion • aktiviert ist. Die LED erlischt, wenn diese Funktion ausgeschaltet wird. Das eingebaute Mikrofon und seine Funktion ist die gleiche wie beim •...
-
Page 42: Ansicht Von Vorne
Power-LED/GPU-Modus-LED Weiß leuchtend, wenn das Notebook eingeschaltet wird, und der • UMA-GPU-Modus ausgewählt ist. Leuchtet gelb, wenn der optional unterstützte diskrete GPU-Modus • ausgewählt ist. Die LED blinkt, wenn das Notebook in den Ruhezustand versetzt wird. • Die LED erlischt, wenn das Notebook ausgeschaltet wird. •... -
Page 43: Ansicht Von Rechts
Status LED Wireless LAN (WiFi) Die LED-Anzeige leuchtet, wenn die Wireless LAN (WiFi)-Funktion • aktiviert ist. Die LED-Anzeige erlischt, wenn diese Funktion ausgeschaltet ist. • Akkustatus Die LED leuchtet, wenn der Akku geladen wird. • Die LED leuchtet gelb, wenn die Akkuleistung niedrig ist. •... -
Page 44: Ansicht Von Links
Ansicht von links Kensington-Schloss Dieses Notebook verfügt über eine Öffnung für ein Kensington-Schloss, womit der Benutzer das Notebook mit einem festen Gegenstand verbinden und vor Diebstahl schützen kann. RJ-45-Stecker Der Ethernet-Anschluss mit der optional unterstützten Übertragungsrate von 10/100/1000/10000 Megabit pro Sekunde wird zum Anschluss eines LAN-Kabels für die Netzwerkverbindung verwendet. -
Page 45: Ansicht Von Hinten
Lüfter Der Lüfter ist zur Kühlung des Systems vorgesehen. Für ausreichend Luftzirkulation den Lüfter NICHT blockieren. HDMI-Anschluss Die HDMI (High-Definition Multimedia Interface)-Technologie ist die branchenführende Schnittstelle und Standard für die Verbindung von High-Definition (HD)- und Ultra-High-Definition (UHD)-Geräten. USB 3.2 Gen 1/ Gen 2-Anschluss (optional) USB 3.2 Gen 1/ Gen 2, die SuperSpeed USB/ SuperSpeed USB 10 Gbps, bietet höhere Schnittstellengeschwindigkeiten für den Anschluss ver- schiedener Geräte, wie Speichergeräte, Festplatten oder Videokameras,... -
Page 46: Ansicht Von Unten
Ansicht von unten Lüfter Der Lüfter ist zur Kühlung des Systems vorgesehen. Für ausreichend Luftzirkulation den Lüfter NICHT blockieren. Stereolautsprecher Dieses Notebook ist mit eingebauten Stereolautsprechern ausgestattet, die eine hohe Tonqualität liefern und die HD-Audiotechnologie unterstützen. Akku-Resetöffnung Wann immer die System-Firmware (EC) aktualisiert wird oder das System hängt, schalten Sie bitte 1) das Notebook aus;... -
Page 47: Verwendung Der Tastatur
Verwendung der Tastatur Dieses Notebook bietet eine voll funktionsfähige Tastatur. Um sicherzustel- len, dass die Tastatur ordnungsgemäß funktioniert, wird dringend empfohlen, die notwendigen Anwendungen zu installieren, bevor die Funktionstasten der Tastatur verwendet werden. Windows-Taste Auf der Tastatur finden Sie die Windows-Taste, mit der Windows-spezi- fische Funktionen ausgeführt werden, wie z.B. -
Page 48: Touchpad Deaktivieren Oder Aktivieren
Touchpad deaktivieren oder aktivieren Schaltet das Touchpad ein oder aus Ruhezustand aktivieren Bringt den Computer in den Ruhezustand (je nach Systemkon- figuration). Drücken Sie die Netztaste, um das System aus dem Ruhezustand zu reaktivieren. Bildschirm umschalten Schalten Sie den Bildschirm-Ausgabemodus zwischen LCD, externem Monitor oder beiden um. -
Page 49: Alautstärke Des Lautsprechers Einstellen
Lautstärke des Lautsprechers einstellen Erhöht die Lautstärke des Lautsprechers Verringert die Lautstärke des Lautsprechers Schaltet die eingebauten Lautsprecher auf lautlos. Helligkeit der Tastatur-Hintergrundbeleuchtung einstellen (optional) Erhöht die Helligkeit der Tastatur- Hintergrundbeleuchtung. Verringert die Helligkeit der Tastatur- Hintergrundbeleuchtung. Spezifikationen Die hier aufgeführten Spezifikationen dienen nur als Referenz und können ohne vorherige Ankündigung geändert werden. - Page 50 Stromversorgung Netzteil 180W, 19.5V Eingang: 100-240V~, 50/60Hz Ausgang: 19.5V Akku 6-Zellen RTC-Akku Speicher x1 SATA Schnittstelle für 2.5” HDD x1 M.2 Steckplatz, unterstützt PCIe/SATA-SSD x1 M.2 Steckplatz, unterstützt PCIe-SSD (optional) E/A Anschluss x1 USB 3.2 Gen 2 x2 USB 3.2 Gen 1 x1 USB 3.2 Gen 2 Type C Audio-Anschlüsse 1 x Mikrofon...
-
Page 51: Chapter 3 - Erste Schritte
Sicherheit Intel® vPro™Technologie (optional) D Die Intel® vProTM -Technologie bietet eine zusätzliche ITSicherheitsstufe mit einem umfangreichen Angebot an hardwarebasierten Sicherheitsmaßnahmen. Dazu gehören der Fernzugriff durch die Intel® Active Management Technology, die Datensicherheit und die Verschlüsselung durch die Intel® Trusted Execution Tech- nology. -
Page 52: Verwendung Des Notebooks
Angenehmes Arbeiten am Notebook Wenn Sie bisher noch nicht mit Notebooks gearbeitet haben, lesen Sie bitte die folgenden Anweisungen, um die Benutzung des Notebooks so angenehm wie möglich zu machen. Eine gute Beleuchtung im Arbeitsbereich ist unerlässlich. • Wählen Sie einen ergonomischen Stuhl und Schreibtisch und passen Sie die •... - Page 53 AC/DC Netzteil Vergewissern Sie sich, dass Ihr Notebook vor dem ersten Einschalten über das Netzteil mit Strom versorgt wird. Wenn sich das Notebook aufgrund eines niedrigen Akkuladestands au- tomatisch abschaltet, kann dies zu einem Systemausfall führen. Im Folgenden finden Sie einige Do’s und Don’ts des Netzteils.
-
Page 54: Energiesparplan Unter Windows 10 Einrichten
Akku richtig laden Bitte beachten Sie die folgenden Tipps, bevor Sie den Akku wieder aufladen: Sollte kein geladener Akku zur Verfügung steht, speichern Sie Ihre Arbeit, • schließen alle laufenden Programme und fahren das System herunter. Schließen Sie eine Netzteil an. •... - Page 55 Unter [Related settings] (Zugehörige Einstellungen) wählen Sie [Additional power settings] (Weitere Energieoptionen). Die Energieoption [Balanced] (Ausbalanciert) ist standardmäßig ausgewählt. Klicken Sie auf [Chance plan settings] (Energiesparplaneinstellungen), um einen Energiesparplan anzupassen. Wählen Sie die Ruhezustand-und Anzeigeeinstellungen aus, die Ihr Computer zukünftig verwenden soll. Klicken Sie auf [Change advanced power settings] (Erweiterte Energieeinstellungen ändern), um die gewählten Einstellungen des...
- Page 56 Erstellen eines eigenen Energiesparplans Sie können einen eigenen Energieplan erstellen und ihn nach Ihren Wünschen anpassen. Es wird jedoch empfohlen, die Energiesparfunktion des ECO-Modus zu verwenden, um die Akkulaufzeit bei der Verwendung dieses Notebooks zu optimieren. Wählen Sie im Menü „Energieoptionen“.
-
Page 57: Verwendung Des Touchpads
Verwendung des Toupads Das in Ihr Notebook integrierte Touchpad ist ein mit der Standardmaus kom- patibles Zeigegerät, mit dem Sie das Notebook durch Zeigen auf die Position des Cursors auf dem Bildschirm steuern können. Touchpad konfigurieren Sie können das Zeigegerät d.h. das Touchpad an Ihre persönlichen Bedürfnisse anpassen. -
Page 58: Festplatte Und Ssd (Solid-State-Disk)
Dieses als Point and Click (Zeigen und Klicken) bezeichnete Verfahren ist die Grundlage für die Bedienung Ihres Notebooks. Im Gegensatz zu einem herkömmlichen Zeigegerät wie der Maus kann das gesamte Touchpad als linke Taste fungieren. Somit entspricht jedes Antippen des Touchpads dem Drücken der linken Maustaste. -
Page 59: Benutzerhandbuch Mit Dem Internet Verbinden
Mit dem Internet verbinden Wireless LAN Wireless LAN ist eine drahtlose Breitbandverbindung, die es Ihnen ermöglicht, sich ohne Kabel mit dem Internet zu verbinden. Befolgen Sie die folgenden Anweisungen, um eine drahtlose LAN-Verbindung einzurichten. Gehen Sie auf den Desktop. Suchen Sie das Symbol unten rechts in der Taskleiste und klicken Sie darauf, um das Menü... - Page 60 Dynamische IP/PPPoE-Verbindung Gehen Sie auf den Desktop. Suchen Sie das Symbol unten rechts in der Taskleiste und klicken mit der rechten Maustaste darauf, um die Option [Open Network & Internet settings] (Netzwerk- und Freigabecenter) zu öffnen. Troubleshoot problems Wählen Sie [Change adapter options] (Adaptereinstellungen ändern ).
- Page 61 Breitband (PPPoE)-Verbindung Gehen Sie auf den Desktop. Such- Troubleshoot problems en Sie das Symbol unten rechts in der Taskleiste und klicken mit der rechten Maustaste darauf, um die Option [Open Network & Internet settings] (Netzwerk- und Freigabecenter) zu öffnen. Unter [Change your networking settings] (Netzwerkeinstellungen ändern) wählen Sie [Set up a new connection or network] (Neue...
- Page 62 Klicken Sie auf [Broadband (PPPoE)] (Breitband (PPPoE)). Geben Sie Ihren Benutzer- namen, Ihr Kennwort und den Verbindungsnamen ein und klicken dann auf [Con- nect] (Verbinden). Statische IP-Verbindung 1. Befolgen Sie die Schritte 1 bis 4 unter Dynamische IP/PP- PoE-Verbindung. 2. Wählen Sie die Registerkarte [General] (Allgemein) und klicken Sie auf [Use the following IP address] (Folgende IP-Adresse...
-
Page 63: Bluetooth-Verbindung Aufbauen
Bluetooth-Verbindung aufbauen Mit Bluetooth lässt sich eine drahtlose Verbindung zwischen zwei sich in unmittelbarer Nähe befindenden Bluetooth-Geräten herstellen. Aktivierung der Bluetooth-Verbindung Überprüfung des Bluetooth-Status Wenn der Flugzeugmodus aktiviert ist, wird die Bluetooth-Verbindung ausgeschaltet. Stellen Sie vor dem Einrichten einer Bluetooth-Verbindung sicher, dass der Flugzeugmodus deaktiviert ist. - Page 64 Kopplung der Bluetooth-Geräte 1. Gehen Sie zu [Start/ Settings/ Devices] (Start/Einstellungen/Geräte) und suchen Sie [Bluetooth & other devices] (Bluetooth & andere Geräte). Klicken Sie auf [Add Bluetooth or other devices] (Bluetooth oder andere Geräte hinzufügen). Klicken Sie auf [Bluetooth]. Wählen Sie ein Gerät aus, um die Kopplung zu starten.
-
Page 65: Anschluss Von Externen Geräten
Anschluss von externen Geräten Dieses Notebook ist mit verschiede- nen Anschlüssen (Ein-/Ausgang) ausgestattet, beispielsweise USB, HDMI, DisplayPort und Mini Display- Port, an denen unterschiedliche Peripheriegeräte angeschlossen werden können. Um diese Geräte anzuschließen, lesen Sie zuerst die Bedienungsan- leitungen der jeweiligen Geräte und schließen erst dann das Gerät an Ihr Notebook an. - Page 66 İÇİNDEKİLER BÖLÜM 1 - İçerik .............. 66 FCC Koşulları ................66 Güvenlik Uyarıları ..............68 BÖLÜM 2 -Giriş ..............71 Paketin Açılması ................71 Ürüne Genel Bakış ..............71 Kapak Açık Görünüm ..............71 Önden Görünüm ................73 Sağdan Görünüm ..............74 Soldan Görünüm ...............75 Arkadan Görünüm ..............76 Alttan Görünüm .................77 Klavyeyi Kullanma ..............78 Windows Tuşu ................78...
-
Page 67: Bölüm 1 - İçerik
Telif Hakkı ve Ticari Marka Bildirimi Belirtilen tüm markalar ve isimler ilgili sahiplerinin ticari markaları olabilir. Doğruluk veya eksiksizlik konusunda hiçbir garanti verilmez veya ima edilmez. Bu belgede önceden bildirimde bulunmaksızın değişiklik yapma hakkımız saklıdır. BÖLÜM 1 İçeriik FCC-B Radyo Frekansı Girişim Bildirgesi Yapılan testler sonucunda bu aygıtın, FCC kuralları... - Page 68 CE Uygunluğu Bu cihaz, Avrupa Yönergesinde belirtilen temel güvenlik gerekliliklerine ve diğer ilgili maddelere uygundur. Pil Yönetmeliği Avrupa Birliği: Piller, pil grupları ve akümülatörler ayrıştırıl- mamış evsel atık olarak atılmamalıdır. Bunları yerel yönet- meliklere uygun olarak iade etmek, geri dönüştürmek veya işlemek için yerel toplama sistemlerini kullanın.
-
Page 69: Güvenlik Uyarıları
Yükseltme ve Garanti Ürüne önceden yüklenmiş bellek modülleri, HDD, SSD, ODD ve Bluetooth/ WiFi birleşik kartı vb. gibi bazı parçaların, satın alınan modellere bağlı olarak kullanıcının isteği üzerine yükseltilebilir veya değiştirilebilir olabileceğini unut- mayın. Satın alınan ürünle ilgili daha fazla bilgi için lütfen yerel satıcınıza başvurun. Kullanıcılar, parçaların yerini veya nasıl sökülüp takılacağını... - Page 70 Güç kablosunu her zaman kolayca erişebileceğiniz bir AC prizine • takın. Güç kablosunu AC prizinden çıkararak dizüstü bilgisayardaki • gücü kesin. Paketle birlikte 3 dişli bir güç kablosu gelirse, güç kablosunu • her zaman topraklı (topraklanmış) bir AC prizine takın. Önemli bir güvenlik özelliği olan güç...
- Page 71 Dizüstü bilgisayarı, bilgisayara zarar verebilecek, saklama sıcaklığı • 60ºC’nin (140ºF) üzerinde veya 0ºC’nin (32ºF) altında havası düzenlenmeyen bir ortamda bırakmayın. Bu dizüstü bilgisayar, en fazla 35ºC (95ºF) ortam sıcaklığında • çalıştırılmalıdır. Cihaza zarar verebilecek veya elektrik çarpmasına neden • olabilecek şekilde deliklere sıvı dökmeyin. Bu cihazın klavye, touchpad ve kasa gibi yüzeylerini silmek için •...
-
Page 72: Bölüm 2 Giriş
BÖLÜM 2 Giriş Titizlikle tasarlanmış bu dizüstü bilgisayara sahip olmanızdan dolayı sizi kutlarız. Bu mükemmel dizüstü bilgisayar size kullanırken zevkli ve profesyonel bir deneyim yaşatacak. Bu dizüstü bilgisayarın, rakipsiz güvenilirliğimiz ve müşteri memnuniyetine verdiğimiz değer konusunda kazandığımız haklı ünümüz ile test edilip onaylandığını... - Page 73 Web kamerası/Web kamerası LED’i/Dahili Mikrofon Bu dâhili web kamerası fotoğraf çekimi, video kaydı veya konferans • toplantıları vb. için kullanılabilir. Web kamerasının yanındaki web kamerası LED göstergesi, web • kamerası işlevi etkinleştirildiğinde yanıp söner; bu işlev kapatıldığında LED söner. Dahili mikrofon ve işlevi mikrofonla aynıdır. •...
-
Page 74: Önden Görünüm
Power LED/ GPU Mode LED Dizüstü bilgisayar açıldığında ve UMA GPU modu seçildiğinde • beyaz renkte yanar. İsteğe bağlı olarak desteklenen ayrık GPU modu seçildiğinde sarı renkte • yanar. Dizüstü bilgisayar uyku durumuna geçtiğinde LED yanıp söner. • Dizüstü bilgisayar kapatıldığında LED söner. •... -
Page 75: Sağdan Görünüm
Durum LED’i Kablosuz Ağ (WiFi) WLAN (WiFi) işlevi etkinleştirildiğinde LED yanar. • Bu işlev devre dışı bırakıldığında LED söner. • Batarya Durumu Pil şarj edilirken LED yanar. • Pil düşük kapasite durumundayken LED sarı renkte yanar. • Pil arızalanırsa sürekli yanıp söner. Sorun devam ederse, lütfen yerel •... -
Page 76: Soldan Görünüm
Soldan Görünüm Kensington Kilidi Bu dizüstü bilgisayar, kullanıcıların dizüstü bilgisayarı yerinde sabitle- melerini sağlayan bir Kensington kilit deliğine sahiptir. RJ-45 Bağlayıcı İsteğe bağlı olarak desteklenen saniyede 10/100/1000/10000 megabit iletim hızına sahip Ethernet bağlayıcı ağ bağlantısı için LAN kablosu bağlamak amacıyla kullanılır. Mini-DisplayPort Mini-DisplayPort, DisplayPort’un minyatürleştirilmiş... -
Page 77: Arkadan Görünüm
Soğutma Fanı Soğutma fanı sistemi soğutmak için tasarlanmıştır. Hava sirkülasyonu sağlanabilmesi için fanı KAPATMAYIN. HDMI Bağlayıcı HDMI (Yüksek Çözünürlüklü Multimedya Arayüzü) teknolojisi, yüksek çözünürlüklü (HD) ve ultra yüksek çözünürlüklü (UHD) ekipmanın bağl- anmasını sağlayan endüstri lideri arayüz ve fiili standarttır. USB 3.2 Gen 1/ Gen 2 Bağlantı... -
Page 78: Alttan Görünüm
Alttan Görünüm Soğutma fanı Soğutma fanı sistemi soğutmak için tasarlanmıştır. Hava sirkülasyonu sağlanabilmesi için fanı KAPATMAYIN. Stereo Hoparlörler Bu dizüstü bilgisayar, yüksek kaliteli ses sağlayan ve HD ses teknolojisini destekleyen dâhili stereo hoparlörlerle donatılmış olabilir. Pil Sıfırlama Deliği Sistem ürün yazılımı (EC) yükseltildiğinde veya sistem durduğunda, 1) dizüstü... -
Page 79: Klavyeyi Kullanma
Klavyeyi Kullanma Bu dizüstü bilgisayar tam işlevli bir klavyeye sahiptir. Klavyenin düzgün çalışması için, klavye işlev tuşlarını kullanmadan önce gerekli uygulamaların yüklenmesi gerekir. Windows Tuşu Başlat menüsünü açma ve kısayol menüsünü çalıştırma gibi Windows’a özgü işlevleri gerçekleştirmek için kullanılan Windows Logosu tuşunu klavyede bulabilirsiniz. -
Page 80: Touchpad'i Etkinleştirme Veya Devre Dışı Bırakma
Touchpad’i Etkinleştirme veya Devre Dışı Bırakma Touchpad işlevini etkinleştirin veya devre dışı bırakın. Uyku Moduna Geçme Bilgisayarı uyku durumuna geçirin (sistem yapılandırmasına bağlı olarak). Sistemi uyandırmak için Güç tuşuna basın. Ekran Değiştirme Ekran çıkış modunu LCD, harici monitör ve her ikisi arasında değiştirin. -
Page 81: Hoparlörün Ses Düzeyini Ayarlama
Hoparlörün Ses Düzeyini Ayarlama Dâhili hoparlörün ses seviyesini artırın. Dâhili hoparlörün ses seviyesini azaltın. Dâhili hoparlörleri sessize alın. Klavye Arka Işık LED’inin Parlaklık Düzeyini Ayarlama Klavye arka ışık LED’lerinin parlaklık düzeyini artırın. Klavye arka ışık LED’lerinin parlaklık düzeyini azaltın. Teknik Özellikler Burada listelenen özellikler yalnızca referanstır ve önceden bildirilmeksizin değiştirilebilir. - Page 82 Güç AC/DC Adaptör Giriş: 100-240V~, 50/60Hz Çıkış: 19.5V~, 9.23A 6-hücreli RTC Pil Depolama x1 2,5” HDD cihaz için 1 x SATA arayüz x1 M.2 yuvası, PCIe veya SATA SSD aygıtını destekler x1 M.2 yuvası, PCIe SSD aygıtını destekler G/Ç Bağlantı Noktası x1 USB 3.2 Gen 2 x2 USB 3.2 Gen 1 x1 USB 3.2 Gen 2 Type C...
-
Page 83: Bölüm 3 - Başlarken
Güvenlik Intel® vPro™ Teknolojisi (isteğe bağlı) Intel® vPro™ Teknolojisi, eksiksiz bir donanım tabanlı güvenlik önlemleri seti ile ek bir BT güvenliği sunar. Intel® Aktif Yönetim Teknolojisi ile uzaktan yönetile- bilirlik, Intel® Güvenilir Yürütme Teknolojisi ile veri güvenliği ve şifreleme gibi, işletmelerin BT politikaları... -
Page 84: Dizüstü Bilgisayarı Rahat Kullanma
Dizüstü Bilgisayarı Rahat Kullanma Dizüstü bilgisayarı kullanmaya yeni başlıyorsanız, kendi güvenliğinizi sağlamak ve işlemleri rahat bir şekilde gerçekleştirmek için lütfen aşağıdaki talimatları okuyun. Çalışma alanında iyi bir aydınlatma şarttır. • Ergonomik bir sandalye ve masa seçin ve yüksekliklerini duruşunuza göre •... - Page 85 AC/DC Adaptörü İlk kez açmadan önce dizüstü bilgisayarınızın AC adaptörü aracılığıyla bir AC güç kaynağına bağlı olduğundan emin olun. Dizüstü bilgisayarın düşük pil gücü ned- eniyle otomatik olarak kapanması sistem hatasına neden olabilir. Aşağıda bir AC/ DC adaptörü ile ilgili Yapılması ve Yapılmaması Gerekenler yer almaktadır. Yapılması...
-
Page 86: Windows 10'Da Güç Planı Oluşturma
Pili düzgün şarj etme Pili şarj etmeden önce lütfen aşağıdaki önerilere dikkat edin: Pilin şarjı boşalmışsa, çalışmanızı kaydedip çalışan tüm programları sonlandırın • ve sistemi kapatın. Bir AC/DC adaptörü takın. • Piliniz şarj olurken bilgisayarınızı kullanabilir, bekleme konumuna geçirebilir • veya bilgisayarınızı... - Page 87 [İlgili ayarlar] altından [Ek güç ayarları]’nı seçin. Burada örnek olarak [Dengeli] Güç Planı seçilmiştir. Bir güç planını özelleştirmek için güç planının sağındaki [Plan ayarlarını değiştir]’e tıklayın. Bilgisayarınızın kullanmasını istediğiniz uyku ve ekran ayarlarını seçin. İhtiyaçlarınızı karşılamak amacıyla seçilen güç planı ayarlarında değişiklik yapmak için [Gelişmiş...
- Page 88 Kendi Güç Planınızı Oluşturun Kendi güç planınızı oluşturabilir ve gereksiniminiz doğrultusunda özelleştirebilir- siniz. Ancak, bu dizüstü bilgisayarı kullanırken pil ömrünü en uygun duruma get- irmek için ECO Modu güç tasarrufu işlevinin kullanılması önerilir. Menüden Güç Seçenekleri’ni seçin. Sol bölmedeki [Güç planı oluştur]’a tıklayın.
-
Page 89: Touchpad Kullanımı
Touchpad’i Kullanma Dizüstü bilgisayarınıza entegre touchpad, standart fare ile uyumlu bir işaret aygıtıdır ve imlecin ekrandaki konumunu işaretleyerek dizüstü bilgisayarı kontrol etmenizi sağlar. Touchpad’i Yapılandırın İşaret aygıtını kişisel ihtiyaçlarınızı karşılayacak şekilde özelleştirebilirsiniz. Örneğin, solak bir kullanıcıysanız, iki tuşun işlevlerinin yer değiştirmesini ist- eyebilirsiniz. -
Page 90: Hdd Ve Ssd Hakkında
Fare gibi geleneksel işaretleme aygıtından farklı olarak, tüm touchpad sol fare tuşu olarak işlev görür, böylece touchpad’e her dokunuşunuz sol tuşa basmaya eşdeğerdir. Touchpad’e iki kez daha hızlı dokunmak, çift tıklatma komutunu yerine getirir. Sürükleme ve Bırakma Sürükleyip bırakma yöntemini kullanarak dizüstü bilgisayarınızdaki dosyaları veya nesneleri taşıyabilirsiniz. -
Page 91: K U L L A N I M İnternete Bağlanma
İnternete Bağlanma Kablosuz LAN Kablosuz LAN, herhangi bir kablo kullanmadan Internet’e bağlanmanızı sağlayan kablosuz geniş bant bağlantıdır. Kablosuz LAN bağlantısı kurmak için aşağıdaki talimatları izleyin. Masaüstüne gidin. Görev çubuğunun sağ alt köşesindeki simgesini bulun ve ayarlar menüsünü açmak için üzerine tıklayın. Ağ... - Page 92 Dinamik IP/PPPoE Bağlantısı Masaüstüne gidin. Görev çubuğunun sağ alt köşesindeki simgesini bulun ve [Ağ ve Internet ayarlarını Aç] öğesini seçmek için sağ tıklayın. Troubleshoot problems [Bağdaştırıcı seçeneklerini değiştirin] öğesini seçin. Açılır menüden [Özellikler] öğesini seçmek için [Ethernet] öğesine sağ tıklayın. Ethernet Özellikleri penceresinde, [Ağ...
- Page 93 Geniş Bant (PPPoE) Bağlantısı Masaüstüne gidin. Görev Troubleshoot problems çubuğunun sağ alt köşesindeki simgesini bulun ve [Ağ ve Internet ayarlarını Aç] öğesini seçmek için sağ tıklayın. [Ağ ve Paylaşım Merkezi]’ni seçin ve [Ağ ayarlarınızı değiştirin] altında [Yeni bağlantı veya ağ kurun] seçimini yapın.
- Page 94 [Geniş Bant (PPPoE)] öğesine tıklayın. Dosya adı, Şifre ve Bağlantı adı alanlarını doldurun. Ardından [Bağlan] düğmesine tıklayın. Statik IP Bağlantısı 1. Dinamik IP/PPPoE Bağlantısı kısmındaki 1 ila 4. adımları izleyin. 2. [Genel] sekmesini seçip, [Aşağıdaki IP adresini kullan:] ve [Aşağıdaki DNS sunucu adresler- ini kullan:] öğelerine tıklayın.
-
Page 95: K I L A V U Z U Bluetooth Bağlantısı Kurma
Bluetooth Bağlantısı Kurma Bluetooth eşleştirme, iki Bluetooth aygıtın yapılan bağlantı aracılığıyla birbirleriyle iletişim kurduğu bir işlemdir. Bluetooth Bağlantısını Etkinleştirme Bluetooth durumunu kontrol etme Uçak modu etkinleştirildiğinde, Blue- tooth bağlantısı kapatılacaktır. Bir Bluetooth bağlantısı ayarlamadan önce Uçak modunun kapatıldığından emin olun. 1. - Page 96 Bluetooth aygıtları eşleştirme 1. [Başlat/ Ayarlar/ Aygıtlar] kısmına gidip [Bluetooth ve diğer aygıtlar] öğesini bulun. [Bluetooth veya diğer aygıt ekle] öğesine tıklayın. [Bluetooth] öğesine tıklayın. Eşleştirmeyi başlatmak için bir aygıt seçin. Bağlanılmayı bekleyen aygıt tarafından belirtilen şifreyi sağlayın ve ardından devam etmek için [Bağlan] öğesine tıklayın.
-
Page 97: Harici Aygıtları Bağlama
Harici Aygıtları Bağlama Bu dizüstü bilgisayar, USB, HDMI, DisplayPort ve mini DisplayPort gibi çeşitli G/Ç (giriş/çıkış) bağlantı noktalarıyla donatılmış olabilir. Kul- lanıcılar, dizüstü bilgisayara çeşitli çevre birimlerini bağlayabilecektir. Bu aygıtları bağlamak için, önce her bir aygıtın kullanım talimatına okuyun, ardından aygıtı dizüstü bilgisayara bağlayın. - Page 98 TURKEY • UAE • CYPRUS • GERMANY...
Need help?
Do you have a question about the Markut M7 and is the answer not in the manual?
Questions and answers
où est situé la prise pour charger la batterie
The charging port on the Monster Markut M7 is located at the "Micro USB/Charger Interface" port on the tablet.
This answer is automatically generated