Table of Contents
Advertisement
Available languages
Available languages
Advertisement
Table of Contents

Summary of Contents for Duramaxx Inspex 4000
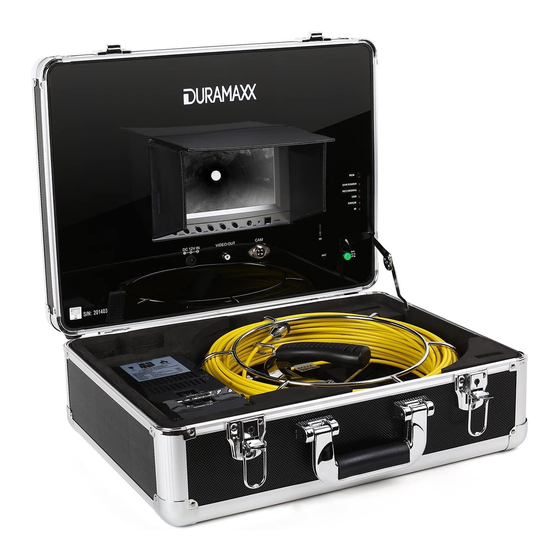
- Page 1 Inspektionskamera 10022715...
- Page 2 Sehr geehrter Kunde, Wir gratulieren Ihnen zum Erwerb Ihres Gerätes. Lesen Sie die folgenden Anschluss- und Anwendungshinweise sorgfältig durch und befolgen Sie diese, um möglichen technischen Schäden vorzubeugen. Für Schäden, die durch Missachtung der Sicherheitshinweise und unsachgemäßen Gebrauch entstehen, übernehmen wir keine Haftung. Sicherheitshinweise •...
- Page 3 Bestimmungsgemäßer Gebrauch • Dieses Gerät dient der Inspektion von Rohren mit einem Durchmesser von 25–120mm. Es ist ausschließlich für diesen Zweck bestimmt und darf nur zu diesem Zweck ver- wendet werden. Es darf nur in der Art und Weise benutzt werden, wie es in dieser Gebrauchsanleitung beschrieben ist.
- Page 4 Geräteübersicht 1 AV-Auswahl-Knopf 10 Stromversorgung/Auflade-Umschalter 2 Menü 11 DC 12 V Ausgangs-Kabel 3 Runter-Taste 12 DC 12V Eingang 4 Hoch-Taste 13 Video-Ausgang 5 Menü-Hoch/Runter 14 Kamera-Anschluss 6 LED AN/AUS 15 SD-Karten-Slot 7 AN-/AUS-Taste 16 Mikrofon 8 TFT-Bildschirm 17 USB-Port 9 Lade-Anschluss 18 Sonnenschutz Kamera-Kopf Kabel-Rolle...
-
Page 5: Inbetriebnahme Und Bedienung
Fernbedienung 1. Enter: Zum Ansehen und Abspielen der Videos 2. Hoch: Navigation nach oben / zum vorherigen Menü-Punkt 3. REC: Aufnahme starten 4. Setup: System-Einstellungen und Aufnahme-Funktionen 5. Power: System einschalten 6. Runter: Navigation nach unten / zum nächsten Menü-Punkt 7. - Page 6 Mit einem Video-Kabel können Sie das Bild auch auf einem größeren Bildschirm dar- stellen. 10. Entfernen Sie nach Abschluss der Arbeit die Kamera aus dem Rohr. Schrauben Sie die Kamera ab und reinigen Sie sie mit einem sauberen, weichen, trockenen Tuch und bringen Sie sie auf ihre vorherige Position.
- Page 7 System Software-Version anzeigen, Produkt-Version-Anzeigen, freien und verwendeten Speicher anzeigen (wenn USB- oder SD-Speicher verbunden sind. Record-Setup Wählen Sie zwischen USB und SD als Zielspeicher Play-Mode Abspielmodus wählen Master-Reset Master-Reset: OK drücken um das Gerät zurückzusetzen Firmware-Update Firmware-Update: wählen Sie den Speicherort, an dem die neue Firmware gespeichert ist Browse-File Browse-File: Zeigt alle Dateien auf dem aktuellen SD- oder USB-...
- Page 8 Drücken Sie Taste 7 auf der Fernbedienung, um die Aufnahme zu stoppen. Drücken Sie Taste 1 auf der Fernbedienung, um die Aufnahme abzuspielen. Drücken Sie Taste 4 auf der Fernbedienung, um Ihre Aufnahmen zu verwalten. Alter- nativ können Sie auch „Play Video“ am Bildschirm drücken. Hinweis: Das Aufnahme- System benötigt manchmal 10 -20 Sekunden zur Kalibrierung.
- Page 9 Codec-Installation Falls Sie die Dateien auf Ihrem Computer nicht wiedergeben können, installieren Sie die Codec-Software von der beliegenden CD-ROM. Alternativ erhalten Sie die Software kosten- los unter dieser Webadresse: kmplayer.en.softonic.com/download. Legen Sie die CD-ROM ein, klicken Sie auf folgendes Symbol und folgen Sie den Installationsschritten wie auf den folgenden Bildern dargestellt.
- Page 10 Schritt 4 Schritt 5...
- Page 11 Schritt 6 Schritt 7...
- Page 12 Schritt 8 Schritt 9...
-
Page 13: Akku Aufladen
Akku aufladen Stecken Sie den Auflade- Adapter in eine Steckdose und den Ladeanschluss. Drücken Sie die Akkutaste während das Gerät aus- geschaltet ist. Der Akku kann auch aufgeladen werden, während das Ge- rät eingeschaltet und in Benutzung ist. Ein kom- plett entleerter Akku kann allerdings nur aufgeladen werden, wenn das Gerät... -
Page 14: Hinweise Zur Entsorgung
Problem Mögliche Ursache und Lösung Keine Aufnahme 1. Drücken Sie die Video Taste und wechseln Sie zu „Video 2“ 2. Drücken Sie die Power-Taste. Die Monitor Leuchte sollte grün aufl euchten 3. Verwenden Sie einen anderen USB-/SD-Speicher und versuchen Sie es erneut. Fehlerhafte Schalten Sie das Gerät aus, starten Sie es neu und versuchen Sie Aufnahme... -
Page 15: Safety Instructions
Dear Customer, Congratulations on purchasing this equipment. Please read this manual carefully and take care of the following hints to avoid damages. Any failure caused by ignoring the mentioned items and cautions mentioned in the instruction manual are not covered by our warranty and any liability. - Page 16 Intended Use • This unit is used to inspect pipes with a diameter of 25-120mm. It is intended solely for this purpose and must be used for this purpose only. It may only be used in the manner as described in this manual. •...
-
Page 17: Product Description
Product Description 1 AV selection button 10 Power supply / charging switch 2 Menu 11 DC 12V output cable 3 Down button 12 DC 12V input 4 Up button 13 Video output 5 Menu up / down 14 Camera connection 6 LED ON / OFF 15 SD card slot 7 ON / OFF button... -
Page 18: Getting Started
Remote control 1 Enter: to view or play the video 2 Up: navigate up / to the previous menu item 3 REC: start recording 4 Setup: system settings and recording capabilities 5 Power: switch system on 6 Down: navigate down / to the next menu item 7 Exit: exit or stop the current menu item 8 Left: navigation to the left 9 Right: navigate to the right... -
Page 19: System Menu Settings
Using a video cable, you can the display the image on a larger screen. 10. After completion of the work, remove the camera from the tube. Unscrew the camera and clean it with a clean, soft, dry cloth and return it to its previous position System Menu Settings Clock: Setting Set time and date... -
Page 20: Recording Mode
System Display software version, display product version, free and used memory are connected Record Setup Choose between USB and SD as destination memory Play Mode Choose play mode Master Reset Press OK to reset the unit Firmware Update Choose the location where the new firmware will be saved Browse File Displays all files on the current SD or USB storage medium... - Page 21 Press button 7 on the remote control to stop recording. Press button 1 on the remote control to play the recording back. Press button 4 on the remote control to manage your recordings. Alternatively, you may also press „Play Video“ on the screen. Note: The recording system sometimes requires 10 -20 seconds to calibrate.
- Page 22 Codec Installation If you can not play the files on your computer, install the codec software from the CD-ROM that is included with delivery. Alternatively, you may get the software for free at this web address: kmplayer.en.softonic.com/download. Insert the CD-ROM, click the following icon and follow the installation steps as shown in the following images.
- Page 23 Step 4 Step 5...
- Page 24 Step 6 Step 7...
- Page 25 Step 8 Step 9...
-
Page 26: Troubleshooting
Recharge Battery Plug the charging adapter into a mains outlet and the charging port. Press the battery button while the device is swit- ched off. The battery may be charged while the de- vice is turned on and in use. However, a complete- ly discharged battery can only be charged when the device is switched off. -
Page 27: Hints On Disposal
Problem Possible Cause and Solution No recording Press the Video button and go to "Video 2". Press the power button. The monitor light should be green. Use a diff erent USB / SD memory and try again. Faulty recording Turn off the device, restart and try again. Flickering picture Weak battery. -
Page 28: Consignes De Sécurité
Chère cliente, cher client, Toutes nos félicitations pour l’acquisition de ce nouvel appareil. Veuillez lire attentivement et respecter les instructions de ce mode d’emploi afin d’éviter d’éventuels dommages. Nous ne saurions être tenus pour responsables des dommages dus au non-respect des consignes et à... -
Page 29: Contenu De L'emballage
Utilisation conforme • Cet appareil sert à inspecter les canalisations d’un diamètre de 25-120 mm. Il a été conçu uniquement dans ce but et doit être utilisé exclusivement dans ce but. Il doit être utilisé uniquement conformément aux instructions de ce mode d‘emploi. •... -
Page 30: Aperçu De L'appareil
Aperçu de l’appareil 1 Bouton de sélection AV 10 Sélecteur alimentation /charge 2 Menu 11 Câble de sortie DC 12 V 3 Touche bas 12 Entrée DC 12 V 4 Touche haut 13 Sortie vidéo 5 Descendre/monter dans le menu 14 Prise caméra 6 LED allumée/éteinte 15 Fente pour carte SD... -
Page 31: Mise En Marche Et Utilisation
Télécommande 1. Entrée : pour visualiser et lire les vidéos 2. Haut : naviguer vers le haut / revenir à l’option de menu précédente 3. REC : démarrer l’enregistrement 4. Setup : paramètres système et fonctions d’enregistrement 5. Power : allumer l’appareil 6. - Page 32 Il est également possible de visualiser l’image sur un plus grand écran grâce à un câble vidéo. 10. Une fois l’opération terminée, sortir la caméra de la canalisation. Dévisser la caméra et la nettoyer avec un chiffon propre, doux et sec puis la replacer à sa position initiale. Paramètres du menu système Clock:Setting Réglage de l’heure et de la date...
-
Page 33: Mode Enregistrement
System Afficher la version du logiciel, afficher la version du produit, affi- cher la mémoire libre et utilisée (si un support USB ou une carte SD sont branchés). Record-Setup Sélectionner entre USB et SD comme cible d’enregistrement Play-mode Sélectionner le mode de lecture. Master-reset Master-reset : appuyer sur OK pour réinitialiser l’appareil Firmware-Update... - Page 34 Appuyer sur la touche 7 de la télécommande pour arrêter l’enregistrement. Appuyer sur la touche 1 de la télécommande pour visualiser l’enregistrement. Appuyer sur la touche 8 de la télécommande pour utiliser l’enregistrement. L’autre alternative consiste à appuyer sur « Play Video » sur l’écran. Remarque : le mode enregistrement nécessite parfois 10-20 secondes pour le calibrage.
- Page 35 Installation du codec S’il est impossible de lire les fichiers sur son ordinateur, installer le logiciel de codec du CD- ROM fourni. Une alternative consiste à se procurer gratuitement le logiciel à cette adresse web : kmplayer.en.softonic.com/download. Insérer le CD-ROM, cliquer sur l’icône suivante et suivre les étapes d’installation comme illustré...
- Page 36 Étape 4 Étape 5...
- Page 37 Étape 6 Étape 7...
- Page 38 Étape 8 Étape 9...
-
Page 39: Recharger La Batterie
Recharger la batterie Brancher le chargeur à une prise de courant et à la prise de charge Appuyer touche batterie lorsque l’appareil éteint. batterie peut également être re- chargée lorsque l’appareil est allumé et qu’il foncti- onne. Il n’est cependant possible de recharger une batterie entièrement vide que lorsque l’appareil est... -
Page 40: Information Sur Le Recyclage
Problème Cause possible et solution 1. Appuyer sur la touche Vidéo et basculer sur « Video 2 » d’enregistrement 2. Appuyer sur la touche Power. Le voyant lumineux du moniteur devient vert. 3. Utiliser un autre support de stockage USB/SD et réessayer. Enregistrement Éteindre l’appareil, le redémarrer et réessayer. - Page 41 Gentile cliente, congratulazioni per l‘acquisto del dispositivo. Legga attentamente le seguenti istruzioni per evitare possibili danni. Non ci assumiamo alcuna responsabilità per danni causati dal man- cato rispetto delle presenti istruzioni e per un uso improprio del dispositivo. Precauzioni • Non esporre il dispositivo alla pioggia.
-
Page 42: Volume Di Consegna
Destinazione d‘uso • Questo dispositivo serve per controllare tubi con un diametro di 25- 120 mm. E‘ adatto e va utilizzato esclusivamente per questo scopo. Va utilizzato seguendo quanto descritto nel manuale di istruzioni. • Questo dispositivo non è adatto per essere utilizzato da persone (inclusi i bambini) con capacità... -
Page 43: Panoramica Del Dispositivo
Panoramica del dispositivo 1 Pulsante di selezione AV 10 Alimentazione/ interruttore di ricarica 2 Menù 11Cavo d’uscita DC 12 V 3 Tasto Giù 12 Ingresso DC 12V 4 Tasto Su 13 Uscita video 5 Menù-Su/Giù 14 Collegamento videocamera 6 LED ON/OFF 15 Slot scheda SD 7 Pulsante ON/OFF 16 Microfono... - Page 44 Telecomando 1. Enter: per vedere e riprodurre i video 2. Su: navigazione verso l‘alto / al menù precedente 3. REC: avvia la registrazione 4. Setup: impostazioni di sistema e funzioni per la registrazione 5. Power: attivare il sistema 6. Giù: navigazione verso il basso / al menù successivo 7.
- Page 45 Con il cavo video è possibile riprodurre le immagini anche su uno schermo più grande. 10. A lavoro terminato, rimuovere la telecamera dal tubo. Svitare la telecamera, pulirla con un panno pulito, morbido e asciutto e rimetterla nella posizione precedente. Impostazioni menù...
-
Page 46: Modalità Registrazione
System Indica la versione del software, la versione del prodotto, la memo- ria disponibile e utilizzata (se sono collegate USB o schede SD). Record-Setup Selezionare tra USB e SD come memoria di archiviazione Play-Mode Selezionare la modalità play Master-Reset Master-Reset: premere OK per resettare il dispositivo Firmware-Update Firmware-Update: selezionare dove salvare il nuovo Firmware Browse-File... - Page 47 Premere il pulsante 7 sul telecomando, per fermare la registrazione. Premere il pulsante 1 sul telecomando, per riprodurre la registrazione. Premere il pulsante 4 sul telecomando, per gestire la registrazione. In alternativa, è possibile anche premere “Play Video” sullo schermo. Avvertenza: il sistema di regist- razione potrebbe necessitare talvolta di 10-20 secondi per la calibrazione.
- Page 48 Installazione Codec Se i dati non possono essere riprodotti sul computer, installare il software Codec dal CD- Rom in dotazione. In alternativa, è possibile scaricare il software gratuitamente da questo sito web: kmplayer.en.softonic.com/download. Inserire il CD-Rom, cliccare sul seguente simbolo e seguire le fasi di installazione come indicato nelle figure di seguito riportate. Fase 1 Fase 2 Fase 3...
- Page 49 Fase 4 Fase 5...
- Page 50 Fase 6 Fase 7...
- Page 51 Fase 8 Fase 9...
-
Page 52: Caricare La Batteria
Caricare la batteria Collegare l’adattatore di caricamento e il carica- batterie ad una presa di corrente. Premere il tasto di carica- mento mentre il disposi- tivo è spento. La batteria può essere caricata ment- re il dispositivo è acceso e lo si sta utilizzando. -
Page 53: Istruzioni Sullo Smaltimento
Problema Possibili cause e soluzione Nessuna 1. Premere il tasto Video e spostarsi su “Video 2“ registrazione 2. Premere il tasto On. La luce del monitor dovrebbe essere verde 3. Utilizzare un’altra memoria USB e riprovare. Registrazione Spegnere il dispositivo, accenderlo nuovamente e riprovare difettosa Immagine Batteria scarica.
Need help?
Do you have a question about the Inspex 4000 and is the answer not in the manual?
Questions and answers