Advertisement
Quick Links
-KEEP FOR REFERENCE-
WARNING
Unit can tip over causing severe injury
or death.
Anchor unit to stud or wall.
DO NOT allow children to climb on unit.
Put heavy items on lower shelves or drawers.
Read and follow all assembly instructions.
Please Recycle
Recicle Por Favor
9878015EBL
-GUARDAR PARA REFERENCIA-
ADVERTENCIA
Este mueble puede caerse por encima
causando daño serio o la muerte
Anolar el mueble a un espárrago muro.
NO dejar que los niños suben por encima del mueble.
Poner los articulos mas pesados en los tableros o cajones inferiores.
Leer y sequir todos de los instucciones para el montaje.
DO NOT RETURN PRODUCT TO THE STORE
STOP
Individual stores do not stock parts.
NO REGRESAS ESTA PRODUCTO A LA TIENDA
ALTO
Las tiendas no tiene partes.
If a part is missing or damaged, please visit our website or call our toll-free customer
service line. We will gladly ship your replacement parts FREE of charge.
Si las partes están perdidas o dañadas Por favor visite nuestra página de Internet o
llame a nuestra línea de teléfono gratis de Servicio al Cliente. Nosotros le enviaremos
sus repuestos sin cargo adicional, serán totalmente gratis.
Need Parts or
Nesacitas partes o
Assistance?
WWW.SYSTEMBUILD.COM/PARTS
or call toll free:
1-866-452-4081
o llame a nuestra línea gratis:
For prompt, reliable service; please have your assembly manual ready.
Para servicio mas rapido y reliable por favor tenga esta manual listo.
Asistancia?
B349878015EBL 2
Advertisement

Related Manuals for System Build 9878015EBL


Summary of Contents for System Build 9878015EBL
- Page 1 9878015EBL DO NOT RETURN PRODUCT TO THE STORE STOP Individual stores do not stock parts. NO REGRESAS ESTA PRODUCTO A LA TIENDA ALTO Las tiendas no tiene partes. If a part is missing or damaged, please visit our website or call our toll-free customer service line.
- Page 3 PARTS - PIEZAS Parts shown are the base cabinet of your model. Please note, some parts are labeled with a sticker and some parts have a letter stamped on a raw edge. Piezas mostradas son la base del gabinete de su modelo. Tenga en cuenta las mismas partes se etiquetan con una etiqueta engomada y algunas partes tienen una carta impresa en un borde crudo.
- Page 4 PARTS - PIEZAS left cabinet member right cabinet member correda de mueble izquierda correda de mueble derecha right drawer runner #A70040 #A70050 left drawer runner grommet grommet cap deslizador derecha de cajón deslizador izquierdo de cajón ojal tapa del ojal 1 each #A56630 #A50695...
- Page 5 This illustration shows how the CAM fastening system works. Esta ilustración muestra el sistema de fijación de leva y como funciona. Important: When using a power drill or power screwdriver for screwing, please be aware to slow down and stop when screw is tight.
- Page 6 Refer to page 5 for cam lock & cam bolt procedure if needed. Consulte la página 5 para la cerradura de la leva y procedimiento del perno de leva si es necesario. Finished Edge Borde Acabado B349878015EBL 2 6 /24 www.systembuild.com...
- Page 7 Refer to page 5 for cam lock & cam bolt procedure if needed. Consulte la página 5 para la cerradura de la leva y procedimiento del perno de leva si es necesario. left cabinet member correda de mueble izquierda Finished Edge Borde Acabado left cabinet member correde de mueble izquierda...
- Page 8 Refer to page 5 for cam lock & cam bolt procedure if needed. Consulte la página 5 para la cerradura de la leva y procedimiento del perno de leva si es necesario. Finished Edge Borde Acabado left surface superficie izquierda right cabinet member correda de mueble derecha right cabinet...
- Page 9 Refer to page 5 for cam lock & cam bolt procedure Finished Edge Borde Acabado if needed. Consulte la página 5 para la cerradura de la leva y procedimiento del perno de leva si es necesario. Finished Edge Borde Acabado Finished Edge Borde Acabado B349878015EBL 2...
- Page 10 Refer to page 5 for cam lock & cam bolt procedure if needed. Consulte la página 5 para la cerradura de la leva y procedimiento del perno de leva si es necesario. B349878015EBL 2 10 /24 www.systembuild.com...
- Page 11 Refer to page 5 for cam lock & cam bolt procedure if needed. Consulte la página 5 para la cerradura de la leva y procedimiento del perno de leva si es necesario. B349878015EBL 2 11 /24 www.systembuild.com...
- Page 12 Finished Edge Borde Acabado Finished Edge Borde Acabado Refer to page 5 for cam lock & cam bolt procedure if needed. Consulte la página 5 para la cerradura LOCK de la leva y procedimiento del perno de UNLOCK APRETAR DESAPRETAR leva si es necesario.
- Page 13 Finished Edge Borde Acabado Finished Edge Borde Acabado LOCK UNLOCK APRETAR DESAPRETAR Refer to page 5 for cam lock & cam bolt procedure if needed. Consulte la página 5 para la cerradura de la leva y procedimiento del perno de leva si es necesario.
- Page 14 Refer to page 5 for cam lock & cam bolt procedure if needed. Consulte la página 5 para la cerradura de la leva y procedimiento del perno de leva si es necesario. Finished Edge Borde Acabado LOCK Finished Edge UNLOCK APRETAR Borde Acabado DESAPRETAR...
- Page 15 Refer to page 5 for cam lock & cam bolt procedure if needed. Consulte la página 5 para la cerradura de la leva y procedimiento del perno de leva si es necesario. Finished Edge Borde Acabado LOCK APRETAR UNLOCK DESAPRETAR Finished Edge Borde Acabado B349878015EBL 2...
- Page 16 Finished Edge Borde Acabado Finished Edge LOCK Borde Acabado UNLOCK APRETAR DESAPRETAR Attach the component from step 8 to the top (E) as shown. After attachment, attach the modesty panel (D) to the partition (C) with two screws (8) as shown. Conecte el componente desde el paso 8 de la parte superior (E) como se muestra.
- Page 17 Posiiton back panel (K) as shown. Align squarely and nail straight into back edges as shown. Posición del panel posterior (K) como se muestra. Alinear en ángulo recto con uñas y directamente en los bordes traseros como se muestra. Assure that the unit is square. Distance from corner to corner must be equal as shown.
- Page 18 left drawer runner deslizador izquierdo de cajón left drawer runner right drawer runner deslizador izquierdo de cajón deslizador derecha de cajón Finished Edge right drawer runner Borde Acabado deslizador derecha de cajón B349878015EBL 2 18 /24 www.systembuild.com...
- Page 19 Finished Edge Borde Acabado B349878015EBL 2 19 /24 www.systembuild.com...
- Page 20 Place a bushing (13b) and hinge (13a) into the hole in the upper shelf (F). Place the other bushing (13b) onto the top hinge (13a) attached to the door. While holding onto the door, press the top bushing into the hole in the top (E). Slide the bottom edge of the door (J) onto the bottom hinge.
- Page 21 Install keyboard shelf (I) as shown. Insert grommet (2) and grommet cap (3) into large hole in top (E). Insert adjustable shelf supports (12) at the desired level and place the adjustable shelf (H) onto the supports. Instalar estante teclado (I) tal como se muestra. Inserte la arandela (2) y la tapa de la arandela (3) en gran agujero en la parte superior (E).
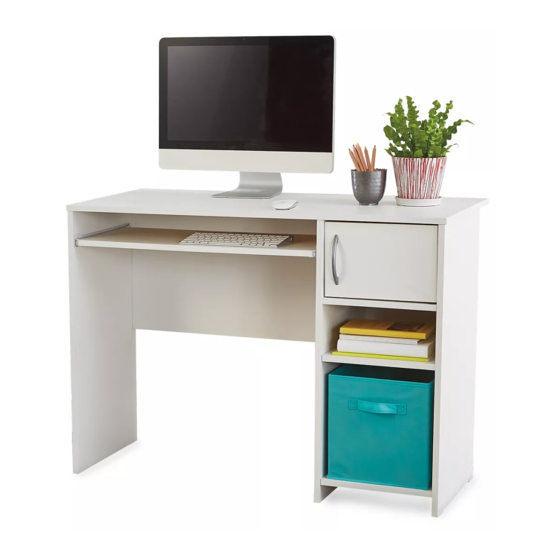
- Page 22 Please Note: A fabric bin can be purchased and placed on the adjustable shelf (H) or bottom (G). You will need to adjust the height of the adjustable shelf (H) to acommodate the fabric bin. A plastic stop (15) and screw (16) have been supplied to use as a stop for positioning of the bin.
- Page 23 MAXIMUM LOADS – CARGA MAXIMA - CHARGES MAXIMALES This unit has been designed to support the maximum loads shown. Exceeding these load limits could cause sagging, instability, product collapse, and/or serious injury. Esta unidad ha sido diseñada para soportar la carga máxima anotada.
- Page 24 Certificate of Conformity 1. This certificate applies to the Dorel Home Furnishings, Inc. product identified by this instruction manual. 2. This certificate applies to compliance of this product with the CPSC Ban on Lead-Containing Paint (16 CFR 1303). 3. This product is distributed by: Dorel Home Furnishings, Inc. 410 East First Street South Wright City, MO 63390 636-745-3351...
Need help?
Do you have a question about the 9878015EBL and is the answer not in the manual?
Questions and answers