
Related Manuals for Opus Air OPUS OP4


Summary of Contents for Opus Air OPUS OP4
- Page 1 PCT Patent Pending GB/2017/050391 & Australian Patent Pending 2017902549 OWNERS Design Registration No. 201712065 & No. 201712062 HANDBOOK...
- Page 2 PCT Patent Pending GB/2017/050391 & Australian Patent Pending 2017902549 Design Registration No. 201712065 & No. 201712062...
-
Page 3: Table Of Contents
Page 11 Setting Up your Air OPUS® Camper Page 12-13 Understanding the Air OPUS® Switchboard Page 14 Understanding the air valves when setting up your Air OPUS® Camper Page 15 Air OPUS® Water System Page 16 -17 Air OPUS® Gas System Page 18 Air OPUS®... -
Page 4: My Air Opus® Camper
MY Air OPUS® CAMPER OWNER: ADDRESS: MODEL: VIN: BUILD DATE: ATM: TARE: MAX PAY LOAD: TYRE SIZE: DEALER: CLAIM: by receiving this handbook, you confirm there you have read and agree to all the terms and conditions and understood the use and maintaince care of the Air OPUS®... -
Page 5: Vehicle Identification Number (Vin)
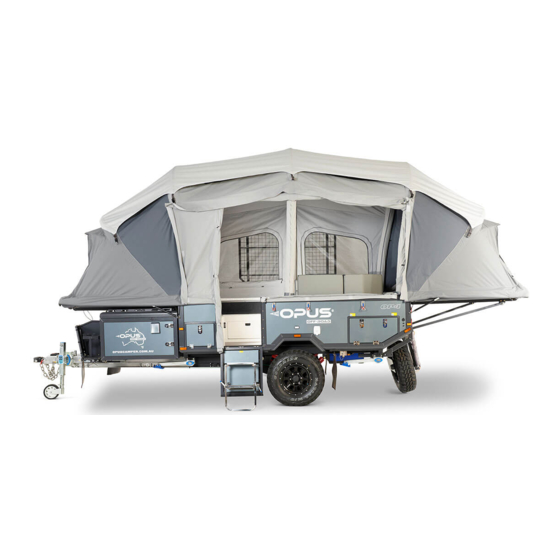
Every Air OPUS® has a Vehicle Identification Number (VIN). The VIN Plate can be found on the exterior of your Air OPUS® to the left of the door secured, to the draw bar. We recommend making a note of your VIN in the template below. - Page 6 SPECIFICATIONS - OP4 Colour Orange, Blue, Grey, Black, Green Body Work Baked enamel finish Box Material Main body aluminium f rame & composite panel exterior, with galvanized steel chassis and draw bar Dimension (Lid Closed) 5600 x 2155 x 1635mm Dimension (Lid Open) 6580 x 2735 x 3460mm Ground clearance...
- Page 7 SPECIFICATIONS - OP4 Electrical Power Supply 12V & 240V Towing 7 PIN flat plug & Anderson plug Player Included within stereo Stereo System Stereo System with 2x speakers, Radio, USB inputs, CD & DVD player Battery 2x 100Ah deep cycle AGM batteries with 240V charger Trailer Lights LED tail lights, Clearance lights, Number plate light, Tool Box lights, Living room lights , Kitchen light, Annexe...
- Page 8 DIMENSIONS - OP4 2050mm 2155mm 6580mm 5600mm opuscamper.com.au...
- Page 9 12 QUICK TIPS TO SET UP AND PACK UP YOUR Air OPUS® 12 Handy tips that will make you a PRO at setting up an Air OPUS! Invest in a cordless drill and 19mm hex head bit to adjust stabiliser legs rather than manually winding them.
- Page 10 12 QUICK TIPS TO SET UP AND PACK UP YOUR Air OPUS® Take special care to ensure all canvas is When folding the bed lids away, tucked away on all sides especially around always fold the rear bed lid first and gas struts, hinge points and where the two ensure all canvas is tucked in.
- Page 11 12 QUICK TIPS TO SET UP AND PACK UP YOUR Air OPUS® During annexe inflation make sure the external During canopy inflation make sure air valves are closed off before turning air all external air valves are closed off pump on BUT MAKE SURE the annexe linking...
-
Page 12: Hitching & Trailer Electrics
first 100km and then 7 PIN FLAT PLUG every 1000km. The Air OPUS® is fitted with a 7-pin flat plug that connects all the exterior trailer lighting and the electric brakes to the towing vehicle. A standard 7 pin plug is required on your tow vehicle for this to connect to. -
Page 13: Air Opus® Brake Set Up
About your Brakes The Air OPUS® is fitted with electric trailer brakes. You need an electric brake controller fitted to your car in order to tow the Air OPUS® and operate the electric brakes safely. Before towing, check that the Air OPUS®... -
Page 14: Setting Up Your Air Opus® Camper
SETTING UP YOUR Air OPUS® CAMPER Initial Steps Once you have positioned your Air OPUS® level in the desired location, engage the handbrake. Levelling ramps may be required (not supplied). Raise or lower the jockey wheel to level your Air OPUS® lengthways. - Page 15 Walk around the Air OPUS® and inspect the tent to ensure that the canvas is properly located within the aluminium channels and that no part of the tent is caught or snagged.
- Page 16 SETTING UP YOUR Air OPUS® CAMPER Main features of your switchboard 1 Main Power Button Switch 7 Front Tank 2 Fridge 8 Air Inflation 3 12 Volt Sockets 9 Battery Level Indicator 4 Lighting 10 Battery Level Indicator 5 Pump...
- Page 17 UNDERSTANDING THE AIR VALVES WHEN SETTING UP YOUR Air OPUS® CAMPER Before inflating, twist the Main Close all 5 external air valves on Inflation valve switch (inside tent and 7 on annexe camper) to a Vertical OPEN position by rotating anti-clockwise.
-
Page 18: Air Opus® Water System
Water System Set up The Air OPUS® is fitted with two 80L f reshwater tanks. With one unit mounted in f ront of the axle and the other unit mounted behind the axle. Each water tank has its own lockable fill point located on the driver side of the body of the Air OPUS®... - Page 19 When the water system is not required Air OPUS® recommends switching off the pump when not in use. When packing away the Air OPUS® follow the procedure below to drain the system of any excess water before disconnecting the water inlet and internal waste pipe: IMPORTANT A.
-
Page 20: Air Opus® Gas System
The gas tap/valve on the top of the gas bottle can now be opened. Turn on the yellow gas tap (situated underneath the rear of the OPUS behind each of the gas outlets unit) by turning 90°. -
Page 21: Air Opus® 240 Volt Mains Power
MAINS POWER 240V - Safe operating procedures The Air OPUS® comes fitted with a 240 volt power system. This 240 volt power system complies with Australian Safety Standard AS3001. The main circuit breaker and RCD is located with the main 15 amp power input on the drivers side of the Air OPUS®... - Page 22 On both sides of the tool box there is an LED work light. This has an automatic on/off switch Inside the Air OPUS® there are four 12V mini sockets. These are for the 12V LED light kit (optional extra). Above the main circuit board inside the Air OPUS® there is a twin 12V USB socket.
- Page 23 It is recommended to have the mains 240V connected to a suitable supply if available, even if appliances are run on 12V only. The trailer lights and electric brakes are wired to a standard 7 pin trailer plug. The Air OPUS® is fitted with electric brakes.
- Page 24 SETTING UP THE ADDITIONAL BED Seating moved to create additional bed The seating area inside the Air OPUS® can be reconfigured to provide an additional bed. BOLSTERS The furniture of the Camper with the inclusion of the table forms the base of the additional bed; the table is reinforced to provide adequate support for sleeping.
-
Page 25: Setting Up The King Size Bed Extension
Seating moved to create King Size Bed Extension The seating area inside the Air OPUS® can be reconfigured for the North South bed. The furniture of the Air OPUS® Camper rearranges to form a larger king size sleeping area that faces is a north south sleeping position. -
Page 26: Installing Your Air Opus® Annexe
Thus connect left and right corners of the annexe to the corners of the OPUS camper. STEP 2B Connect roof air inflation point to the Opus tent. opuscamper.com.au... - Page 27 Spread annexe canvas out f rom the camper as shown Inflating the annexe when attached to canopy Make sure the 5 valves on the Opus camper tent are closed and inflate the main tent STEP 4 whilst the annexe attached.
- Page 28 INSTALLING YOUR Air OPUS® ANNEXE Inflating the annexe when attached to canopy continued... After main pump shuts off it has reached the desired pressure. Remember to turn the STEP 8 MAIN GREEN INFLATION switch in the camper to the horizontal CLOSED position when inflation is complete.
- Page 29 With your OPUS® Camper fully erected, you’re ready to assemble the annexe, and the first step is to attach the wall skirt: STEP 1 Position the OPUS® wall skirt along the entry side wall of your OPUS® Camper. STEP 2 Attach the skirt with the velcro strips and zips around the edges.
-
Page 30: Air Opus® Care & Maintenance
Air OPUS® CARE AND MAINTENANCE Changing a faulty bladder when product is not inflated/in use Locate the faulty air beam and checkthat all valves are closed on the beam. Remove linking air tubes f rom faulty beam. IMPORTANT DO NOT EVER REMOVE THE BLADDER OUT OF IT’S... - Page 31 Air OPUS® CARE AND MAINTENANCE Undo the ties holding the zips on the grey tube together and unfasten the zip. While unzipping or zipping be careful NOT to allow the zipper to pinch the air tube. Remove the bladder f rom the grey tube. When you remove the bladder, you will remove the bladder and the plastic tube and valve as shown below.
- Page 32 Air OPUS® CARE AND MAINTENANCE The bladder is longer than the grey tube and it is essential that you carefully and tightlyroll the bladder at both ends and fit carefully into the grey tube. Rolling the bladder onboth ends is essential for the bladder to function correctly.
- Page 33 Air OPUS® CARE AND MAINTENANCE Open the valves at on the beam. Air should go into the replacement bladder. Depending on the size of the bladder it may be necessary to switch your pump ‘ON’ to ensure there is sufficient air in the air tent for it to be rigid.
- Page 34 OPUS® maximising the use of space. It is strongly advised that you purchase a storage cover for your OPUS® if it is to be stored in an uncovered location. The storage cover is advised for an extended period of storage to keep your camper in pristine condition.
- Page 35 MUST NOT be left wet/damp when packed away. If it is unavoidable that you will have to pack down your Air OPUS® when the canvas is wet, it is very important that the Air OPUS® tent and annexe are opened up to dry off as soon as possible and should be done within 24 hours.
- Page 36 Should a rip/tear occur asses the damage before taking action. If unsure contact your OPUS Camper dealer. Small rips/tears can be repaired using the appropriate repair kit and procedure and may not require a professional or return to the dealer or us for repair;...
- Page 37 AND MAINTENANCE EXTERNAL CARE FOR YOUR AIR OPUS® Inspect the outside panels of your Air OPUS® including the roof (bed lids) for anydamage or cracks. Inspect the sealant around the panels to verify that there is adequate bondingaround the body panels and exterior features such as the f ront storage box/f ridgecabinet.
- Page 38 If in storage for a long period of time such as 4 weeks or longer, its recommended to open and let it breathe for 24 hours. If the Air OPUS® is based in tropical warm areas eg. NSW, QLD, NT etc.
- Page 39 AND MAINTENANCE VENTILATION Ventilation is more important than is generally realised - your Air OPUS® camper and annxe have several windows/vents that can be opened to help increase air ventilation. An increase in ventilation will result in a decrease of condensation. Under extreme conditions, condensation cannot be completely avoided.
-
Page 40: Air Opus® Warranty
fittings and fixtures, plus the following specific warranties: 5 Year Suspension Warranty 3 Year Canvas & Tent Warranty 5 Year Structural Warranty OPUS warranties apply for the use of your OPUS on any road or track that is trafficable to normal four-wheel-drive vehicles. IMPORTANT VALIDITY OF CLAIMS Warranties are valid to the original purchaser of the item in question and apply f rom the original date of purchase. - Page 41 OPUS Campers are designed for use on any road or track that is trafficable to normal four-wheel-drive vehicles. OPUS Campers can be exposed to water crossings where the water is below body floor level, but never where the water is at, or above, body floor level.
- Page 42 There are no warranties, refunds, credits, exchanges or similar associated with such items. In the sale of such items, OPUS will attempt to provide all relevant information regarding the item, including faults, defects, or similar, however, there may be instances where minor defects or imperfections have been overlooked.
-
Page 43: Air Opus® Internal Features
Air OPUS® INTERNAL FEATURES Beds private sleeping pods Zippable block out, pvc clear window and fixed fly screen. Full LED Lighting System with Stereo System with 2x speakers, dimmer switch Radio, USB inputs, CD & DVD player opuscamper.com.au... - Page 44 Air OPUS® INTERNAL FEATURES Fire Extinguisher USB Sockets Toilet Batteries 2x 100Ah deep cycle AGM batteries with 240V charger opuscamper.com.au...
-
Page 45: Air Opus® Storage
Air OPUS® STORAGE Driver side storage Passenger side Fridge slide storage opuscamper.com.au... -
Page 46: Air Opus® Accessories
Air OPUS® ACCESSORIES LED Kitchen Lighting Support leg for slide out kitchen Leg stabiliser lever Wheel chocks opuscamper.com.au... - Page 47 OPUS® Service Schedule 1000 KM 10000 KM 20000 KM 30000 KM 50000 KM 40000 KM SERVICE INTERVAL 3 MONTHS 1 YEAR 2 YEARS 3 YEARS 5 YEARS 4 YEARS Check coupling moves f reely and is lubricated Torque coupling bolts...
- Page 48 OPUS® Bolt Torque Guide LOCATION BOLT SIZE BOLT GRADE TORQUE Coupling 12 mm 80 Nm Hand Brake 12 mm 80 Nm Jockey Wheel 12 mm 80 Nm Stone Shield 10 mm 22 Nm Tool Box 10 mm 22 Nm Drop-down Legs...
- Page 49 NOTES opuscamper.com.au...
-
Page 50: Pct Patent Pending Gb/2017/050391 & Australian Patent Pending 2017902549
For further information please For further information please For further information please For further information please contact the Air OPUS® team contact the Air OPUS® team contact the Air OPUS® team contact the Air OPUS® team contact the Air OPUS® team contact the Air OPUS®...
Need help?
Do you have a question about the Air OPUS OP4 and is the answer not in the manual?
Questions and answers