
Subscribe to Our Youtube Channel
Related Manuals for Rottler VR10


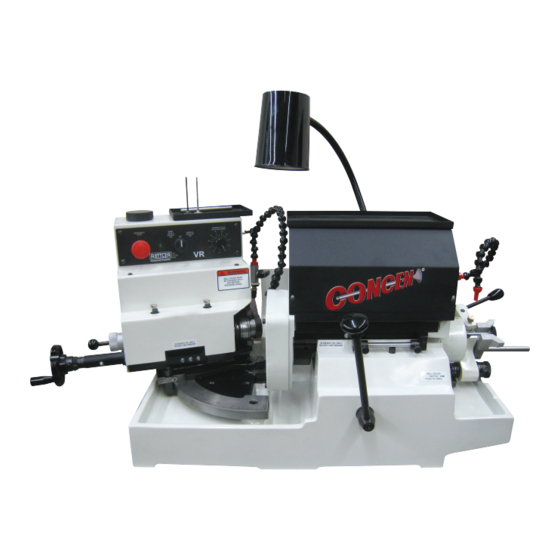
Summary of Contents for Rottler VR10
- Page 1 OPERATION AND MAINTENANCE MANUAL 8029 S 200th St Kent, WA 98032 USA | www.rottlermfg.com | Ph: 253-872-7050 | Fax: 253-395-0230 06.11.2019...
- Page 3 Contact your regional Rottler sales rep for assistance in ordering optional equipment, replacement parts, or tooling. If you are unable to contact your regional Rottler sales rep, call the factory at 253-872-7050 and ask to speak to the parts sales specialist.
-
Page 5: Table Of Contents
Section 1 Introduction VR10 Manual INTRODUCTION Contents Introduction ........................1-1 Description ........................1-2 Disclaimer ........................1-2 Limited Warranty ......................1-3 Online Documentation Access ...................1-4 www.rottlermfg.com... -
Page 6: Introduction
“Installation Report” located in the Installation Chapter of this manual. We suggest that the new user of the VR10 read the CONTROL DEFINITIONS to get an idea how the machine operates. The Operating Instructions chapter should be read in order to familiarize the user with the actual button pushing sequences required to carry out a job. -
Page 7: Description
Turcite Coated Slideways - Low Friction for smooth stroking of Grinding Wheel over Valve. Disclaimer The VR10 Manual (henceforth to be referred to as the “Manual”) is proprietary to Rottler Manufacturing LLC. (“Rottler Manufacturing”) and no ownership rights are hereby transferred. No part of the Manual... -
Page 8: Limited Warranty
Should a product not be as warranted, Rottler sole obligation shall be, at its option, to repair, correct or replace the product or to refund the amounts paid for the Product upon its return to a location designated by Rottler. -
Page 9: Online Documentation Access
VR10 Manual Online Documentation Access Online documentation for machines and optional equipment can be accessed at the Rottler website. To access documentation open your browser and navigate to https://www.rottlermfg.com. Scroll to the bottom of the page and under the Owner Resources title click the type of documentation you want to access. - Page 10 Section 1 Introduction VR10 Manual www.rottlermfg.com...
- Page 11 Section 2 Installation VR10 Manual INSTALLATION Contents INSTALLATION REPORT .....................2-2 Installation Procedure ....................2-6 Unpacking and Lifting ......................2-6 Location ..........................2-6 Machine Bolting ........................2-7 Power Supply ........................2-8 Grounding ..........................2-9 Transformer Connections ....................2-9 Air Supply ..........................2-9 Adding Grinding Oil ......................
- Page 12 Section 2 Installation VR10 Manual ATTENTION OWNER/BUSINESS MANAGER To validate the warranty on your new Rottler machine, please be sure to sign the installation report after the installation technician has installed the machine and verified the machine is operating correctly and given the operators operation and maintenance training.
-
Page 13: Installation Report
0 VAC. L1 to ground __________VAC L2 to ground __________VAC. Make sure all electrical equipment has the proper overload protection. The VR10 should have a stable power supply to prevent damage and uncontrolled movement of the machine. Neutral and machine ground are not the same thing. You should measure an open circuit between Neutral and ground. - Page 14 INSTRUCTING THE OPERATOR Note: Rotter employees and representatives per company policy are not permitted to provide end user of Rottler equipment with any OEM specifications for the workpiece that is created by end user using Rottler equipment. ______Using the operating manual as a guide explain the function of all buttons.
- Page 15 Rottler equipment. It is the responsibility of the end user of Rottler equipment to determine the final dimensions and finishes of the workpiece that they are working on. Any information regarding final dimensions and...
- Page 16 Section 2 Installation VR10 Manual www.rottlermfg.com...
-
Page 17: Installation Procedure
Section 2 Installation VR10 Manual Installation Procedure Unpacking and Lifting Use care when removing the crate materials from the machine. Be careful not to use force on any part of the machine. Remove the shipping screws (4) from the skid; the shipping brackets will be painted red and lifting bracket on yellow for easy identification. -
Page 18: Machine Bolting
Section 2 Installation VR10 Manual 3. Remove the shipping bracket from the swivel plate (located on the front of the chuck swivel plate clamp on the front of the machine). If you are putting the machine on the bench, make sure to remove the drain tube and install the black 1.00”... -
Page 19: Power Supply
Section 2 Installation VR10 Manual Power Supply This machine has the following power requirements: • 110 to 120 or 208 to 240 VAC • Single Phase Power • 50 or 60 Hz • 20 Amps for 115 VAC or 140 Amps for 220 VAC See illustration below for correct connection of incoming power. -
Page 20: Grounding
Licensed Electrician in your area for transformer selection and installation. Air Supply It is very important the air source for the VR10 machine be moisture free. Water and oil in the line will result in early cylinder and valve failure. The factory recommends installing a water trap at the machine. -
Page 21: Adding Grinding Oil
Add grinding oil that was shipped with the machine by pouring oil into drainage area. USE ONLY ROTTLER APPROVED GRINDING OIL ROTTLER GRINDING OIL OR CASTROL HONILO 710 ARE THE ONLY APPROVED GRINDING OILS USE OF NON APPROVED OIL WILL VOID WARRANTY... - Page 22 Section 3 Safety VR10 Manual SAFETY Contents Safety Information .......................3-1 Safety Instructions for Machine Use .................3-1 Electrical Power ......................3-3 Machine Operator ......................... 3-4 Emergency Procedure ......................3-4 When Using the VR10 Machine ................... 3-5 www.rottlermfg.com...
-
Page 23: Safety Information
Section 3 Safety VR10 Manual Safety Information For Your Own Safety Read This Instruction Manual Before Operating This Machine. This is the safety alert symbol. It is used to alert you to potential personal injury hazards. Obey all safety messages that follow this symbol to avoid possible injury or death. - Page 24 DO NOT MODIFY OR ALTER THIS EQUIPMENT in any way. If modifications are deemed necessary, all such requests must be approved and/or handled by Rottler Manufacturing. Unauthorized modifications could cause injury and/or damage to machine and will void the warranty.
-
Page 25: Electrical Power
If the VR10 is on the same power lines that are running to other electrical equipment (grinders, welders, and other AC motors) electrical noise can be induced into the VR10 electrical system. -
Page 26: Machine Operator
The VR10 machines have the following areas of exposed moving parts that you must train yourself to respect and stay away from when they are in motion: Cutting Tool Area –... -
Page 27: When Using The Vr10 Machine
Section 3 Safety VR10 Manual When Using the VR10 Machine Never use wheels, which that have been dropped or damaged • • Never use excessive pressure when installing a new wheel between the wheel and hubs. Tighten nut only enough to hold wheel firmly. - Page 28 Chuck Speed Controllers (3) The Rottler VR10 valve refacer is equipped with a variable speed chuck motor, which allows you to alter the rotational speed based on the valve head diameter (See chart on chuck cover). Spindle Slide Switch...
- Page 29 Section 4 Control Definitions VR10 Manual www.rottlermfg.com...
- Page 30 Section 5 Operating Instructions VR10 Manual OPERATING INSTRUCTIONS Contents Operating Instructions ....................5-1 Machine Operator ......................... 5-2 Work Area ............................5-2 Overreach ............................5-2 Hand Safety ............................5-2 Machine Capacity ......................... 5-2 Avoid Accidental Starting.........................5-2 Careless Acts ............................5-2 Job Completion ..........................5-2 Replacement Parts ..........................5-2 Misuse ..............................5-2...
-
Page 31: Operating Instructions
Section 5 Operating Instructions VR10 Manual Operating Instructions The ROTTLER VR10 MODEL is a machine fitted with high speed rotating grinding wheels, it is therefore very important to apply the following safety instructions. Do not use the machine without all the guards on. -
Page 32: Machine Operator
VR10 Manual Machine Operator The operator of the VR10 should be a skilled machinist craftsman who is well versed in the caution, care, and knowledge required to safely operate metal cutting tools. Clean the machine carefully, removing the protective grease spread on unpainted parts. -
Page 33: Emergency Procedure
PRESS THE EMERGENCY STOP BUTTON (on the front control panel) IMMEDIATELY! Grinding Wheel Replacement Use ONLY ROTTLER grinding wheels when replacing a grinding wheel. Use the reference numbers listed in the consumable section of this manual. Those grinding wheels are checked for balance before shipment. -
Page 34: Grinding Wheel Replacement Instructions
Section 5 Operating Instructions VR10 Manual Grinding Wheel Replacement Instructions Always disconnect the machine from the power source before attempting to change wheels The valve and stem grinding wheels are attached with special spanner nuts and a special wrench for its removal is included with the accessories. -
Page 35: Main Valve Grinding Wheel Replacement
Section 5 Operating Instructions VR10 Manual Main Valve Grinding Wheel Replacement 1. Remove the three mounting screws holding the wheel guard in place. 2. Insert the 3/16” diameter valve stop rod provided. (This will keep the spindle from turning while removing the grinding wheel nut.) -
Page 36: Valve Stem Grinding Wheel Removal
Section 5 Operating Instructions VR10 Manual Valve Stem Grinding Wheel Removal NOTE: It is not necessary to remove the wheel guard to remove this wheel! Insert the 3/16” diameter spindle lock pin provided. (This will keep the spindle from turning) With the special wrench, remove the butt wheel nut and then the butt grinding wheel. -
Page 37: Setting The Swivel Plate Angle
Section 5 Operating Instructions VR10 Manual SETTING THE SWIVEL PLATE ANGLE The swivel plate is marked in 1° increments from 0° to 60°. Actual setting for 0° - 60° are indicated with these numbers. To set the angle 1. Loosen the lock handle (see picture below) and set the edge of the swivel plate to the desired angle. -
Page 38: Setting The Chuck Valve Stop
Section 5 Operating Instructions VR10 Manual SETTING THE CHUCK VALVE STOP The valve stop is a device designed to locate all like valves at a given relative distance from the end of the chuck. (See picture above) To set the valve stop: 1. -
Page 39: Dressing The Main Grinding Wheel
VR10 Manual Dressing the Main Grinding Wheel Use ONLY the ROTTLER grinding wheels using the reference numbers listed on consumable section of this manual. Those grinding wheels are already balanced before delivery. Attention! The use of original parts is required. - Page 40 Section 5 Operating Instructions 5-10 VR10 Manual Note: NEVER MAKE THE WHEEL ROTATE WITHOUT ITS PROTECTING COVER 1. Turn the main switch to the OFF (center) position. 2. Loose the lock arm, swing the diamond dresser device toward the wheel and feed the diamond until it start making Contact to the wheel and dresser and feed the diamond point turns the scaled knob.
-
Page 41: Valve Stem Wheel Dressing
Section 5 Operating Instructions 5-11 VR10 Manual Valve Stem Wheel Dressing 1. The Valve stem grinding wheel needs to be dressed periodically, to keep a sharp cutting edge and a clean face. 2. Press the right side of the main switch (spindle) and move the cross on the handle to the left until the motor starts. - Page 42 Section 5 Operating Instructions 5-12 VR10 Manual 7. Sweep the diamond across the face of the wheel feeding in .003 to .005 until the face has been totally clean up. (see picture below). www.rottlermfg.com...
-
Page 43: Resurfacing Procedure
Section 5 Operating Instructions 5-13 VR10 Manual Resurfacing Procedure Note: To achieve a good run out on the valve head it is imported to keep valve stem clean and the butt must be resurface. 1. Loosen the swivel plate lock and set the proper angle for the valve seat face. - Page 44 Section 5 Operating Instructions 5-14 VR10 Manual With the stroking handle in the extreme right hand position, install the valve in the Chuck by pressing the pneumatic valve button located on the right side of the machine. (See picture below)
-
Page 45: Grinding Of Valve Stem Ends
Section 5 Operating Instructions 5-15 VR10 Manual Grinding of Valve Stem Ends With the spindle motor always to the right and on the switch on the ON position, move the stroking handle away from the switch (the main wheel should not be running at this time), then move the stroking handle to the left until spindle motor starts running. -
Page 46: Valve Stem Chamfering
Section 5 Operating Instructions 5-16 VR10 Manual Valve Stem Chamfering 1. Place the stem end dressing device in the front position as shown in the photo. 2. Release the valve stem stopper device, rotate to the stop and tighten the lock screw. - Page 47 Section 5 Operating Instructions 5-17 VR10 Manual www.rottlermfg.com...
- Page 48 Section 6 Maintenance VR10 Manual MAINTENANCE Contents Maintenance .........................6-1 Lubricating the Chuck Slideways ..................6-1 Adjusting Gibs of Chuck Slideway ..................6-2 Adjusting The Chuck Assemble Belt .................. 6-3 Replacing Chuck Assembly....................6-4 BALL CHUCK ........................6-9 Maintenance Procedure for VR Ball Chucks ..............6-9 CHUCK DISASSEMBLY AND CLEANING ..................6-10...
-
Page 49: Maintenance
Lubrication – the VR10 is supplied with 8 oiler cups and a container of slideway oil. The slideways must be lubricated before starting a new machine and regularly during use of the machine. -
Page 50: Adjusting Gibs Of Chuck Slideway
Section 6 Maintenance VR10 Manual Adjusting Gibs of Chuck Slideway After transport and use, the gibs of the chuck slideways may become lose and require some adjusting. Be sure that the gibs are well oiled as described in lubrication chapter before attempting to tighten the gibs. It is best to tighten the gib set screws without loosening the locknuts. -
Page 51: Adjusting The Chuck Assemble Belt
Section 6 Maintenance VR10 Manual Adjusting The Chuck Assemble Belt 1. The correct adjustment of the chuck drive belt will ensure long life and smooth operation. 2. It is not necessary to give excessive tension to the belt, tooth belt requires less tension then conventional belt. -
Page 52: Replacing Chuck Assembly
Section 6 Maintenance VR10 Manual Replacing Chuck Assembly First remove cover www.rottlermfg.com... - Page 53 Section 6 Maintenance VR10 Manual Then remove bolt holding actuating arm Then loosen set screw holding aluminum drive hub/thrust hub www.rottlermfg.com...
- Page 54 Section 6 Maintenance VR10 Manual Next loosen motor Then remove drive hub/stop shaft assembly. www.rottlermfg.com...
- Page 55 Section 6 Maintenance VR10 Manual Next remove chuck buy slipping out of housing. Install in reverse order. After new chuck is slid into place the housing clamps must be adjusted. Loosen all adjusting bolts. Tighten 1 large allen until slight drag is felt on the chuck when rotating...
- Page 56 Section 6 Maintenance VR10 Manual Then tighten small allen screws until chuck rotates freely Continue to other adjuster and repeat. Do this 2-3 times. Next install aluminum drive hub assembly. Adjust thrust buy pushing towards housing while pushing chuck back, and tighten set screw. Make sure the chuck turns freely and there is no thrust movement in and out.
-
Page 57: Ball Chuck
Squirt ATF fluid into the inside of the ball chuck. Be certain to squirt on each of the 6 balls to flush out any debris and ensure proper lubrication. Contact the Service Department using the service form on the Rottler web site if further assistance is required... -
Page 58: Chuck Disassembly And Cleaning
Section 6 Maintenance 6-10 VR10 Manual CHUCK DISASSEMBLY AND CLEANING www.rottlermfg.com... -
Page 59: Chuck Assembly
Section 6 Maintenance 6-11 VR10 Manual CHUCK ASSEMBLY REMOVAL OF BALL CHUCK ASSEMBLY FROM THE MACHINE INSTALLATION OF THE BALL CHUCK ASSEMBLY www.rottlermfg.com... -
Page 60: Guide Adjustment, Disassembly, And Assembly
Please visit the service tab of our web page at Send a Service Request www.rottlermfg.com or contact the Rottler Factory Service at service@rottlermfg.com for assistance and your service request. You may also call Rottler at 1-800-452-0534 or 1-253-872-7050 Please ensure you have the Machine Model and Serial Number available when contacting Rottler for Service www.rottlermfg.com... -
Page 61: Suggested Tips
VR10 Manual SUGGESTED TIPS Familiarize yourself with your Rottler VR10 valve grinding machine. We recommend that before you start grinding on customer valves, use waste valves to practices. This will prevent any undue pressure or errors while learning on a customer valves. - Page 62 Section 7 Troubleshooting VR10 Manual TROUBLESHOOTING Contents Troubleshooting ......................7-1 PNEUMATIC DIAGRAM & PARTS LIST ................7-1 ELECTRICAL WIRING DIAGRAM ..................7-2 BALL CHUCK ASSEMBLY & PARTS LIST ................7-3 www.rottlermfg.com...
-
Page 63: Troubleshooting
Section 7 Troubleshooting VR10 Manual Troubleshooting Valve chuck sticky and or Grit in Ball chuck Disassemble clean and polish. See concentricity problems instructions in Maintenance section Slideway rough Lack of oil or grit on Oil slideway and or disassemble and clean. -
Page 64: Electrical Wiring Diagram
Section 7 Troubleshooting VR10 Manual ELECTRICAL WIRING DIAGRAM www.rottlermfg.com... -
Page 65: Ball Chuck Assembly & Parts List
Section 7 Troubleshooting VR10 Manual BALL CHUCK ASSEMBLY & PARTS LIST www.rottlermfg.com... - Page 66 Section 8 Machine Parts VR10 Manual MACHINE PARTS Contents Machine Parts ......................8-1 Consumable Parts For VR10 ....................8-1 PNEUMATIC DIAGRAM & PARTS LIST ................8-2 GRINDING WHEEL ASSEMBLY ................... 8-3 GRINDING WHEEL ASSEMBLY PARTS LIST ..................8-4 BASE & BUTT GRIND ASSEMBLY ..................8-6 BASE &...
-
Page 67: Machine Parts
Section 8 Machine Parts VR10 Manual Machine Parts Consumable Parts For VR10 Part Number Description Base Storage Cabinet including removable coolant tank and paper filter VR7-CAB system, capacity 5 gals 20 liters - order grinding oil separately. VTRW-7 Main Grinding Wheel 7.0" (180mm) Diameter Special Applications, Titanium VTRW-8 Main Grinding Wheel 7.0"... -
Page 68: Pneumatic Diagram & Parts List
Section 8 Machine Parts VR10 Manual PNEUMATIC DIAGRAM & PARTS LIST www.rottlermfg.com... -
Page 69: Grinding Wheel Assembly
Section 8 Machine Parts VR10 Manual GRINDING WHEEL ASSEMBLY www.rottlermfg.com... -
Page 70: Grinding Wheel Assembly Parts List
Section 8 Machine Parts VR10 Manual GRINDING WHEEL ASSEMBLY PARTS LIST www.rottlermfg.com... - Page 71 Section 8 Machine Parts VR10 Manual www.rottlermfg.com...
-
Page 72: Base & Butt Grind Assembly
Section 8 Machine Parts VR10 Manual BASE & BUTT GRIND ASSEMBLY www.rottlermfg.com... -
Page 73: Base & Butt Grind Assembly Parts List
Section 8 Machine Parts VR10 Manual BASE & BUTT GRIND ASSEMBLY PARTS LIST REF. PART NO. DESCRIPTION QTY. REMARKS VR7-045 HAND WHEEL ALLEN GRUB SCREW M6x10 THUMB SCREW M6x16 VR7-044 FEED DIAL ------- VR7-043 FEED SCREW BRACKET -------- ALLEN CAP SCREW M6x20... - Page 74 Section 8 Machine Parts VR10 Manual REF. PART NO. DESCRIPTION QTY. REMARKS 48B. BRASS PLUG ALLEN GRUB SCREW M6x6 VR7-189 STUD VR7-191 LOCK NUT VR7-188 CLAMP NUT VR7-268-W CHUCK SLIDE COVER ALLEN BUTTON HEAD SCREW M6x10 TIMING BELT (130XL 037)
-
Page 75: Valve Clutch Assembly
Section 8 Machine Parts VR10 Manual VALVE CLUTCH ASSEMBLY www.rottlermfg.com... -
Page 76: Valve Clutch Assembly Parts List
Section 8 Machine Parts 8-10 VR10 Manual VALVE CLUTCH ASSEMBLY PARTS LIST REF. PART NO. DESCRIPTION QTY. REMARKS VR7-424 ROCKER SHAFT VR7-429 ROCKING LEVER VR7-427 ROCKER LEVER SPRING DOWEL 1/8”x1/2” VR7-187 STOPPER PLATE VR7-186 KNOB VR7-428 ROCKER PIN VR7-425 ROCKER HUB CYLINDRICAL PIN DIA. - Page 77 Section 8 Machine Parts 8-11 VR10 Manual REF. PART NO. DESCRIPTION QTY. REMARKS VR7-112 GUIDE PIN VR7-111 CONE VR7-110 CLAMP HEX. NUT M6 VR7-440 ALLEN GRUB SCREW M6x32 VR7-023 PARALLEL GIB ALLEN HEAD CAP SCREW M5x10 VR7-201 DRESSER PIVOT GRUB SCREW M8x10...
- Page 78 Section 8 Machine Parts 8-12 VR10 Manual REF. PART NO. DESCRIPTION QTY. REMARKS ALLEN CAP SCREW M5x8 ALLEN CAP SCREW M6x6 AL. GRUB SCR. M5x10 WITH NYLON PLUG BUTTON HEAD SCREW M6x12 www.rottlermfg.com...
-
Page 79: Ball Chuck Assembly & Parts List
Section 8 Machine Parts 8-13 VR10 Manual BALL CHUCK ASSEMBLY & PARTS LIST www.rottlermfg.com... - Page 80 Section 9 Options VR10 Manual OPTIONS Contents Optional Cabinet ......................9-1 CAB-VR10..........................9-1 Valve Measuring Equipment ..................9-2 VALVE-CHECK ......................... 9-2 Grinding Wheels and Diamond Dressers ..............9-3 VTRW-7 Main Grinding Wheel ....................9-3 VTRW-8 Main Grinding Wheel ....................9-3 VTRW-9 Butt Grinding Wheel ....................9-3 VTRW-13 Main Grinding Wheel ....................
-
Page 81: Optional Cabinet
Section 9 Options VR10 Manual Optional Cabinet CAB-VR10 Base Storage Cabinet including removable coolant tank and paper filter system, capacity (5) gallons (20 liters) - order grinding oil 7609C separately www.rottlermfg.com... -
Page 82: Valve Measuring Equipment
Section 9 Options VR10 Manual Valve Measuring Equipment VALVE-CHECK Valve Stem Runout Fixture Assembly measures Valve Seat and Valve Stem Runout with two separate dial gages, specify Inch .0001” or Metric .002mm www.rottlermfg.com... -
Page 83: Grinding Wheels And Diamond Dressers
Section 9 Options VR10 Manual Grinding Wheels and Diamond Dressers VTRW-7 Main Grinding Wheel 7.0” (180mm) Diameter Special Applications, Titanium VTRW-8 Main Grinding Wheel 7.0” (180mm) Diameter General Purpose VTRW-9 Butt Grinding Wheel General Purpose www.rottlermfg.com... -
Page 84: Vtrw-13 Main Grinding Wheel
Section 9 Options VR10 Manual VTRW-13 Main Grinding Wheel 7.0” (180mm)Diameter(White) Fine Finishing/Stellite VTRW-4 Dressing Diamond For Main and Butt Grinding Wheel Rocker Arm Grinding Device 555-10-48 Rocker Arm Grinding Device for Shaft Type Rocker Arms www.rottlermfg.com... -
Page 85: Optional Chucks
Section 9 Options VR10 Manual Optional Chucks Valve Stem Diameter Range from .138 - .815” (3.5 - 20.7mm) See VR7 Specification chart for valve seat angles, valve head diameters and valve stem length capacities for different design valves. Note: New VR7 machine may be ordered with small or large chuck. Machine price change will be differ- ence of standard and small or large chuck. -
Page 86: Service Parts And Supplies
Section 9 Options VR10 Manual Service Parts and Supplies 7609C Grinding Oil 5 Gallon (20 Liters) 514-7-66E Filter Paper Minimum order of (10) sheets, pricing per sheet www.rottlermfg.com... - Page 87 Section 9 Options VR10 Manual www.rottlermfg.com...
- Page 88 Other substances and materials are used in the manufacture, testing, and shipping of this machine. A complete list of the Safety Data Sheets of substances and materials used by Rottler Manufacturing during manufacturing, testing, and shipping is located on the Manual flash drive shipped with the machine.
- Page 89 Section 10 Safety Data Sheets 10-2 VR10 Manual SAFETY DATA SHEET Section 1. Identification Product name Honilo 710 SDS # 461349 Historic SDS #: 05267 Code 461349-US03 Relevant identified uses of the substance or mixture and uses advised against Product use Metalworking fluid - neat.
- Page 90 Section 10 Safety Data Sheets 10-3 VR10 Manual Section 3. Composition/information on ingredients Cooling agents for metal processing - Honing oils Substance/mixture Mixture Ingredient name CAS number Distillates, petroleum, hydrotreated middle 64742-46-7 ≥75 - <90 Triazole derivative Proprietary ≥0.1 - <0.3 Any concentration shown as a range is to protect confidentiality or is due to batch variation.
- Page 91 Section 10 Safety Data Sheets 10-4 VR10 Manual Section 5. Fire-fighting measures Special protective actions Promptly isolate the scene by removing all persons from the vicinity of the incident if there is a fire. No action shall be taken involving any personal risk or without suitable for fire-fighters training.
- Page 92 Section 10 Safety Data Sheets 10-5 VR10 Manual Section 7. Handling and storage Conditions for safe storage, Store in accordance with local regulations. Store in original container protected from direct sunlight in a dry, cool and well-ventilated area, away from incompatible materials including any (see Section 10) and food and drink.
- Page 93 Section 10 Safety Data Sheets 10-6 VR10 Manual Section 8. Exposure controls/personal protection Body protection Use of protective clothing is good industrial practice. Cotton or polyester/cotton overalls will only provide protection against light superficial contamination that will not soak through to the skin. Overalls should be laundered on a regular basis.
- Page 94 Section 10 Safety Data Sheets 10-7 VR10 Manual Section 10. Stability and reactivity Incompatible materials Reactive or incompatible with the following materials: oxidizing materials. Hazardous decomposition Under normal conditions of storage and use, hazardous decomposition products should not be produced.
- Page 95 Section 10 Safety Data Sheets 10-8 VR10 Manual Section 11. Toxicological information Section 12. Ecological information Toxicity No testing has been performed by the manufacturer. Persistence and degradability Expected to be biodegradable. Bioaccumulative potential Not available. Mobility in soil Soil/water partition Not available.
- Page 96 Section 10 Safety Data Sheets 10-9 VR10 Manual Section 14. Transport information Transport in bulk according Not available. to Annex II of MARPOL 73/78 and the IBC Code Section 15. Regulatory information U.S. Federal regulations United States inventory All components are listed or exempted.
- Page 97 Section 10 Safety Data Sheets 10-10 VR10 Manual Section 16. Other information Key to abbreviations ACGIH = American Conference of Industrial Hygienists ATE = Acute Toxicity Estimate BCF = Bioconcentration Factor CAS Number = Chemical Abstracts Service Registry Number GHS = Globally Harmonized System of Classification and Labelling of Chemicals...
Need help?
Do you have a question about the VR10 and is the answer not in the manual?
Questions and answers