Table of Contents
Advertisement
Quick Links
Advertisement
Table of Contents

Subscribe to Our Youtube Channel
Related Manuals for Optimum BM1000


Summary of Contents for Optimum BM1000
- Page 1 QUALITY YOU CAN TRUST USER’S MANUAL BREAD MAKER BM1000...
-
Page 2: Table Of Contents
CONTENTS 1. WELCOME TO YOUR NEW KITCHEN ASSISTANT! 2. IMPORTANT 02-04 3. GETTING TO KNOW YOUR OPTIMUM BREAD MAKER 05-06 4. QUICK BREAD IDEAS 5. CONTROL PANEL INTRODUCTION 08-09 6. OPERATING GUIDE 10-14 7. DESCRIPTION OF SPECIFIC FUNTIONS 15-16 8. RECOMMENDED RECIPES 17-23 9. -
Page 3: Welcome To Your New Kitchen Assistant
Congratulations on your quality investment of the Optimum Bread Maker. Fill your home with the scent of freshly baked bread with the help of your new kitchen assistant the Optimum BM1000. With 17 variable programme settings you can create the perfect homemade loaf just the way you like it, from hearty whole-wheat to soft bread, French bread and multigrain. -
Page 4: Important
-by clients in hotels, motels and other residential type environments; -bed and breakfast type environments. At Optimum we are very safety conscious. We design and manufacture consumer products with the safety of you, our valued customer, foremost in mind. In addition we ask that you exercise a degree of care when using any electrical appliance and adhere to the following precautions. - Page 5 13. To avoid damaging the appliance do not operate the unit without the bread pan placed in the chamber 14. Never switch on the appliance without properly placing the bread pan correctly filled with ingredients. 15. The lid and the outer surface may get hot when the appliance is operating. 16.
- Page 6 Return the entire appliance to the nearest authorised Optimum/Froothie Service Centre for examination and/or repair. j. Any maintenance, other than cleaning, should be performed at an authorised Optimum/Froothie Service Centre.
-
Page 7: Getting To Know Your Optimum Bread Maker
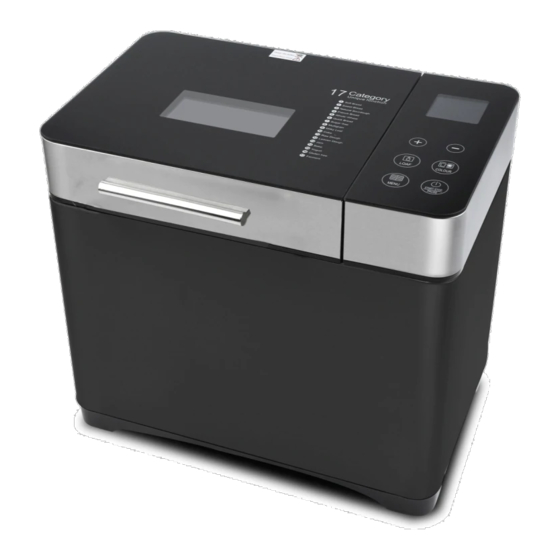
GETTING TO KNOW YOUR OPTIMUM BREAD MAKER PRODUCT FEATURES 1. Handle 2. LCD Touch Control Panel 3. Steel Housing 4. Fruit Dispenser 5. Ceramic Bread Barrel 6. Viewing Window 7. Stirring Rod 8. Hook 9. Measuring Spoon 10. Measuring Cup... - Page 8 UNDERSTANDING THE MEASURING CUP Measuring Cup. (Please see the right graphic) 1. Measure the desired amount of dry or liquid ingredients by placing the measuring cup on a flat surface at eye level. 2. For dry ingredients, pour desired amount into the cup.
-
Page 9: Quick Bread Ideas
QUICK BREAD IDEAS 750 GRAMS OF SOFT, MEDIUM COLOR BREAD: 1. Clean Bread Barrel, Stirring Rod, Measuring Cup, and Measuring Spoon. 2. Align the oblate hole at the stirring rod to the corresponding position of the revolving axle in the bread barrel and fix it in the appropriate position. -
Page 10: Control Panel Introduction
CONTROL PANEL INTRODUCTION CONTROL PANEL INTRODUCTION 1. "MENU": When selecting an option from the menu’s 1-17 modes, the LCD indicator will display the corresponding settings: 1—“Soft Bread” 2—“Sweet Bread” 3—“Natural Sourdough” 4—“French” 5—“Whole-Wheat” 6—“Quick” 7—“Sugar-Free” 8—“Multigrain” 9—“ Milky Loaf” 10—“Cake” 11—“Raw Dough”... - Page 11 8. Working for START/PAUSE/STOP ★ Programmes 1-9 and 16 serve the function of “Reservation”. After setting your reservation time, click the “start /stop/pause” button until ":" starts flashing, indicating that the reservation function is activated and the countdown begins. If you do not want a delayed starting time, click on the “start/ stop/pause”...
-
Page 12: Operating Guide
OPERATING GUIDE OPERATING GUIDE Please be careful before use: Check wire cord, socket and fuse box in order. Rating Load is higher than 3A. Bread Maker must be grounded in safe. Earth Wire and Zero Line must be separated, preventing them from twisting in each other over the three-plug connector. - Page 13 4. Plug the bread maker into the outlet and you will hear a buzzing sound. The indicator will display the following: 750g /Medium Color /soft bread. 5. To select your Bread Recipe press “Menu”: The number corresponding to each program will move clockwise from 1-17.
- Page 14 8. Start The Unit and Begin to Make Bread Press “START/STOP/PAUSE” to begin the countdown. ★ After starting, the appliance will start to stir ingredients. To avoid the splashing of flour, the machine is auto-programmed to interval stir in the first 7 minutes. After 7 minutes, the system auto-switches to continuous stirring.
- Page 15 Color and Loaf. Once complete, the buzzer will sound. “Jam” Operation Instructions: You can make delicious fruit jams with the Optimum BM1000. Prepare fruit of choice in accordance to your recipe. Ensure fruit is cut into 3cm pieces. Add fruit, sugar and all other ingredients into the barrel, select “Jam”...
- Page 16 “Automatic Fruit Dispenser” Operation Instructions: a) Open the cover and take the fruit box out. Press the fruit box handle and lift to remove. (Ref picture 1) b) Open the box. (Ref picture 2) c) Add the measured fruit and or nuts, and close the cover. (Ref picture 3) d) Align the two pillars at the bottom of the box holder with the fruit box handle and press until it re- attaches itself to the lid.
-
Page 17: Description Of Specific Funtions
6. The intermittent buzzer sound will emit when the “Keep Warm” function ends. MEMORY FUNCTION IN LIEU OF POWER OUTAGE 1. The BM1000 holds a 15 minute charge to power the bread maker in lieu of a temporary power outage. - Page 18 KEEP WARM The BM1000 keeps your bread warm even after baking. ★ After the bread is done, the machine automatically enters “Keep Warm” mode with flashing “:” ★ The maximum time it will remain in “Keep Warm” is 1 hour.
-
Page 19: Recommended Recipes
RECOMMENDED RECIPES Note: 500g=500g, 750g=750g, 1000g=1000g 1. SOFT Material 500g 750g 1000g Water 160ml 240ml 290ml Butter 2 Big Spoon 2 Big Spoon 3 Big Spoon Table Salt 1/2 Small Spoon 1/2 Small Spoon 1 Small Spoon Sugar 1 Big Spoon 2 Big Spoon 3 Big Spoon Milk Powder... - Page 20 4. FRENCH Material 500g 750g 1000g Water 200ml 260ml 320ml Butter 2 Big Spoon 2 Big Spoon 3 Big Spoon Table Salt 1/2 Small Spoon 1/2 Small Spoon 1/2 Small Spoon Sugar 2 Big Spoon 3 Big Spoon 4 Big Spoon Milk Powder 2 Big Spoon 3 Big Spoon...
- Page 21 7. SUGAR FREE Material 500g 750g 1000g Water 120ml 180ml 240ml Butter 2 Big Spoon 2 Big Spoon 3 Big Spoon Table Salt 3/4 Small Spoon 1 Small Spoon 1+1/4 Small Spoon 1 pcs 1 pcs 1 pcs Milk Powder 2 Big Spoon 3 Big Spoon 4 Big Spoon...
- Page 22 Special note: Making a soft cake is not impossible in the BM1000, but it may take a little more effort. To do this, select programme 14 /"Bake" on the menu to manually control baking time.
- Page 23 11. RAW DOUGH Material Water 280ml Butter 2 Big Spoon ▲Egg 2 pcs ▲Table Salt 1+1/3 Small Spoon ▲Sugar 1 Big Spoon Flour 4 Cups P.S. Select the recipes marked “▲” as your needs 12. LEAVEN DOUGH Material Water 240ml Butter 2 Big Spoon Table Salt...
- Page 24 15. GLUTEN-FREE Material 500g 750g 1000g Water 120ml 180ml 240ml Sugar 2.5 Big Spoon 3 Big Spoon 3.5 Big Spoon Table Salt 1/2 Small Spoon 1 Small Spoon 1.5 Small Spoon Butter 2 Big Spoon 2.5 Big Spoon 3 Big Spoon Gluten-free flour 140g 210g...
- Page 25 Mixture Ratio of Water and Flour: Different flours have different water absorption efficiency. Please adjust the amount of water used in accordance with the flour used. 1. If too much water is added, the dough will become too soft and sticky. This may lead to bread that has a rough surface and a texture with no elasticity.
-
Page 26: Cleaning And Maintenance
CLEANING AND MAINTENANCE Keep Surface Clean 1. Unplug the unit and disconnect electricity before cleaning. 2. Apply a small amount of neutral cleaning solution to a clean and soft cloth. Wipe the unit gently and use another cloth to dry thoroughly. Please do not use oils or abrasive cleaners as they are corrosive materials to clean. -
Page 27: Troubleshooting
PROBLEM SOLUTION The answers corresponding to the questions below are for your reference only. If there are possible serious problems or damage to the machine, please contact maintenance service or dial service hotline for more help. Defects Possible Issues Solution Check if plug is in the outlet Press “Start/Stop”... -
Page 28: Technical Specifications
TECHNICAL SPECIFICATION The device complies with the European Directives 2014/35/EU, 2014/30/EU and 2009/125/EC Australia standard: AS/NZS 60335.2.9:2014+A1-3; AS/NZS 60335.1:2011+A1-4 At the end of its service life, this product may not be disposed of in the normal household waste, but rather must be disposed of at a collection point for recycling electrical and electronic devices. -
Page 29: Warranty Terms And Conditions
Effective as of 1st January 2014 Optimum® (“we”) warrants this appliance to be free from defects in materials and workmanship. As long as you use it according to this instruction book, Optimum® warrants that it will perform satisfactorily in household use for a period of 1 year. - Page 30 Please contact the distributor located in the country where you made your original purchase for all Support, Servicing and Warranty...
- Page 31 Optimum Breadmaker BM1000...
Need help?
Do you have a question about the BM1000 and is the answer not in the manual?
Questions and answers