
Related Manuals for Promate CarShade


Summary of Contents for Promate CarShade
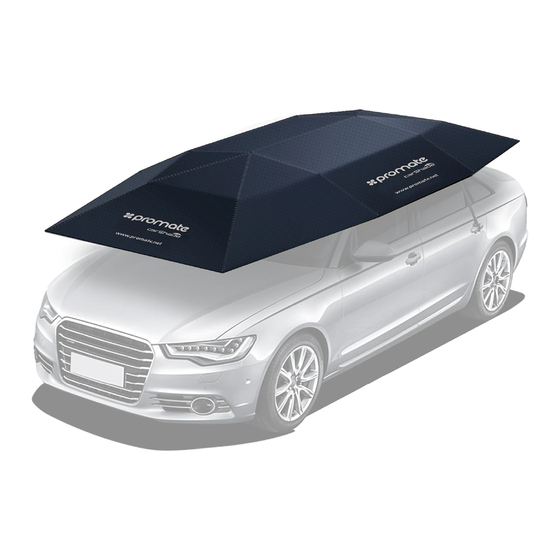
- Page 1 CarShade Universal Protective Weather Proof Car Umbrella Windproof Design • Anti-Theft Protection • Automated Set-Up User Guide...
- Page 2 The secure suction cup makes this car shade windproof. The patented automated folding structures o er a safe and stable weatherproof design. CarShade has been tested to reduce your car temperatures by at least 30 degrees. Portable and easy to use, CarShade is the car accessory your car needs.
- Page 3 11. In case you lose the remote, press the reset button on CarShade to fold it. 12. In the event of a malfunction, push the reset switch on the CarShade to fold it. If this does not work, charge the CarShade using the car charger provided and press the reset button again.
- Page 4 English English Appearance & Interface Description 1. CarShade Handle 2. Suction Holder 3. Anti-Theft Safety Rope 4. Windproof Hooks 5. Soft Rubber Mat 6. Tarp Snap Fastener 7. Reset Button 8. Car Charger Socket 9. Charging LED 10. Lock Pin 11.
- Page 5 Usage Instructions: 1. Installation of “CarShade”: 1. Place the “CarShade” on the car with the suction cup rmly set in the middle of the car roof with the handle of the “CarShade” Base facing you. 2. Press the Power Switch to the “On” position.
- Page 6 2. Removal of “CarShade”: 1. Detach the “Windproof Hooks”. 2. Press the button “ ” on the remote controller to turn on the automatic folding of the “CarShade”. 3. Open the car door and remove the “Anti-Theft Rope”. 4. Pull the “CarShade” Base o the car and tie the gathering rope.
- Page 7 English...
- Page 8 Spanish Descripción del Aspecto y la Interfaz 1. Agarradera del CarShade 2. Soporte de ventosa 3. Cuerda de seguridad antirrobo 4. Ganchos a prueba de viento 5. Tapete de hule suave 6. Sujetador rápido de la lona 7. Botón de reinicio 8.
- Page 9 2. Oprima el interruptor POWER a la posición "ON". 3. Desate la cuerda de recoger. 4. Baje la manija de acero para asegurar el cobertor CarShade sobre el techo del coche. 5.Ate la "Cuerda Antirrobo" dentro del coche y cierre la puerta.
- Page 10 Conecte un extremo del cargador del coche al cobertor “CarShade” y el otro extremo a la toma de carga en su vehículo. El LED de carga azul se iluminará indicando que el “CarShade” se ha cargado por completo. El indicador LED rojo de carga destella mientras la batería se está cargando.
- Page 11 French Description Apparence & Interface: 1. Poignée CarShade 2. Support d’aspiration 3. Corde de sécurite antivol 4. Crochet coupe vent 5. Tapis en caoutchouc souple 6. Attache bache à pression 7. Bouton de réinitialisation 8. Prise de chargeur voiture 9. LED de charge 10.
-
Page 12: Instructions D'utilisation
3. Détachez la corde de rassemblement. 4. Tirez la poignée en acier vers le bas pour xer le CarShade sur le toit de la voiture. 5. Clipsez la «corde anti-vol de sécurité» dans la voiture et fermez la porte de la voiture. - Page 13 2. Enlèvement de “CarShade”: 1. Détachez les "crochets coupe-vent". 2. Appuyez sur le bouton “ ” de la télécommande pour activer le repliage automatique du "CarShade" 3. Ouvrez la porte de la voiture et retirez la "Corde antivol" Tirez la base de "CarShade" de la voiture et attachez la corde de collecte.
- Page 14 Portuguese Aparência e descrição do interface 1. Pega do CarShade 2. Suporte de sucção 3. Corda de segurança antirroubo 4. Ganchos à prova de vento 5. Tapete de borracha macia 6. Mola de aperto da lona 7. Botão de reinicialização 8.
- Page 15 5. Fixe a "Corda de segurança antirroubo" dentro do carro e feche a porta do carro. 6. Prima o botão " " no controlo remoto para ligar o desdobramento automático do "CarShade". 7. Aguarde que o "CarShade" se desdobre completamente.
- Page 16 " no controlo remoto para ligar a dobragem automática do "CarShade". 3. Abra a porta do carro e remova a “corda antirroubo”. 4. Puxe a base do "CarShade" para fora do carro e amarre a corda de recolha. 3. Carregamento do “CarShade"...
- Page 17 Romanian 1. Mâner CarShade 2. Suport Ventuză 3. Chingă de Siguran ă Antifurt 4. Cârlige Rezistente la Vânt 5. Înveli din Cauciuc Fin 6. Flan ă de Prindere 7. Buton de Resetare 8. Soclu Încărcare Ma ină 9. LED de Încărcare 10.
- Page 18 Instruc iuni de Utilizare: 1. Instalare “CarShade”: 1. A eza i "CarShade" pe masina cu ventuza xată ferm în mijlocul acoperi ului autovehi culului, cu mânerul "CarShade" îndreptat spre dvs.. 2. Apăsa i comutatorul de alimentare în pozi ia "Pornit".
- Page 19 2. Îndepărtare “CarShade”: 1. Deta a i “Cârligele Rezistente la Vânt”. 2. Apăsa i butonul “ ” de pe telecomandă pentru a activa plierea automată "CarShade". 3. Deschide i u a ma inii i îndepărta i "Cablul Antifurt". 4. Trage i "CarShade" de pe ma ină i lega i chinga de colectare.
- Page 20 Romanian...
- Page 21 Russian CarShade...
- Page 22 Russian “CarShade”: “CarShade” “CarShade” " .". CarShade " " “ ” “CarShade”. “CarShade” “ ”...
- Page 23 Russian “CarShade”: “ ”. “ ” “CarShade”. " ". “CarShade” “CarShade” “CarShade” , “CarShade”.
- Page 24 Turkish 1. CarShade Tutma Yeri 2. Vakum Tutucu 3. Hırsızlığa Kar ı Koruma İpi 4. Rüzgârdan Koruma Kancaları 5. Yumu ak Kauçuk Mat 6. Kolay Branda Gericisi 7. Sıfırlama Düğmesi 8. Araç arj Giri i 9. arj LED Lambası 10. Kilitleme Pimi 11.
- Page 25 Turkish Kullanım Talimatları: 1. “CarShade” Kurulumu: 1. “CarShade”in alt kısmı size dönük olacak, emme kabı sımsıkı ve dümdüz bir ekilde araç tavanının tam orta kısmı üzerine gelecek ekilde yerle tirin. 2. Güç Düğmesini “Açık” konumuna getirin. 3. Toplama ipini çözün.
- Page 26 4. “CarShade”in Alt Kısmını araçtan çekin ve toplama ipini bağlayın. 3. “CarShade”in arj Edilmesi: Araç arjının bir ucunu “CarShade”e bağlayın ve diğer ucunu da aracınızın arj soketine bağ layın. Mavi renkli arj gösterge LED ı ığı “CarShade” tamamen arj olduğunda yanacaktır. Batarya...
- Page 27 German Beschreibung von Aussehen & Interface: 1. CarShade Gri 2. Saughalter 3. Diebstahlschutz-Sicherungsseil 4. Windfeste Haken 5. Weiche Gummimatte 6. Schnappverschluss Abdeckplane 7. Rücksetztaste 8. Buchse für das Autoladegerät 9. Lade-LED-Licht 10. Verriegungsstift 11. Stahlgri 12. Geräteschalter...
- Page 28 Benutzungsanleitung: 1. Installation des „CarShade“: 1. Platzieren Sie den „CarShade“ auf dem Auto. Der Saughalter muss dabei fest in der Mitte des Autodaches aufgesetzt werden, wobei der Gri an der Basis des „CarShade“ zu Ihnen zeigt. 2. Stellen Sie den Geräteschalter auf „Ein“ [„On“].
- Page 29 Faltmechan ismus des „CarShade“ einzuschalten. 3. Ö nen Sie die Autotür und entfernen Sie das „Diebstahlschutz-Sicherungsseil“. 4. Lösen Sie die Basis des „CarShade“ vom Auto und machen Sie das Halteseil fest. 3. Den „CarShade“ au aden Stecken Sie ein Ende des Autoladegeräts in den „CarShade“ und das andere Ende in die Ladebuchse Ihres Fahrzeugs.
- Page 30 Chinese 外观和接口说明: 1. CarShade把手 2. 吸引式把持器 3. 防盗安全绳 4. 防风钩 5. 软橡胶垫 6. 篷布按扣 7. 重置按钮 8. 车用充电器插座 9. 充电LED灯 10. 锁定销 11. 钢把手 12. 电源开关...
- Page 31 Chinese 使用说明: 1. “CarShade”的安装: 1. 将“CarShade”放置在车上,将吸盘牢牢地固定在车顶中间,CarShade”底座 的把手朝向您自己。 2. 按下电源开关至“开”位置。 3. 解开绳索。 4. 拉下钢把手,将CarShade固定在车顶上。 5. 在车内夹上“防盗安全绳”并关上车门。 6. 按按遥控器上的 “ ” 按钮,以打开“CarShade”的自动展开功能。 7. 等到“CarShade”完全展开。 8. 如下图所示将“防风钩”固定在车上。根据需要调整带子的长度。...
- Page 32 Chinese 2. “CarShade”的移除: 1. 拆下“防风钩”。 2. 按遥控器上的“ ” 按钮,以打开“CarShade”的自动折叠功能。 3. 打开车门并移除“防盗绳”。 4. 拉出车中的将“CarShade”底座,并系上绳索。 3. 给“CarShade”充电 将车用充电器的一端连接到“CarShade”,另一端连接到车上的充电插座。 蓝色充电 指示灯将亮起,表示“CarShade”充满电。电池在充电时, 红色充电LED指示灯会闪烁。...
- Page 33 . را از ﺧﻮدرو ﺟﺪا ﮐﻨﯿﺪ و طﻨﺎب ﺟﻤﻊ ﮐﻨﻨﺪه را ﺑﺒﻨﺪﯾﺪCarShade 4. ﭘﺎﯾﻪ CarShade 3. ﺷﺎرژ ﮐﺮدن . و ﺳﺮ دﯾﮕﺮ را ﺑﻪ ﺳﻮﮐﺖ ﺷﺎرژ داﺧﻞ ﺧﻮدرو وﺻﻞ ﮐﻨﯿﺪCarShade ﯾﮏ ﺳﺮ ﺷﺎرژر ﺧﻮدرو را ﺑﻪ ﺑﻪ طﻮر ﮐﺎﻣﻞ ﺷﺎرژ ﺷﺪهCarShade آﺑﯽ رﻧﮓ ﺷﺎرژ روﺷﻦ ﻣﯽ ﺷﻮد ﮐﻪ ﻧﺸﺎن ﻣﯽ دھﺪLED...
- Page 34 Persian :دﺳﺘﻮراﻟﻌﻤﻞ ھﺎی اﺳﺘﻔﺎده :CarShade 1. ﻧﺼﺐ را روی ﺧﻮدرو ﻗﺮار دھﯿﺪ طﻮری ﮐﻪ ﻓﻨﺠﺎن ﻣﮑﺸﯽ وﺳﻂ ﺳﻘﻒ ﺧﻮدرو وCarShade .1 . ﺑﻪ ﺳﻤﺖ ﺧﻮدﺗﺎن ﺑﺎﺷﺪCarShade دﺳﺘﻪ ﭘﺎﯾﻪ . ﻗﺮار دھﯿﺪON 2. ﺳﻮﺋﯿﭻ روﺷﻦ ﺧﺎﻣﻮش را در وﺿﻌﯿﺖ .3. طﻨﺎب ﺟﻤﻊ ﮐﻨﻨﺪه را ﺑﺎز ﮐﻨﯿﺪ...
- Page 35 Persian :ﻇﺎھﺮ و ﺷﺮح راﺑﻂ CarShade 1. دﺳﺘﻪ 2. ﻧﮕﮭﺪارﻧﺪه ﻣﮑﺸﯽ 3. طﻨﺎب اﯾﻤﻨﯽ ﺿﺪﺳﺮﻗﺖ 4. ﺣﻠﻘﻪ ﻣﺤﺎﻓﻆ در ﺑﺮاﺑﺮ ﺑﺎد 5. ﺗﺸﮏ ﻻﺳﺘﯿﮑﯽ ﻧﺮم 6. دﮐﻤﻪ ﻓﺸﺎری ﺑﺮزﻧﺖ 7. دﮐﻤﻪ ﺑﺎزﻧﺸﺎﻧﯽ 8. ﺳﻮﮐﺖ ﺷﺎرژر ﺧﻮدرو ﺷﺎرژLED .9 01. ﭘﯿﻦ ﻗﻔﻞ...
- Page 36 .“ ﻣﻦ اﻟﺴﯿﺎرة وأرﺑﻂ ﺣﺒﻞ اﻟﺮﺑﻂCarShade” 4. أﺧﻠﻊ ﻗﺎﻋﺪة “CarShade” 3. ﺷﺤﻦ .“ واﻟﻄﺮف اﻵﺧﺮ ﺑﻤﻨﻔﺬ اﻟﺸﺎﺣﻦ ﻓﻲ اﻟﺴﯿﺎرةCarShade” ﻗﻢ ﺑﺘﻮﺻﯿﻞ أﺣﺪ طﺮﻓﻲ اﻟﺸﺎﺣﻦ ﻣﻊ “ ﺗﻤﺎﻣ ﺎ ً . ﺳﻮفCarShade” ﺳﻮف ﻳﻀﻲء ﻣﺼﺒﺎح ﻣﺆﺷﺮ اﻟﺸﺤﻦ اﻷزرق ﻟﻠﺪﻻﻟﺔ ﻋﻠﻰ ﺷﺤﻦ .ﻳﻮﻣﺾ ﻣﺼﺒﺎح ﻣﺆﺷﺮ اﻟﺸﺤﻦ اﻷﺣﻤﺮ ﻋﻨﺪ ﺷﺤﻦ اﻟﺴﯿﺎرة...
- Page 37 . ﻓﺲ ﺳﻘﻒ اﻟﺴﯿﺎرةCarShade 4. اﺿﻐﻂ اﻟﻤﻘﺒﺾ اﻟﻔﻮﻻذي أﺳﻔﻞ ﻟﺮﺑﻂ .5. ﺛﺒﺖ "اﻟﺤﺒﻞ اﻟﻤﺎﻧﻊ ﻟﻠﺴﺮﻗﺔ" ﺣﻮل اﻟﺴﯿﺎرة واﻏﻠﻖ ﺑﺎب اﻟﺴﯿﺎرة . ً “ ﺗﻠﻘﺎﺋﯿ ﺎCarShade” 6. اﺿﻐﻂ زر ” “ ﻋﻠﻰ اﻟﺮﻳﻤﻮت ﻛﻨﺘﺮول ﻟﺘﺸﻐﯿﻞ طﻲ .“ ﺑﺎﻟﻜﺎﻣﻞCarShade” 7. اﻧﺘﻈﺮ ﺣﺘﻰ ﻳﻨﻔﺘﺢ...
- Page 38 Arabic :وﺻﻒ اﻟﺸﻜﻞ واﻟﻮاﺟﮭﺔ CarShade 1. ﻣﻘﺒﺾ 2. ﺣﺎﻣﻞ اﻟﺸﻔﺎط 3. اﻟﺤﺒﻞ اﻟﻤﺎﻧﻊ ﻟﻠﺴﺮﻗﺔ 4. دﻋﺎﻣﺎت ﺣﺎﺟﺐ اﻟﺮﻳﺎح 5. دواﺳﺔ ﻣﻦ اﻟﻤﻄﺎط اﻟﻠﯿﻦ 6. ﺣﺰام اﻟﺮﺑﻂ 7. زر إﻋﺎدة اﻟﻀﺒﻂ 8. ﻣﻨﻔﺬ ﺷﺎﺣﻦ اﻟﺴﯿﺎرة اﻟﺨﺎص ﺑﺎﻟﺸﺤﻦLED 9. ﻣﺆﺷﺮ 01. ﻣﻔﺘﺎح ﻗﻔﻞ...
Need help?
Do you have a question about the CarShade and is the answer not in the manual?
Questions and answers