Advertisement
Available languages
Available languages
Quick Links
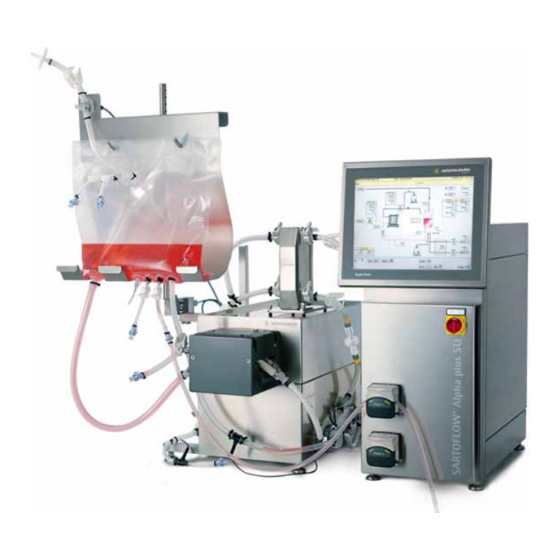
SARTOFLOW
Installation of the Sartocon
Installation der Sartocon
Crossflow Bag Loops
®
Alpha plus SU
®
Slice Self Contained and presterilized Single use Bag Loop |
®
Slice Self Contained und Montage des vorsterilisierten
85032-537-30
Vers. 06 | 2010
Advertisement

Related Manuals for Sartorius stedim SARTOFLOW Alpha plus SU


Summary of Contents for Sartorius stedim SARTOFLOW Alpha plus SU
- Page 1 ® SARTOFLOW Alpha plus SU Installation of the Sartocon ® Slice Self Contained and presterilized Single use Bag Loop | ® Installation der Sartocon Slice Self Contained und Montage des vorsterilisierten Crossflow Bag Loops 85032-537-30 Vers. 06 | 2010...
- Page 2 English ..........Page 5 Deutsch .
- Page 3 Installation of the presterilized When unpacking the components please check whether the packaging is intact Single use Bag Loop and no damage to the individual components is visible. Also, make sure that during the installation no parts are being damaged or contaminated. Procedure 1.
- Page 4 Electronic positioning valve – 1. During assembly of the valve body, the electronic positioning valve must be Valve body installation in the position “100%”. 2. Mount the Valve body to the connector (see Figure 3). 3. Fasten the Valve with Tri-clamp (see Figure 4). 4.
- Page 5 Installation of the Sartocon Slice Self Contained Before the assembly and cleaning of the filter holder you must carefully read the operating manual of the Sartocon Slice Self Contained Unit! In the case of incorrect handling of the filter cassettes severe injuries may result or the filter cassette may be damaged.
- Page 6 OPTA-Connector 1. Connect the female and male OPTA connectors with the same colour tag. These colour codes ensure the correct allocation of the ports. Orange: Feed Blue: Retentate Yellow: Permeate Making the Connection Male connector Female connector Step 1 Remove the protective caps by pulling on the flaps that are located at the bottom of each cap.
- Page 7 Step 3 After the two pins of the male connector are “clicked” into place, join the grippers at the bottom of each membrane tape together. The grippers should also “click” into place. Remove the membrane horizontally. Pins Click Grippers Step 4 (A) Slide the collar that has been retracted back in place and (B) turn it clockwise until the lock “clicks”...
- Page 9 Montage des vorsterilisierten Crossflow Überprüfen Sie beim Auspacken der Komponenten, ob die Verpackung intakt ist Bag Loops oder Crossflow Bag Loops und an den einzelnen Komponenten keine Schäden erkennbar sind. Stellen Sie zudem während der Montage sicher, dass kein Teil beschädigt oder verunreinigt wird. Vorgehensweise 1.
- Page 10 Elektrisches Positionierventil – 1. Bei der Montage des Ventilkörpers muss sich das elektrische Positionierventil Installation des Ventilkörpers in der Position „100%“ befinden. 2. Bringen Sie den Ventilkörper am Anschluss an (siehe Abbildung 3). 3. Sichern Sie das Ventil mit einer Tri-Clamp-Verbindung (siehe Abbildung 4). 4.
- Page 11 Installation der Sartocon Slice Self Contained Lesen Sie vor der Montage und Reinigung des Filterhalters die Bedienungsanleitung der Sartocon Slice Self Contained aufmerksam durch. Eine falsche Handhabung der Filterkassetten kann zu Verletzungen oder Schäden an der Filterkassette führen. Verwenden Sie ausschließlich den mitgelieferten Drehmomentschlüssel oder die Hydraulikeinheit, um die Self Contained Filtereinheit zu befestigen.
- Page 12 OPTA-Verbinder 1. Verbinden Sie die OPTA-Buchse und den OPTA-Stecker mit derselben Farbkodierung. Mithilfe dieser Farbcodierungen kann die korrekte Zuordnung der Anschlüsse sichergestellt werden. Orange: Zufuhr Blau: Retentat Gelb: Permeat Herstellen der Verbindung Stecker Buchse Schritt 1 Nehmen Sie die Schutzkappen durch Ziehen an den Laschen unten an den Kappen ab. Wenn Sie die Kappen abgenommen haben, werden die Membranfolien freigegeben.
- Page 13 Schritt 3 Sobald die beiden Steckerstifte eingerastet sind, schieben Sie die Greifer unten an den Membranfolien zusammen. Auch die Greifer sollten einrasten. Entfernen Sie die Membran horizontal. Stifte Klick Greifer Schritt 4 (A) Schieben Sie die zurückgezogene Manschette wieder nach vorne, und (B) drehen Sie sie im Uhrzeigersinn, bis die Verriegelung einrastet.
- Page 14 Sartorius Stedim Biotech GmbH August-Spindler-Str. 11 37079 Goettingen, Germany Phone +49.551.308.0 Fax +49.551.308.3289 www.sartorius-stedim.com Copyright by Sartorius Stedim Biotech GmbH, Goettingen, Germany. All rights reserved. No part of this publication may be reprinted or translated in any form or by...
Need help?
Do you have a question about the SARTOFLOW Alpha plus SU and is the answer not in the manual?
Questions and answers