Table of Contents
Advertisement
Quick Links
SMARTMAC 200 W
SMARTMAC 200 W
SMARTMAC 200 W
SMARTMAC 200 W
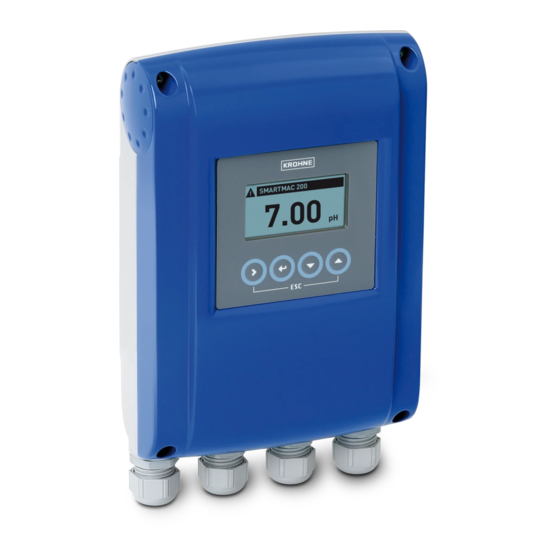
Operating and display unit
for SMARTPAT PH/ORP/COND sensors
Electronic Revision: ER 2.0.X_
The documentation is only complete when used in combination with the relevant
documentation for the sensor.
© KROHNE 09/2017 - 4003047503 - MA SMARTMAC 200 W R03 en
Handbook
Handbook
Handbook
Handbook
Advertisement
Table of Contents

Subscribe to Our Youtube Channel
Related Manuals for KROHNE SMARTMAC 200 W


Summary of Contents for KROHNE SMARTMAC 200 W
- Page 1 Operating and display unit for SMARTPAT PH/ORP/COND sensors Electronic Revision: ER 2.0.X_ The documentation is only complete when used in combination with the relevant documentation for the sensor. © KROHNE 09/2017 - 4003047503 - MA SMARTMAC 200 W R03 en...
- Page 2 All rights reserved. It is prohibited to reproduce this documentation, or any part thereof, without the prior written authorisation of KROHNE Messtechnik GmbH. Subject to change without notice. Copyright 2017 by KROHNE Messtechnik GmbH - Ludwig-Krohne-Str. 5 - 47058 Duisburg (Germany) www.krohne.com 09/2017 - 4003047503 - MA SMARTMAC 200 W R03 en...
-
Page 3: Table Of Contents
5.2.2 Error page ORP ........................28 5.2.3 Error page conductive conductivity ..................29 5.3 Menu mode ........................29 5.4 Menu mode structure pH ....................30 5.4.1 Function table pH measurement..................31 09/2017 - 4003047503 - MA SMARTMAC 200 W R03 en www.krohne.com... - Page 4 7.2 Dimensions ........................65 7.2.1 Housing die-cast aluminium....................67 7.2.2 Housing stainless steel......................68 7.2.3 Mounting plate die-cast aluminium ..................69 7.2.4 Mounting plate stainless steel....................70 8 Notes www.krohne.com 09/2017 - 4003047503 - MA SMARTMAC 200 W R03 en...
-
Page 5: Safety Instructions
WARNING! If the device is not used according to the operating conditions (refer to chapter "Technical data"), the intended protection could be affected. 09/2017 - 4003047503 - MA SMARTMAC 200 W R03 en www.krohne.com... -
Page 6: Certifications
The manufacturer is not liable for any damage resulting from improper use or use for other than the intended purpose. SMARTMAC 200 W is a loop-powered operating unit with display. The intended use of the SMARTMAC 200 W is to configure and calibrate the SMARTPAT PH, ORP or COND sensors in field. 1.3 Certifications CE marking The device meets the essential requirements of the EU directives. -
Page 7: Safety Instructions From The Manufacturer
The manufacturer reserves the right to alter the content of its documents, including this disclaimer in any way, at any time, for any reason, without prior notification, and will not be liable in any way for possible consequences of such changes. 09/2017 - 4003047503 - MA SMARTMAC 200 W R03 en www.krohne.com... -
Page 8: Product Liability And Warranty
This document is provided to help you establish operating conditions, which will permit safe and efficient use of this device. Special considerations and precautions are also described in the document, which appear in the form of icons as shown below. www.krohne.com 09/2017 - 4003047503 - MA SMARTMAC 200 W R03 en... -
Page 9: Warnings And Symbols Used
In general, devices from the manufacturer may only be installed, commissioned, operated and maintained by properly trained and authorized personnel. This document is provided to help you establish operating conditions, which will permit safe and efficient use of this device. 09/2017 - 4003047503 - MA SMARTMAC 200 W R03 en www.krohne.com... -
Page 10: Device Description
Look at the device nameplate to ensure that the device is delivered according to your order. Check for the correct supply voltage printed on the nameplate. Figure 2-1: Standard scope of delivery 1 Ordered device 2 Documentation www.krohne.com 09/2017 - 4003047503 - MA SMARTMAC 200 W R03 en... -
Page 11: Device Description
DEVICE DESCRIPTION SMARTMAC 200 W 2.2 Device description Figure 2-2: Device description (left - die-cast aluminium / right - stainless steel) 1 Display 2 Operation keys 3 Cable glands 09/2017 - 4003047503 - MA SMARTMAC 200 W R03 en www.krohne.com... -
Page 12: Nameplate
Observe the operation and installation instruction 6 Power supply data, Ingress protection Parameter of measuring unit 7 Order code, Manufacturing date, Internet address of manufacturer 8 Electronic revision, Serial number 9 Production order www.krohne.com 09/2017 - 4003047503 - MA SMARTMAC 200 W R03 en... -
Page 13: Installation
The original packing is designed to protect the equipment. It has to be used if the device is transported or sent back to the manufacturer to prevent damage of the device. 09/2017 - 4003047503 - MA SMARTMAC 200 W R03 en www.krohne.com... -
Page 14: Point-To-Point Connection - Analogue / Digital Mode
4 SMARTMAC 200 W 5 SMARTPAT Sensor ® 6 Secondary master with HART 7 Power supply for devices (slaves) with passive current output 8 Load ≥ 250 Ω (Ohm) www.krohne.com 09/2017 - 4003047503 - MA SMARTMAC 200 W R03 en... -
Page 15: Pre-Installation Requirements
For further information refer to on page 69. INFORMATION! Only sensors with software (SW) version > 1.0.3 can be operated with the SMARTMAC 200 W. Please check the SW version of the sensor. 09/2017 - 4003047503 - MA SMARTMAC 200 W R03 en... -
Page 16: Wall Mounting
• Note the drawing above and mark all drill holes with the help of a pen, e.g. a felt pen 1. • Fasten the device securely to the wall with the help of drilling machine, plugs, screws and the mounting plate 2. www.krohne.com 09/2017 - 4003047503 - MA SMARTMAC 200 W R03 en... - Page 17 INSTALLATION SMARTMAC 200 W Wall mounting of multiple devices (Die-cast aluminium) Figure 3-3: Dimensions and distances [mm] ["] Ø6.5 Ø0.26 87.2 12.2 10.1 09/2017 - 4003047503 - MA SMARTMAC 200 W R03 en www.krohne.com...
- Page 18 INSTALLATION SMARTMAC 200 W Wall mounting of multiple devices (Stainless steel) Figure 3-4: Dimensions and distances [mm] [inch] Ø6.5 Ø0.26 10.5 13.2 10.1 www.krohne.com 09/2017 - 4003047503 - MA SMARTMAC 200 W R03 en...
-
Page 19: Electrical Connections
SMARTPAT sensor. INFORMATION! The SMARTMAC 200 W is a loop powered device and has no function if no sensor is connected. INFORMATION! Use only shielded cables for connection with the control system (e.g. PLC). -
Page 20: Opening And Closing The Converter Housing
• Lift the housing at the top and bottom at the same time 2. • Slide the housing cover backward 3. The housing cover is guided and held by the inside hinge; you have access to the terminal compartment now 4. www.krohne.com 09/2017 - 4003047503 - MA SMARTMAC 200 W R03 en... -
Page 21: Connection Assignment
Figure 4-3: Tighten the screws 4.4 Connection assignment HART resistor on board ext. HART resistor required Figure 4-4: Connection assignment 1 Connection terminal 2 Functional earth 3 Cable glands 09/2017 - 4003047503 - MA SMARTMAC 200 W R03 en www.krohne.com... -
Page 22: Connecting The Sensor Cable
4.6 Connection diagram overview Connection with sensor and control system Figure 4-5: SMARTMAC 200 W connection to a control system with internal 250 Ω resistor (left side). SMARTMAC 200 W connection to a control system without internal 250 Ω resistor (right side). -
Page 23: Power Supply
Connection of SMARTMAC 200 W with a loop powered device via the optional SJB 200 W-Ex junction box to a SMARTPAT sensor Figure 4-6: Example of connecting the SMARTMAC 200 W to a control system without internal 250 Ω resistor and one additional loop powered device... - Page 24 Figure 4-7: Measuring mode for conductive conductivity (for example) The previous drawing shows the measured value of sensor in the upper line and the temperature reading in the lower line. www.krohne.com 09/2017 - 4003047503 - MA SMARTMAC 200 W R03 en...
-
Page 25: Operation
INFORMATION! Always push the keys at right angles to the front. Touching them from the side can cause incorrect operation! 09/2017 - 4003047503 - MA SMARTMAC 200 W R03 en www.krohne.com... -
Page 26: Measuring Mode
Figure 5-1: NE 107 signs 1 Maintenance required 2 Out of specification 3 Check function Figure 5-2: Measuring mode conductivity sensor 7.00 +25.0°C Figure 5-3: Measuring mode pH sensor www.krohne.com 09/2017 - 4003047503 - MA SMARTMAC 200 W R03 en... -
Page 27: Error
Description Description Description Action Action Action Action Slope < -65 mV/pH Recalibrate the sensor. Slope > -50 mV/pH Offset < -99 mV Offset > +99 mV Maintenance interval expired 09/2017 - 4003047503 - MA SMARTMAC 200 W R03 en www.krohne.com... -
Page 28: Error
Temperature value out of range Maintenance Message Message Message Message Description Description Description Description Action Action Action Action Offset < -99 mV Recalibrate the sensor. Offset > +99 mV Maintenance interval expired www.krohne.com 09/2017 - 4003047503 - MA SMARTMAC 200 W R03 en... -
Page 29: Error Page Conductive Conductivity
Maintenance interval expired 5.3 Menu mode The menu mode consists of main menus with different sub-levels: • Main menu level • First and second sub-menu level • Parameter level 09/2017 - 4003047503 - MA SMARTMAC 200 W R03 en www.krohne.com... -
Page 30: Menu Mode Structure Ph
> 1.5 s D Device > D1 Setup > D1.1 Language D1.2 HART master D1.3 Set clock D1.4 Contrast D1.5 Information D2 Service D2.1 Password D2.2 Reset display ↓↑ ↓↑ www.krohne.com 09/2017 - 4003047503 - MA SMARTMAC 200 W R03 en... -
Page 31: Function Table Ph Measurement
SMARTMAC 200 W 5.4.1 Function table pH measurement CAUTION! All data change in SMARTMAC 200 W will be directly saved in SMARTPAT 200 W sensor. If the sensor has to be changed please use the menu R replace sensor to copy sensor data. - Page 32 Press > to access the function and ↑ or ↓ to set and display time constant for 4...20 mA; update range: 1...60 seconds. Press > to move the cursor one position to the right. Default setting: 1 second Press ^ to confirm and to proceed. www.krohne.com 09/2017 - 4003047503 - MA SMARTMAC 200 W R03 en...
- Page 33 Press > to move the cursor one position to the right. Press ^ to confirm and to proceed. S3.3.6 Device variables (read only) PV: pH value SV: mV value TV: Temperature value (°C / °F) Press ^ to leave. 09/2017 - 4003047503 - MA SMARTMAC 200 W R03 en www.krohne.com...
- Page 34 S4.1.2 20 mA trimming Press > to access the function and ↑ or ↓ to select between "Decrease" and "Increase" for trimming. Press ^ to confirm and to proceed. www.krohne.com 09/2017 - 4003047503 - MA SMARTMAC 200 W R03 en...
- Page 35 Press > to start loading the sensor settings form the sensor to the device. R2 Write to sensor Press > to start writing the sensor settings form the device to the new sensor. 09/2017 - 4003047503 - MA SMARTMAC 200 W R03 en www.krohne.com...
- Page 36 D2.2 Reset Display Press > to access the function and ↑ or ↓ to select between "No" and "Yes". Default setting: No Press ^ to confirm and to proceed. www.krohne.com 09/2017 - 4003047503 - MA SMARTMAC 200 W R03 en...
-
Page 37: Ph Calibration
• Press > to access the function and ↑ or ↓ to adjust the value. Press > to move the cursor one position to the right. • Press ^ twice to confirm and to proceed. 09/2017 - 4003047503 - MA SMARTMAC 200 W R03 en www.krohne.com... - Page 38 • Press > to access the function "Set clock" and ↑ or ↓ to enter the data for calibration: "YYYY- MM-DD HH:MM". Press > to move the cursor one position to the right. • Press ^ to confirm and to proceed. www.krohne.com 09/2017 - 4003047503 - MA SMARTMAC 200 W R03 en...
-
Page 39: Menu Mode Structure Orp
> 1.5 s D Device > D1 Setup > D1.1 Language D1.2 HART master D1.3 Set clock D1.4 Contrast D1.5 Information D Service D2.1 Password D2.2 Reset display ↓↑ ↓↑ 09/2017 - 4003047503 - MA SMARTMAC 200 W R03 en www.krohne.com... -
Page 40: Function Table Orp Measurement
SMARTMAC 200 W 5.5.1 Function table ORP measurement CAUTION! All data change in SMARTMAC 200 W will be directly saved in SMARTPAT 200 W sensor. If the sensor has to be changed please use the menu R replace sensor to copy sensor data. - Page 41 Press > to access the function and ↑ or ↓ to set and display time constant for 4...20 mA; update range: 1...60 seconds. Press > to move the cursor one position to the right. Default setting: 1 second Press ^ to confirm and to proceed. 09/2017 - 4003047503 - MA SMARTMAC 200 W R03 en www.krohne.com...
- Page 42 Press > to move the cursor one position to the right. Press ^ to confirm and to proceed. S3.3.6 Device variables (read only) PV: mV value SV: mV value TV: Temperature value (°C / °F) Press ^ to leave. www.krohne.com 09/2017 - 4003047503 - MA SMARTMAC 200 W R03 en...
- Page 43 Press > to access the function and ↑ or ↓ to enter the date of commissioning. S3.5 Commissioning Press > to move the cursor one position to the right. Press ^ twice to confirm and to proceed. 09/2017 - 4003047503 - MA SMARTMAC 200 W R03 en www.krohne.com...
- Page 44 Press > to start loading the sensor settings form the sensor to the device. R2 Write to sensor Press > to start writing the sensor settings form the device to the new sensor. www.krohne.com 09/2017 - 4003047503 - MA SMARTMAC 200 W R03 en...
- Page 45 D2.2 Reset Display Press > to access the function and ↑ or ↓ to select between "No" and "Yes". Default setting: No Press ^ to confirm and to proceed. 09/2017 - 4003047503 - MA SMARTMAC 200 W R03 en www.krohne.com...
-
Page 46: Orp Calibration
• The message "ORP calibration aborted" appears on the screen. • Press ^ to leave the calibration menu. • On the screen the following message appears: "YYYY-MM-DD" "Set clock" "2000-01-01 00:00" (for example) www.krohne.com 09/2017 - 4003047503 - MA SMARTMAC 200 W R03 en... -
Page 47: Menu Mode Structure Conductivity
> 1.5 s D Device > D1 Setup > D1.1 Language D1.2 HART master D1.3 Set clock D1.4 Contrast D1.5 Information D2 Service D2.1 Password D2.2 Reset display ↓↑ ↓↑ 09/2017 - 4003047503 - MA SMARTMAC 200 W R03 en www.krohne.com... -
Page 48: Function Table Conductivity Measurement
SMARTMAC 200 W 5.6.1 Function table conductivity measurement CAUTION! All data change in SMARTMAC 200 W will be directly saved in SMARTPAT 200 W sensor. If the sensor has to be changed please use the menu R replace sensor to copy sensor data. - Page 49 S3.1.4 Reset maintenance Press > to access the function and ↑ or ↓ to select between "No" and "Yes" Default setting: No Press ^ to confirm and to proceed. 09/2017 - 4003047503 - MA SMARTMAC 200 W R03 en www.krohne.com...
- Page 50 Press > to move the cursor one position to the right. Press ^ to confirm and to proceed. S3.3.6 Device variables (read only) PV: Conductivity (Resistivity) SV: Resistivity (Conductivity) TV: Temperature value (°C / °F) Press ^ to leave. www.krohne.com 09/2017 - 4003047503 - MA SMARTMAC 200 W R03 en...
- Page 51 Press > to access the function and ↑ or ↓ to enter the date of commissioning. S3.5 Commissioning Press > to move the cursor one position to the right. Press ^ to confirm and to proceed. 09/2017 - 4003047503 - MA SMARTMAC 200 W R03 en www.krohne.com...
- Page 52 Press > to start loading the sensor settings form the sensor to the device. R2 Write to sensor Press > to start writing the sensor settings form the device to the new sensor. www.krohne.com 09/2017 - 4003047503 - MA SMARTMAC 200 W R03 en...
- Page 53 D2.2 Reset Display Press > to access the function and ↑ or ↓ to select between "No" and "Yes". Default setting: No Press ^ to confirm and to proceed. 09/2017 - 4003047503 - MA SMARTMAC 200 W R03 en www.krohne.com...
-
Page 54: Conductivity Calibration
• Select "No" to deactivate the function "Manual hold?" • Press ^ twice to confirm and to proceed. • The message "Calibration aborted" appears on the screen. • Press ^ to leave the calibration method. www.krohne.com 09/2017 - 4003047503 - MA SMARTMAC 200 W R03 en... - Page 55 • The message "Calibration aborted" appears on the screen. • Press ^ to leave the calibration menu. • On the screen the following message appears: "YYYY-MM-DD" "Set clock" "2000-01-01 00:00" (for example) 09/2017 - 4003047503 - MA SMARTMAC 200 W R03 en www.krohne.com...
- Page 56 • On the screen the following message appears: "Calibration" "successful" • Press ^ several times to leave the calibration. • If the cell deviates, please check the new cell constant and repeat the calibration procedure again. www.krohne.com 09/2017 - 4003047503 - MA SMARTMAC 200 W R03 en...
- Page 57 • Select "Yes" to save the value. • Press ^ twice to confirm and to proceed. • Select "No" to abort the calibration. • Press ^ to confirm and to proceed. 09/2017 - 4003047503 - MA SMARTMAC 200 W R03 en www.krohne.com...
- Page 58 • On the screen the following message appears: "Calibration" "successful" • Press ^ several times to leave the calibration. • If the cell deviates, please check the new cell constant and repeat the calibration procedure again. www.krohne.com 09/2017 - 4003047503 - MA SMARTMAC 200 W R03 en...
- Page 59 • Press > to access the function "Manual hold?" and ↑ or ↓ to select between "No" and "Yes". • Select "No" to deactivate the function "Manual Hold?" • Press ^ twice to confirm and to proceed. 09/2017 - 4003047503 - MA SMARTMAC 200 W R03 en www.krohne.com...
- Page 60 • On the screen the following message appears: "Calibration" "successful" • Press ^ several times to leave the calibration. • If the cell deviates, please check the new cell constant and repeat the calibration procedure again. www.krohne.com 09/2017 - 4003047503 - MA SMARTMAC 200 W R03 en...
-
Page 61: Service
• product used. 09/2017 - 4003047503 - MA SMARTMAC 200 W R03 en www.krohne.com... -
Page 62: Form (For Copying) To Accompany A Returned Device
The user must dispose of the WEEE to a designated collection point for the recycling of WEEE or send them back to our local organisation or authorised representative. www.krohne.com 09/2017 - 4003047503 - MA SMARTMAC 200 W R03 en... -
Page 63: Technical Data
Storage -40...+70°C / -40...+158°F Other conditions Humidity 5...95% rH, not condensing Ingress protection IP66/ IP67 acc. to IEC 60529: IP69K (stainless steel only) NEMA 4/4X 09/2017 - 4003047503 - MA SMARTMAC 200 W R03 en www.krohne.com... - Page 64 For full information of the EU directives and standards and the approved certifications, please refer to the EU declaration on the website of the manufacturer. Other approvals and standards NAMUR recommendation NE 21 Shock resistance IEC 60068-2-31 www.krohne.com 09/2017 - 4003047503 - MA SMARTMAC 200 W R03 en...
-
Page 65: Dimensions
Figure 7-1: Dimensions stainless steel housing Dimensions and weights in mm and kg Dimensions [mm] Dimensions [inch] 10.55 7.36 4.33 10.87 1.14 2.09 1.57 Weight Approx. 3.5 kg Approx. 7.2 lb 09/2017 - 4003047503 - MA SMARTMAC 200 W R03 en www.krohne.com... - Page 66 Figure 7-2: Dimensions die-cast aluminium housing Dimensions and weights in mm and kg Dimensions [mm] Dimensions [inch] 9.50 6.34 95.2 3.75 10.12 19.3 0.76 39.7 1.56 1.57 Weight Approx. 1.9 kg Approx. 4.2 lb www.krohne.com 09/2017 - 4003047503 - MA SMARTMAC 200 W R03 en...
-
Page 67: Housing Die-Cast Aluminium
Weight [kg] Wall- 95.2 19.3 39.7 mounted version Dimensions and weights in inch and lb Dimensions [inch] Weight [lb] Wall- 9.50 6.34 3.75 10.12 0.76 1.56 1.57 mounted version 09/2017 - 4003047503 - MA SMARTMAC 200 W R03 en www.krohne.com... -
Page 68: Housing Stainless Steel
Dimensions [mm] Weight [kg] Wall- Approx. mounted version Dimensions and weights in inch and lb Dimensions [inch] Weight [lb] Wall- 10.55 7.36 4.33 10.87 1.14 2.09 1.57 Approx. mounted version www.krohne.com 09/2017 - 4003047503 - MA SMARTMAC 200 W R03 en... -
Page 69: Mounting Plate Die-Cast Aluminium
TECHNICAL DATA SMARTMAC 200 W 7.2.3 Mounting plate die-cast aluminium Figure 7-5: Dimensions mounting plate Dimensions mounting plate [mm] [inch] Ø6.5 Ø0.26 87.2 09/2017 - 4003047503 - MA SMARTMAC 200 W R03 en www.krohne.com... -
Page 70: Mounting Plate Stainless Steel
TECHNICAL DATA SMARTMAC 200 W 7.2.4 Mounting plate stainless steel Figure 7-6: Dimensions mounting plate Dimensions mounting plate [mm] [inch] Ø6.5 Ø0.26 10.5 www.krohne.com 09/2017 - 4003047503 - MA SMARTMAC 200 W R03 en... -
Page 71: Notes
NOTES SMARTMAC 200 W 09/2017 - 4003047503 - MA SMARTMAC 200 W R03 en www.krohne.com... - Page 72 • Process Analysis • Services Head Office KROHNE Messtechnik GmbH Ludwig-Krohne-Str. 5 47058 Duisburg (Germany) Tel.: +49 203 301 0 Fax: +49 203 301 10389 info@krohne.com The current list of all KROHNE contacts and addresses can be found at: www.krohne.com...
Need help?
Do you have a question about the SMARTMAC 200 W and is the answer not in the manual?
Questions and answers