
Subscribe to Our Youtube Channel
Related Manuals for INVENTOR RFWD-188IA1


Summary of Contents for INVENTOR RFWD-188IA1
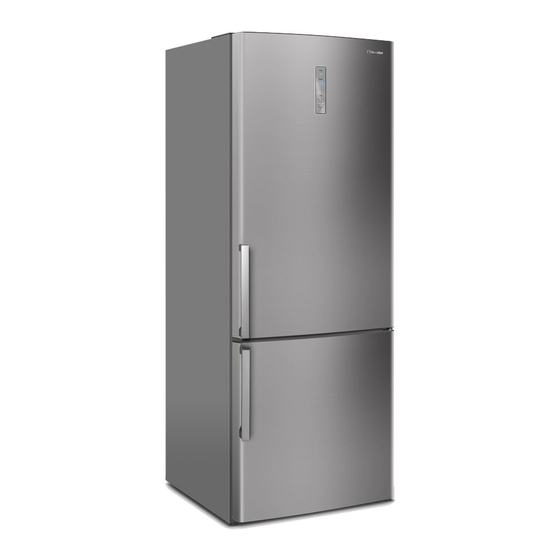
- Page 1 REFRIGERATOR BOTTOM FREEZER • USER’S MANUAL • ΕΓΧΕΙΡΙΔΙΟ ΧΡΗΣΗΣ MODEL: RFWD-188IA1 ENGLISH | ΕΛΛΗΝΙΚΑ...
-
Page 2: Table Of Contents
Contents 1. SAFETY WARNINGS .....................3 2. INSTALLATION .....................5 2.1 Location ..........................5 2.2 Door Handle Install lllumination (optional) ..............5 2.3 Reversing the Door Swing ....................7 2.4 Door Space Requirements .....................9 2.5 Levelling the Unit ......................9 2.6 Cleaning Before Use ......................9 2.7 Before Using Your Unit ....................9 2.8 Interior Accessories ...................... -
Page 3: Safety Warnings
1. SAFETY WARNINGS WARNING - Keep ventilation openings, in the appliance enclosure or in the built-in structure, clear of obstruction. WARNING - Do not use mechanical devices or other means to accelerate the defrosting process, other than those recommended by the manufacturer. WARNING - Do not damage the refrigerant circuit. - Page 4 IT IS HAZARDOUS FOR ANYONE OTHER THAN AUTHORISED SERVICE PERSONNEL TO CARRY OUT SERVICING OF REPAIRS WHICH INVOLVE THE REMOVAL OF COVERS. TO AVOID THE RISK OF AN ELECTRICAL SHOCK DO NOT ATTEMPT REPAIRS YOURSELF. The refrigerator must be disconnected from the source of electrical supply before attempting the installation of accessory.
-
Page 5: Installation
2. INSTALLATION 2.1 Location When selecting a position for your unit you should make sure the floor is flat and firm, and the room is well ventilated. Avoid locating your unit near a heat source, e.g. cooker, boiler or radiator. Also avoid direct sunlight as it may increase the electrical consumption. Extreme cold ambient temperatures may also cause the unit not to perform properly. - Page 6 Cap the screw caps on the handle Remove the screw and take the screws handle down. Take out the screw caps from the Cap the screw caps on the door handle screw holes. handle holes again.
-
Page 7: Reversing The Door Swing
Install the handles into the door handle holes of the other side in accordance with the handle installation instructions. 2.3 Reversing the Door Swing Take off knuckle guard. Take off top hinge... - Page 8 Take off the door of refrigerating Assemble the door of freezer chamber. chamber on the lower hinge. Take off middle hinge with a Assemble middle hinge assembly screw driver. to left side of the cabinet. Take off the door of freezing Assemble the door of refrigerating.
-
Page 9: Door Space Requirements
2.4 Door Space Requirements The unit’s door must be able to open fully as shown. W x D ≥ 990X 1025mm 2.5 Levelling the Unit To do this adjust the two levelling feet at the front of the unit. If the unit is not level, the door and magnetic seal alignments will not be covered properly. -
Page 10: Interior Accessories
Before placing any food in your unit, turn it on and wait for 24 hours, to make sure it is working properly and to allow it time to fall to the correct temperature. Your unit should not be overfilled. Do not damage the power cord under any condition so as to ensure safe- ty use, do not use when the power cord is damaged or the plug is worn. -
Page 11: Product Overview
3. PRODUCT OVERVIEW * Dotted line represents the position of air outlet and return air inlet. *AII images in this instruction manual are for indication only; please refer to your individu- al unit for details. 4. OPERATION 4.1 Operation Instructions Temperature control •... - Page 12 ⑤ ④ ③ ② ① fast cool (External display - optional) A.SET: gear setting key. Display screen 1 Gear 1 2 Gear 2 3 Gear 3 4 Gear 4 5 Gear 5 Display For the first power-on, the display screen (including the key light) will be displayed in full for 3s, and then the gear in the middle displays the state of running.
-
Page 13: Noise Inside The Unit
Fast cool function Enter: Circulating modulation rapid cooling mode. Operate: Indicator of rapid cooling lights up, and the refrigerator operates at 2°C. Exit: 1. Operate 150min under the rapid cooling mode. 2. Temperature adjustment can exit from the rapid cooling mode. •... -
Page 14: Change The Light Bulb
u Always let pre-cooked food cool down before you put in the unit. This will help to maintain the internal temperature of the unit. u To prevent cold air escaping from the unit, try to limit the number of times you open the door. We recommend that you only open the door when you need to put food in or take food out. -
Page 15: Water Dispenser
5. WATER DISPENSER (optional) Attention: The water dispenser can be used only for purified water.Hot water,soft drinks contain- ing carbon dioxide such as cola,fruit juice,etc.are not applicable; The water injection by taking down the water box from the door is not allowed; The maximum water injection rate shall be lower than the maximum scale indicated on the water box;... - Page 16 Filling of drinking water: Open the water tank cover and directly fill the water; Attentions: Only purified water and cool water without any impu- rities can be used for water dispenser. The hot water and soft drink with carbon dioxide, likes cola, apple juice and so on can not be used;...
-
Page 17: Instructions For Water Dispenser Disassembly And Cleaning
5.2 Instructions for water dispenser disassembly and cleaning I. Disassembly 1. Take out the water tank components To pull out the water tank components in the direction of 45°of oblique upward by hands that are closely attached on the two sides of the water tank components, when the lower parts of water tank components are separated from the water valve components, the water tank compo- nents can be taken out through horizontal movement (to the direction... - Page 18 II. Cleaning 1. To disassemble the water tank, water tank cover, sealing ring and water valve; 2. Use cold or warm water to cleaning the components of water dispenser. 3. Wipe it with dry cloth. Attentions: If the cleaning solution is used for cleaning water dispenser, then it is suggest- ed that, before the water taking and drinking, the water shall be drained to the amount of 5-6 cups after the water tank is installed back, so as to avoid the residue cleaning solution.
-
Page 19: Cleaning
6. CLEANING 6.1 Defrosting Auto-defrost for Frost-free Refrigerator 6.2 Cleaning the Interior and the Exterior of the Unit u Remove all the shelves and the salad bin. To remove the salad bin first remove the low- er door shelf. u Wipe the inside of the unit with a weak solution of bicarbonate soda and then rinse with warm water using a “wrung-out”... -
Page 20: Cleaning Tips
6.3 Cleaning Tips Condensation may appear on the outside of the unit. This may be due to a change in room temperature. Wipe of any moisture residue. If the problem continues, please contact a qualified technician for assistance. 6.MAINTENANCE 7.1 Changing the Internal Light Lamp replacement by professionals. -
Page 21: Warm Tips
It is normal that refrigerator operates for longer time in summer when the ambient temperature is higher; Long-term operation Do not put too much food in the freezer at one time; of compressor Do not put foods until they are cooled; Frequent opening of refrigerator door. -
Page 22: Disposal
u Appliance storage bin should not be lined with aluminum foil, wax paper, or paper tow- eling. Liners interfere with cold air circulation, making the appliance less efficient. u Organize and label food to reduce door openings and extended searches. Remove as many items as needed at one time, and close the door as soon as possible. - Page 23 - please also check your spam folder. sent to your email STEP 5 Additional Details Additional Details Inventor warranty is now valid! Subscribe to Inventor's Newsletter e to Inventor's Newsletter...
- Page 24 Περιεχόμενα 1. ΠΡΟΕΙΔΟΠΟΙΗΣΕΙΣ ΑΣΦΑΛΕΙΑΣ ................26 2. ΕΓΚΑΤΑΣΤΑΣΗ ....................28 2.1 Τοποθεσία ........................28 2.2. Αλλαγή φοράς λαβής θύρας (προαιρετικά) ............. 28 2.3 Αναστροφή της κατεύθυνσης ανοίγματος της πόρτας ........... 30 2.4 Απαιτούμενος χώρος για το άνοιγμα της πόρτας ........... 32 2.5 Οριζοντίωση της συσκευής ..................32 2.6 Καθαρισμός...
-
Page 25: Προειδοποιησεισ Ασφαλειασ
1. ΠΡΟΕΙΔΟΠΟΙΗΣΕΙΣ ΑΣΦΑΛΕΙΑΣ ΠΡΟΕΙΔΟΠΟΙΗΣΗ - Διατηρήστε ελεύθερες τις οπές εξαερισμού, στο περίβλημα της συσκευής ή στην ενσωματωμένη δομή της, απομακρύνοντας τυχόν εμπόδια. ΠΡΟΕΙΔΟΠΟΙΗΣΗ - Μη χρησιμοποιείτε μηχανικές συσκευές ή οποιαδήποτε άλλα μέσα για να επιταχύνετε τη διαδικασία απόψυξης, εκτός από αυτά που συνιστώνται από τον κατασκευαστή. - Page 26 15) ΚΙΝΔΥΝΟΣ: Κίνδυνος παγίδευσης παιδιών. Προτού απορρίψετε τον παλιό σας ψυγειοκαταψύκτη: - Αφαιρέστε τις πόρτες - Αφήστε τα ράφια στη θέση τους έτσι ώστε τα παιδιά να μην μπορούν εύκολα να σκαρφαλώσουν στο εσωτερικό. ΕΙΝΑΙ ΕΠΙΚΙΝΔΥΝΟ ΟΠΟΙΟΣΔΗΠΟΤΕ ΑΛΛΟΣ ΕΚΤΟΣ ΑΠΟ ΕΞΟΥΣΙΟΔΟΤΗΜΕΝΟ ΠΡΟΣΩΠΙΚΟ...
- Page 27 - Αποθηκεύστε το ωμό κρέας και ψάρι στα κατάλληλα τμήματα μέσα στον ψυγειοκαταψύκτη, ώστε να μην έρθουν σε επαφή με άλλα τρόφιμα. - Τα τμήματα τροφίμων που εμφανίζουν την σήμανση με τα δύο αστέρια ÛÛ είναι κατάλληλα για την αποθήκευση προκατεψυγμένων φαγητών, αποθήκευση και ετοιμασία παγωτού...
-
Page 28: Εγκατασταση
2. ΕΓΚΑΤΑΣΤΑΣΗ 2.1 Τοποθεσία Κατά την επιλογή της θέσης για τη συσκευή σας πρέπει να διασφαλίζετε ότι το δάπεδο είναι επίπεδο και σταθερό και το δωμάτιο αερίζεται καλά. Αποφύγετε να τοποθετήσετε τη συσκευή σας κοντά σε πηγή θερμότητας, π.χ. κουζίνα, θερμοσίφωνα ή σώμα καλοριφέρ. Επίσης... - Page 29 Τοποθετήστε τα βιδωτά πώματα Αφαιρέστε τις βίδες και βγάλτε στις βίδες των λαβών. τις λαβές. Αφαιρέστε τα βιδωτά πώματα από Τοποθετήστε πάλι τα βιδωτά τις οπές βιδών των λαβών. πώματα στις βίδες των λαβών.
-
Page 30: Αναστροφή Της Κατεύθυνσης Ανοίγματος Της Πόρτας
Τοποθετήστε τις λαβές στις οπές των λαβών της πόρτας στην άλλη πλευρά, σύμφωνα με τις οδηγίες εγκατάστασης των λαβών. 2.3 Αναστροφή της κατεύθυνσης ανοίγματος της πόρτας Αφαιρέστε τον προφυλακτήρα Αφαιρέστε τον άνω των αρθρώσεων των δαχτύλων. μεντεσέ. - Page 31 Αφαιρέστε την πόρτα του θαλάμου Συναρμολογήστε την πόρτα του θαλά- ψύξης. μου κατάψυξης στον κάτω μεντεσέ. Αφαιρέστε τον μεσαίο Συναρμολογήστε το μεσαίο μεντεσέ με κατσαβίδι. συγκρότημα μεντεσέ στην αριστερή πλευρά του θαλάμου. Αφαιρέστε την πόρτα του Συναρμολογήστε την πόρτα της ψύξης. θαλάμου...
-
Page 32: Απαιτούμενος Χώρος Για Το Άνοιγμα Της Πόρτας
2.4 Απαιτούμενος χώρος για το άνοιγμα της πόρτας Η πόρτα της συσκευής πρέπει να μπορεί να ανοίγει εντελώς, όπως φαίνεται στην εικόνα. ΠxΒ≥990 x 1025mm 2.5 Οριζοντίωση της συσκευής Για να γίνει αυτό, ρυθμίσετε τα δύο πόδια οριζοντίωσης στο μπροστινό μέρος... -
Page 33: Εσωτερικά Αξεσουάρ
Μην τοποθετείτε εύφλεκτα, εκρηκτικά, πτητικά και εξαιρετικά διαβρωτικά στοιχεία στο ψυγείο, για να προλάβετε τις ζημιές στο προϊόν και τα ατυχήματα με πυρκαγιά. Μην τοποθετείτε εύφλεκτα αντικείμενα κοντά στο ψυγείο, για να αποφύγετε τις πυρκαγιές. Αυτό το προϊόν είναι οικιακό ψυγείο και είναι κατάλληλο μόνο για την αποθήκευση τροφίμων. -
Page 34: Επισκοπηση Του Προϊοντοσ
3. ΕΠΙΣΚΟΠΗΣΗ ΤΟΥ ΠΡΟΪΟΝΤΟΣ * Η διακεκομμένη γραμμή αντιπροσωπεύει τη θέση της εξόδου αέρα και της εισόδου αέρα επιστροφής. * Όλες οι εικόνες σε αυτό το εγχειρίδιο οδηγιών είναι μόνο ενδεικτικές. Ανατρέξτε στη δική σας συσκευή για λεπτομέρειες. 4. ΛΕΙΤΟΥΡΓΙΑ 4.1 Οδηγίες... - Page 35 ⑤ ④ ③ ② ① fast cool (Εξωτερική οθόνη - προαιρετικά) Πλήκτρο A.SET: πλήκτρο ρύθμισης βαθμίδας. Οθόνη ένδειξης 1 Βαθμίδα 1 2 Βαθμίδα 2 3 Βαθμίδα 3 4 Βαθμίδα 4 5 Βαθμίδα 5 Οθόνη Για την πρώτη ενεργοποίηση η οθόνη ένδειξης (συμπεριλαμβανομένου του φωτός του πλήκτρου) θα...
-
Page 36: Θόρυβος Στο Εσωτερικό Της Συσκευής
Λειτουργία γρήγορης ψύξης Είσοδος: Λειτουργία γρήγορης ψύξης για τη διαμόρφωση της κυκλοφορίας. Χειρισμός: Η ένδειξη γρήγορης ψύξης ανάβει και το ψυγείο λειτουργεί στους 2°0. Έξοδος: 1. Παραμονή για 150 λεπτά στη λειτουργία γρήγορης ψύξης. 2. Με τη ρύθμιση της θερμοκρασίας μπορεί να γίνει έξοδος από τη λειτουργία γρήγορης... -
Page 37: Συμβουλές Για Τη Διατήρηση Των Τροφίμων Στην Συσκευή
εσωτερικό της συσκευής. Βεβαιωθείτε ότι όλα τα μέρη της συσκευής διατηρούνται δροσερά. u Για να προληφθεί η μεταφορά οσμών και η ξήρανση, συσκευάζετε ή καλύπτετε το φαγητό χωριστά. Τα φρούτα και τα λαχανικά δεν χρειάζεται να τυλίγονται. u Πάντα αφήνετε το προμαγειρεμένο φαγητό να κρυώσει πριν το βάλετε στη συσκευή. Αυτό θα συμβάλλει... -
Page 38: Παροχη Νερου
5. ΠΑΡΟΧΗ ΝΕΡΟΥ (προαιρετικό) ΠΡΟΣΟΧΗ: Στην παροχή νερού μπορεί να προστεθεί μόνο καθαρό και κρύο νερό. Να μην χρησιμοποιείται για ζεστό νερό ή αναψυκτικά που περιέχουν διοξείδιο του άνθρακα. Η άντληση νερού αφαιρώντας το δοχείο νερού από την πόρτα του ψυγείου δεν επιτρέπεται. - Page 39 Γέμισμα δοχείου νερού: Ανοίξτε το καπάκι του δοχείου νερού και προσθέστε απευθείας νερό σε αυτό. Προσοχή: Στην παροχή νερού μπορεί να προστεθεί μόνο καθαρό και κρύο νερό. Να μην χρησιμοποιείται για ζεστό νερό ή αναψυκτικά που περιέχουν διοξείδιο του άνθρακα. Η...
-
Page 40: Οδηγίες Αποσυναρμολόγησης Της Παροχής Νερού Και Καθαρισμού
5.2 Οδηγίες αποσυναρμολόγησης της παροχής νερού και καθαρισμού I. Αποσυναρμολόγηση 1. Αφαιρέστε τα μέρη του δοχείου νερού Για να αφαιρέσετε το δοχείο νερού κρατήστε το από τις δύο πλαϊνές πλευρές και τραβήξτε το προς το μέρος σας σε οριζόντια κίνηση σε πλάγια... - Page 41 II. Καθαρισμός Αποσυναρμολογήστε το δοχείο νερού, το κάλυμμα του δοχείου νερού, το δακτύλιο σφράγισης και την βαλβίδα νερού. Χρησιμοποιήστε κρύο ή ζεστό νερό για να καθαρίσετε τα εξαρτήματα. Σκουπίστε τα με ένα στεγνό πανί. Προσοχή: Εάν χρησιμοποιήσετε καθαριστικό διάλυμα για τον καθαρισμό του μηχανισμού άντλησης, συνίσταται...
-
Page 42: Καθαρισμοσ
6. ΚΑΘΑΡΙΣΜΟΣ 6.1 Απόψυξη Αυτόματη απόψυξη. 6.2 Καθαρισμός του εσωτερικού και του εξωτερικού μέρους της συσκευής u Αφαιρέστε όλα τα ράφια και το συρτάρι λαχανικών. Για να αφαιρέσετε το συρτάρι λαχανικών, αφαιρέστε πρώτα το χαμηλότερο ράφι της πόρτας. u Σκουπίστε το εσωτερικό της συσκευής με ένα ασθενές διάλυμα διττανθρακικού νατρίου και στη... -
Page 43: Συμβουλές Για Τον Καθαρισμό
ψυγειοκαταψύκτη. u Μην ρίχνετε απευθείας νερό ή άλλα υγρά κατά την διάρκεια του καθαρισμού για να αποφευχθεί ο κίνδυνος βραχυκυκλώματος ή να επηρεαστεί η ηλεκτρική μόνωση. 5.3 Συμβουλές για τον καθαρισμό Μπορεί να εμφανιστεί συμπύκνωση στο εξωτερικό μέρος της συσκευής. Αυτό μπορεί να οφείλεται... -
Page 44: Χρήσιμες Συμβουλές
Είναι φυσιολογικό το ψυγείο να λειτουργεί για μεγαλύτερο χρονικό διάστημα το καλοκαίρι, όταν η θερμοκρασία του περιβάλλοντος είναι Μακροπρόθεσμη υψηλότερη λειτουργία του Μην βάζετε πάρα πολλά τρόφιμα στον καταψύκτη ταυτόχρονα συμπιεστή Μην τοποθετείτε τα τρόφιμα μέχρι να κρυώσουν Συχνό άνοιγμα της πόρτας του ψυγείου. Αν... -
Page 45: Απορριψη
u Φροντίζετε να τυλίγετε τα τρόφιμα σωστά και σκουπίζετε τα δοχεία πριν απάτην τοποθέτησή τους στη συσκευή. Αυτό μειώνει τη συσσώρευση παγετού στο εσωτερικό της συσκευής. u Το δοχείο αποθήκευσης της συσκευής δεν θα πρέπει επενδύεται με αλουμινόχαρτο, λαδόχαρτο ή χαρτοπετσέτες. Οι επενδύσεις παρεμβαίνουν στην κυκλοφορία κρύου αέρα, καθιστώντας... - Page 46 Μόλις ολοκληρωθεί η υποβολή της εγγύησης θα λάβετε την επιβεβαίωση Παρακαλούμε ελέγξτε και τον φάκελο με τα Ανεπιθύμητα εισερχόμενα. Διεύθυνση email* mail* κατοχύρωσης στο email σας ΒΗΜΑ 5 Έχετε υποβάλει επιτυχώς την εγγύηση του προϊόντος Inventor! Να εγγραφώ στο newsletter της Inventor στο newsletter της Inventor * Απαραίτητο πεδίο...
- Page 47 NOTES ................................................................................................................................................................................................................................................................................................................................................................................................................................................................................................................................................................................................................................................................................................................................................................................................................................................................................................................................................................................................................................................................................................................................................................................................................................................................................................................................................................................................................................................
- Page 48 REFRIGERATOR BOTTOM FREEZER...
Need help?
Do you have a question about the RFWD-188IA1 and is the answer not in the manual?
Questions and answers