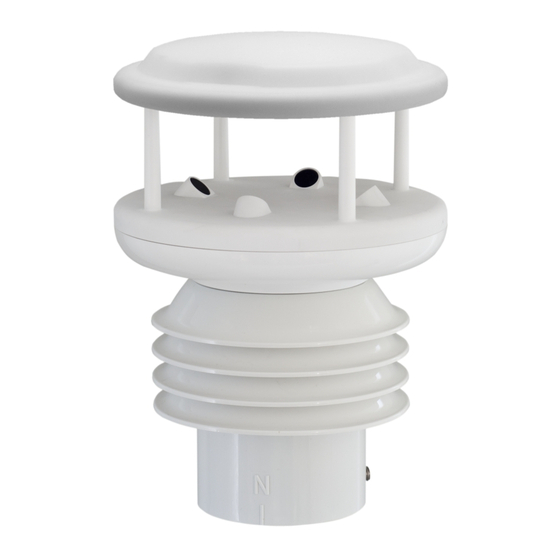
Summary of Contents for Thies CLIMA SENSOR US
- Page 1 CLIMA SENSOR US Short manual 4.920x.x0.xxx From Softwareversion V4.16 Stand: 02/2020 4.9200.00.xxx ; 4.9201.00.x0x 4.9200.20.xxx 4.9202.00.00x ; 4.9203.00.x0x Dok. No. 021690/10/20/short T H E W O R L D O F W E A T H E R D A T A...
- Page 2 Safety Instructions • Before operating with or at the device/product, read through the operating instructions. This manual contains instructions which should be followed on mounting, start-up, and operation. A non-observance might cause: - failure of important functions - endangerment of persons by electrical or mechanical effect - damage to objects •...
- Page 3 The working position of the CLIMA SENSOR US is vertical (plug connection underneath). During mounting, de-mounting, transport or maintenance of the CLIMA SENSOR US please make sure that no water gets into the instrument base or plug. The instrument must be mounted and wired only by qualified personnel, who knows and observes the generalities of techniques, and applicable regulations and norms.
- Page 4 The inside diameter of the tube socket must be at least 30mm as the electrical connection of the CLIMA SENSOR US is carried out at the bottom of the device. After connection the CLIMA SENSOR US is then mounted on the tube or mast socket.
- Page 5 2.2 Electrical installation / Start-up 1. The connection of the ClimaSensor US to the interface module and power supply unit differs, depending on the instrument variant. You have to distinguish between the connection types full-duplex and half-duplex with cable 16pole or resp. 8pole. Information on the duplex-mode are given by parameter DM on the supplemental sheet “Factory settings”...
- Page 6 10. After the program start select the button “Search”. 11. The program searches for connected instruments, and displays the search result and detail parameter. 12. By pressing the button “Terminal” a window is opened, where individual commands can be sent, and parameters can be changed. See also the online help of the program “Thies Device Utility.exe”.
- Page 7 Connection Diagram of 4.920x.x0.xxx in Full-duplex Mode and 16pole Connecting Cable © Adolf Thies GmbH & Co. KG · Hauptstraße 76 · 37083 Göttingen · Germany 021690/10/20/short Phone +49 551 79001-0 · Fax +49 551 79001-65 · info@thiesclima.com ·www.thiesclima.com Page 7 of 16...
- Page 8 Connection Diagram of 4.920x.x0.xxx in Full-duplex Mode and 8pole Connecting Cable © Adolf Thies GmbH & Co. KG · Hauptstraße 76 · 37083 Göttingen · Germany 021690/10/20/short Phone +49 551 79001-0 · Fax +49 551 79001-65 · info@thiesclima.com ·www.thiesclima.com Page 8 of 16...
- Page 9 Connection Cable of 4.920x.x0.xxx in Half-duplex Mode and 8pole Connection Cable © Adolf Thies GmbH & Co. KG · Hauptstraße 76 · 37083 Göttingen · Germany 021690/10/20/short Phone +49 551 79001-0 · Fax +49 551 79001-65 · info@thiesclima.com ·www.thiesclima.com Page 9 of 16...
- Page 10 Installation of the USB/RS485 Interface Converter 9.1702.40.002 For the installation of the USB/RS485 interface converter please proceed as follows: 1. Put the USB-plug of the RS485 converter into the provided socket of the PC. 2. The PC identifies a new instrument, and displays it as follows. 3.
- Page 11 7 Dimensional Drawing © Adolf Thies GmbH & Co. KG · Hauptstraße 76 · 37083 Göttingen · Germany 021690/10/20/short Phone +49 551 79001-0 · Fax +49 551 79001-65 · info@thiesclima.com ·www.thiesclima.com Page 11 of 16...
-
Page 12: Table Of Contents
8 Technical Data Parameter 0.01 ... 60m/s Wind velocity Measuring range Scaling of analogue output freely selectable. ≤5m/s: ±0.3m/s (rms - mean over 360°). Accuracy ±3% of measured value (rms - mean over 5 ... 60m/s: 360°) Resolution 0.1m/s: in telegrams 1, 2, 3, 5, 6 0.01m/s: in telegram 14 Wind direction Measuring range... -
Page 13: Accuracy
Resolution: Approx. 0.3% of measuring value. Precipitation Measuring ranges: Intensities 0.001 … 999mm/h Resolution 0.001mm/h intensity Daily total 0.01 … 999mm Resolution daily 0.01mm total Droplet size 0.25 … 5.0mm, large as hail. Accuracy with With 95% of the precipitations deviations less than precipitation 15% compared with Thies Laser Precipitation Monitor (Reference). -
Page 14: Air Pressure
Protocol ASCII- Thies-Format and MODBUS RTU All a/m parameters, including derivative parameters, Parameter are depending on the respective model. Data output analogue Electrical outputs 0 ... 10V Electrically isolated from supply. Attention: For the actual scaling of the analogue outputs, please refer to the supplementary sheet "Factory setting"... - Page 15 Temperature range Operating temperature -50 ... +80°C Storage temperature -55 ... +80°C Operating voltage Supply without 6 ... 40V DC or 10 ... 28V AC 50Hz / 60Hz cover heating typ. 50mA @ 24V 24V AC/DC ±15%, 25VA typically @ 24V nominal Operating voltage Supply with cover heating...
- Page 16 Please contact us for your system requirements. We advise you gladly. ADOLF THIES GMBH & CO. KG Meteorology and environmental metrology Hauptstraße 76 · 37083 Göttingen · Germany Phone +49 551 79001-0 · Fax +49 551 79001-65 info@thiesclima.com www.thiesclima.com © Adolf Thies GmbH & Co. KG · Hauptstraße 76 · 37083 Göttingen · Germany 021690/10/20/short Phone +49 551 79001-0 ·...


Need help?
Do you have a question about the SENSOR US and is the answer not in the manual?
Questions and answers