Advertisement
Available languages
Available languages
Quick Links
INSTRUCTION MANUAL ENCLOSED
MANUEL D'INSTRUCTIONS À L'INTÉRIEUR
MANUAL DE INSTRUCCIONES ADJUNTO
STOP
IF YOU HAVE ANY PROBLEMS OR QUESTIONS, EMAIL
OR CALL CUSTOMER SERVICE BEFORE YOU RETURN
THIS PRODUCT TO THE STORE WHERE IT WAS PURCHASED.
ENVÍE UN MENSAJE DE CORREO ELECTRÓNICO O LLAME AL SERVICIO
DE ATENCIÓN AL CLIENTE ANTES DE DEVOLVER
ESTE PRODUCTO A LA TIENDA EN LA QUE LO COMPRÓ.
Servicio de atención al cliente: www.twinstarhome.com
POUR TOUT PROBLÈME OU TOUTE QUESTION,
ENVOYEZ UN COURRIEL AU SERVICE À LA CLIENTÈLE OU APPELEZ LE
SERVICE À LA CLIENTÈLE AVANT DE RETOURNER
MANUEL D'INSTRUCTIONS À L'INTÉRIEUR
MANUAL DE INSTRUCCIONES ADJUNTO
ATTENTION
For Customer Service: www.twinstarhome.com
in English Call: 866-661-1218
in Spanish Call: 866-661-1218
in French Call: 866-374-9203
PARE
ATENCIÓN
SI TIENE ALGÚN PROBLEMA O PREGUNTAS,
Línea para llamadas en inglés: 866-661-1218
Línea para llamadas en español: 866-661-1218
Línea para llamadas en francés: 866-374-9203
ATTENTION
STOP
CE PRODUIT OÙ VOUS L'AVEZ ACHETÉ.
Pour le service à la clientèle : www.twinstarhome.com
Pour appeler en anglais, composez le 866-661-1218
Pour appeler en espagnol, composez le 866-661-1218
Pour appeler en français, composez le 866-374-9203
INSTRUCTION MANUAL ENCLOSED
STOP
PARE
STOP
Advertisement

Subscribe to Our Youtube Channel
Related Manuals for Twin-Star International WOOD FIREPLACE MANTEL 23MM1424


Summary of Contents for Twin-Star International WOOD FIREPLACE MANTEL 23MM1424
- Page 1 INSTRUCTION MANUAL ENCLOSED MANUEL D'INSTRUCTIONS À L’INTÉRIEUR MANUAL DE INSTRUCCIONES ADJUNTO STOP ATTENTION STOP IF YOU HAVE ANY PROBLEMS OR QUESTIONS, EMAIL OR CALL CUSTOMER SERVICE BEFORE YOU RETURN THIS PRODUCT TO THE STORE WHERE IT WAS PURCHASED. For Customer Service: www.twinstarhome.com in English Call: 866-661-1218 in Spanish Call: 866-661-1218 in French Call: 866-374-9203...
-
Page 2: For Customer Service
Screw Knob (with bolt) Touch-Up Pen A T T E N T I O N For Customer Service: www.twinstarhome.com Twin-Star International, Inc. ALSO Requires-Electric In English call: 866-661-1218 Delray Beach, FL 33445 In French call: 866-374-9203 Fireplace Insert with Heater... - Page 3 PLEASE READ AND FOLLOW ALL SAFETY TIPS GETTING STARTED 1. Before assembly, carefully use scissors or utility knife to cut and unwrap all parts. Make sure you do not discard the hardware. 2. Make sure that you have all the parts listed. If you are missing any parts please email Customer Service: www.twinstarhome.com or call 1-866-661-1218 in English, 1-866-374-9203 in French or 1-866-661-1218 in Spanish.
- Page 4 2. Locate Center Left Side Panel (B) and Center Right Side Panel (C) from step 1, Center Front Panel (D) and set out on a scratch free surface. Insert one Wood Dowel (N) into each of the pre-drilled holes. Push Center Left Side Panel (B) and Right Side Panel (C) snug to Center Front Panel(D).
- Page 5 6. Insert one Wood Dowel (N) into each of the pre-drilled holes. 7. Then locate Center Shelf (H) and lay f nished side up on top of Completed Assembly from step 5. From the inside, attach the Center Shelf Center Shelf using Bolts (L) and Washers (M) through the pre-drilled holes in the mounting blocks.
-
Page 6: Back Panel
9. Insert one Wood Dowel (N) into each of the pre-drilled holes on the top edges of the Assembly from step 8. Then locate Mantel/Top (G) and lay f nished side up on top of completed assembly. From the inside, Mantel/Top attach the Mantel using Bolts (L) and Washers (M) through the pre-drilled holes in the... - Page 7 12. Locate Right Front Door (U) and Left Front Door (T). Slide door hinge keyhole into panel hinge bracket. (Diagram 1) Use Phillips Head Screwdriver to tighten screws. (Diagram 2) TO ADJUST HINGES To adjust door forward or backward change keyhole slot position.
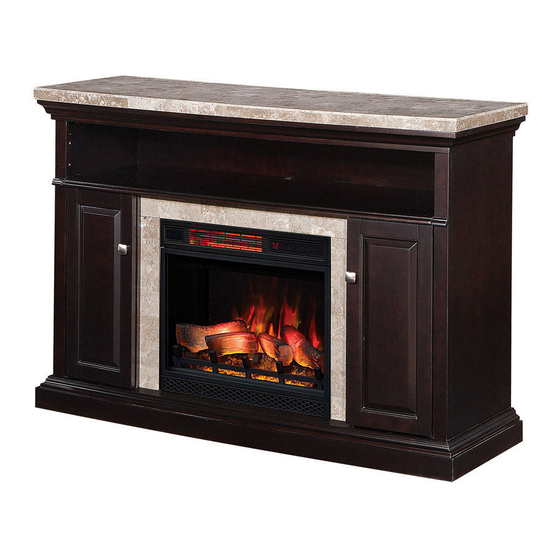
- Page 8 COMPLETED UNIT WITH GREAT Completed CARE. IT TAKES TWO PEOPLE TO Unit MOVE COMPLETED UNIT INTO ITS FINAL POSITION. Twin-Star International, Inc. Delray Beach, FL 33445 In English: 1-866-661-1218 In French: 1-866-374-9203 In Spanish: 1-866-661-1218 Model# 23MM1424 Made in China Printed in China 2010,Twin-Star International, Inc.
-
Page 9: Lista De Piezas
Botón (Con Perno) Bolígrafo Para Retocar A T E N C I Ó N Servicio de atención al cliente: www.twinstarhome.com Twin-Star International, Inc. Necesitará, Además, El Necesitará, Además, El Delray Beach, FL 33445 Línea para llamadas en inglés: 866-661-1218 Línea para llamadas en francés: 866-374-9203 Hogar Eléctrico Con Calentador... -
Page 10: Cuidado Y Limpieza
LEA TODOS LOS CONSEJOS PRÁCTICOS DE SEGURIDAD COMIENZO 1. Antes de comenzar con el montaje, utilice las tijeras o una navaja para cortar el envoltorio CON MUCHO CUIDADO y, a continuación, extraiga todas las piezas. Tenga cuidado de no arrojar los elementos que utilizará... - Page 11 2. Ubique el Panel Lateral Izquierdo Central (B) y el Panel Lateral Derecho Central (C) del paso 1, junto con el Panneau Central Avant (D), y colóquelos sobre una superf cie que no raye. Inserte una Espiga de Madera (N) en cada uno de los orif cios previamente perforados.
- Page 12 6. Inserte una Espiga De Madera (N) en cada uno de los orif cios previamente perforados. 7. Luego, tome la Tabla Central (H) y colóquela, con el lado acabado hacia arrinba, sobre el conjunto armado. Desde el interior, ajuste la Tabla Central Repisa colocando un Tornillos (L) y una Arandelas (M) en los orif cios previamente...
- Page 13 9. Inserte una Espiga De Madera (N) en cada uno de los orif cios previamente perforados del borde superior del Conjunto que armó en Repisa/Parte Superior el paso 8. Luego, tome la Repisa/Parte Superior (G) y colóquela, con el lado acabado hacia arrinba, sobre el conjunto armado.
- Page 14 12. Localice la Puerta Delantera Derecha (U) y la Puerta Delantera Izquierda (T). Deslice la ranura en forma de cerradura de la bisagra situado sobre el panel. (Diagrama 1) Utilice un destornillador Phillips (cruciforme), para apretar los tornillos. (Diagrama 2) PARA AJUSTAR LAS BISAGRAS Para ajustar la puerta hacia adelante o hacia detrás, cambie la posición de la...
- Page 15 DEFINITIVO QUE VA A OCUPAR. Twin-Star International, Inc. Delray Beach, FL 33445 Línea para llamadas en inglés: 1-866-661-1218 Línea para llamadas en francés: 1-866-374-9203 Línea para llamadas en español: 1-866-661-1218 Modelo N° 23MM1424 Fabricado en China Impreso en China © 2010, Twin-Star International, Inc.
- Page 16 A T T E N T I O N Pour le service à la clientèle Exige aussi -foyer www.twinstarhome.com Twin-Star International, Inc. Delray Beach, FL 33445 pour le service en anglais, composez le 866-661-1218 encastrable électrique avec pour le service en français, composez le 866-374-9203 Fabriqué...
- Page 17 VEUILLEZ LIRE ET SUIVRE TOUS LES CONSEILS DE SÉCURITÉ AVANT DE COMMENCER 1. Avant l’installation, utilisez des ciseaux ou un couteau universel pour couper et déballer tous les composants. Faites ATTENTION de ne pas endommager le manteau. Assurez-vous de ne pas jeter la quincaillerie d’installation incluse.
- Page 18 2. Repérer le panneau latéral central gauche (B), le panneau latéral central droit (C) de l’étape 1, ainsi que la panneau avant central (D), et les placer sur une surface parfaitement lisse. Insérer un goujon en bois (N) dans chacun des trous prépercés.
- Page 19 6. Insérez un goujon en bois (N) dans chacun des trous pré-percés. 7. Trouvez ensuite le tablette centrale (H). Déposez le côté f ni du manteau sur le dessus du panneau entièrement monté. De l’intérieur, f xez le manteau à l’aide Tablette centrale d’un boulons (L) et d’une rondelles (M), en les insérant dans les trous pré-percés...
- Page 20 9. Insérez un goujon en bois (N) dans chacun des trous pré-percés de la bordure supérieure du panneau assemblé à l’étape 8. Trouvez Manteau/Dessue ensuite le manteau/dessue (G). Déposez le côté f ni du manteau sur le dessus du panneau entièrement monté.
- Page 21 12. Retrouver la porte avant droite (U) et la porte avant gauche (T). Glisser la penture en forme de serrure à l’intérieur du support de penture situé sur le panneau. (Diagramme 1) Utiliser un tournevis Phillips (cruciforme) pour serrer les vis. (Diagramme 2) AJUSTEMENT DES PENTURES Pour ajuster la porte vers l’avant ou vers l’arrière, changer la position de la rainure...
- Page 22 Delray Beach, FL 33445 pour le service en anglais, composez le 866-661-1218 pour le service en français, composez le 866-374-9203 pour le service en espagnol, composez le 866-661-1218 Modèle 23MM1424 Fabriqué en Chine Imprimé en Chine © 2010, Twin-Star International, Inc.
Need help?
Do you have a question about the WOOD FIREPLACE MANTEL 23MM1424 and is the answer not in the manual?
Questions and answers