Advertisement
Quick Links
Installation Guide
Replacement Passive Screen Housing for Andersen®
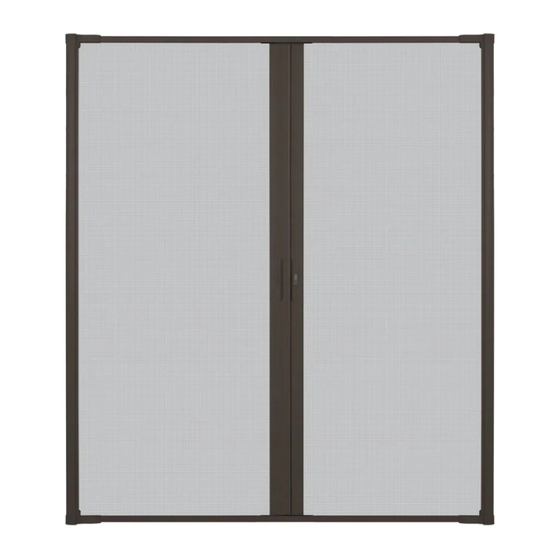
LuminAire® Retractable Insect Screen Double Door
For installation help please visit www.AndersenLuminAire.com/install
Please Do Not Return Product to Store!
PLEASE call the Storm Door Solution Center at 844-813-6664,
with any questions regarding installation, lost part replacement, or anything else related to your retractable
insect screen purchase. Replacement parts can also be found at: parts.andersenstormdoors.com
Read this entire guide before you begin your installation. If your abilities do not
match the requirements of this installation, contact an experienced contractor.
Your replacement part should contain the following parts.
1
Passive Screen Housing
End Caps (attached to each end of housing)
2
Orange Installation Clips
3
Shipping Plastic Wrap
4
Not Shown: Screw Pack containing:
• 1 inch #8 screws (qty 6)
• 1/2 inch #8 self-tapping screws (qty 6)
• #2 Phillips Bit
• 1/8 inch Drill Bit
• 3/32 inch Hex Wrench
• Corner Pile (qty 2)
NOTICE
To avoid product damage, be sure to place all parts of your retractable
insect screen on a soft non-abrasive surface such as carpet, drop cloth
placed on your lawn or cardboard.
DOUBLE DOOR PARTS OVERVIEW
Emco Enterprises, Inc., is a wholly owned subsidiary of Andersen Corporation. Emco Enterprises, Inc.
manufactures and supports the limited warranties for Andersen ® and EMCO ® doors. "Andersen",
"EMCO" and all other marks where denoted are trademarks of Andersen Corporation.
©2019 Andersen Corporation. All rights reserved.
1
2
2
3
1
4
3
2
Andersen SDD, PO Box 853
Des Moines, IA 50306-0853
05-2019 r2 Print in Color
p/n 900265
Advertisement

Summary of Contents for Andersen LuminAire
- Page 1 Andersen SDD, PO Box 853 Emco Enterprises, Inc., is a wholly owned subsidiary of Andersen Corporation. Emco Enterprises, Inc. Des Moines, IA 50306-0853 manufactures and supports the limited warranties for Andersen ® and EMCO ® doors. “Andersen”, 05-2019 r2 Print in Color “EMCO”...
-
Page 2: Recommended Tools
SAFETY FIRST: Please read and follow all Cautions and Warnings in this guide. WARNING WARNING Follow manufacturers' instructions for hand and power Windows and doors can be heavy. Use safe lifting techniques and a reasonable number of people with enough tools. - Page 3 SILL REMOVAL - Continued ADAPTER SILL ADAPTER DOOR SILL Figure 1 ADAPTER CHANNEL DOOR SILL SILL From the interior of the screen assembly, remove the six screws from the Sill Adapter. Dispose of screws properly. ADAPTER Rotate Sill Adapter up and pull out of Adapter Channel (see Figure 1 &...
- Page 4 REASSEMBLE KEY REFERENCES SCREEN Screw Flanges Receiving Tabs TRACKS & Letter Labels PASSIVE Passive Label HOUSING Passive Housing Screen Track Screen Track For Some Installations Only: Track Extenders for Passive Housing Not all openings require the use of Track Extenders. They are for reinforcing the If the track extender is present, it needs to be saved and reinstalled.
-
Page 5: Tools Recommended
Tools Recommended: PLACE, FASTEN ASSEMBLY Screwdriver INTO OPENING Scissors PRIMARY PRIMARY ACTIVE ACTIVE DOOR DOOR ACTIVE ACTIVE PASSIVE PASSIVE HOUSING HOUSING HOUSING HOUSING DOOR OPENING DOOR OPENING SCREW FLANGE With a Scissors, cut the Plastic Wrap along inside edge of the Screw Flange from new housing. SCISSORS With the interior of the screen assembly facing the door opening, rotate the assembly so the Active Housing is on the same side of the Door Opening as your Primary Active Door. - Page 6 7/8” Machine Pan Painted 1” SMS Pan Tools Recommended: SCREW PACK PLACE, FASTEN ASSEMBLY #8-1" 1” SMS Pan Painted INTO OPENING (Qty 6) Screwdriver Continued 1” Machine Pan Painted Switch to Interior View 1-1/2” Machine Flathead MOUNTING SURFACE EXPAND ACTIVE SCREW HOUSING FLANGE...
- Page 7 1/2” SMS Pan Painted 1/2” SMS Flathead Tools Recommended: SCREW PACK PLACE AND #8 - ½" FASTEN SILL Sealant 1/2” Self-Drill Pan (Qty 6) ADAPTER #2 Phillips Bit Drill/Driver 1/2” Self-Drill Pan Painted Sill Adapter (provided) 3/4” Machine Flathead ADAPTER CHANNEL SCREEN ADAPTER...
- Page 8 Tools Recommended: REINSTALL SCREW PACK ADJUSTMENT, SLOT COVER & CORNER PILE Screwdriver INSTALLATION Slot Covers Corner Pile LOWER SCREEN ADJUSTMENT ADJUSTMENT TRACK SLOT SLOT SLOT PASSIVE LOCK COVER HOUSING LEGS PHILLIPS SCREEN PULL SCREWDRIVER SLOT COVER ADJUSTMENT UPPER SLOT ADJUSTMENT SLOT Inside the Upper Adjustment Slot, keeping the Phillips Screwdriver in Once the Locking Pins have been adjusted and set, unlatch and open contact with the screw, loosen the screw until it can be moved, approximately...
- Page 9 R E T R ACTA B L E S C R E E N D O O R 1-844-813-6664...


Need help?
Do you have a question about the LuminAire and is the answer not in the manual?
Questions and answers