Advertisement
Quick Links
Advertisement

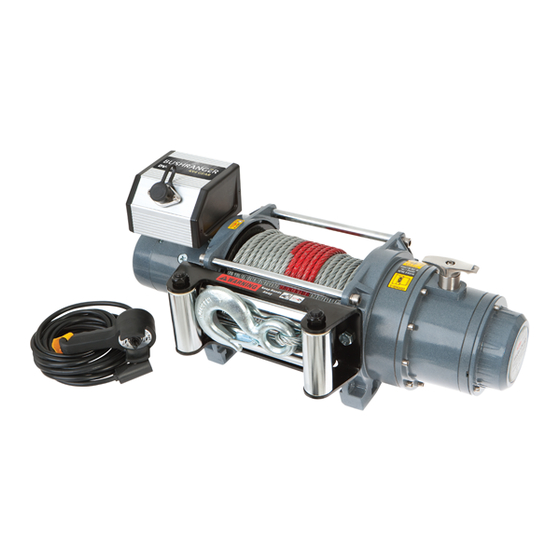
Related Manuals for Bushranger DV-9TH


Summary of Contents for Bushranger DV-9TH
- Page 2 Warranty Statement Kingsley Enterprises Pty Ltd ('Kingsley') warrants to the original purchaser that the product sold or distributed by Kingsley identified below (the Product) will be free from defects in materials and workmanship for the warranty period identified below commencing on the date of purchase from Kingsley ('the Warranty'). Kingsley, will rectify any defect in materials or workmanship appearing within the Warranty period by repairing or replacing the Product (at its option).
- Page 3 Warranty Period The period in which a defect must appear in a Kingsley Enterprises or Bushranger 4x4 Gear product if the customer is entitled to claim the warranty is 1 year for electrical components and a lifetime for mechanical components from the date of purchase from Kingsley.
- Page 4 We reserve the right to make changes without notice because of continued product improvement. Your Bushranger winch has been designed to give safe and dependable service if operated according to the instructions. Please read and understand this manual before installation and operation of the winch.
- Page 5 Safety NOTE: This product is a very powerful machine. Treat with extreme care and observe all caution and warnings (See ‘Warnings’ on Page 3 of this manual). Before use, ensure that you are familiar with all winching operations (winch speeds & direction). In some cases, the operator of a winch may be required to have qualifications according to applicable laws and ordinances.
- Page 6 Remove the remote control from the winch when not in use and store in a safe, dry place. Do not wrap the rope around the load and back onto itself. Always use a tree trunk or winch extension strap. Keep hands and clothing clear of the winch, rope, and fairlead opening.
- Page 7 Winching Principles NOTE: Kingsley Enterprises Pty. Ltd. recommend that prior to using this recovery equipment, users should undertake formal training from an accredited industry body in winch use and vehicle recovery. Calculating Fleet Angle To obtain the best rope service, the direction of pull should be on a horizontal plane within ±15 degrees and perpendicular to the centreline of the winch drum within ±15 degrees.
- Page 8 Required Pulling Force Your winch must be powerful enough to overcome the resistance caused by an obstacle, such as moving water, mud, snow, sand or on a steep hill, as well as pulling the vehicle’s full weight. As a general guide, you need a winch with a maximum line pull at least 1.5 times greater than the gross vehicle weight.
- Page 9 For example, if a vehicle weighing 3,000kg is winched up an incline of 100% on a marshy surface, the above formula would be used as follows: Where Wt: 3,000kg, S: 0.52 G: 0.71 = (Wt X S) + (Wt X G) = (3,000kg X 0.52) + (3,000kg X 0.71) = 1,560kg + 2,130kg = 3,690kg of effect required to recover the vehicle.
-
Page 10: Using Accessories
Using Accessories Snatch Block A snatch block is an important aid to successful winching and can be used to increase the pulling power (or mechanical advantage) of a winch, or change the direction of a pull. Where a double line pull is used (i.e. where a snatch block is used at the load or anchor point and the winch rope is connected back to the vehicle), twice the pull force is... - Page 11 Winch Extension Strap Used when your rope isn’t long enough to reach the recovery anchor point, extension straps are made from polyester webbing and come in various lengths and load ratings to suit varying recovery situations. Bow Shackles Only bow shackles that are load rated should be used for vehicle recovery.
- Page 12 3) Pull the rope to the anchor point 4) Engaging the clutch Wear leather gloves when free spooling To engage, lift the clutch T-handle and the rope out from the drum. Pull out turn it in a 90° clockwise direction to the enough rope to reach the anchor point.
- Page 13 3) Secure anchor point 4) Setting the vehicle engine It is very important that an anchor point The recovery vehicle engine should is strong enough to hold the load while be running to provide maximum winching. Do not wrap the rope around power to the winch.
- Page 14 7) Secure vehicle 8) Disconnect remote control Once the vehicle is secured, wind the Take remote control out of the socket remaining rope back onto the drum and store it in a safe, dry and easily tightly and evenly and secure the hook accessible place.
- Page 15 Keep winching area clear. Do not allow Never guide a rope onto the drum people to remain in the area while with your hand. Use the supplied hand winching. Never step over a live wire saver strap. rope whilst under load. Avoid the remote control cord from A winching operation requires extra coming in contact with the rope, as...
-
Page 16: Led Light
LED LIGHT LED LIGHT GREEN (Normal winching) (Abnormal winching) Cable-in/Cable-out Operation 1).To “Winch or Cable - Out”, trigger → out 2).To “Winch or Cable - In”, trigger ← in To stop winching, release the trigger. Cable-In Cable-Out Clutch Operation The clutch allows rapid pay-out of the rope for hooking onto a load or anchor point and is operated by a clutch T-handle. -
Page 17: Installation
3). If a clutch T-handle cannot be properly locked in the “Engaged” position, rotate the drum to help the clutch device engage the gear train. 4). Wear leather gloves and use a hand saver strap when guiding the rope off the drum. - Page 18 For DV-9 & SEAL 9.5 models . Four (4) M10 x 1.50 pitch 8.8 grade high tensile steel bolts (supplied) must be used in order to sustain the loads imposed on the winch mounting. . Two (2) M12 x 1.75 pitch 8.8 grade high tensile steel bolts (supplied) must be used for fastening the Roller fairlead into the mounting channel.
- Page 19 Wiring Diagram Attach the black lead firmly to the negative (–) battery terminal and red lead to the positive (+) battery terminal. The voltage drop for the winch motor must not exceed 10% of the nominal voltage of 12V. For best performance, mount the winch as close to the battery as possible.
- Page 20 Rope Preparation The rope supplied on the winch has been installed under a minimum load from the factory. Prior to using the rope for the first time, it must be tensioned onto the drum under load to ensure a tight and uniform wrap is achieved. A rope that is not tensioned and wound tightly and evenly prior to use can be permanently damaged since the outer layers of rope can draw down into the inner layers leading to binding, pinching or wedging between layers.
- Page 21 Gearbox Rotation The gearbox end of the winch can be rotated to allow for the clutch handle to be orientated to suit the vehicle being fitted to. For DV-9 and SEAL 9.5 1). Loosen and remove the bolts that secure the brake cover, then remove the brake cover.
- Page 22 For DV-12 1). Loosen and remove the 10 bolts retaining the gearbox housing (externally visible, brake cover does not need to be removed). 2). Rotate the gearbox housing to achieve the target angle as detailed below. 3). Reinstall and tighten all bolts removed in previous steps. Tighten bolts to 6Nm DV-12 Gearbox...
-
Page 23: Maintenance
Maintenance Wire Rope Replacement Always use a replacement rope that is correctly rated for the capacity of the winch. Use the following method to replace the wire rope: 1). Disengage the clutch T-handle. 2). Spool out the entire wire rope, loosen the set screw and then remove the rope from the drum. - Page 24 Synthetic Rope Replacement Always use a replacement rope that is correctly rated for the capacity of the winch. Use the following method to replace the synthetic rope: 1). Disengage the clutch T-handle. 2). Spool out the entire synthetic rope, loosen the set screw and then remove rope from the drum and replace the hawse fairlead if necessary.
- Page 25 Brake Adjustment Note: It is highly recommended that any adjustments are carried out by a qualified technician at an authorised service centre. Under normal use, the brake mechanism will not require any adjustment. If the brake fails to hold a load, the brake disc may be worn and require replacement. When the brake wears to the point that the load begins to slip, the brake can be adjusted as follows: 1).
- Page 26 Do not submerge the DV-9 or DV-12 winch in water. If the winch is subject to a wet environment or submersion, it must be serviced immediately to prevent internal damage and ensure correct gearbox lubrication is maintained. Failure to do so could result in winch failure. For DV-9 &...
-
Page 27: Maintenance Schedule
Maintenance Schedule 1). Ensure that a responsible person carries out all inspections as per schedule. 2). Inspections are divided into Daily, Monthly and Three Months. Classification of check Checking Periodical Item Checking Reference Method Daily Three month months Bolt tension & ... -
Page 28: Troubleshooting
Troubleshooting If the winch fails to operate after several attempts, or if there is any fault whilst operating: Symptom Possible Cause Remedy Cut circuit Check battery lead Weak battery Recharge or replace battery (at least 650CCA) Bad connection of wirings Reconnect tightly Winch will not Damaged contactor... -
Page 29: Specifications
Specifications DV-9 Specifications: Line Pull 4,082kg/9,000lb Motor 12V 3,430W/4.6hp Gear Train 3 stage planetary Gear Ratio 156:1 Free-spool rotating ring gear Brake automatic, full load cone brake Wire Rope Size 8.3mm x 30.5m (21/64" x 100') Wire Rope Type galvanised aircraft A7 x 19 Drum Size 63.5mm x 227mm (2.5"... - Page 30 SEAL 9.5 Specifications: Line Pull 4,309kg/9,500lb Motor 12V 3,730w/5hp Gear Train 3 stage planetary Gear Ratio 159:1 Free-spool rotating ring gear Brake automatic, full load cone brake Rope Size 10mm x 30.5m (3/8" x 100') Rope Type Dyneema SK-75 Synthetic Rope Drum Size 63.5mm x 227mm (2.5"...
- Page 31 DV-12 Specifications: Line Pull 5,443kg/12,000lb Motor 12V 4,180w/5.6hp Gear Train 3 stage planetary Gear Ration 261:1 Free-spool rotating ring gear Brake automatic, full load cone brake Wire Rope Size 9.5mm x 38m (3/8" x 125') Wire Rope Type galvanised aircraft A7 x 19 Drum Size 89mm x 206mm (3.5"...
- Page 32 DV-9 Model Parts List & Winch Assembly Ver:2 Item No. Description Part No. Motor 12V 881294 Motor 24V 881295 Tie bar kit 880003 Motor support rack 880004 Motor coupling 880005 Drum bushing 880006 Drum kit 881521 Gearbox support rack 880008 Grounding lead 880009 Wire rope...
- Page 33 Winch Assembly - DV-9 Page 32...
- Page 34 SEAL 9.5 Model Parts List & Winch Assembly Ver:3 Item No. Description Part No. Motor Kit 12V 882179 Tie bar kit 880349 Motor coupling 880005 Drum bushing 880006 Drum kit 881521 Gearbox support rack 881563 Grounding lead 880009 Synthetic Rope 882025 shaft 880011...
- Page 35 Winch Assembly – SEAL 9.5 Page 34...
- Page 36 DV-12 Model Parts List & Winch Assembly Ver:2 Item No. Description Part No. Motor 12V 881296 Motor 24V 881297 Tie bar kit 880045 Motor support rack 880046 Motor coupling 880047 Drum bushing 880048 Drum kit 882162 Gearbox support rack 880050 Grounding lead 880009 Wire rope...
- Page 37 Winch Assembly - DV-12 Page 36...
- Page 38 NOTES --------------------------------------------------------------------------------------- --------------------------------------------------------------------------------------- --------------------------------------------------------------------------------------- --------------------------------------------------------------------------------------- --------------------------------------------------------------------------------------- --------------------------------------------------------------------------------------- --------------------------------------------------------------------------------------- --------------------------------------------------------------------------------------- --------------------------------------------------------------------------------------- --------------------------------------------------------------------------------------- --------------------------------------------------------------------------------------- --------------------------------------------------------------------------------------- --------------------------------------------------------------------------------------- --------------------------------------------------------------------------------------- --------------------------------------------------------------------------------------- --------------------------------------------------------------------------------------- --------------------------------------------------------------------------------------- --------------------------------------------------------------------------------------- --------------------------------------------------------------------------------------- --------------------------------------------------------------------------------------- --------------------------------------------------------------------------------------- --------------------------------------------------------------------------------------- --------------------------------------------------------------------------------------- --------------------------------------------------------------------------------------- Page 37...
- Page 39 Kingsley Enterprises Pty Ltd 6A Brooks Rd Ingleburn NSW 2565 Sydney, Australia Phone: 1800 654 767 (Toll Free) International Calls: +61 2 8700 0400 Fax: 02 8700 0499 www.bushranger.com.au INSTRUCTION NO. IO23 ISSUED MARCH 2013 REV. 1. DA Page 38...
- Page 40 Page 39...
Need help?
Do you have a question about the DV-9TH and is the answer not in the manual?
Questions and answers