Table of Contents
Advertisement
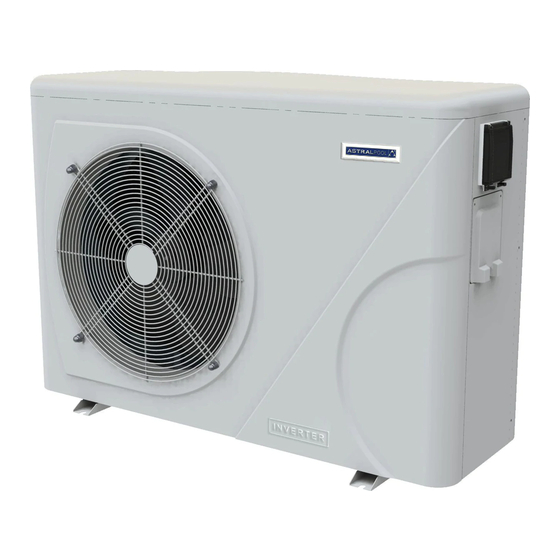
SWIMMING POOL HEAT PUMP
EN
POMPE À CHALEUR POUR PISCINE
FR
ZWEMBAD WARMTEPOMP
NL
BOMBA DE CALOR PARA PISCINA
ES
SCHWIMMBAD - WÄRMEPUMPE
DE
PISCINA POMPA DI CALORE
IT
BOMBA DE CALOR DE PISCINA
PT
PRO ELYO INVERBOOST NN
User and service manual
Manuel d'installation et d'utilisation
Gebruiker en service manual
Manual del usuario y de servicio
Benutzer - und Wartungshandbuch
Istruzioni per l'uso e di servizio
Manual do usuário e serviço
Advertisement
Table of Contents

Related Manuals for Astralpool PRO ELYO INVERBOOST NN


Summary of Contents for Astralpool PRO ELYO INVERBOOST NN
- Page 1 BOMBA DE CALOR PARA PISCINA Manual del usuario y de servicio SCHWIMMBAD - WÄRMEPUMPE Benutzer - und Wartungshandbuch PISCINA POMPA DI CALORE Istruzioni per l'uso e di servizio BOMBA DE CALOR DE PISCINA Manual do usuário e serviço PRO ELYO INVERBOOST NN...
- Page 2 User and Service manual SWIMMING POOL HEAT PUMP PRO ELYO INVERBOOST NN - 9 -...
-
Page 3: Important Notice
9. Exploded Diagram Thank you for using PRO ELYO INVERBOOST NN swimming pool heat pump for your pool heating, it will heat your pool water and keep the constant temperature when the air ambient temperature is at -20 to 50℃. - Page 4 Description Description Description 1.1 Included with your Heat Pump - Water connection assembly 50 mm (pcs: 2) - User and service manual - Reducer connection - 10 meters’ signal wire - Waterproof box - Winter cover - Anti-vibration base (pcs: 4) 1.2 Dimension Model: 71676 - 11 -...
- Page 5 Description Description Description Models: 71677/71678/71679 Models: 71680/71681 - 12 -...
- Page 6 Description Description Description Models: 71682/71683/68821/68822/68823 - 13 -...
-
Page 7: Transport Information
Transport Transport Transport information information information 2.1 Delivery of the unit For the transportation, the heat pumps are fixed on the pallet and covered with a cardboard box. To protect from any damage, the heat pump must be transferred in its package. It is the responsibility of the addressee to notify of any damage incurred during delivery within 48 hours. -
Page 8: Specifications
Specifications Specifications Specifications Technical data PRO ELYO INVERBOOST NN pool heat pumps CE Standard, R32, ABS Cabinet MODEL PROELYXP07i PROELYXP09i PROELYXP11i PROELYXP14i CODE 71676 71677 71678 71679 * Performance at Air 28℃, Water 28℃, Humidity 80% Heating capacity 7-3.1 9-2.3 11-2.9... - Page 9 Specifications Specifications Specifications Technical data PRO ELYO INVERBOOST NN pool heat pumps CE Standard, R32, ABS Cabinet MODEL PROELYXP16i PROELYXP20i PROELYXP26i PROELYXP30i CODE 71680 71681 71682 71683 * Performance at Air 28℃, Water 28℃, Humidity 80% Heating capacity 16-3.8 20-4.7 26-5.9...
- Page 10 Specifications Specifications Specifications Technical data PRO ELYO INVERBOOST NN pool heat pumps CE Standard, R410A, ABS Cabinet MODEL Pro Elyo Inverboost NN26T Pro Elyo Inverboost NN 35 Pro Elyo Inverboost NN35T CODE 68821 68822 68823 * Performance at Air 28℃, Water 28℃, Humidity 80% Heating capacity 26-5.9...
-
Page 11: Accessories And Options
Accessories Accessories options options Accessories options 4.1 Accessories list Anti-vibration base, 4 pcs Draining plug, 2 pcs Waterproof box, 1 pc 10M signal wire, 1 pc Modbus signal wire, 1 pc Water connection assembly, 2 sets Winter Cover, 1 pc 4.2 The By-Pass Kit The By-Pass Kit is the essential accessory for the installation of your heat pump, it is also a tool for the optimization of the heating of the water. - Page 12 Accessories Accessories Accessories options options options 4.3 Accessories Installation Anti-vibration bases 1. Take out 4 Anti-vibration bases 2. Install them on the bottom of machine. Draining plug 1. Install the draining plug under the bottom panel 2. Connect with a water pipe to drain out the water.
-
Page 13: Location And Connection
Location connection Location Location connection connection ATTENTION: Please observe the following rules when installing the heat pump: Any addition of chemicals must take place in the piping located downstream from the heat pump. Always keep the heat pump upright. If the unit has been held at an angle, wait at least 24 hours before applying mains power to the heat pump. - Page 14 Location Location Location connection connection connection 5.2 Check-valve installation NOTE Note: If automatic dosing equipment for chlorine and acidity (pH) is used, it is essential to protect the heat pump against excessively high chemical concentrations which may corrode the heat exchanger. For this reason, equipment of this sort must always be fitted in the piping on the downstream side of the heat pump, and it is recommended to install a check-valve to prevent reverse flow in the absence of water circulation.
-
Page 15: Typical Arrangement
Location connection Location Location connection connection 5.3 Typical arrangement This arrangement is only an illustrative example. NOTE The factory supplies only the heat pump. All other components, including a bypass if necessary, must be provided by the user or the installer. ATTENTION: In order to heat the water in the pool (or hot tub), the filtration pump must be running so the water is circulating through the heat pump. -
Page 16: Initial Operation
Location Location Location connection connection connection 5.4 Initial operation After all connections have been made and checked, carry out the following procedure: Switch on the filtration pump. Check for leaks and verify that water is flowing to and from the swimming pool. Connect power to the heat pump and press the On/Off button on the electronic control panel. - Page 17 Location Location Location connection connection connection 5.5 Condensation The air drawn into the heat pump is cooled by the operation of the heat pump for heating the pool water, which may cause condensation on the fins of the evaporator. NOTE The amount of condensation may be as much as several litters per hour at high humidity.
-
Page 18: Electrical Wiring
Electrical Electrical Wiring Wiring Electrical Wiring 6.1 Inverter swimming pool heat pump wiring diagram Ref. 71676/71677/71678/71679/71680 - 25 -... - Page 19 Electrical Electrical Electrical Wiring Wiring Wiring 6.2 Inverter swimming pool heat pump wiring diagram Ref: 71681 - 26 -...
- Page 20 Electrical Electrical Electrical Wiring Wiring Wiring 6.3 Inverter swimming pool heat pump wiring diagram Ref: 71682/71683 - 27 -...
- Page 21 Electrical Electrical Electrical Wiring Wiring Wiring 6.4 Inverter swimming pool heat pump wiring diagram Ref. 68822 (R410A) - 28 -...
- Page 22 Electrical Electrical Wiring Wiring Electrical Wiring 6.5 Inverter swimming pool heat pump wiring diagram Ref. 68821/68823 (R410A) * Above electrical wiring diagram only for your reference, please subject machine posted the wiring diagram. - 29 -...
- Page 23 210 m 315 m 525 m PROELYXP30i 35 A 21 m 34 m 49 m 84 m PRO ELYO INVERBOOST NN 26T 57 m 90 m 130 m 225 m PRO ELYO INVERBOOST NN 35 34 A 21 m 34 m...
- Page 24 Electrical Electrical Electrical Wiring Wiring Wiring 6.7 Installation of the display deportee Photo(1) Photo(2) Photo(3) Photo(4) Photo(5) - The end with plug connects with the control panel (photo1) - The other end of the signal wire. (photo2) - Open the cover of the terminal box and pass through it the cable of the remote screen.(photo3,4) - Insert the wiring into the designated position on the Modbus Module or PCB(without Modbus).
- Page 25 Electrical Wiring Electrical Electrical Wiring Wiring Dry contact timer connection Timer Dry contact pump connection - 32 -...
-
Page 26: Start-Up Of The Heat Pump
Start-up Start-up Start-up Heat Heat Heat Pump Pump Pump 7. Display Controller Operation 7.1. Guide for operation When the heat pump connects to the power, the LED display shows a code for 3 seconds which indicates the heat pump model. 7.2 The keys and their operations 7.2.1 button... - Page 27 Start-up Start-up Start-up Heat Heat Heat Pump Pump Pump Parameter checking: Press first, then press to check the User parameter from d0 to d14 Code Condition Scope Remark IPM mould temperature 0-120℃ Real testing value Inlet water temp. Real testing value -9℃~99℃...
- Page 28 Start-up Start-up Start-up Heat Heat Heat Pump Pump Pump Code with connect Parameter P Description 71676 17FC PAC PROELYXP07i 7-3.1Kw 71677 17FD PAC PROELYXP09i 9-2.3Kw 71678 17FE PAC PROELYXP11i 11-2.9Kw 71679 17FF PAC PROELYXP14i 14-3.2Kw 71680 1800 PAC PROELYXP16i 16-3.8Kw 71681 1801 PAC PROELYXP20i 20-4.7Kw...
-
Page 29: System Reset Function
Start-up Start-up Start-up Heat Heat Heat Pump Pump Pump 7.2.4 System reset function Press in 10s, the system will reset and display “0000” on the controller. 7.2.5 Symbol of heating, the light will be on when it is in operation. When defrosting, the light will flash. -
Page 30: Auto Mode
Start-up Start-up Start-up Heat Heat Heat Pump Pump Pump 7.2.12 Auto Mode There are 3 modes for the unit, Heating only, Auto mode(heating and cooling switch), Cooling only. You can switch Heating only and Auto mode by pressing for 5 seconds, no matter the unit is on or off. Both lights are on Heat Light On Operation logic of Auto Mode... - Page 31 Start-up Start-up Start-up Heat Heat Heat Pump Pump Pump Option 1 Water pump is related to heat pump operation to start or stop. Filtration pump starts 60s before compressor, filtration pump start 30s and then the water flow switch detect flow.
- Page 32 Start-up Start-up Start-up Heat Heat Heat Pump Pump Pump 7.3 Heating operation logic For example , Working Water in Working mode water in Heat pump working level status temperature-T1 temperature-T1 T1< Tset-1 T1< 27℃ Powerful mode-frequency F9 When you Tset-1≦T1 < Tset 27℃≦T1 <28℃...
- Page 33 Start-up Start-up Heat Heat Pump Pump Start-up Heat Pump 7.4 Cooling operation logic Working Water in For example , water Working mode Heat pump working level status temperature in temperature T1≦Tset-1 T1≦27℃ Standby. When you select Tset-1<T1 ≦Tset 27℃< T1 ≦ 28℃ Silent mode-frequency F2 the "Smart Tset<T1≦Tset+1...
-
Page 34: Troubleshooting
Troubleshooting Troubleshooting Troubleshooting 8.1 Error code display on LED wire controller Malfunction Error code Reason Solution 1. The sensor in open or short 1. Check or change the sensor Inlet water temperature sensor PP01 circuit 2.Re-fix the wiring of the failure T1 2. - Page 35 Troubleshooting Troubleshooting Troubleshooting Malfunction Error code Reason Solution 1. Check the EEV and piping 1. EEV has blocked or pipe system is system Check the motor jammed Low pressure failure 2. Through the high pressure EE02 2. Motor speed is abnormal or motor gauge to check the pressure has damaged value...
- Page 36 Troubleshooting Troubleshooting Troubleshooting Malfunction Error code Reason Solution 1. Check and re-connect the signal wire Communication failure 1. Poor signal wire connection or 2. Change a new signal wire between controller and EE08 damaged signal wire 3. Turn off electricity supply and main board 2.
- Page 37 Troubleshooting Troubleshooting Troubleshooting Malfunction Error code Reason Solution 1. Change a driver board 1. Output exception of IPM module IPM module 2. Check if the fan motor speed thermal circuit temperature too high EE15 is too low or fan motor damaged, 2.
- Page 38 Troubleshooting Troubleshooting Troubleshooting Malfunction Error code Reason Solution 1.Compressor runs out of step 1. Check the main board or Software control 2. Wrong program EE21 change a new one exception 3. Impurity inside compressor causes 2. Enter correct program the unstable rotate speed 1.
- Page 39 Troubleshooting Troubleshooting Troubleshooting Remarks: 1. In heating mode, if the water out temperature is higher than the set temperature over 7℃, LED controller displays EE04 for water over-heating protection. In cooling mode, if the water out temperature is lower than the set temperature over 7℃, LED controller displays PP11 for water over-cooling protection.
- Page 40 Troubleshooting Troubleshooting Troubleshooting 8.2 Other Malfunctions and Solutions (No display on LED wire controller) Malfunctions Observing Reasons Solution LED wire controller Check cable and circuit breaker if it is No power supply no display. connected LED wire controller. Heat pump under standby Startup heat pump to run.
-
Page 41: Exploded Diagram
Exploded Exploded Diagram Diagram Exploded Diagram 9. 1 Exploded Diagram Mode: 71676 - 48 -... - Page 42 Exploded Exploded Exploded Diagram Diagram Diagram 9.2 Spare Parts list Model : 71676 Parts name Parts name 1330900291 Top cover 117020180 Controller 117110020 Ambient temp. sensor 103000227 Evaporator pipe T5-TH1 133020010 Ambient temp. sensor clip 136020018 Rubber block 1330900271 Back panel 103000227 Distribution piping 103000227...
- Page 43 Exploded Exploded Diagram Diagram Exploded Diagram 9.3 Model: 71677/71678/71679 - 50 -...
- Page 44 Exploded Exploded Exploded Diagram Diagram Diagram 9.4 Spare parts list: 71677 Parts name Parts name 1330900291 Top cover 113712007 Waterproof controller box 117110020 Ambient temp. sensor 117020180 Controller T5-TH1 133020010 Ambient temp. sensor clip 103000221 Evaporator pipe 1330900271 Back panel 136020005 Rubber block 103000221...
- Page 45 Exploded Exploded Diagram Diagram Exploded Diagram 9.5 Spare parts list: 71678 Parts Name Parts Name 1330900291 Top cover 113712007 Waterproof controller box 117110020 Ambient temp. sensor T5-TH1 117020180 Controller 133020010 Ambient temp. sensor clip 103000182 Evaporator pipe 1330900271 Back panel 136020005 Rubber block 103000182...
- Page 46 Exploded Diagram Exploded Exploded Diagram Diagram 9.6 Spare parts list: 71679 Parts Name Parts Name 1330900291 Top cover 113712007 Waterproof controller box 117110020 Ambient temp. sensor T5-TH1 117020180 Controller 133020010 Ambient temp. sensor clip 103000220 Evaporator pipe 1330900271 Back panel 136020005 Rubber block 103000220...
- Page 47 Exploded Diagram Exploded Exploded Diagram Diagram 9.7 Model: 71680/71681 - 54 -...
- Page 48 Exploded Exploded Exploded Diagram Diagram Diagram 9.8 Spare parts list: 71680 Spare parts name Spare parts name 1332600011 Top cover 1332600041 Right panel 1332600021 Back panel 103000230 Distribution piping assembly 117110020 Ambient temp. sensor T5-TH1 136020005 Rubber block 133020010 Ambient temp. sensor clip 103000230 Collective piping assembly 103000230...
- Page 49 Exploded Diagram Exploded Exploded Diagram Diagram Spare parts list : 71681 Spare parts name Spare parts name 1332600011 Top cover 1332600041 Right panel 1332600021 Back panel 103000204 Distribution piping assembly 117110020 Ambient temp. sensor T5-TH1 136020005 Rubber block 133020010 Ambient temp. sensor clip 103000204 Evaporator pipe 103000204...
- Page 50 Exploded Exploded Diagram Diagram Exploded Diagram 9.10 Model: 71682,71683 - 57 -...
- Page 51 Exploded Exploded Exploded Diagram Diagram Diagram 9.11 Spare parts list: 71682 Parts name Parts name 133100001 Top cover 117020180 Controller 117110020 Ambient temp. sensor T5-TH1 113712007 Waterproof controller box 133020010 Ambient temp. sensor clip 103000208 Evaporator pipe 133250003 Back panel 136020005 Rubber block 103000208...
- Page 52 Exploded Exploded Exploded Diagram Diagram Diagram 9.12 Spare parts list: 71683 Parts name Parts name 133100001 Top cover 117020180 Controller 117110020 Ambient temp. sensor T5-TH1 113712007 Waterproof controller box 133020010 Ambient temp. sensor clip 103000209 Evaporator pipe 133250003 Back panel 136020005 Rubber block 103000209...
- Page 53 Exploded Exploded Exploded Diagram Diagram Diagram 9.13 Model: 68821/68822/68823 - 60 -...
- Page 54 Exploded Exploded Exploded Diagram Diagram Diagram 9.14 Spare parts list: 68821 Parts Name Parts Name 133100001 Top cover 113050109 Evaporator pipe 117110020 Ambient temp. sensor T5-TH1 113170028 Dehydrator filter pipe 133020010 Ambient temp. sensor clip 120000066 Dehydrator filter 133250003 Back panel 119000022 103000153 Evaporator...
- Page 55 Exploded Exploded Exploded Diagram Diagram Diagram 9.15 Spare parts list: 68822 Parts Name Parts Name 133100001 Top cover 113050110 Evaporator pipe 117110020 Ambient temp. sensor T5-TH1 113170028 Dehydrator filter pipe 133020010 Ambient temp. sensor clip 120000066 Dehydrator filter 133250003 Back panel 119000022 103000154 Evaporator...
- Page 56 Exploded Exploded Exploded Diagram Diagram Diagram 9.16 Spare parts list: 68823 Parts Name Parts Name 133100001 Top cover 113050110 Collective piping 117110020 Ambient temp. sensor T5-TH1 113170028 Degydrator filter pipe 133020010 Ambient temp. sensor clip 120000066 Dehydrator filter 133250003 Back panel 119000022 103000154 Evaporator...
-
Page 57: Maintenance
Exploded Diagram Exploded Exploded Diagram Diagram 9.17 Maintenance You should check the water supply system regularly to avoid air entering the system and creation of low water flow, because it would reduce the performance and reliability of HP unit. Clean your pools and filtration system regularly to avoid the damage of the unit. Only a qualified technician is authorized to operate the cooling system pressure.
Need help?
Do you have a question about the PRO ELYO INVERBOOST NN and is the answer not in the manual?
Questions and answers