Page 1
Auto-tuning Control ISO 9001 Registered Company Winona, Minnesota USA Watlow Controls Watlow Controls, 1241 Bundy Blvd., P.O. Box 5580, Winona, MN 55987-5580, Phone: 507/454-5300, Fax: 507/452-4507 0600-0003-0000 Rev. C $10.00 July 1998 Made in the U.S.A. Supersedes: 0600-0003-0000 Rev. B...
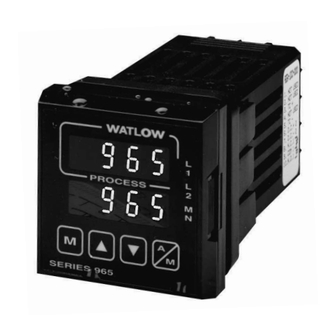
Page 2
Technical Assistance WARNING: Details of a "Warn- If you encounter a problem with your Watlow controller, review all of your configuration ing" appear here, in information for each step of the setup, to verify that your selections are consistent with the narrow box on your applications.
Starting Out Page Item 31 Calibration Procedures 34 Glossary Chapter 1 36 Index Starting Out With The Watlow Series 965 37 Warranty and Returns General Description 38 Specifications 39 Model Number Information Chapter 2 40 Declaration of Conformity Install And Wire The Series 965...
Operator-friendly features include automatic LED indicators to aid in monitoring and setup, as well as a calibration offset at the front panel. The Watlow Series 965 automatically stores all information in a non-volatile memory.
Grainger. Installation Procedure Follow this procedure to mount the Watlow Series 965 temperature control: 1. Make a panel cutout per the dimensions in Figure 2. 2. Remove the 965 chassis from its case. Holding each side of the bezel, press in firmly on the side grips until the tabs release.
5. Insert the control chassis into its case and press the bezel to seat it. Make sure the inside gasket is also seated properly and not twisted. The hard- ware installation is complete. Proceed to the wiring section from here. Install and Wire, Chapter 2 WATLOW Series 965 User's Manual...
1 - 00 Figure 7 - Low Voltage Ó Power Wiring ‡ 12-24V (ac/dc) Ó WARNING: If high voltage is applied to the low voltage unit, irreversible damage will occur. Install and Wire, Chapter 2 WATLOW Series 965 User's Manual...
Process input does not have sensor break protection. Outputs can remain ç full on. DIP Switch Orientation Figure 9 - Î 0-5V (dc) Process Sensor Input Wiring Ω Input impedance: 10K WATLOW Series 965 User's Manual Install and Wire, Chapter 2...
CAUTION: ç Process input does not have sensor break protection. DIP Switch Orientation Outputs can remain full on. Figure 11 - 4-20mA Process Sensor Input Wiring Ω Input impedance: 5 Install and Wire, Chapter 2 WATLOW Series 965 User's Manual...
Model # 965A - 3 K - 00 Custommer Supplied Figure 15 - Quencharc 0.5 Amp Solid-state Relay Without Contact Suppression Wiring External Load S S 1 Fuse S S 1 WATLOW Series 965 User's Manual Install and Wire, Chapter 2...
NOTE: Output is in open State in Alarm Fuse Condition. External Load Figure 18 - 0.5 Amp Solid-state Relay Without Contact Suppres- Custommer Supplied Customer Supplied sion Wiring Quencharc Quencharc Install and Wire, Chapter 2 WATLOW Series 965 User's Manual...
Failure to observe NEC safety guide- System Wiring lines could result in injury to personnel or damage to property. Example ç CAUTION: Watlow mercury relay loads must have a unity power factor. For RESISTIVE LOADS ONLY. 120VÅ (VAC) Earth Ground High Temperature Light...
Up-arrow/Down-arrow Keys When pressed simultaneously for three seconds, the Setup Menu appears displaying the [`LOC] parameter. Continue to press the Up-arrow/Down-arrow keys, and the Calibration Menu appears. Keys & Displays, Chapter 3 WATLOW Series 965 User's Manual...
In parameter in the Setup Menu. Set the software selection for the input type to match. See Page 16. Figure 21 - DIP Switch Location and Orientation Control Chassis - Bottom View Input Types Thermocouple Process WATLOW Series 965 User's Manual Setup, Chapter 4...
The Setup Menu Celcius__Fahrenheit RTD calibration curve C _ F Ramp function Range low Ramp rate Range high % Power limiting Ot 1 Output 1 Display Control hysteresis Output 2 Control Set Point Setup, Chapter 4 WATLOW Series 965 User's Manual...
Appendix for range values, or refer to Table 1 on Page 18. Range: Sensor range low to rH Default: Low limit of sensor type/-500 for process input WATLOW Series 965 User's Manual Setup, Chapter 4...
Page 17
Range: Str, On, OFF Default: OFF Rate: Selects the ramping rate in degrees per hour. This parameter will not appear if rP = OFF. Range: 0 to 9999 Default: 100°/hr Setup, Chapter 4 WATLOW Series 965 User's Manual...
= Ramping to set point at all times OFF = None rP ≠ OFF 0 to 9999 100°/hr 0 to 100 nor = normal SEt = Set Point (lower only) Pro = Process (upper only) WATLOW Series 965 User's Manual Setup, Chapter 4...
If a mechanical relay or contactor is switching power to the load, a longer cycle time may be desirable to minimize wear on the mechanical compo- nents. Typical life of a mechanical relay is 100,000 cycles. Range: 0.1 to 999.9 Default: 5.0 Setup, Chapter 4 WATLOW Series 965 User's Manual...
Page 20
Will not appear if Ot2 = no or Con. AHI - Deviation dE 0 to 999 Process Pr ALO to rH Will not appear if Ot2 = no or Con. ±18°F/±10°C/±18 Units WATLOW Series 965 User's Manual Setup, Chapter 4...
90% of set point four times within 80 minutes after auto-tune has started. If this does not happen within the 80 minute time limit, the Pb remains at 0 and the control functions in an on/off mode. WATLOW Series 965 User's Manual Tuning and Operating, Chapter 5...
4. Cycle Time Adjustment: Set Ct as required. Faster cycle times sometimes achieve the best system control. However, if a mechanical contactor or solenoid is switching power to the load, a longer cycle time may be desirable Tuning and Operating, Chapter 5 WATLOW Series 965 User's Manual...
("bumpless," smooth transition). When transferring from manual to automatic operation, the control output(s) may change significantly. In manual operation, the output value appears in the lower display; in automatic operation, the set point appears. WATLOW Series 965 User's Manual Tuning and Operating, Chapter 5...
The alarm clears itself automatically as soon as the process temperature is inside the HSA parameter alarm limit. Press once - Figure 26 - Clear Alarm Display a latched Examples corrected alarm. Tuning and Operating, Chapter 5 WATLOW Series 965 User's Manual...
The A/D overrange voltage is too high to convert an A/D signal. Make sure the In parameter matches your sensor and DIP switches are set accordingly. WATLOW Series 965 User's Manual Tuning and Operating, Chapter 5...
Page 26
• The above conditions occur regardless of the value of LOC, or the presence of the Setup or Calibration Menus. • To clear a corrected error… • Cycle power to the control. Tuning and Operating, Chapter 5 WATLOW Series 965 User's Manual...
◊ Maintain shield continuity at daisy chain connection points by reconnecting the broken shield. ◊ Assume no electrostatic shielding when using the shield as a signal return. If you must do this, use triaxial cable (electrostatically shielded coaxial cable). Appendix WATLOW Series 965 User's Manual...
• The ultimate protection is an "uninterruptable" power supply. This "senses" the ac power line; when the line fluctuates, a battery powered 60Hz inverted circuit takes over, supplying power within one-half to one cycle of the ac line; very expensive. Appendix WATLOW Series 965 User's Manual...
5 to 10 seconds, the MODE key may then be used to display the next prompt. After the final input is established, press the MODE key twice to return the unit to the configuration menu at the top of the parameter list. Appendix WATLOW Series 965 User's Manual...
SI (integral, derivative, proportional band in % of span, °C) Factory use only. ç Before attempting to calibrate, make sure you have the proper equipment called for in each procedure. The Series 965 is calibrated and tested before leaving the factory. WATLOW Series 965 User's Manual Appendix...
Page 31
To conclude the RTD calibration, advance the MODE key to the next prompt or exit the CAL menu. At the 255 prompt, set the decade resistance box to 255.42. Allow at least 10 seconds to stabilize. Press the MODE key. Appendix WATLOW Series 965 User's Manual...
Page 32
The unit leaves the CAL mode if 1 minute passes between key activa- tions. Press A/M twice to exit the MANUAL mode. To conclude, advance the MODE key to the next prompt or exit the CAL menu. WATLOW Series 965 User's Manual Appendix...
Page 33
VERY To conclude the 4-20mA output calibration, advance the MODE key to the next important. Always move to the next prompt or exit the CAL menu. parameter before changing the calibration equip- ment. Appendix WATLOW Series 965 User's Manual...
Page 34
Parameter: A physical property whose value Display capability: In a digital indicating instru- determines the response of an electronic control to ment, the entire possible span of a particular given inputs. parameter or value. WATLOW Series 965 User's Manual Appendix...
Page 35
Rate band: A thermal control band that defines is energized depends on the system temperature. where the rate (derivative) function begins. A Watlow rate band occurs centered on set point at Triac: Solid state switching device. one or more times the width of the proportional band.
Thermocouple Sensor Wiring 8 Tuning 21 L1 & L2 Keys 13 Ladder Wiring Diagram, System 12 U, V, W Lock Parameter 16 Up-arrow key 13 Low Voltage Wiring 7 Upper Display 13 Lower Display 13 Warranty 37 Index WATLOW Series 965 User's Manual...
Page 37
Index Warranty The Watlow Series 965 is warranted to be free of defects in material and workmanship for 36 months after delivery to the first purchaser for use, provid- ing that the units have not been misapplied. Since Watlow has no control over their use, and sometimes misuse, we cannot guarantee against failure.
, Form A, 0.5A @ 24V~ (ac) min., 264V~ finish not rougher than 0.000032 inch (0.000812 mm). (ac) max., opto-isolated burst fire switched, without contact Switching inductive loads (relay coils, etc.) requires using an suppression. Off-state output impedance is 31MΩ. RC suppressor. WATLOW Series 965 User's Manual Appendix...
Series 965 Quick Reference Use this page as a quick reference for the Series 965. Tear along the perforation. Keys & Displays Upper Display: Red or green, LED display, L1: When lit it indicates Output 1 is energized. indicating either process actual temperature, the L2: When lit it indicates when Output 2 is active.
Entering the Setup Menu The Setup Menu displays the parameters that configure the Series 965's features to your applicaton. Enter the Setup menu by pressing the Up-arrow/Down-arrow keys simultaneously for 3 seconds. The lower display shows the LOC parameter, and the upper display shows its current level. All keys are inactive until you release both keys.
Need help?
Do you have a question about the 965 Series and is the answer not in the manual?
Questions and answers