Advertisement
Quick Links
Please be sure to read the enclosed Shark
STEAM MOP
QUICK START GUIDE
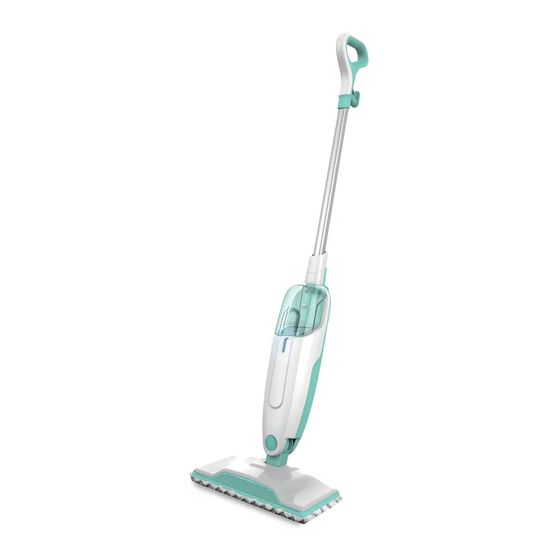
WHAT'S INSIDE
A
Steam Mop Handle
B
Steam Mop Pole
C
Steam Mop Body
D
Water Tank
E
Water Tank Cap
F
Dirt Grip™ Pad x 2
G
Mop Head
A
B
G
S1000UK_QSG_MP_190328
C
D
E
F
Instructions prior to using your unit.
®
ASSEMBLY
1
(Click)
2
(Click)
1.
A lign the Mop Handle and Mop Pole so the arrow
symbols inside them face forward. Insert either end
of the pole into the handle until it clicks securely into
place.
2.
Align the Mop Pole and the Mop Body so their arrow
symbols face forward. Insert the pole into the top of the
mop body, sliding it in until it clicks into place.
3.
Place the Dirt Grip™ cleaning pad on the floor with
the quick fastener strips facing up. Align the mop
head directly over the pad, then press the mop head
down onto the pad. The quick fastener strips will
secure the pad to the mop head.
3
Advertisement

Related Manuals for Shark S1000UK


Summary of Contents for Shark S1000UK
- Page 1 Please be sure to read the enclosed Shark Instructions prior to using your unit. ® STEAM MOP QUICK START GUIDE WHAT’S INSIDE ASSEMBLY Steam Mop Handle Steam Mop Pole Steam Mop Body Water Tank Water Tank Cap Dirt Grip™ Pad x 2 (Click) Mop Head (Click) A lign the Mop Handle and Mop Pole so the arrow symbols inside them face forward. Insert either end of the pole into the handle until it clicks securely into place. Align the Mop Pole and the Mop Body so their arrow symbols face forward. Insert the pole into the top of the mop body, sliding it in until it clicks into place.
- Page 2 Please be sure to read the enclosed Shark Instructions prior to using your unit. ® FILLING THE WATER TANK USING THE STEAM MOP To remove the water tank, lift it up and away from the Pull and twist the quick release cord holder to unwrap Steam Mop body. the power cord completely (Fig. 1). When Steam Mop is plugged into an electrical outlet, the power light will illuminate (Fig. 2). Fig. 1 Fig. 2 After 30 seconds, pump the handle a few times in a downward motion to prime the mop and activate steam. Remove the water tank cap by twisting counterclockwise. Fill tank completely with distilled water or tap water. Mop with a forward and backward motion to automatically customize steam output. Replace cap on water tank and turn cap clockwise to seal. To replace the water tank, align it so the cap faces...
Need help?
Do you have a question about the S1000UK and is the answer not in the manual?
Questions and answers