
Subscribe to Our Youtube Channel
Related Manuals for ThyssenKrupp NBS


Summary of Contents for ThyssenKrupp NBS
- Page 1 Operating manual Emergency brake system NBS For: TW45C, TW63, TW130, TW160 ThyssenKrupp Aufzugswerke...
- Page 3 ThyssenKrupp Aufzugswerke GmbH. Any duplication, dissemination or storage on data media unauthorised by ThyssenKrupp Aufzugswerke GmbH is an infringement of copyright and shall give rise to prosecution. Right to make changes of a technical nature reserved...
-
Page 5: Table Of Contents
2.2 Operation principle of the NBS 2.3 Placing the emergency brake system out of operation 2.4 NBS control unit 2.5 Speed governor connection 2.6 Releasing the NBS emergency brake mechanically Technical data 3.1 Mounting the NBS TW45C 3.2 Mounting the NBS, TW63 3.3 Mounting the NBS, TW130... -
Page 6: Safety
Nonobservance can lead to damage, danger or malfunctions. Check/Test Test steps are specified with this symbol. The test instructions marked in this way should be followed without fail. They contribute to preventing personal injury or damage to property. 10-2012 ThyssenKrupp Aufzugswerke GmbH... -
Page 7: Safety Instructions
Organisational measures The required personal safety equipment must be provided by the operator or installation company, as the case may be. All existing safety devices are to be tested regularly in accordance with the maintenance schedule. 10-2012 ThyssenKrupp Aufzugswerke GmbH... - Page 8 Warranty and liability claims in the event of personal injury and damage to property shall be excluded if they arise due to any of the following causes: Improper use that is not in line with the intended purpose of the NBS emergency brake...
- Page 9 Cases of catastrophe due to third-party interference and force majeure. Constructional changes to the NBS emergency brake The components of the NBS emergency brake are assembled and tested in the plant. In event of changes being made to the assembly, all warranty on...
-
Page 10: Product Description
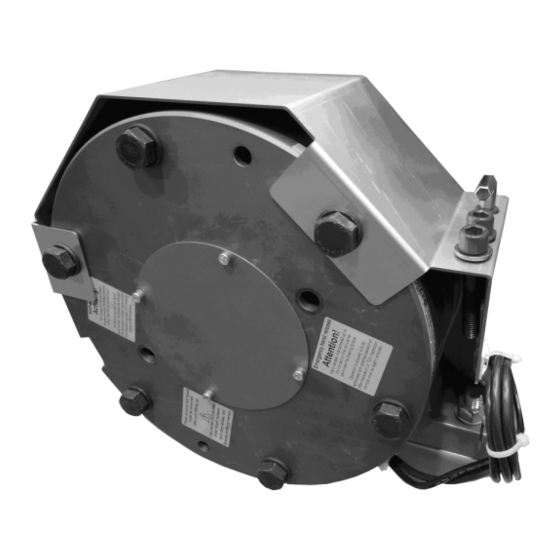
Terminal box, NBS connection Motor TW63, horizontal The NBS emergency brake system that is mounted as an option on ThyssenKrupp elevator gears serves as an additional protection device against overspeed for the elevator car as it moves upwards. It complies with the applicable regulations of EN81. - Page 11 NBS emergency brake system after a preset delay time. Closing in the event of emergency stop or power failure: In all 3 cases, the drive brake and NBS emergency brake respond without a delay. (UCM – uncontrolled car movement complying with EN81-A3)
- Page 12 If the installation is defective or without current, initiate rescue. To move the elevator car in order to achieve this, the NBS emergency brake must be put out of operation. Proceed as described in chapter 6.3 and comply with the specified safety instructions.
- Page 13 • The operator must ensure that the setting of the air gap made at the plant is not changed, thus ensuring faultless release of the brake. • The NBS emergency brake system is intended for static application as a parking brake. Dynamic braking is restricted to emergency braking when the elevator is moving upwards.
- Page 14 Indicator lamp +NBS-H77 does not light up. The power supply +NBS-G77.2 provides the control voltage of 24 V. The die 230V AC is provided as mains voltage at the input of the NBS control system terminal X2:L. This mains voltage also supplies the module from generation of the brake DC voltage G77.1 via make contacts of the NBS contactors.
- Page 15 (safety circuit closed), a run can be initiated by the elevator control system. Initiation of a run is signalled by the elevator control system to the NBS emergency brake control system in that the elevator control system applies a voltage of 230 V~ to contactor coil +NBS-K77.3.
- Page 16 The delay of the auxiliary switch block +NBS-K77.3, which can be set from 0.1 to 30 seconds, should be set in such a way that the NBS emergency brake only engages when the drive is at a standstill and the service brake firmly brakes the drive.
- Page 17 / disconnected. Reset the switches and speed governor to their operating positions. a) With functioning drive brake: set switch on the control unit of the NBS to "Open". This electrically releases the NBS emergency brake. Run emergency rescue with manual release of the drive brake (same as for drives without NBS).
- Page 18 After completion of the measures, the secure operating mode is to be established. The connection terminals in the control unit of the NBS emergency brake are to be bridged according to installation plan / wiring diagram / drawing.
-
Page 19: Nbs Control Unit
PERATING MANUAL RODUCT DESCRIPTION NBS control unit NBS control unit in the operating mode Fig. 2.4 1 Indicator lamp 2 Operating mode selector switch 3 Device panel 4 Housing cover ThyssenKrupp Aufzugswerke GmbH 10-2012... - Page 20 PERATING MANUAL RODUCT DESCRIPTION 2.4.1 NBS control unit with opened housing cover Fig. 2.4.1 ThyssenKrupp Aufzugswerke GmbH 10-2012...
- Page 21 PERATING MANUAL RODUCT DESCRIPTION 2.4.2 Component layout and mounting dimensions of the NBS control unit Fig. 2.4.2 Power pack Brake voltage module Radio interference NBS contactor suppression element Safety module Door zone relay 230V AC terminal strip 24V DC terminal strip...
-
Page 22: Speed Governor Connection
This means that in the case of modifications the existing speed governor is to be replaced by a new one with an additional switch or separate switch is to be fitted to the NBS emergency brake in line with Fig. 2.5.1, Item 1. ThyssenKrupp Aufzugswerke GmbH... - Page 23 PERATING MANUAL RODUCT DESCRIPTION Alternatively, the existing switch (Item 3) with one switch contact can be replaced by a switch with two independent switch contacts. Here, the NBS emergency brake must be wired in a separate circuit. Setting the additional switch:...
-
Page 24: Releasing The Nbs Emergency Brake Mechanically
Warner: 3 hexagon socket bolts M8 3 Allen key If the NBS emergency brake has to be released or put out of operation for certain reasons (testing purposes or emergency rescue), proceed as follows: Turn off the power supply to the installation. -
Page 25: Technical Data
PERATING MANUAL ECHNOLOGY Technical data Mounting the NBS, TW45C Fig. 3.1.1 Fig. 3.1 1 Guard plate for brake 6 Brake test switch 2 Mounting bolts for brake to 7 Screw for manual gear emergency release 3 Thread for emergency release... - Page 26 PERATING MANUAL ECHNOLOGY Technical data of the NBS brakes TW45C Technical data Designation Unit Manufacturer Warner Electric Europe Chr.Mayr GmbH Type Mayr RSO500/1200 Nm Warner SZ1050/1000 Nm Braking torque [Nm] 1000 1200 Braking torque setting not possible not possible Design...
- Page 27 Setting value for time delay on operating contactor The time delay at the operating contactor +NBS-K3 in the control unit must be set in such a way that the NBS emergency braking device closes with approx. 1 second delay after the drive has come to a standstill.
-
Page 28: Mounting The Nbs, Tw63
PERATING MANUAL ECHNOLOGY Mounting the NBS, TW63 Mounting, see Fig. 3.1 Technical data Designation Unit Manufacturer Warner Electric Europe Chr.Mayr GmbH Type Mayr RSO800/2200 Nm Warner SZ1700/1700 Nm Braking torque [Nm] 1700 2200 Braking torque setting not possible not possible... -
Page 29: Mounting The Nbs, Tw130
PERATING MANUAL ECHNOLOGY Mounting the NBS, TW130 Mounting, see Fig. 3.1 Designation Unit Technical data Manufacturer Warner Electric Europe Chr.Mayr GmbH Warner SZ2500/3000 Mayr RSO1300/4000 Type Braking torque [Nm] 3000 4000 Braking torque setting not possible not possible Design 4-surface disc brake... -
Page 30: Mounting The Nbs, Tw160
PERATING MANUAL ECHNOLOGY Mounting the NBS, TW160 Mounting, see Fig. 3.1 Designation Unit Technical data Manufacturer Warner Electric Europe Chr.Mayr GmbH Warner SZ5000/5000 Mayr RSO1800/5500 Type Braking torque [Nm] 5000 5500 Braking torque setting not possible not possible Design 4-surface disc brake... -
Page 31: Connecting The Nbs Emergency Brake
PERATING MANUAL ECHNOLOGY Connecting the NBS emergency brake 3.5.1 Monitoring of door monitor, NBS switchbox, ROBA switch Fig. 3.5.1 ThyssenKrupp Aufzugswerke GmbH 10-2012... - Page 32 PERATING MANUAL ECHNOLOGY Monitoring of door zone, NBS switchbox, ROBA switch Fig. 3.5.2 ThyssenKrupp Aufzugswerke GmbH 10-2012...
- Page 33 Relay contactor that monitors the brake test switch S78 of the NBS emergency brake system for drop-out, thus making this brake the safety brake. Braking device (NBS emergency brake system) affecting the traction sheave shaft as part of the protection device against overspeed for the elevator car moving upwards.
- Page 34 PERATING MANUAL ECHNOLOGY 3.5.2 Monitoring of door zone, NBS switchbox, ROBA switch Fig. 3.5.5 ThyssenKrupp Aufzugswerke GmbH 10-2012...
- Page 35 Connection to third-party control systems When connecting the NBS emergency brake to a control system that was not supplied by ThyssenKrupp Aufzugswerke, the regulations of the type approval in the Appendix (see chapter 8) must be complied with.
-
Page 36: Transport And Storage
On delivery, make sure that no damage in transit has occurred. Any damage that is determined is to be documented immediately (photo or sketch and description of the damage). Forward the corresponding documents without delay to THYSSENKRUPP AUFZUGSWERKE GmbH. 10-2012... - Page 37 The regulations for elevator machine and pulley rooms apply with regard to the ambient conditions at the final location (humidity, temperature). (As per EN 81 between +5°C and +40°C) The relative air humidity should not exceed 70%. 10-2012 ThyssenKrupp Aufzugswerke GmbH...
-
Page 38: Assembly
2.4. The terminal box for connection of the control unit is to be mounted as close as possible to the NBS emergency brake on the site. (For example on the frame or base of the drive. -
Page 39: Commissioning / Maintenance
The time delay at the operating contactor +NBS-K77.3 in the control unit must be set in such a way that the NBS emergency brake closes with approx. 1 second delay after the drive has come to a standstill. The switch for the emergency brake control at the control cabinet must be in the position "normal mode". -
Page 40: Maintenance
OMMISSIONING MAINTENANCE Maintenance Maintenance period: maintenance of NBS emergency brake control system should take place within the framework of central maintenance of the elevator, at least once a year. Note: Commissioning and maintenance work may only be carried out by trained and instructed qualified personnel. -
Page 41: Emergency Rescue For Drives With Nbs
If the cause of the malfunction cannot be rectified, check the function of the gear and service brake. If there are no discernible defects on the gear and brake, release the NBS emergency brake manually. This is done by screwing the brake release screws into the brake housing of the NBS. - Page 42 With triggered speed governor Procedure is the same as for drives without NBS, whereby the switch on the control unit remains in operating position ("normal mode"). If the elevator car cannot be moved with the drive (recall), it is to be disengaged from the safety gear using lifting gear.
-
Page 43: Repairs
AINTENANCE Repairs Replacement of the NBS emergency brake Note: if the brake is defective, the complete NBS emergency brake is to be replaced in general. Disconnect the power from the drive and secure it against unauthorised activation. Disconnect the cable connections to the terminal box such as the magnet connection, monitoring switch and thermal switch. - Page 44 PERATING MANUAL AINTENANCE Illustration of TW45C Worm drive shaft end with toothing for mounting the Fig. 7.1 Inserting springs on the NBS emergency brake system Fig. 7.1.1 Fig. 7.1.2 Eye bolt for lifting the NBS emergency brake system Fig. 7.1.3...
- Page 45 PERATING MANUAL AINTENANCE Fig. 7.1.4 Fig. 7.1.5 10-2012 ThyssenKrupp Aufzugswerke GmbH...
-
Page 46: Replacing The Brake Test Switch
AINTENANCE Replacing the brake test switch The purpose of the microswitch on the brake magnet of the NBS is to monitor the brake function. If the switch is defective, it is to be replaced. Unscrew the protective cover on the brake and remove the switch connection at the terminal box. -
Page 47: Appendix
Hexagon screws ISO 4014 / 4017 (DIN 931 / 933) Unless special values are stipulated in the assembly descriptions. The screws are to be tightened with a torque wrench! Dimensions Tightening torque M (Nm) Tightness 10.9 12.9 1100 ThyssenKrupp Aufzugswerke GmbH 10-2012... -
Page 48: Changes
PERATING MANUAL PPENDIX Changes Changes Version Chapter 10/2012 EN81-A3-conform Appendices See extra overview Mayr and Warner ThyssenKrupp Aufzugswerke GmbH 10-2012... - Page 49 The Mayr documents follow Installation and operating manual ROBA stop, type 869.213.30 Declaration of conformity, Mayr Verification of calculation for traction sheave shaft TW45C TW63 TW130 TW160 Type test certificates ABV762/.. for TW45C and TW63 ...
- Page 50 Installation and Operational Instructions ® ® for ROBA-stop -silenzio Type 896.213.30 Sizes 500 – 1800 Design according to: Size Drawing Number Article Number Braking Torque E079 10 228 000 210 8213409 1200 Nm E079 11 221 000 110 8213412 2200 Nm 1300 E079 13 216 000 110 8213466...
- Page 51 Installation and Operational Instructions ® ® for ROBA-stop -silenzio Type 896.213.30 Sizes 500 – 1800 Guidelines on the Declaration of Conformity A conformity evaluation has been carried out for the product (electromagnetic safety brake) in terms of the EC Low Voltage Directive 2006/95/EC.
- Page 52 Installation and Operational Instructions ® ® for ROBA-stop -silenzio Type 896.213.30 Sizes 500 – 1800 Safety Regulations These Safety Regulations are user hints only and may not be complete! General Guidelines Guidelines for Electromagnetic Compatibility (EMC) DANGER In accordance with the EMC directive 2004/108/EC, the Danger of death! individual components produce no emissions.
- Page 53 Installation and Operational Instructions ® ® for ROBA-stop -silenzio Type 896.213.30 Sizes 500 – 1800 Safety Regulations These Safety Regulations are user hints only and may not be complete! Ambient Temperature: 0 °C up to + 40 °C Brake Storage Store the brakes in a horizontal position, in dry rooms and ...
- Page 54 Installation and Operational Instructions ® ® for ROBA-stop -silenzio Type 896.213.30 Sizes 500 – 1800 Safety Regulations These Safety Regulations are user hints only and may not be complete! Regulations, Standards and Directives Used: Liability DIN VDE 0580 Electromagnetic devices and The information, guidelines and technical data in these components, general directives documents were up to date at the time of printing.
- Page 55 Installation and Operational Instructions ® ® for ROBA-stop -silenzio Type 896.213.30 Sizes 500 – 1800 Brake Illustrations Size 500 Not included in delivery Air gap "a" Cable length approx. 1000 mm Fig. 1 Fig. 2 Brake Illustrations Size 800 Not included in delivery Customer-side shaft Air gap "a"...
- Page 56 Installation and Operational Instructions ® ® for ROBA-stop -silenzio Type 896.213.30 Sizes 500 – 1800 Brake Illustrations Size 1300 Not included in delivery Cable length approx. 1000 mm Customer-side shaft Air gap "a" Fig. 5 Fig. 6 Brake Illustrations Size 1800 Not included in delivery Cable length approx.
- Page 57 Installation and Operational Instructions ® ® for ROBA-stop -silenzio Type 896.213.30 Sizes 500 – 1800 Brake Illustrations, General Individual air gaps "b" "b" 6.4/6.5 Fig. 9 Fig. 10 Fig. 11 Chr. Mayr GmbH + Co. KG Tel.: +49 8341 804-0 E079 10 228 000 471 Page 8 of 17 Eichenstraße 1...
- Page 58 Installation and Operational Instructions ® ® for ROBA-stop -silenzio Type 896.213.30 Sizes 500 – 1800 Parts List (Only use mayr original parts) Pcs. Item Name Size 500 Size 800 Size 1300 Size 1800 Coil carrier assembly Armature disk Rotor 1 Rotor 2 Emergency hand release Cap screw...
- Page 59 Installation and Operational Instructions ® ® for ROBA-stop -silenzio Type 896.213.30 Sizes 500 – 1800 Technical Data General Technical Data Size: 1300 1800 Article number: 8213409 8213412 8213466 8213551 Braking torque 1200 Nm 2200 Nm 4000 Nm 5500 Nm Nominal voltage: 104 V 104 V 104 V...
- Page 60 Installation and Operational Instructions ® ® for ROBA-stop -silenzio Type 896.213.30 Sizes 500 – 1800 Application State of Delivery ® ® ROBA-stop -silenzio for use as a holding brake with The brakes are pre-assembled. occasional EMERGENCY STOP braking actions The release monitoring devices (6) are mounted and set manufacturer-side.
- Page 61 Installation and Operational Instructions ® ® for ROBA-stop -silenzio Type 896.213.30 Sizes 500 – 1800 Installation Conditions Installation The eccentricity of the shaft end in relation to the mounting For Size 500: pitch circle must not exceed 0,2 mm. Mount the hub (1) onto the shaft with the inserted key, bring it into the correct position (the length of the key should lie The position tolerance of the threaded holes for the...
- Page 62 Installation and Operational Instructions ® ® for ROBA-stop -silenzio Type 896.213.30 Sizes 500 – 1800 Emergency Hand Release (Item 5 / Fig. 12) The brakes have an emergency hand release (5), so that they can be moved upwards or downwards during an emergency evacuation with the aid of the additional dual-circuit brake, or so that the torque can be set to 0 during a TÜV (German Technical Inspectorate) inspection of the additional dual-circuit brake.
- Page 63 Installation and Operational Instructions ® ® for ROBA-stop -silenzio Type 896.213.30 Sizes 500 – 1800 Electrical Connection and Wiring Magnetic Field Removal AC-side Switching The power circuit is The brake must be operated with interrupted before the rectifier. ROBA -switch overexcitation.
- Page 64 Installation and Operational Instructions ® ® for ROBA-stop -silenzio Type 896.213.30 Sizes 500 – 1800 Release Monitoring (6), Fig. 13 Manufacturer-side Adjustment and Functional Inspection of the Microswitch (6.1), see Fig. 13: ® ® The ROBA-stop -silenzio brakes are delivered with manufacturer-side set release monitoring.
- Page 65 Installation and Operational Instructions ® ® for ROBA-stop -silenzio Type 896.213.30 Sizes 500 – 1800 Braking Torque Maintenance ® ® The (nominal) braking torque is the torque effective in the shaft ROBA-stop -silenzio brakes are mainly maintenance-free. train on slipping brakes, with a sliding speed of 1 m/s referring to The friction linings are robust and wear-resistant.
- Page 66 Installation and Operational Instructions ® ® for ROBA-stop -silenzio Type 896.213.30 Sizes 500 – 1800 Disposal Our electromagnetic brake components must be disposed of separately as they consist of different materials. Please observe the relevant authority regulations. Code numbers may vary according to the disassembling process (metal, plastic and cable).
- Page 98 The Warner documents follow Installation and operating manual ERS VAR__SZ__ Declaration of conformity, Warner Verification of calculation for traction sheave shaft TW45C TW63 TW130 TW160 Type test certificates ABV818/.. for TW45C ...
- Page 99 SM421gb - rev 12/09 Electrically Released Brakes ERS VAR08 SZ 1050/800 ERS VAR08 SZ 1050/1000 EC type certificate according EC95/16 ABV 818 According to drawing 1 12 107138 Industrie Service WARNER ELECTRIC EUROPE Rue Champfleur, B.P. 20095, F- 49182 St Barthélemy d’Anjou Cedex Tél.
-
Page 100: Technical Specifications
We: WARNER ELECTRIC EUROPE, 7, rue Champfleur, B.P. 11095, F-49182 St Barthélemy d’Anjou Cedex declare that the brakes made in our factory from St Barthélemy d’Anjou, and hereafter designated : ERS VAR08 SZ1050/---- Fully comply with directive 95/16/EC on Lifts and are intended for incorporation into an installation or for assembly with other equipment, with the aim of constituting a machine subject to the application of directive 98/37/EC and the directive on Electromagnetic Compatibility 89/336 (modified). -
Page 101: Restrictions On Use
Symbol designating Symbol designating an Symbol designating an elec- an action that might action that might be dan- trical action that might be damage the brake gerous to human safety dangerous to human safety Precautions and restrictions on use Precautions and safety measures Restrictions on use During maintenance, make sure that the ●... -
Page 102: Maintenance
• Engage the disc Adjusting the microswitch OMRON Caution: When installing and should the brake ever be dis- Slide a wedge 0,10 mm thick close to the screw between mantled, make sure that the friction disc boss is the right the face of the magnet and the moving armature. -
Page 103: Connections (Option)
Connections (Option), see Fig5. WAGO connector 231-204/037-000 WAGO connector 731-406/019-000 Fig. 5 Microswitch Coil Spare parts Part Thank you to join to your request for spare part, the reference and the part number of the brake. Friction disc Microswitch MP320 Microswitch OMRON Date of the Nominal torque... - Page 104 SM342gb - rev 01/06 Electrically Released Brakes ERS VAR08 SZ 1700/1700 Warner Electric Part Number 1 12 106606 EC type certificate ABV 590/1 According to drawing 1 12 106580 WARNER ELECTRIC EUROPE Rue Champfleur, B.P. 20095, F- 49182 St Barthélemy d’Anjou Cedex Tél.
-
Page 105: Nominal Torque Nm
We, WARNER ELECTRIC EUROPE, 7, rue Champfleur, B.P. 11095, F-49182 St Barthélemy d’Anjou Cedex declare that the brakes made in our factories from St Barthélemy d’Anjou, and hereafter designated: ERS VAR08 SZ1700/1700 Warner Electric Part Number 1 12 106606 Fully comply with directive 95/16/EC on Lifts and are intended for incorporation into an installation or for assembly with other equipment, with the aim of constituting a machine subject to the application of directive 98/37/EC and the directive on Electromagnetic Compatibility 89/336 (modified). - Page 106 Symbol designating Symbol designating an Symbol designating an elec- an action that might action that might be dan- trical action that might be damage the brake gerous to human safety dangerous to human safety Precautions and restrictions on use Installation Restrictions on use Transport / storage For the brake to comply with directive 95 / 16 / EC,...
- Page 107 Caution: When installing and should the brake ever be Adjusting screw for microswitch dismantled, make sure that the friction disc heel is the right way round when the brake is re-assembled (see Fig.1). • Engage the brake (line up the brake on the fixing thread) •...
- Page 108 Spare parts Part Part number Friction disc BT 2 12 095100 Microswitch NF BT 2 12 095145 O-ring Kit BT 2 12 095228 Tools Tools Function Airgap adjustment shims Airgap and microswitch adjustment Open jawed spanner 21 mm A/F Airgap adjustment Torque wrench (measurement range >...
- Page 109 SM344gb - rev 01/06 Electrically Released Brakes ERS VAR10 SZ 2500/2500 Warner Electric Part Number 1 12 106607 ERS VAR10 SZ 2500/3000 Warner Electric Part Number 1 12 106806 EC type certificate ABV 592/1 According to drawing 1 12 106582 WARNER ELECTRIC EUROPE Rue Champfleur, B.P.
- Page 110 We, WARNER ELECTRIC EUROPE, 7, rue Champfleur, B.P. 20095, F-49182 St Barthélemy d’Anjou Cedex declare that the brakes made in our factories from St Barthélemy d’Anjou, and hereafter designated: ERS VAR10 SZ 2500/2500 Warner Electric Part Number 1 12 106607 ERS VAR10 SZ 2500/3000 Warner Electric Part Number 1 12 106806 Fully comply with directive 95/16/EC on Lifts and are intended for incorporation into an installation or for assembly with other equipment, with the aim of constituting a machine subject to the application of directive 98/37/EC and the directive on Electromagnetic Compatibility 89/336...
-
Page 111: Precautions And Restrictions On Use
Symbol designating Symbol designating an Symbol designating an elec- an action that might action that might be dan- trical action that might be damage the brake gerous to human safety dangerous to human safety Precautions and restrictions on use Installation Restrictions on use Transport / storage For the brake to comply with directive 95 / 16 / EC,... -
Page 112: Fig. 3
Caution: When installing and should the brake ever be Adjusting the microswitch dismantled, make sure that the friction disc heel is the right way round when the brake is re-assembled (see Fig.1). Slide a wedge 0,15 mm thick close to the screw between the face of the magnet and the moving armature. -
Page 113: Spare Parts
Emergency braking : for emergency braking the The connecting wires must be thick enough to help prevent switching OFF must be connected on DC current sudden drops in voltage between the source and the brake. side, in order to obtain short engaging time of the brake Tolerances on the supply voltage at the brake terminals Service braking : for service braking, the switching OFF +5% / -10% (NF C 79-300). - Page 114 SM348gb - rev 01/06 Electrically Released Brakes ERS VAR10 SZ 5000/5000 Warner Electric Part Number 1 12 106621 EC type certificate ABV 604/1 according drawing 1 12 106602 WARNER ELECTRIC EUROPE Rue Champfleur, B.P. 20095, F- 49182 St Barthélemy d’Anjou Cedex Tél.
-
Page 115: For Eye Hook
We, WARNER ELECTRIC EUROPE, 7, rue Champfleur, B.P. 11095, F-49182 St Barthélemy d’Anjou Cedex declare that the brakes made in our factories from St Barthélemy d’Anjou, and hereafter designated: ERS VAR10 SZ 5000/5000 Warner Electric part number 1 12 106621 Fully comply with directive 95 / 16 / EC on Lifts and are intended for incorporation into an installation or for assembly with other equipment, with the aim of constituting a machine subject to the application of directive 89/392 (modified) and the directive on Electromagnetic Compatibility 89/336 (modified).Compliance with the basic requirements of the Low Voltage Directive 73/23 is guaranteed by our full compliance with the following... - Page 116 Symbol designating Symbol designating an Symbol designating an elec- an action that might action that might be dan- trical action that might be damage the brake gerous to human safety dangerous to human safety Precautions and restrictions on use Installation Restrictions on use Transport / storage For the brake to comply with directive 95 / 16 / EC,...
-
Page 117: Fig. 3
• Tighten the 8 fixing screws CHc M12(Cs: 130 Nm ±10%) (star sequence tightening, to an initial torque of Microswitch 50 Nm) adjusting screw NOTE : Secure the fixing screws (use a safety washer or thermoplastic liquid such as Loctite). •... - Page 118 Spare parts Part Part number Friction disc BT 2 12 095202 Microswitch BT 2 12 095145 O-rings Kit BT 2 12 095345 Tools Tools Function Airgap adjustment shims Airgap and microswitch adjustment Open jawed spanner 21 mm A/F Airgap adjustment Torque wrench (measurement range >...
- Page 156 ThyssenKrupp Aufzugswerke GmbH Bernhäuser Strasse 45 73765 Neuhausen a. d. F. Germany Tel.: +49 7158/12-0 E-mail: Eli.elevator.plant.de@thyssenkrupp.com Internet: www.thyssenkrupp-elevator-eli.de...
Need help?
Do you have a question about the NBS and is the answer not in the manual?
Questions and answers