Table of Contents
Advertisement
Quick Links
Advertisement
Table of Contents

Related Manuals for 3rd Power Kitchen Sink 6VEL


Summary of Contents for 3rd Power Kitchen Sink 6VEL
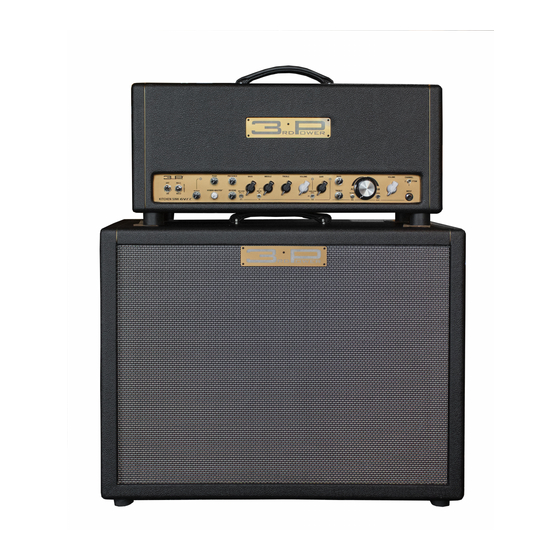
- Page 1 ™ KITCHEN SINK 6VEL ™ G U I T A R A M P L I F I E R U S E R ’ S G U I D E...
-
Page 2: Precautions And Warnings
Your 3RD POWER Amplifier is a professional musical instrument amplifier. The information contained herein is current at the time of publication. However, specifications are subject to change without prior notice. PRECAUTIONS & WARNINGS • READ THESE INSTRUCTIONS. • KEEP THESE INSTRUCTIONS. - Page 3 Special Features of the Kitchen Sink 6VEL™: • Two Foot-switchable Channels (Clean and Dirty) • Clean Channel: Black/Brownface, AC and Top Boost • “Big Knob” Blend Control on CH.1 • Dirty Channel: Multi-voiced Plexi (JTM, JMP, SoCal) • Preamp Gain Boost (foot switchable) •...
-
Page 4: Front Panel
Hybrid-MASTER™ Control (3) The MAIN control is always active and sets the absolute volume ceiling. The foot-switchable HM bypass control will be covered later in the manual. HybridMASTER is a patented by 3rd Power. Push Control (4) The global PUSH control affects both channels and allows you to adjust the low frequency character of your sound. - Page 5 Front Panel: Reverb Level and Assignment Reverb Control (6) The REVERB control is used to add/blend in the perfect amount of ambience to your sound. The reverb effect in this amplifier features pure Class A vacuum tube drive and recovery circuitry to deliver an authentic, vintage sounding spring reverb effect.
- Page 6 Front Panel: Clean Channel Volume Control (10) The VOLUME control allows you to adjust the signal level as well as the temperament and overall character of your instrument’s sound, from clean to edge of breakup. Brown/Blackface Switch (11) The Brownface/Blackface toggle switch allows you to select the preamp operating mode for a variety of tonal options.
- Page 7 Front Panel: Dirty Channel Channel Indicator Light (10) When selecting channel two, this LED will glow a bright red color indicating that you have selected the Dirty channel for operation. When in this mode, only the Dirty channel controls will be active. Gain Control (15) The GAIN control allows you to adjust the signal gain level as well as the temperament and overall character of your instrument’s sound.
- Page 8 Front Panel: Dirty Channel - Tone Controls Treble Control (17) The TREBLE control allows you to adjust the character of the higher frequency range. Middle Control (18) The MIDDLE control allows you to adjust the emphasis of the mid-range frequencies. Tone Stack Selector (19) The TONE STACK SELECTOR switch allows you to adjust the response and feel of the EQ section.
-
Page 9: Back Panel
The AC FUSED INPUT socket (TYPE IEC Grounded) is a required connection for operating your KITCHEN SINK 6VEL at 120V (standard USA household electrical power). The MAINS FUSE requires a 2.5 AMP slow blow fuse. This fuse protects your amplifier from voltage peaks from your power outlet. - Page 10 • Always operate your amplifier with the proper impedance output that matches your speaker cabinet(s). • In all cases, always use a good quality heavy gauge speaker cable (not a shielded instrument cable) to connect your KITCHEN SINK 6VEL to the speaker cabinet(s).
- Page 11 Fortunately, most guitar speakers roll off the harsh higher frequencies that exist beyond 5 - 8 kHz. The Kitchen Sink 6VEL features a pleasing circuit that replicates the type of high frequency roll off you’d expect from a high quality mic’d speaker cabinet. It’s not invasive, it’s voiced ‘just right’ leaving your downstream audio devices, such as digital multi-effects and power amplifiers, to only receive useable signal and not the ‘ratty/fizzy’...
-
Page 12: Operation Notes
Tube Effects Loop Experience STUDIO QUALITY TONE from your pedals or multi-effects units by running them through the loop. The loop on your Kitchen Sink 6VEL can also be placed under foot switch control. FX Loop Operation Switch (28) Choose LOCAL to retain the loop in the signal chain at all times. Choose FTSW to place the loop under command of your foot switch controller (either the included foot switch or a 3rd party switching system). - Page 13 Back Panel: Foot Switch System FS B Foot Switch Connector (31) To remotely control channel selection, preamp gain boost, FX loop on/off and Hybrid-Master bypass (lead boost), connect the foot pedal with the 7-pin DIN cable (both the pedal and cable are included with purchase).
- Page 14 - all with the stomp of a single button on your foot switch. WARNING: The Kitchen Sink 6VEL foot switching system cannot share an electrical ground with any other device. Care should be used when placing your 2 or 4 Button foot switch with other devices on a...
- Page 15 Back Panel: Power Tube Biasing CAUTION: NEVER touch hot tubes!!! Temperatures can exceed 500˚F and cause severe burns! CAUTION: Read all of the information and procedures in this section before attempting to modify the factory bias settings of your amplifier. Power Tube Bias Adjustment Control (32) Controls the amount of negative DC bias voltage being fed into both output tube input grids.
- Page 16 DO NOT attempt to load a rectifier tube in a power socket and vice-versa!!! The Kitchen Sink 6VEL has a logical tube layout with the audio and power tubes located in a cluster near the back corner (see page 19). The rectifier tube is isolated and located in a corner on the opposite end of the chassis.
- Page 17 Proper Power & Rectifier Tube Use: CAUTION (once again): NEVER touch hot tubes!!! Temperatures can exceed 500˚F and cause severe burns! Your amplifier ships with the bias settings optimized for maximum flexibility and safety. During QC and final testing, the bias is set maximum safe power dissipation (approximately 60% of a given tube’s performance rating).
- Page 18 Through our tone testing at the factory, we have found a very pleasing ‘brown sound’ effect can be achieved when operating the Kitchen Sink 6VEL loaded with E34L power tubes, a JJ 5U4GB rectifier tube installed, and selecting Tube Rectifier Mode.
- Page 19 V10: Rectifier Tube, (Base 20: JJ 5U4GB, Base 40: JJ GZ34) Swapping Tubes and Bias Adjustment Your KITCHEN SINK 6VEL comes from the factory biased for safe operation of the factory provided tubes. Limited bias adjustments are available to the user via the back panel bias terminals. Follow the recommended procedures and bias settings at all times and note the highlighted warning and caution alerts as your safety as well as the safe operation of your amplifier depend on it.
- Page 20 Power Tube Biasing: Factory Settings Factory Settings: E34L Your amplifier ships with the bias settings optimized for maximum flexibility and safety. During QC and final testing, the bias is set maximum safe power dissipation (approximately 60% of a given tube’s performance rating). For each type of power tube, you can safely switch between SS and Tube Rectifier.
- Page 21 Power Tube Biasing: Custom Settings Custom Bias Settings: JJ E34L We’re confident that you’ll find pleasing guitar tones at factory settings. However, your Kitchen Sink 6VEL does provide back panel access to the output tube bias circuit for optimization. To optimize your tube bias settings and to keep your amplifier operating in a safe range, we recommend you do not exceed the following settings under any circumstance.
- Page 22 Back Panel: Power Tube Biasing Custom Bias Settings: JJ 6V6GC We’re confident that you’ll find pleasing guitar tones at factory settings. However, your Kitchen Sink 6VEL does provide back panel access to the output tube bias circuit for . To customize your tube bias settings and to keep your amplifier operating in a safe range, we recommend you do not exceed the following settings under any circumstance.
- Page 23 Whichever remote foot switching system you use with the Break-out Box, it must feature isolated ground connection. The Kitchen Sink 6VEL foot switching system cannot share an electrical ground with any other device. Care should be used when placing your Break-out Box with other devices on...
-
Page 24: Limited Lifetime Warranty
Incidental or Consequential Damage: In no event will 3RD POWER be liable for any incidental or consequential damages arising out of the use or inability to use any 3RD POWER product, even if a 3RD POWER dealer has been advised of the possibility of such damages or any other claim by any other party. Some states do not allow the exclusion or limitation of consequential damages, so the above limitation and exclusion may not apply to you. - Page 25 ™ 3RD POWER Amplification LLC 1307 Jewel Street Nashville, TN 37207 Phone: (615) 945-3393 Web Site www.3rdPower.com Sunday, August 23, 2020...
Need help?
Do you have a question about the Kitchen Sink 6VEL and is the answer not in the manual?
Questions and answers