
Related Manuals for Nissei GTR MID Series


Summary of Contents for Nissei GTR MID Series
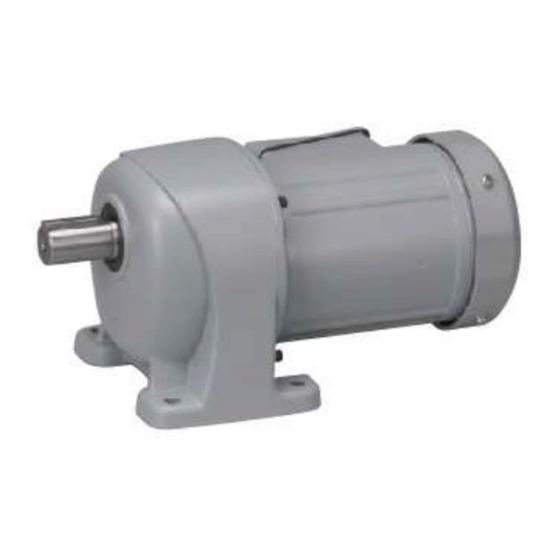
- Page 1 MID SERIES(0.1 kW to 2.2 kW) Induction Gearmotor Detailed Instruction Manual <Please read this manual before using the product. > NISSEI CORPORATION...
-
Page 2: Introduction
Introduction Thank you very much for purchasing our product. Safety Precautions • Be sure to carefully read the contents described in this instruction manual and to understand how to use product correctly before using it. • Extents of hazard/damage expected to occur in the case of improper handling are classified and indicated in ranks of “DANGER”, ”WARNING”, and ”CAUTION.”... - Page 3 Do not repair, disassemble or remodel the product. Failure to observe this precaution may result in injury, fire, electric shock, and/or burns. When performing a trial operation, fix the product in place and disconnect it from the machine. Failure to observe this precaution may result in injury. Be sure not to get water or oil/grease into the brake unit.
-
Page 4: Table Of Contents
Table of Contents Introduction Safety Precautions 1. Inspection upon Unpacking 2. Transportation 3. Installation 4. Connecting with Other Equipment P.17 5. Rotational Direction P.21 6. Wiring 7. Operation P.37 P.38 8. Standards P.41 9. Inspection and Adjustment P.46 10. Troubleshooting 11. -
Page 5: Inspection Upon Unpacking
1. Inspection upon Unpacking CAUTION Check whether the product is consistent with your order. Injury, damage to the device, etc. may occur if a wrong product is installed. Check the top and bottom of the package before opening it. Failure to follow this precaution may result in injury. - Page 6 1-3. Gearmotor Model Descriptions of the symbols for gearmotor model are as follows. Check if the model is connsistent with your order. The gearhead model and motor model are described separately. • Up to Frame No. 32 for Mounting[2] K: Small flange support of Series[1] G3:Parallel shaft. •...
- Page 7 ■Motor Model Motor Model [10] [11] [12] [13] [14] [15] Power Motor No. of Terminal Auxiliary Specificati Spec. Capacity Standards Brake Supply Type Phases Code on Code Voltage [6] Motor Type [14] Auxiliary Code Standard type Blank Standard specifications Water-resistant Special specif ication addition recognized symbol type (IP65)
-
Page 8: Transportation
2. Transportation DANGER Do not enter underneath the product when it is lifted for transportation. Otherwise, injury accidents caused by dropping may occur. CAUTION Dropping and falling of the product on transportation is dangerous. Please pay sufficient attention. For the gearmotor with a hanger, be sure to check that the hanger is not loose before using it. However, do not lift a machine with the hanger after the gearmotor is mounted to the machine. -
Page 9: Connecting With Other Equipment
Location Water-resistant Item Indoor Specifications Specifications (IP65) Ambient -10ºC~40ºC -10ºC~40ºC temperature Ambient 85% or less 100% or less humidity (no dew condensation) (no dew condensation) Altitude 1000 m or lower 1000 m or lower A place with no corrosive gas, A place with no corrosive gas, explosive gas, vapor, etc. - Page 10 4-1. When directly connected Shaft center of the connecting machine and the shaft center of the reducer must be aligned in a straight line. Example of gear coupling δ θ • The displacement amount of δ and θ should be minimized as small as possible. •...
- Page 11 4-3. Installing/Removing FS/F3S Type Hollow Shaft Installing hollow shaft of reducer to the driven shaft • Coat the driven shaft surface and interior surface of hollow shaft with a lubricant (molybdenum disulfide) suitable to the atmosphere in which they are used and connect the reducer to the driven shaft. •...
- Page 12 Fix the driven shaft between pillow block bearings. Endplate Bolt Figure. Attachment Using an Endplate (Customers need to provide their own endplates and bolts.) Note) Please understand that mounting of resin cover which is the F Series accessory is unavailable. In addition, please take safety measures such as applying a protective cover so that there is no entanglement at the output shaft.
- Page 13 Recommended Sizes for the Fixing Elments of the Drive Shaft For the attachment of the hollow shaft in general <Recommended Sizes for the Fixing Elements of the Drive Shaft>(mm) use, we recommend you to refer to the dimensions Spacer dimensions C-shaped Hollow Bolt...
- Page 14 4-4. Installing Flange/Torque Arm <Advantages and disadvantages of flange and torque arm installation> Advantages Disadvantages Can be installed directly on the device. Centering with the application isrequired. ●Requires four(4) tapped holes for Flange Installation Saves space. mounting to the application. (F series) Makes centering with the application easy.
- Page 15 How to install the Torque Arm Detent Ⓐ part [1] For normal/reverse rotation operation and unidirectional operation (intermittently) Fasten the torque arm detent so there is no looseness or wobble. When doing this, center the detent hole with that of the application to make sure that no radial load (suspension load) is applied against the driven shaft and hollow shaft of the reducer.
- Page 16 <Blank page>...
-
Page 17: Rotational Direction
5. Rotational Direction CAUTION Check the rotational direction before the gearmotor is connected to the device. Difference in rotational direction may cause injury and/or damage to the device. The relationship between the input shaft (motor) and output shaft rotational direction of this product are as follows. The following rotational direction is the rotation when “6. - Page 18 For H2 Series 0.1 and 0.2 kW 1/5 to 1/60 and 1/600 to 1/1500 0.4 to 0.75 kW 1/5 to 1/60 and 1/300 to 1/1500 1.5 and 2.2 kW 1/5 to 1/30 T Shaft L Shaft R Shaft 0.1 and 0.2 kW 1/80 to 1/450 0.4 to 0.75 kW 1/80 to 1/240 1.5 and 2.2 kW 1/40 to 1/240...
- Page 19 For F Series 0.1 to 0.75 kW 1/5 to 1/60 and 1/300 to 1/1500 1.5 and 2.2 kW 1/5 to 1/30 L Shaft T Shaft R Shaft 0.1 to 0.75 kW 1/80 to 1/240 1.5•2.2 kW 1/40 to 1/240 L Shaft R Shaft T Shaft...
- Page 20 For F3 Series 0.1 kW 1/5 to 1/60 and 1/300 to 1/1500 0.2 kW 1/5 to 1/60 and 1/300 to 1/1200 0.4 kW 1/5 to 1/60 and 1/300 to 1/600 0.75 kW 1/5 to 1/60 and 1/300 1.5 and 2.2 kW 1/5 to 1/60 T Shaft R Shaft L Shaft...
-
Page 21: Wiring
6. Wiring DANGER Perform connection of the power cable according to the wiring diagram within the terminal box or the instruction manual. Otherwise, an electric shock and/or fire may occur. (For a gear motor without a terminal box, please be sure that the connection parts of the gear motor are properly insulated. ) Do not forcibly bend, pull or pinch the power cable and motor lead wire. - Page 22 6-1. Gearmotor Wiring <Common Items> Precautions for Terminal Box/Terminal Block • Use the nuts and short circuit plate included for terminal block connection. (Short circuit plates are not included for motors with three lead wires since it is unnecessary. ) •...
- Page 23 ■Precautions on Gearmotor with Brake Wiring • The brake voltage is 90V DC for the 200V class brake and 180V DC for the 400V class brake. The brake lead wires are blue for the 200V class brake and yellow for the 400V class brake. •...
- Page 24 6-2. Gearmotor Wiring <Direct Power Input Operation> Refer to the relevant motor wiring diagram in the connection table below to perform wiring for your gearmotor. For the motor rotational direction of the connection below, "Forward" is defined as clockwise rotation seen from the back-side of the motor.
- Page 25 ■3-phase Motor Connection List (Direct Power Input Operation) *200V Class︓200V to 230V, 400V Class︓380V to 480V Number of Terminal Brake Wiring diagram (Direct power input operation) Motor lead connection wires Common for 200V Class/400V Class/575V Fig. - [1] w/ Box Low Voltage (200V Class) High Voltage (400V Class) Fig.
- Page 26 *200V Class︓200V to 230V, 400V Class︓380V to 480V Number of Terminal Brake Wiring diagram (Direct power input operation) Motor lead connection wires Motor :200V Class Motor :400V Class Fig. - [6] Fig. - [9] Brake:200V Class Brake:400V Class 3 / 6 w/ Box Switching ※Please short the A200-D90-UL rectifier's blue-blue wires.
- Page 27 *200V Class︓200V to 230V, 400V Class︓380V to 480V Number of Terminal Brake Wiring diagram (Direct power input operation) Motor lead connection wires Motor :575V Fig. - [13] Brake:200V Class w/Box Switching ※B1・B2 terminals located in the terminal box. Motor :200V Class Motor :400V Class Fig.
- Page 28 *200V Class︓200V to 230V, 400V Class︓380V to 480V Number of Terminal Brake Wiring diagram (Direct power input operation) Motor lead connection wires Motor :200V Class Motor :400V Class Fig. - [20] Fig. - [23] Brake:200V Class Brake:400V Class w/ Box Switching ※Please short the A200-D90-UL rectifier's blue-blue wires.
- Page 29 *200V Class︓200V to 230V, 400V Class︓380V to 480V Number of Terminal Brake Wiring diagram (Direct power input operation) Motor lead connection wires Fig. - AB Common for 200V Class/400V Class <Appearance> 3 / 6 / 9 w/ Box Switching ※The voltage supplied to the brake shall be the same as the supply voltage of the motor. ※The rectifier type would be "A200-D90-UL"...
- Page 30 *200V Class︓200V to 220V, 400V Class︓380V to 440V Number of Terminal Brake Wiring diagram (Direct power input operation) Motor lead connection wires Motor ︓200V Class Fig. - [26] Clutch and Brake : 200V Class w/o Box ― w/ Box Motor ︓400V Class Fig.
- Page 31 6-3. Gearmotor Wiring <Inverter Operation> ■Precautions for Inverter Operation ・ For general usage, please use the gearmotor within the range of 5Hz to 120Hz. *5 to 60 Hz for gearmotors with clutch and brake ・ The vibration/noise is increased with high speed operation that exceeds 60Hz. In addition, the higher shaft speed may shorten the life-span of the oil seal.
- Page 32 ■3-phase Motor Connection List (Inverter Operation) *200V Class︓200V to 230V, 400V Class︓380V to 480V Number of Terminal Brake Wiring diagram (Inverter operation) Motor lead connection wires 200V Class 400V Class Fig. - V [1] Fig. - V [2] w/ Box Low Voltage (200V Class) High Voltage (400V Class) Fig.
- Page 33 *200V Class︓200V to 230V, 400V Class︓380V to 480V Number of Terminal Brake Wiring diagram (Inverter operation) Motor lead connection wires Motor :200V Class Motor :400V Class Fig. - V [7] Fig. - V [9] Brake:200V Class Brake:400V Class 3 / 6 w/ Box Switching ※B1・B2 terminals located in the terminal box.
- Page 34 *200V Class︓200V to 230V, 400V Class︓380V to 480V Number of Terminal Brake Wiring diagram (Inverter operation) Motor lead connection wires Motor :200V Class Motor :400V Class Fig. - V [13] Fig. - V [15] Brake:200V Class Brake:400V Class w/o Box Switching ※Please short the A200-D90-UL rectifier's blue-blue wires.
- Page 35 *200V Class︓200V to 230V, 400V Class︓380V to 480V Number of Terminal Brake Wiring diagram (Inverter operation) Motor lead connection wires Common for 200V Class/400V Class Fig. - VAA <Appearance> 3 / 6 / 9 w/ Box Switching ※Terminal "AC" is located in the terminal box. ※The rectifier type would be "A200-D90-UL"...
- Page 36 *200V Class︓200V to 220V, 400V Class︓380V to 440V Number of Terminal Brake Wiring diagram (Inverter operation) Motor lead connection wires Motor ︓200V Class Fig. - V [21] Clutch and Brake : 200V Class w/o Box ― w/ Box Motor ︓400V Class Fig.
-
Page 37: Operation
7. Operation DANGER Do not operate the motor while the terminal box cover is removed. Mount the terminal box cover to the original position after work. Otherwise, an electric shock may occur. Do not approach or touch rotating bodies (output shafts, etc.) while the product is running. Otherwise, entanglement and injury may occur. -
Page 38: Standards
8. Standards Gearmotor Safety Standards Country Name U.S.A. Canada Europe (EU) China No. of Phases 3-phase 3-phase 3-phase 3-phase Standards CSA C22.2 EN60034-1 Standards No. UL1004-1 GB12350 No.100 EN60034-5 PRGY2. PRGY8. UL File No. E172621 E172621 Low Voltage 3-phase Induction Motor Efficiency Regulation Support Status Country Name U.S.A. - Page 39 By Country (Area) 1. U.S.A. Safety Standards <Target Standards and UL File> Support Details [power/standards] No. of Target Standards UL File No. Capacity Phases 0.1kW 0.4kW UL1004-1 PRGY2. 3-phase (Standard for Rotating Electrical E172621 Machines – General Requirements) 0.75kW 2.2kW High-efficiency Regulation Support Details [power/standards] No.
- Page 40 3. Europe Safety Standards No. of Support Details [power/standards] EU Directive Target Standards Capacity Phases EN60034-1: Low Voltage Rotating Electrical Machine - Part 1: Rating and Characteristics Directive 0.1kW EN60034-5: 3-phase 2014/35/EU Rotating Electrical Machine - Part 5: Low Voltage 2.2kW Classification of Protection Ratings with Directive...
-
Page 41: Inspection And Adjustment
Grease/Oil Seal/O-Ring • Nissei utilizes grease for lubrication for G3, H2, F and F3, and specified amount of grease is pre-sealed in each unit before shipping so that the motors can be used without further lubrication. •... - Page 42 Daily Inspection To be performed every 2 to 3 days. Inspection item Method Inspection Details Load Current Ammeter Within the rated current described on the nameplate. Auditory No abnormal sound (Rattling sound, periodic sound). Noise Observation *Apply a listening rod to the bearing part to check abnormal sound. Vibration By touch No abnormal vibration of the gear case and motor frame.
- Page 43 ■Brake Structure Standard Type (Brake model:B2, B4, J2, J4) Through bolt Motor frame Bracket Stay Fan cover fixing screw Brake [18] [12] Fan cover [13] [11] Relay shaft [14] [10] Fan fixing screw [11] Magnet ASSY [10] [12] Collar [13] Shim [14] Plate screw [15] Plate [15] [16]...
- Page 44 How to Adjust Brake Gap If the disk is worn out after long term usage and the Gap [18] between Magnet ASSY [11] and Armature [17] exceeds the gap limitation value described in the brake specifications, malfunctions of the brake may occur. Please Adjust the brake gap as follows.
- Page 45 Brake Replacement Work The brake gap adjustment can only be done once. If the gap between the magnet ASSY and the armature exceeds the limitation gap described on the <■Brake Specifications> table due to the disk wear after the gap adjustment, the brake must be replaced. Please contact your For the brake replacement procedure, please check the replacement instruction which comes with the new brake package.
-
Page 46: Troubleshooting
10. Troubleshooting Gearmotor Troubleshooting Failure detail Cause Measures Check the power supply. / Power failure Contact the power company. Defective connection line Inspect the circuit/wiring parts. Defective contact of the short circuit plate Inspect the circuit/wiring parts. The motor does not run Defective contact of the switch Repair or replace it. -
Page 47: Disposal
11. Disposal CAUTION When disposing of the product, dispose of it as a general industrial waste. Please follow local laws and regulations if any apply and take care of the waste accordingly. 12. Storage 1. Storage Place When the product is stored for six months or longer, it shall be stored in a place indoors, with good ventilation, dried place, without direct sunlight, temperature change, humidity, dust, and/or corrosive gas. -
Page 48: Contact Us
Contact Us Inquiries for gearmotors Overseas Sales 1-1 Inoue, Izumi-cho, Anjo, Aichi 444-1297, Japan Tel : +81-566-92-5312 Fax : +81-566-92-7002 E-mail: oversea@nissei-gtr.co.jp... - Page 49 NISSEI CORPORATION 2019/10 Ver.3.1...
Need help?
Do you have a question about the GTR MID Series and is the answer not in the manual?
Questions and answers