Table of Contents
Advertisement
Quick Links
CG130 S
ERIES
ZIGBEE WIRELESS SWITCH
U
M
SER
ANUAL
CG130 S
ERIES
V
1.2
ERSION
6 J
, 2020
ANUARY
Disclaimers and Copyright
Nothing contained in this publication is to be construed as granting any right, by implication or otherwise, for the
manufacture, sale, or use in connection with any method, apparatus, or product covered by letters patent, or as
insuring anyone against liability for infringement of letters patent.
Efforts have been made to ensure the accuracy and reliability of the data contained in this publication; however,
CityGrow Energy Systems Limited makes no representation, warranty, or guarantee in connection with this publication
and hereby expressly disclaims any liability or responsibility for loss or damage resulting from its use or from the use
of any product or methodology described herein; for any violation of any federal, state, or municipal regulation with
which this publication may conflict; or for the infringement of any patent from the use of this publication. Nothing
contained in this publication should be viewed as an endorsement by CityGrow Energy Systems Limited of any particular
manufacturer's products.
i
Advertisement
Table of Contents

Related Manuals for CityGrow Systems CG130 Series


Summary of Contents for CityGrow Systems CG130 Series
- Page 1 CG130 S ERIES ZIGBEE WIRELESS SWITCH ANUAL CG130 S ERIES ERSION , 2020 ANUARY Disclaimers and Copyright Nothing contained in this publication is to be construed as granting any right, by implication or otherwise, for the manufacture, sale, or use in connection with any method, apparatus, or product covered by letters patent, or as insuring anyone against liability for infringement of letters patent.
- Page 2 CAUTION RISK OF ELECTRIC SHOCK DO NOT OPEN CAUTION: TO REDUCE THE RISK OF ELECTRIC SHOCK, DO NOT REMOVE COVER (OR BACK) NO USER-SERVICEABLE PARTS INSIDE REFER SERVICING TO QUALIFIED SERVICE PERSONNEL The lightning flash with arrowhead symbol within an equilateral triangle is intended to alert the user to the presence of uninsulated “dangerous voltage”...
-
Page 3: Table Of Contents
Table of content Introduction ....................1 Understanding the product ................2 Dimensions ....................3 Wiring for CG130S1xx, CG130S2, CG130S4, CG130DMxx and CG130DM2 ..3 Wiring for CG130S2-CCP and CG130S4-CCP ..........5 Installation ....................6 Operation instruction .................. 8 7.1. CG130S1xx, CG130S2 and CG130S4 ............ 8 7.2. -
Page 4: Introduction
1. Introduction Thank you for choosing CityGrow’s product. CG130 Series is highly-functional, user-friendly and installation- friendly. It is specially designed for wireless Home Automation control purpose. Description ZigBee wireless remote control. Based on IEEE 802.15.4. 2.4GHz radio frequency. CG130S1/S2/S4/DM – lighting control. -
Page 5: Understanding The Product
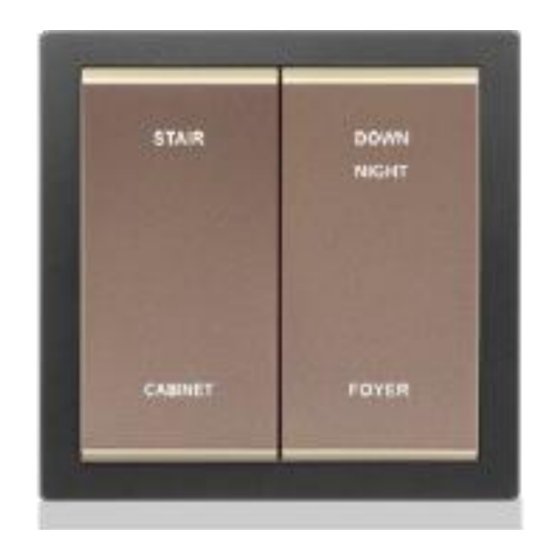
2. Understanding the product Button plate Rear view Control button Button plate Front view Programming port Metal clip to fix the Control unit Control unit (bottom view) button plate Mounting terminals hole lock Contacts for button plate Load terminals CG130S1 One Gang Switch Load1 CG130S2 Two Gang Switch Load2... -
Page 6: Dimensions
3. Dimensions 32mm CG130S2 85mm 42mm 4. Wiring for CG130S1xx, CG130S2, CG130S4, CG130DMxx and CG130DM2 Before getting started WARNING! It must be installed by a qualified electrician in accordance to all applicable regulations and building codes. Improper wiring can result in personal injury or damage to control units or other equipment. Always turn off circuit breaker or remove main fuse from power line before doing any work. - Page 7 Situation 1: Live, Neutral and Load wires are ready at wall box Situation 2: Live and Load wires are ready at wall box, Neutral wire is only ready at ceiling...
-
Page 8: Wiring For Cg130S2-Ccp And Cg130S4-Ccp
5. Wiring for CG130S2-CCP and CG130S4-CCP... -
Page 9: Installation
6. Installation Please follow the instructions to install the product. STEP 1: IMPORTANT! Turn off main power at the main switch board. STEP 2: Loosen the screws of the original wall switch. Remove the switch and disassemble the wiring. STEP 3: Connect the main power cable to the Live and Neutral terminals and the load cable to the load terminals at the rear cabinet of the product. - Page 10 STEP 5: Press the ON/OFF button, to test whether the wiring has been connected correctly. If the ON/OFF Button does not function as expected, please check the wiring connection again. Notes: Use Standard UK (BS4662) wall box for installation. It is recommended to embed the wall box with maximum depth fixed inside the wall for more sufficient installation space.
-
Page 11: Operation Instruction
7. Operation instruction 7.1. CG130S1xx, CG130S2 and CG130S4 CONTROL BUTTON 1. LED Indicator 2. ON/OFF Button 3. Program port 4. Metal clip 5. Mounting hole POWER MODULE Press ON/OFF Button once to toggle between ON and OFF. BRIGHT LED indicates that the Switch is ON. DIMMED LED indicates that the Switch is OFF. -
Page 12: Cg130Dmxx And Cg130Dm2
7.2. CG130DMxx and CG130DM2 CONTROL BUTTON 1. Dim Up/LED Indicator 2. Dim Down/LED Indicator 3. Program port 4. Metal clip 5. Mounting hole POWER MODULE Press the Dim Up/Dim Down button ONCE to Toggle between ON and OFF. LED FLASHING indicates that that the Button was pressed and dimming is in progress. When the LED stopped flashing, it indicates that the dimming is completed. -
Page 13: Cg130S2-Ccp And Cg130S4-Ccp
7.3. CG130S2-CCP and CG130S4-CCP CONTROL BUTTON 1. Open button 2. Close button 3. Program port OPEN CLOSE 4. Metal clip 5. Mounting hole POWER MODULE Press the Open/Close Button once to control the electric curtain. - Press the OPEN button to open the stopped electric curtain. - Press the CLOSE button to close the stopped electric curtain. - Page 14 Set the open and close travel distance for the curtain. The function of the Learning Mode in the CG130S2-CCP and CG130S4-CCP is to program the duration of the curtain Opening/Closing time. Please follow the instructions below to perform the Learning Mode function. STEP 1 Press the CLOSE Button until the curtain is completely closed.
- Page 15 STEP 3 Release the Reset Button. Wait until the LED Indicators begins to BLINK. Release the Open Button. NOTE: The curtain should be opening at this moment. STEP 4 Once the curtain is completely opened, press and release any Button. NOTE: The duration of the Opening/Closing time will be stored when a Button is pressed.
-
Page 16: Adding The Product To Your Home Wireless Zigbee Network
8. Adding the product to your Home Wireless ZigBee Network STEP 1 Open the front cover, you will see a 5-pin connector. STEP 2 Plug the CG101UT5 cable into the 5- pin connector of the product, and then plug the other end of the CG101UT5 cable into the mini USB end of the CG101UTC cable. -
Page 17: Specification
9. Specification CG130S1 CG130DM CG130S2- CG130S2 CG130S4 CG130DM2 CG130S4-CCP CG130S1H2 CG130DMH2 Description One-Gang Two-Gang One-Gang Two-Gang One-Gang Two-Gang Four-Gang Dimmer Dimmer Curtain Curtain Control Switch Switch Switch (Leading edge (Leading edge Control Switch dimming) dimming) Switch Operating voltage AC220-240V, 50Hz Maximum number of devices can be programmed in... - Page 18 Specifications – Loads CG130S1 CG130DM CG130S2- CG130S4- CG130S2 CG130S4 CG130DM2 CG130S1H2 CG130DMH2 Description One-Gang Two-Gang One-Gang Two-Gang One-Gang Two-Gang Four-Gang Dimmer Dimmer Curtain Curtain Switch Switch Switch (Leading edge (Leading edge Control Switch Control Switch dimming) dimming) Resistive load (Per Gang) 1.
Need help?
Do you have a question about the CG130 Series and is the answer not in the manual?
Questions and answers